
HOW TO: Make Dry Aged Beef Stock
I’m currently using the Steakager Pro 40 to dry age at home; making stock is a way to utilize all the bi-products from the aging process. Creating dry aged beef stock from dry aged pellicle and bones makes an incredibly rich stock. You’ll want to collect enough pellicle to make the whole process worth it, as the liquid level reduces significantly over the simmering duration. What’s left when you’re done is “liquid gold”. You can freeze it, use it to make sauces and add flavor to other recipes.
Note: If purchasing a SteakAger Pro 40, use my code GC5 for a 5% discount

INGREDIENTS
The ingredients/quantities below are listed as a guide only, I typically take any aromatic vegetables that I have and roast them up.
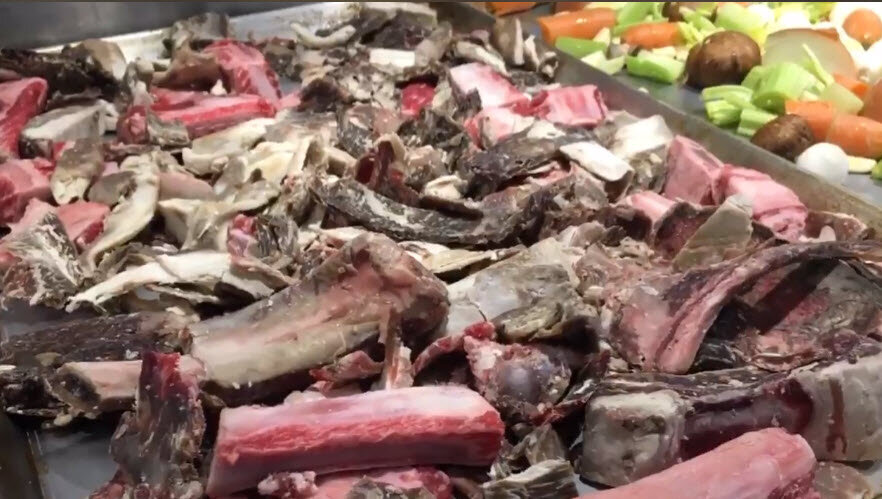
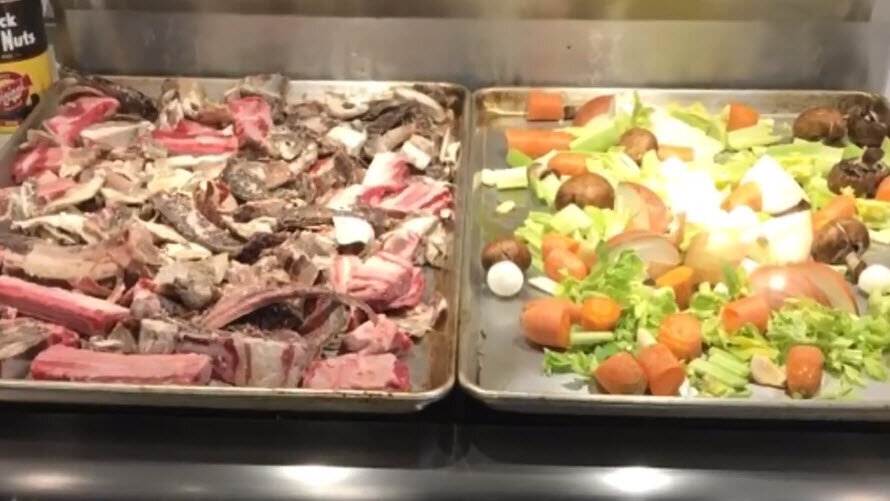
4-5 pounds dry aged pellicle and dry aged bones
Olive oil
2 medium onions quartered
2 large carrots, cut into 1-2 inch segments
Handful of celery tops, or 3 large celery rib, cut into 1 inch segments
3 cloves of garlic, unpeeled
Handful of parsley, stems and leaves
1-2 bay leaves
10 peppercorns
DIRECTIONS
STEP 1: Roast pellicle, bones, and vegetables
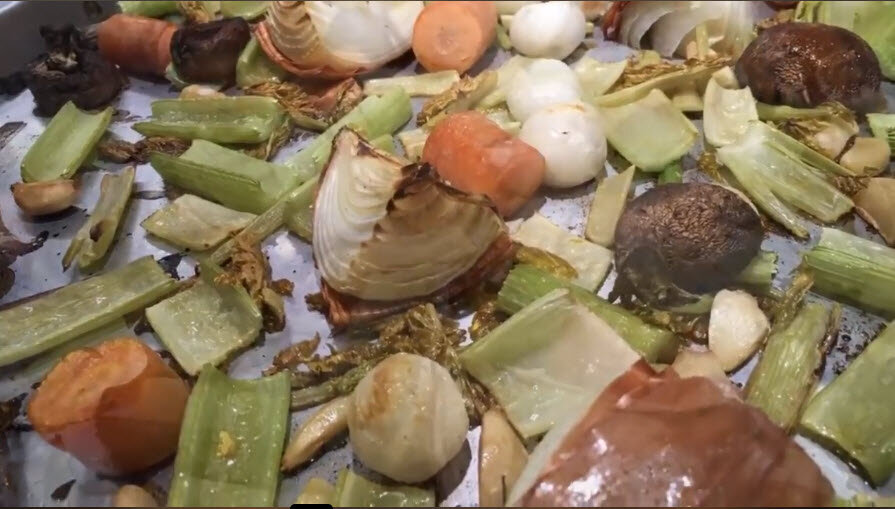
Preheat oven to 400°F. Rub a little olive oil over the pellicle pieces, carrots, and onions. Place stock bones, pellicle pieces, carrots and onions in a large, shallow roasting pan.
Roast in oven for about 30-45 minutes, turning the bones and pellicle pieces half-way through the cooking, until nicely browned. If bones begin to char at all during this cooking process, lower the heat. They should brown, not burn.
When the bones and pellicle are nicely browned, remove them and the vegetables and place them in a large (12 to 16 quart) stock pot.
STEP 2: Add hot water and scrape up the browned bits
Place the roasting pan on the stove-top on low heat (will cover 2 burners), pour 1/2 cup to a cup of water over the pan and scrape up all of the browned bits stuck to the bottom of the pan.
Pour the browned bits and water into the stock pot.
STEP 3: Add vegetables, water, bring to a low simmer
Add celery tops, garlic, parsley, bay leaves, and peppercorns to the stock pot.
Fill the stock pot with cold water, to 1 to 2 inches over the top of the bones. Put the heat on high and bring the pot to a low simmer and then reduce the heat to low.
If you have a candy or meat thermometer, the temperature of the water should be between 180° and 200°F (boiling is 212°F). The stock should be at a bare simmer, just a bubble or two coming up here and there. (You may need to put the pot on your smallest burner on the lowest temp, or if you are using an oven-safe pot, place it in the oven at 190°F.)
Cover the pot loosely and let simmer low and slow for 12 hours.
Do not stir the stock while cooking. Stirring will mix the fats in with the stock, clouding up the stock.
STEP 4: Skim scum and fat
As the stock cooks, fat will be released from the bone marrow and pellicle and rise to the top. From time to time check in on the stock and use a large metal spoon to scoop away the fat and any scum that rises to the surface.
(Do not put this fat down your kitchen drain. It will solidify and block your pipes. Put it in a bowl or jar to save for cooking or to discard.)
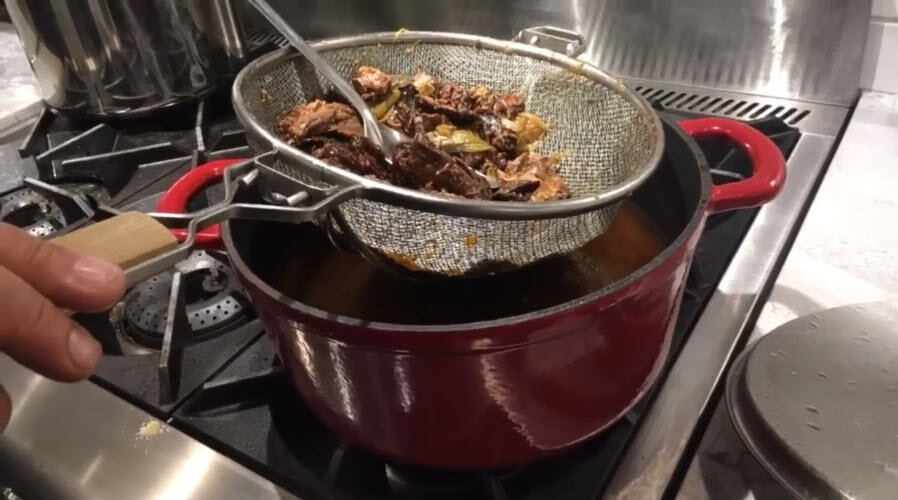
STEP 5: Remove solids and strain
At the end of cooking time (when you want to end the cooking is up to you, 8 hours minimum, 12 hours if you can do it) use a slotted spoon or spider ladle to gently remove the bones and vegetables from the pot (discard them, though if you see a chunk of marrow, taste it, it's delicious).
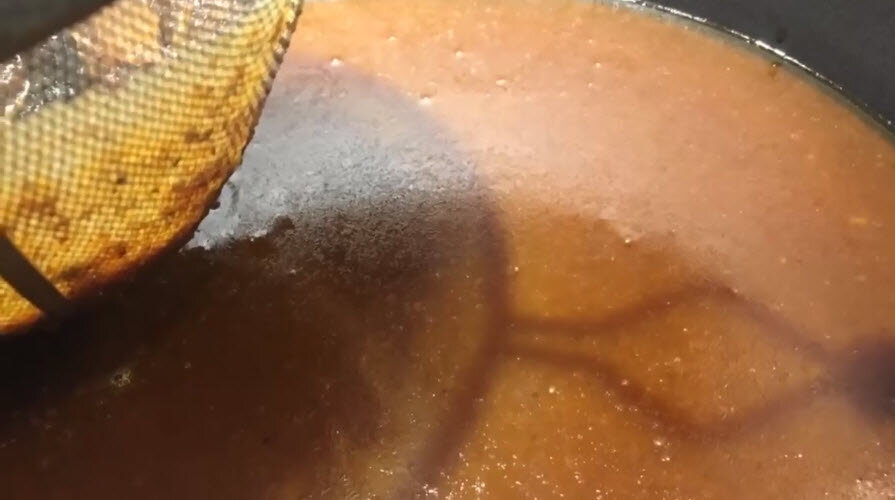
Line another large pot (8-quart) with a fine mesh sieve, covered with a couple layers of cheesecloth.
Pour the stock through the sieve to strain it of remaining solids.
STEP 6: Chill
Let cool to room temperature then chill in the refrigerator.
Once the stock has chilled, any fat remaining will have risen to the top and solidified. The fat forms a protective layer against bacteria while the stock is in the refrigerator.
If you plan to freeze the stock however, remove the fat, pour the stock into a jar or plastic container. (You can also remove the fat, and boil the stock down, concentrating it so that it doesn't take as much storage space.)
Leave an inch head room from the top of the stock to the top of the jar, so that as the stock freezes and expands, it will not break the container.
Note: the fat you removed from the top can also be saved to cook with


