Dry Aged Beef Wellington
Level: Moderate Yield: 6 to 8 Servings
Don’t be intimidated by all the steps. Take your time…. your patients will be rewarded with magnificence!


Dry aged tenderloin makes an amazing Beef Wellington. Keep in mind you’d follow the same steps for un-aged tenderloin as you do for dry aged tenderloin. Typically I dry age tenderloin max 21 days, mostly due to the shrinkage, while other folks swear by 35 day dry aged tenderloin; I just haven’t done that yet, so the choice is yours. While there are a lot of steps in a beef wellington, the WOW factor is totally worth it
INGREDIENTS
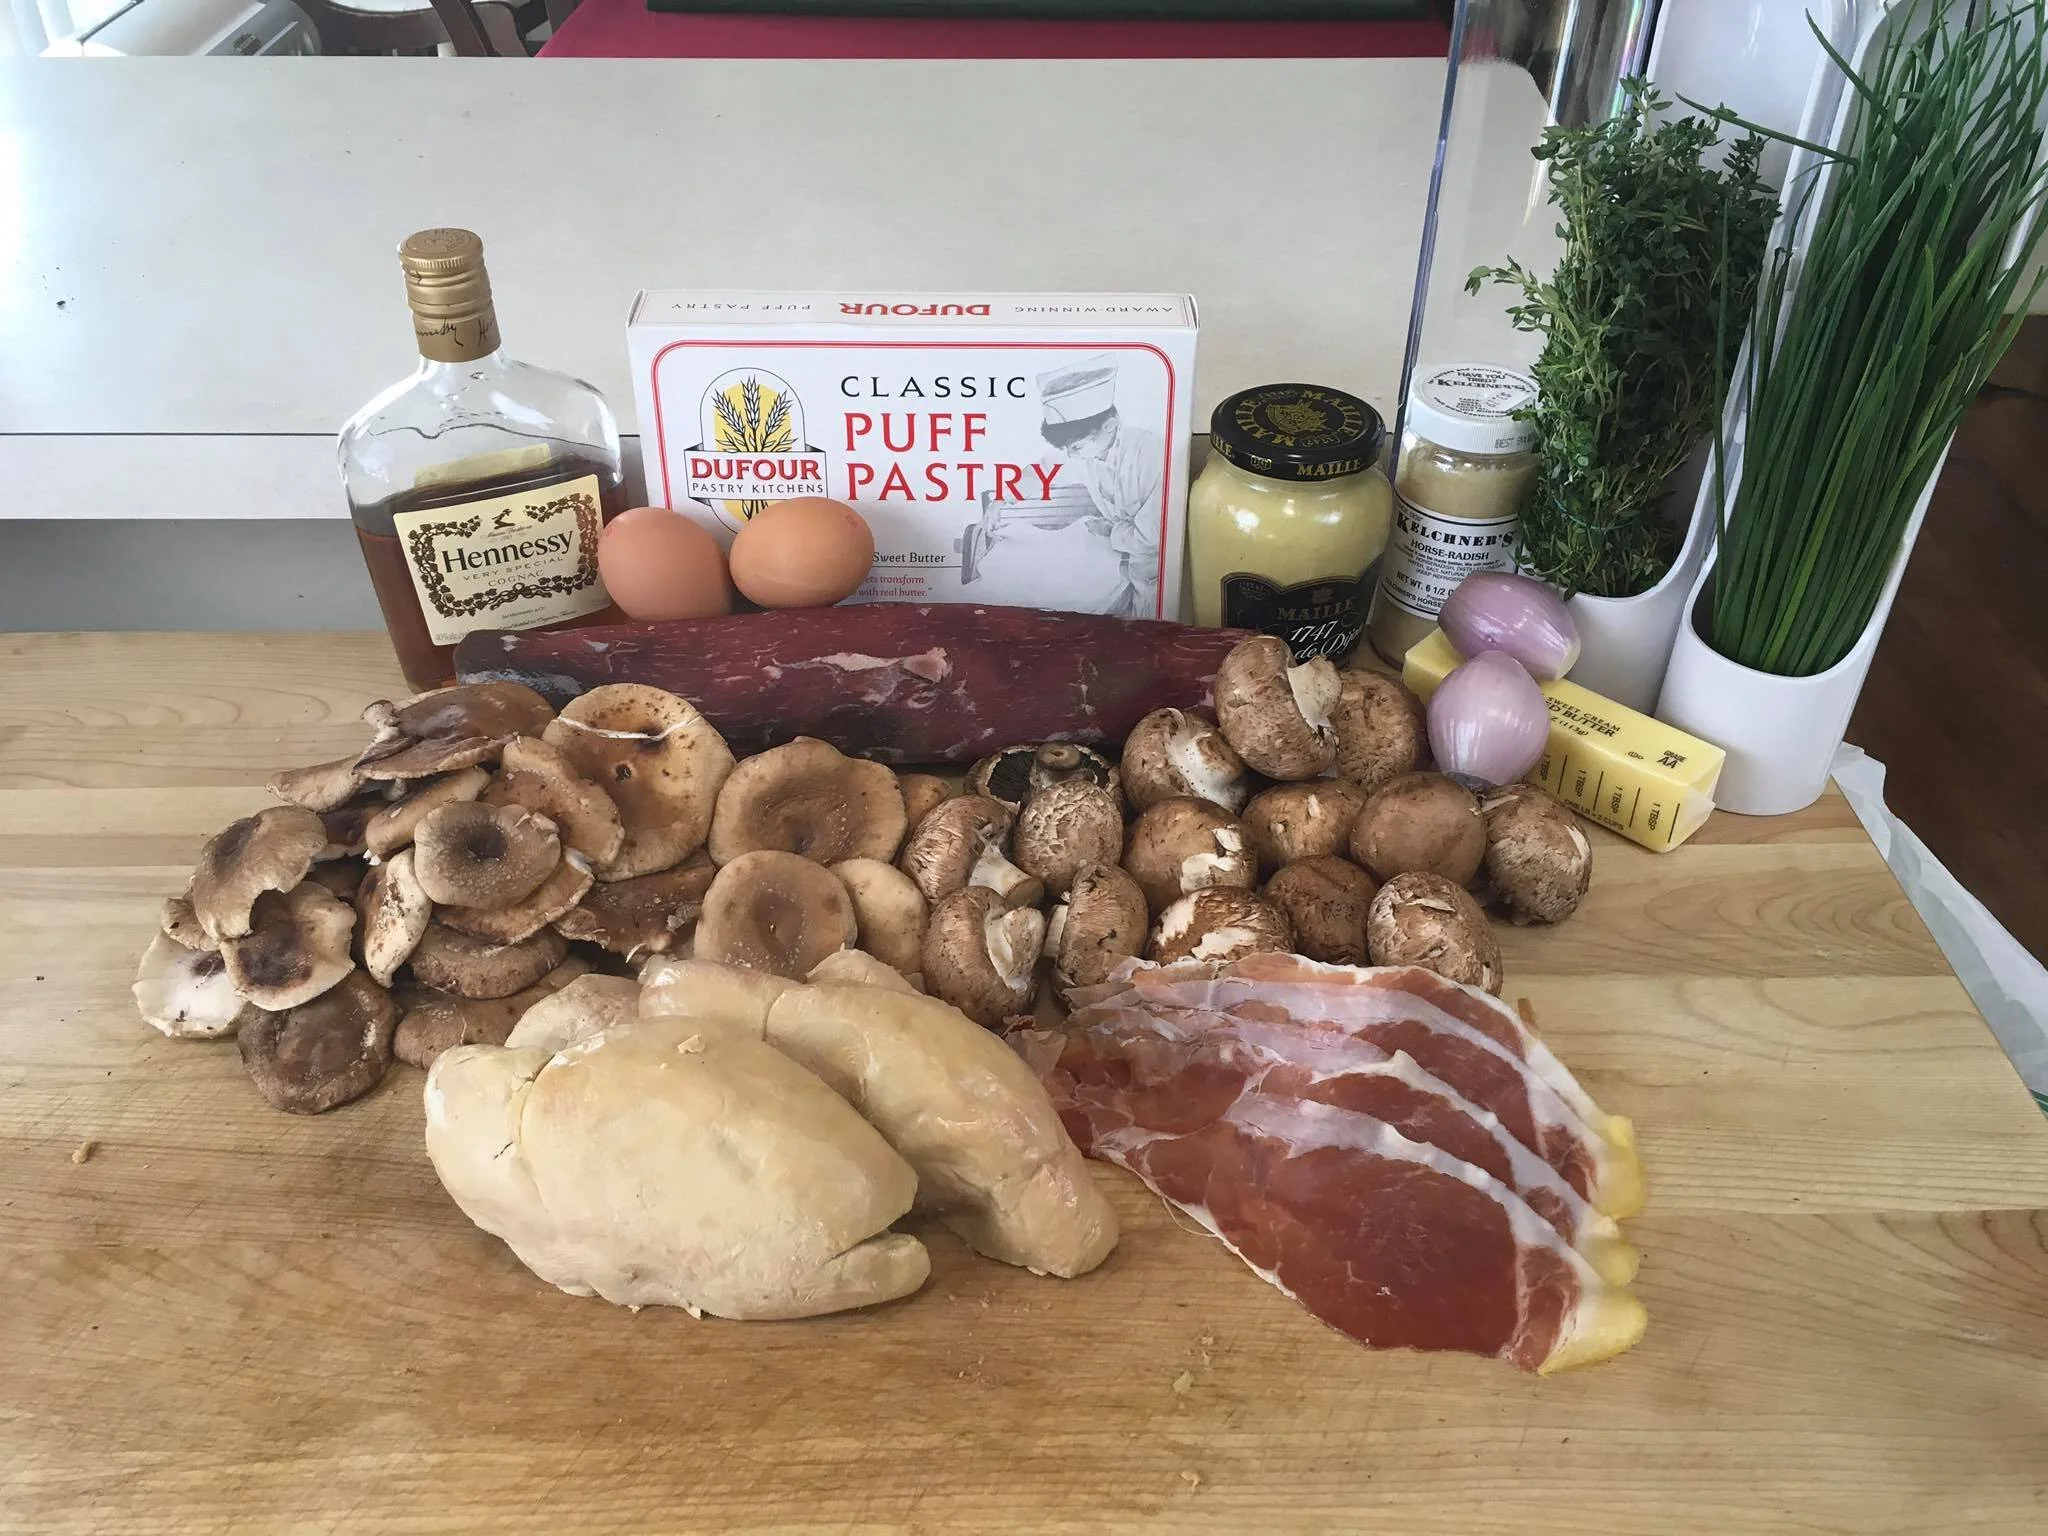
2 center-cut beef tenderloin, trimmed of silverskin and fat, about 2 pounds
4 x 1/2” slices foie gras (OPTIONAL)
kosher salt and freshly ground black pepper
4 tablespoons plus 1/2 teaspoon vegetable or canola oil, divided
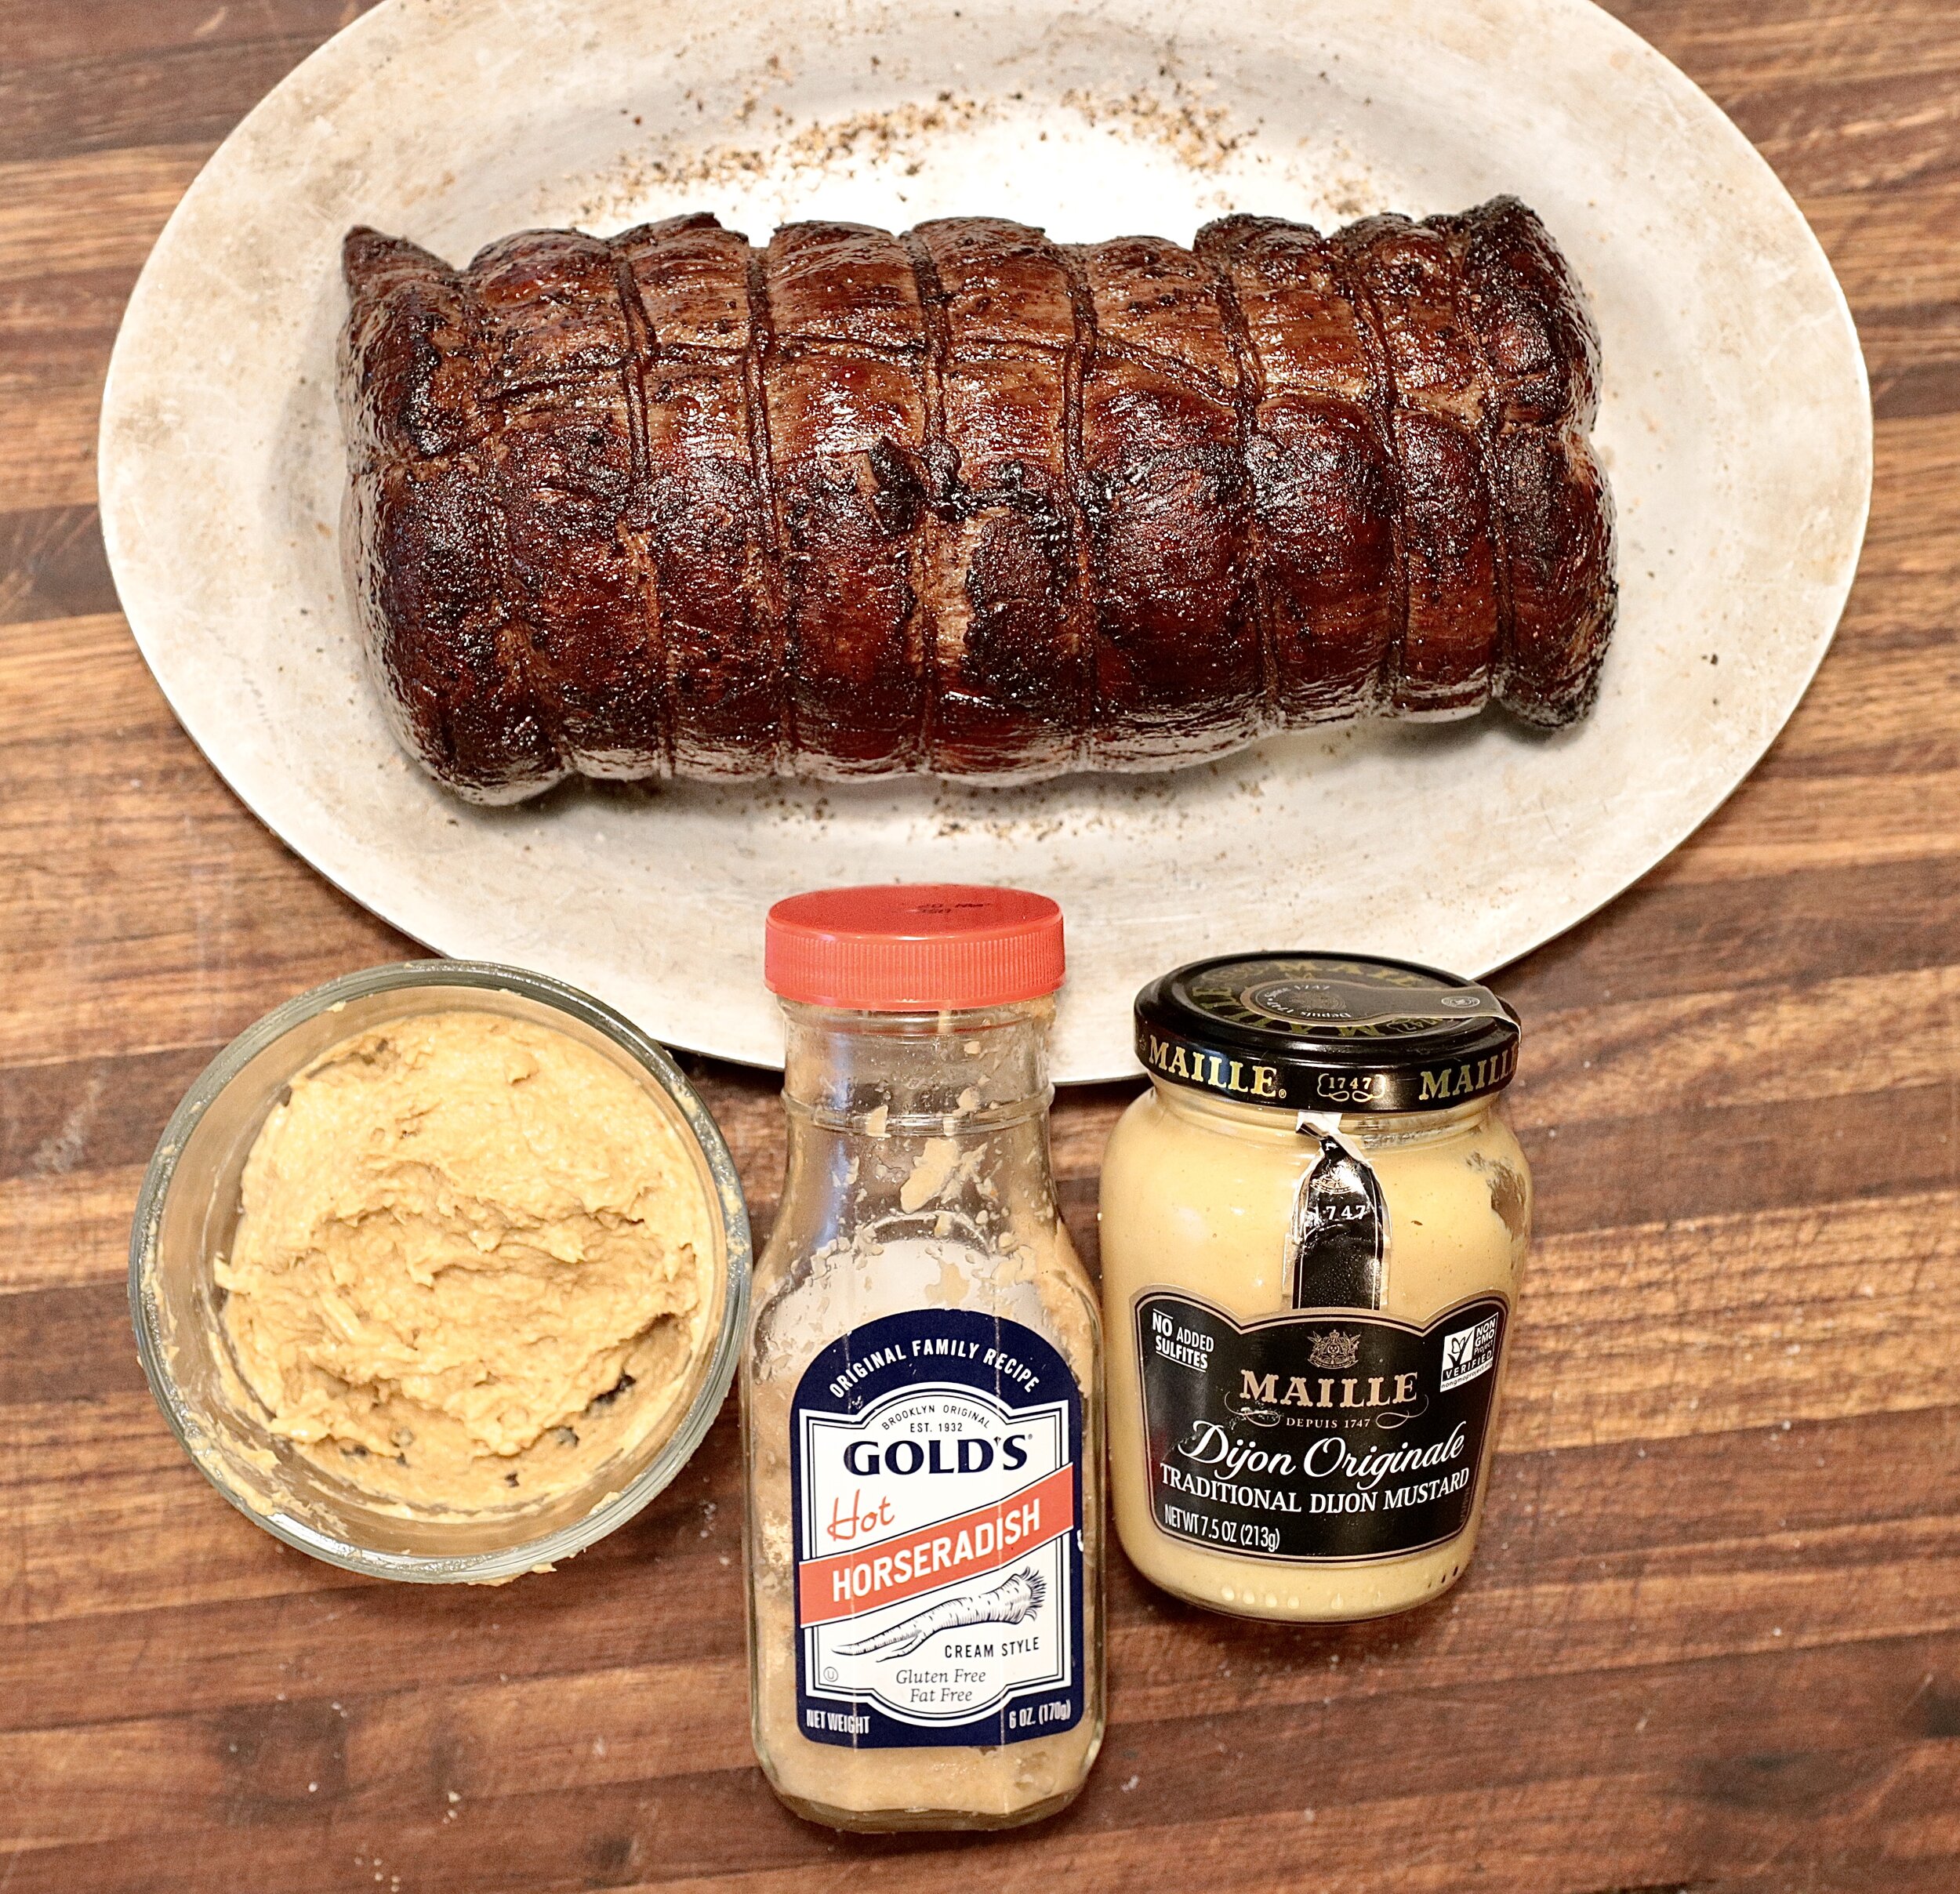
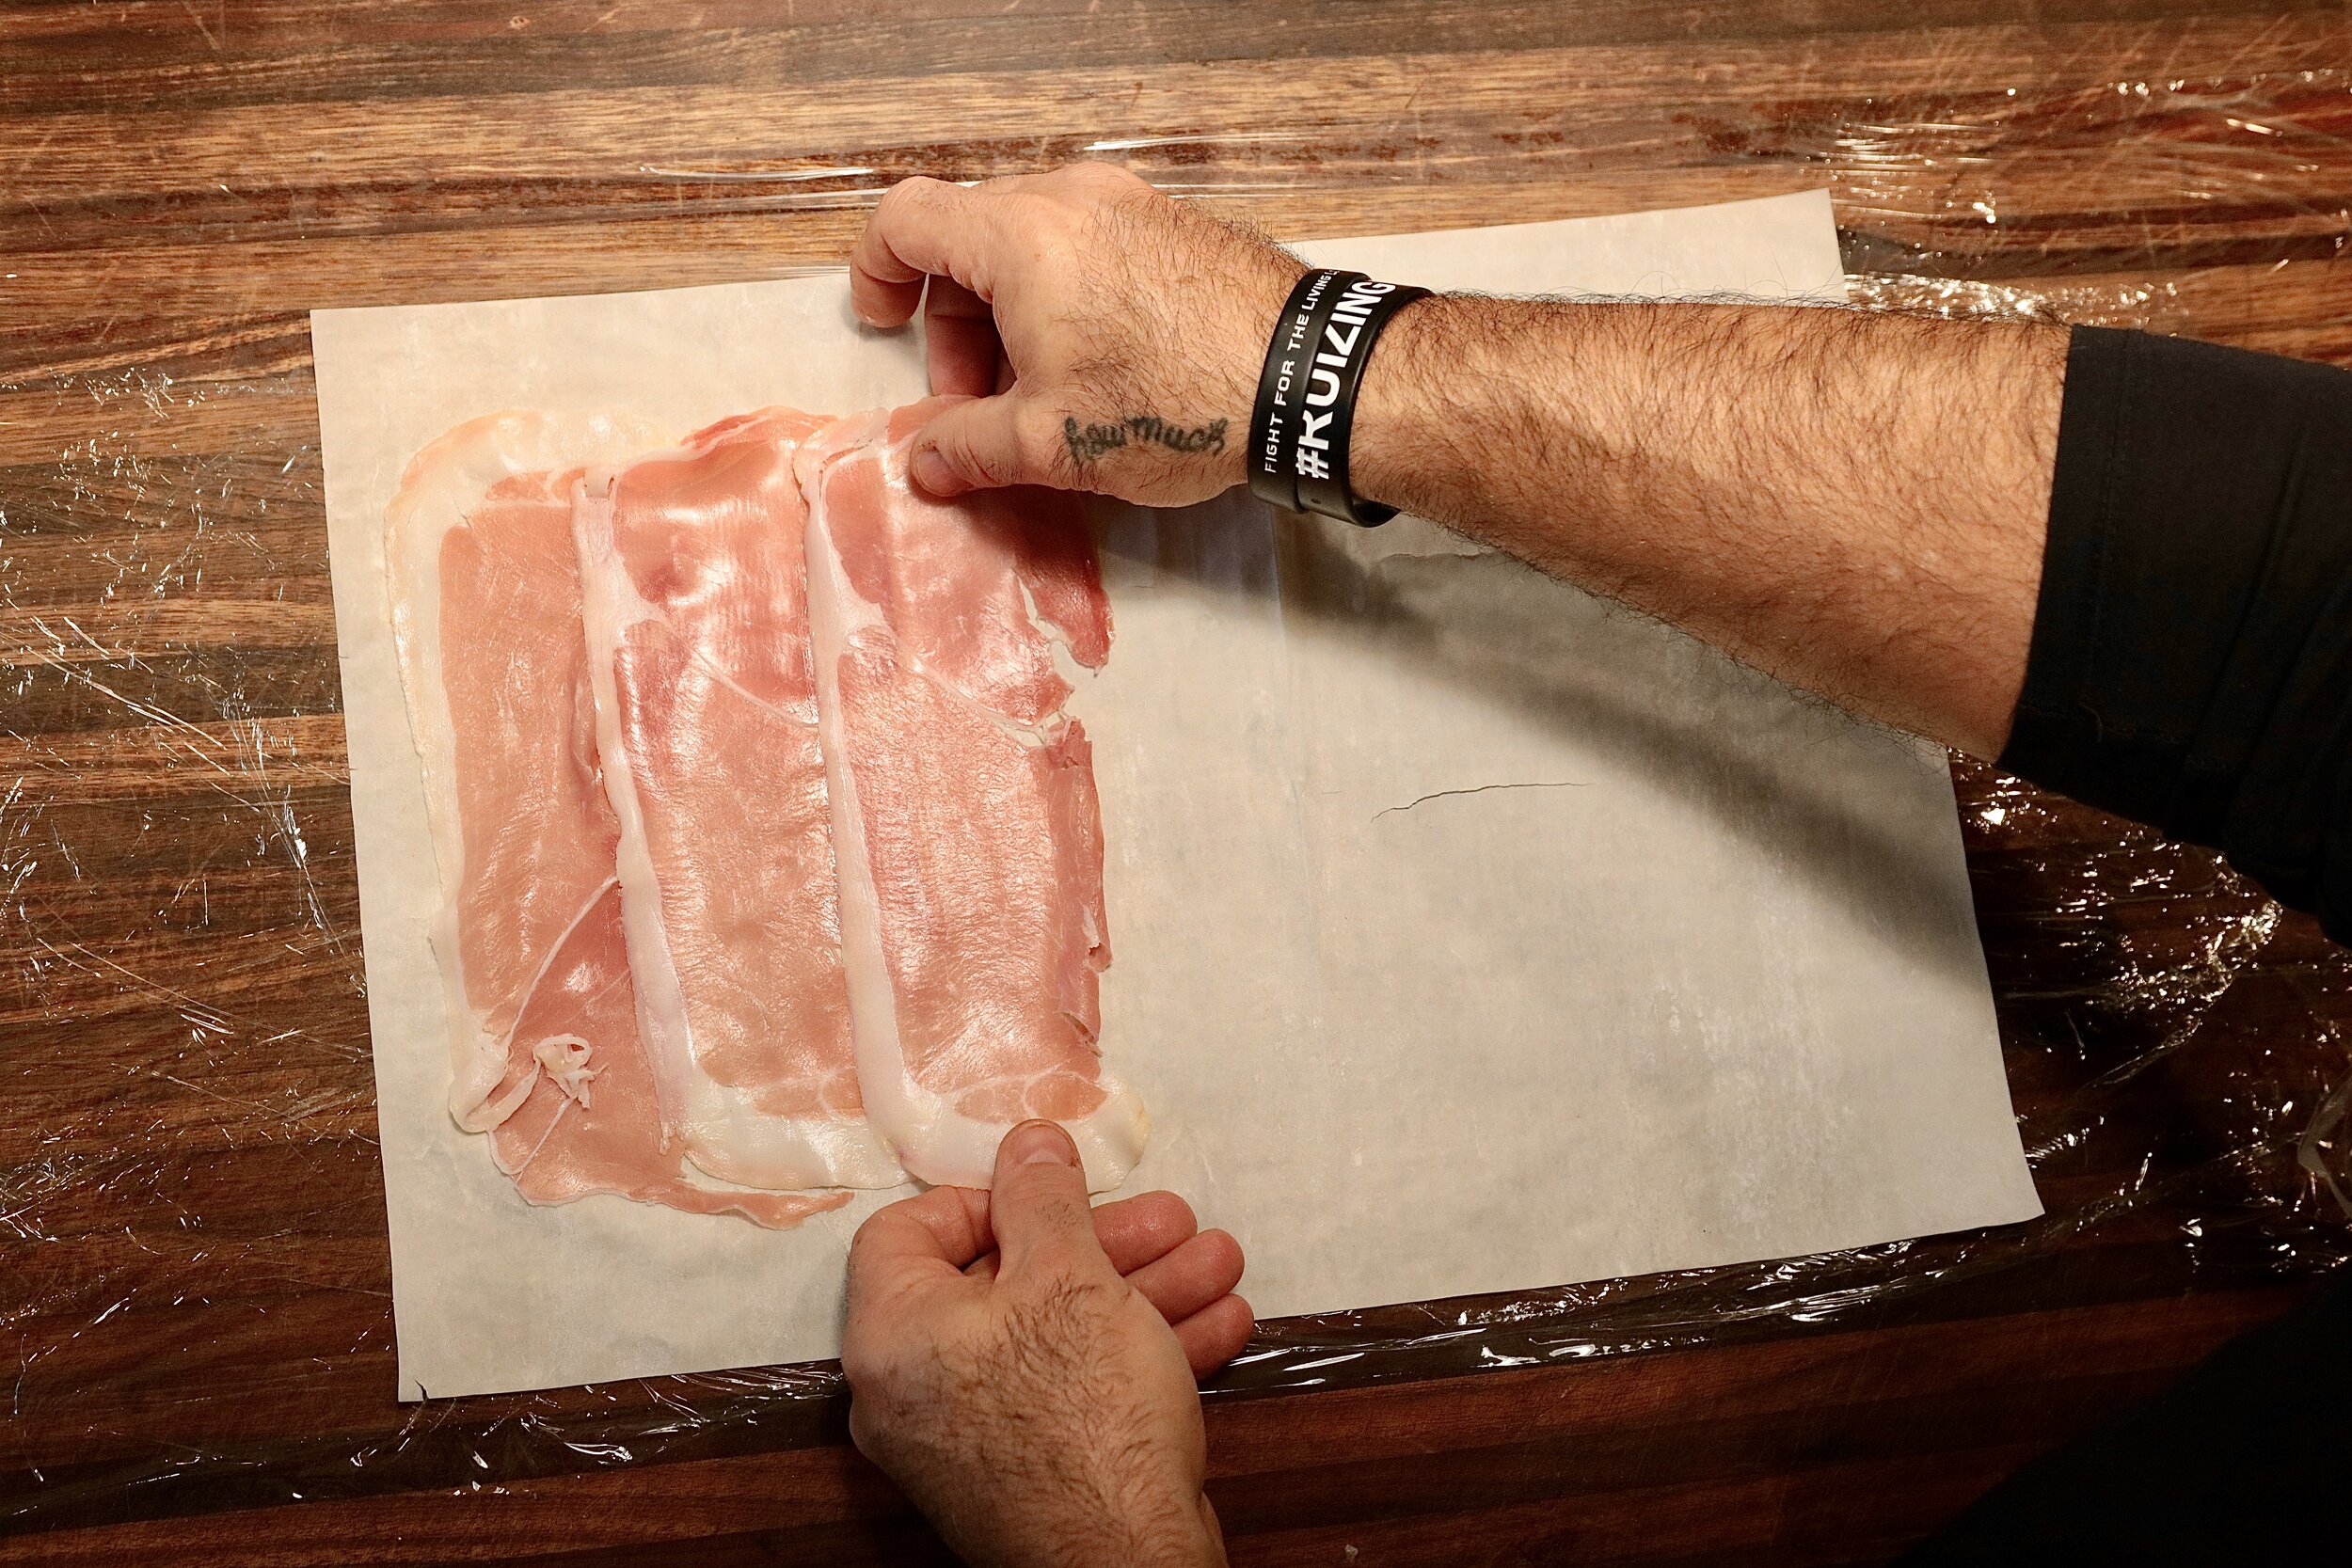
4 tablespoons prepared horseradish
2 tablespoons Dijon, spicy brown, or hot English mustard
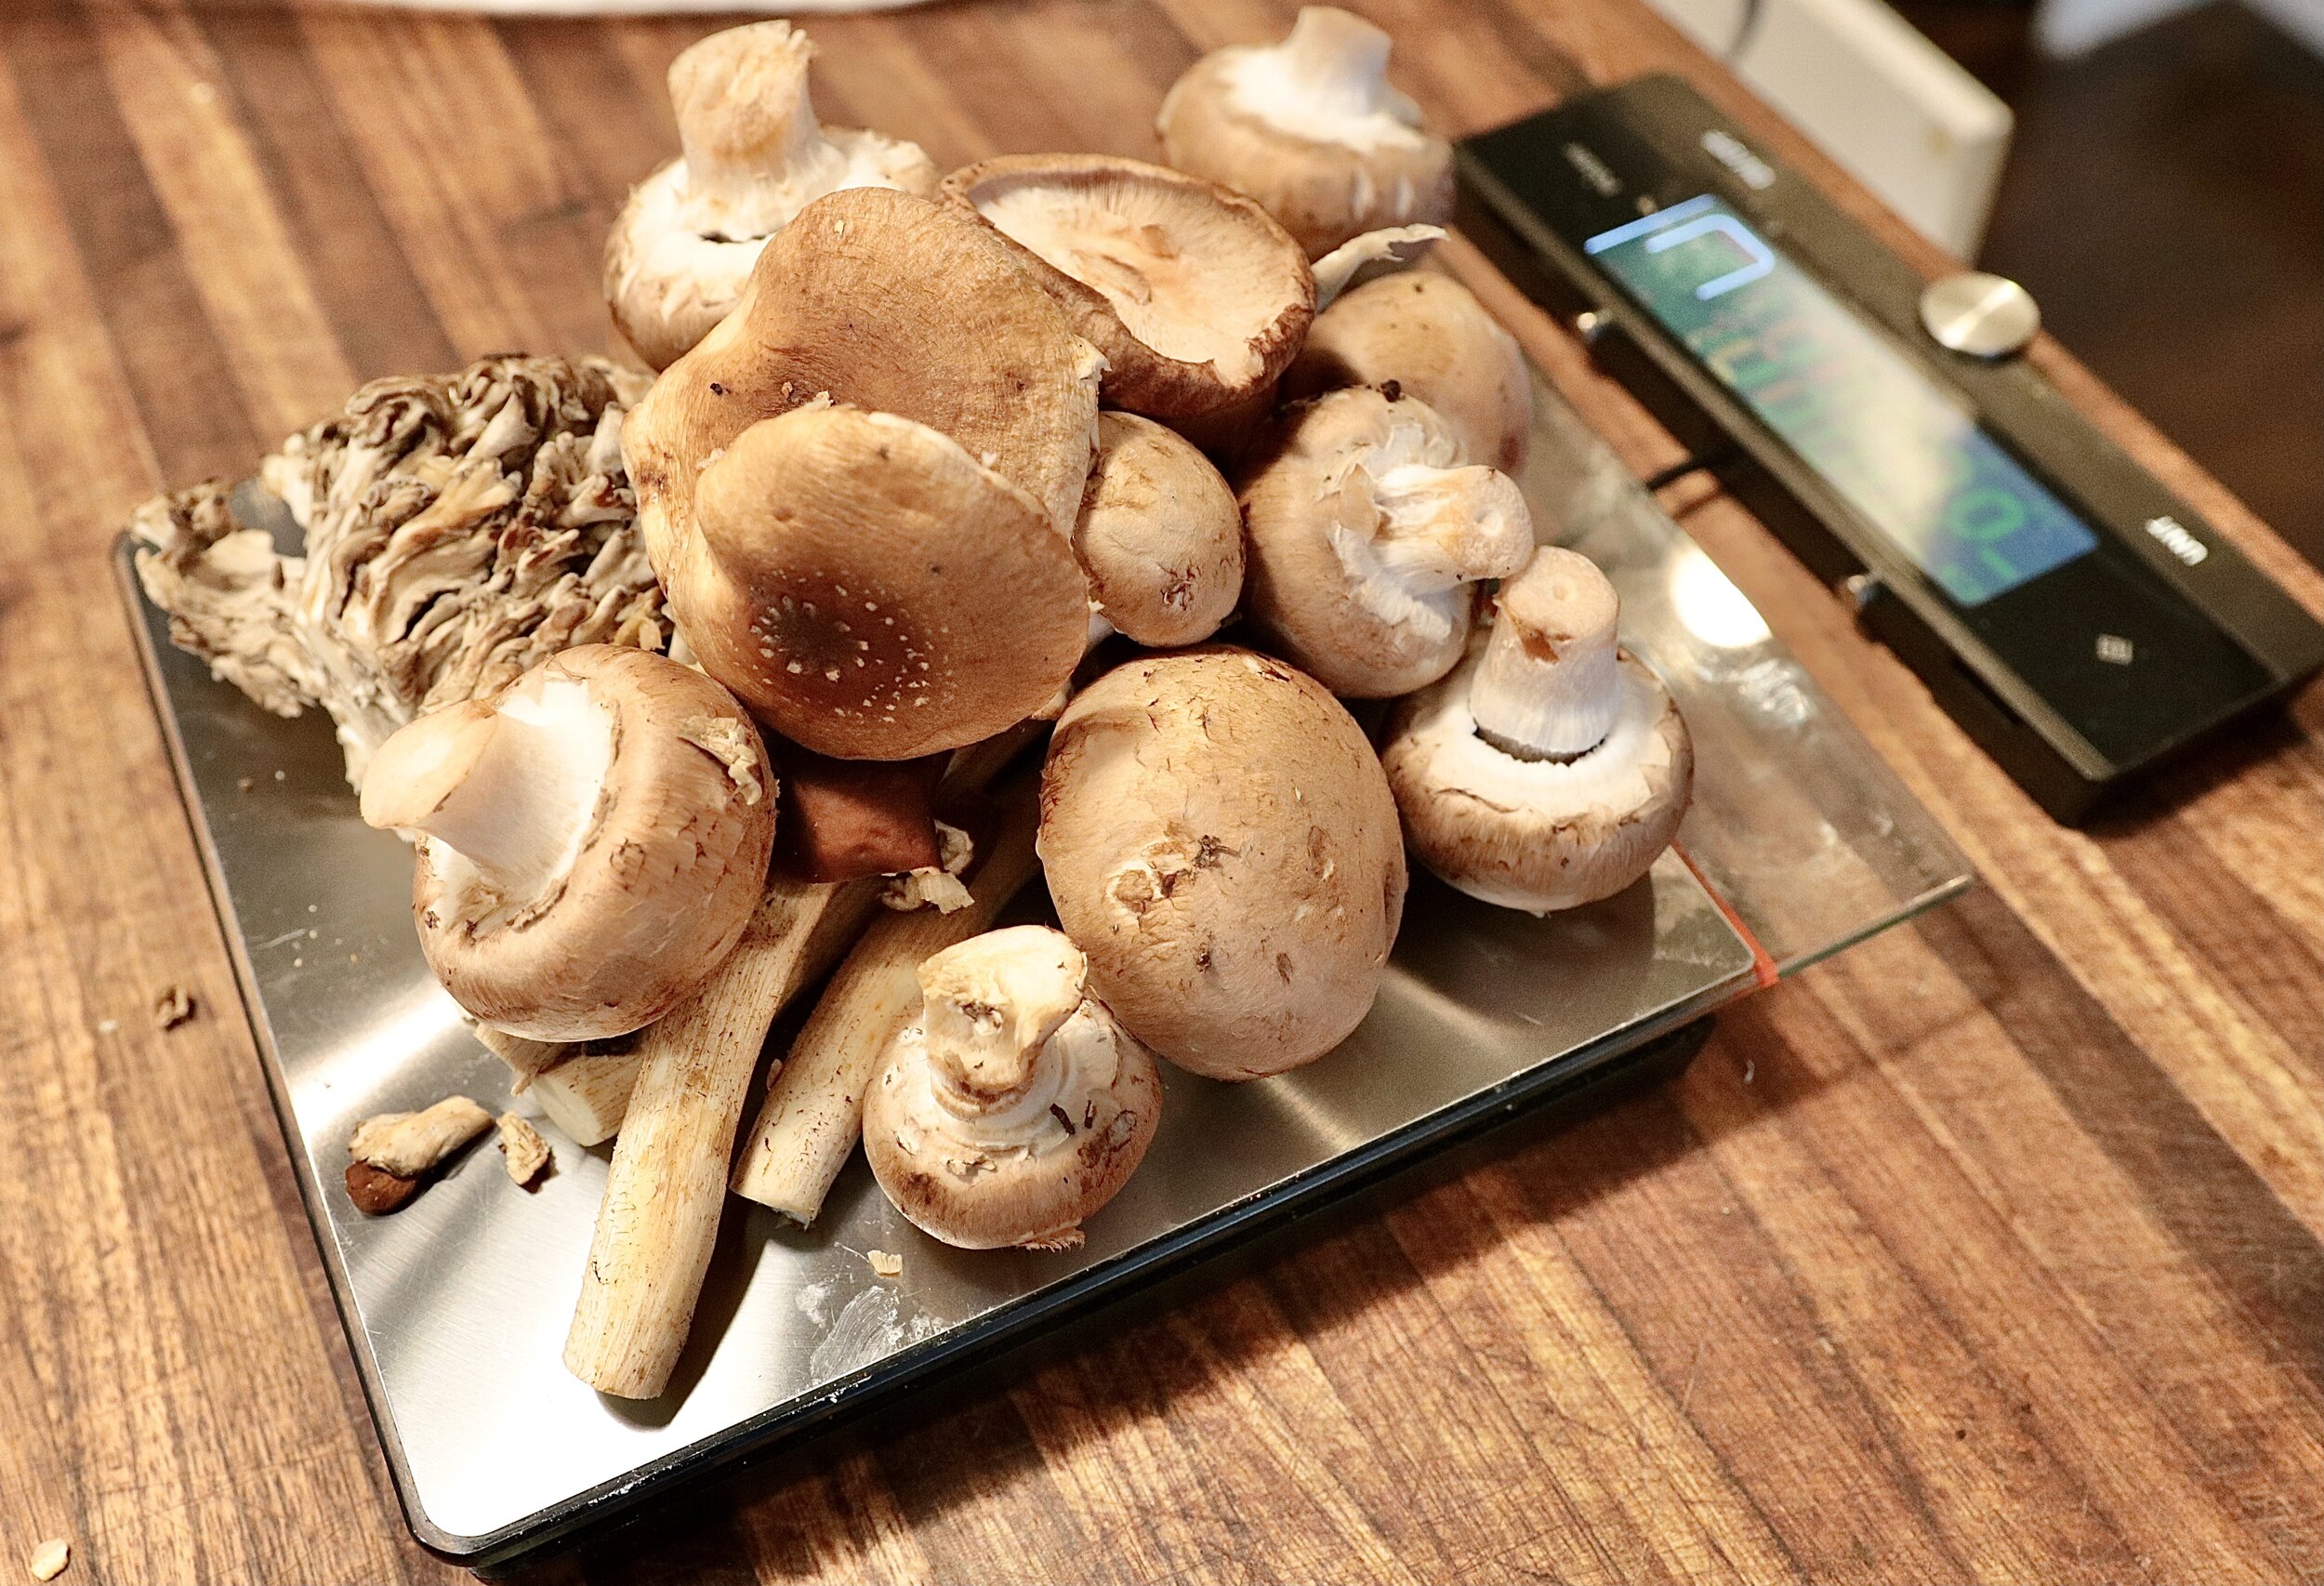
2 pounds mushrooms (button, cremini, shiitake, portobello, or a mix) cleaned, trimmed, and roughly chopped
8 tablespoons unsalted butter
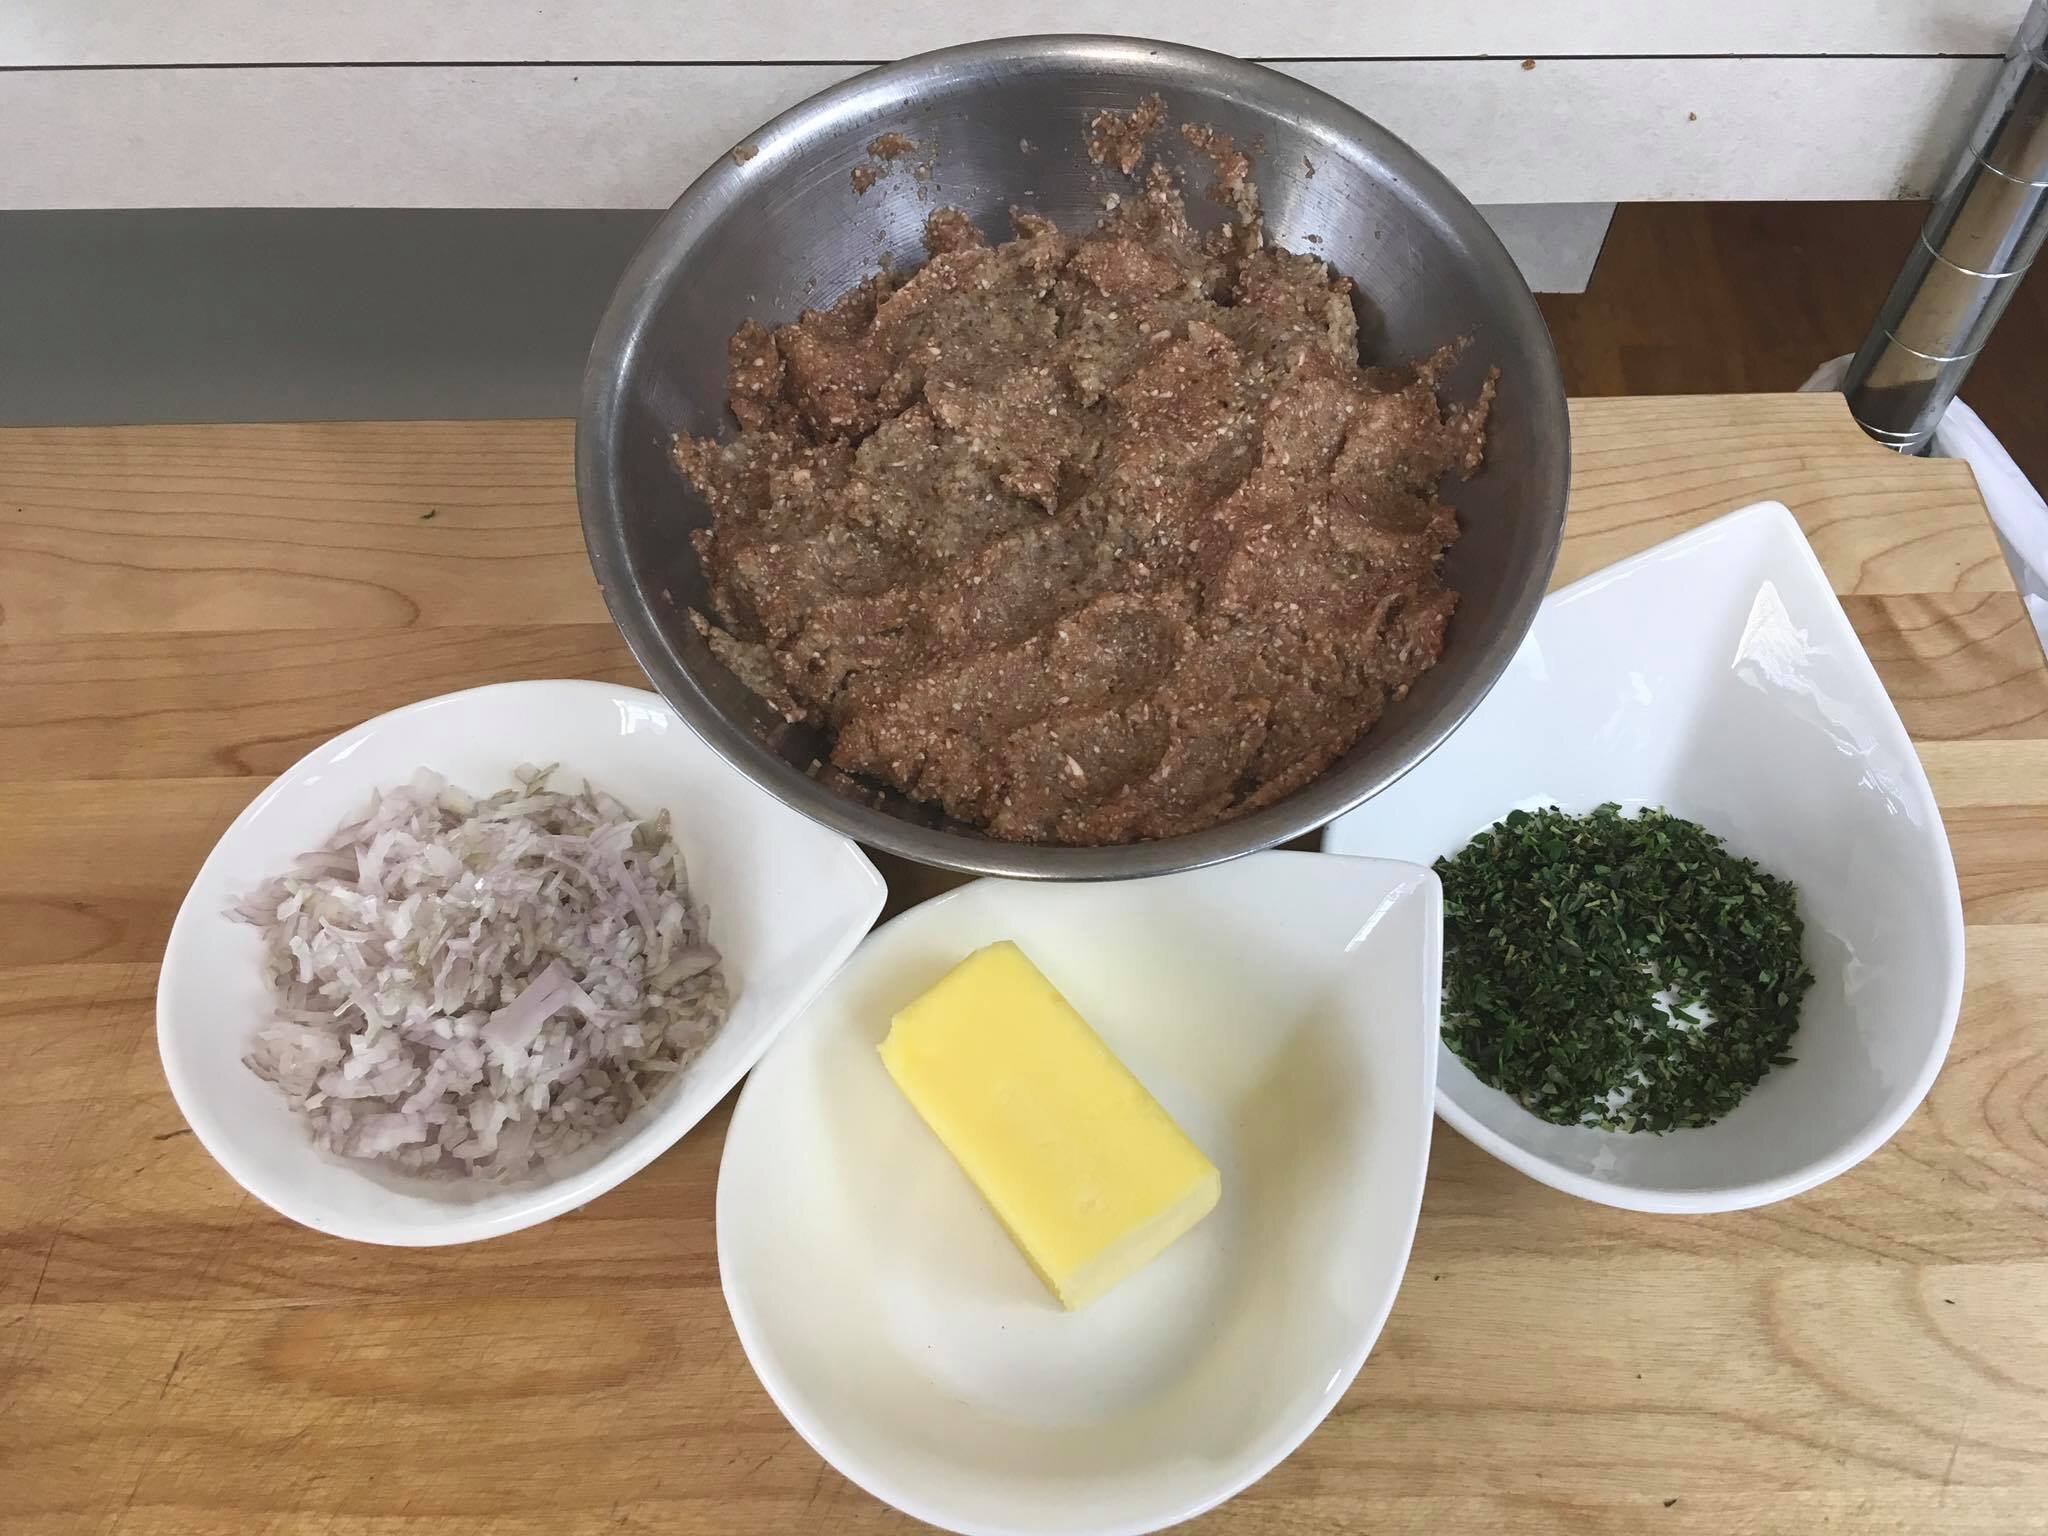
4 medium shallots, finely sliced (about 1/2 cup)
1 1/3 tablespoons finely minced fresh thyme leaves
1 cup cognac or other brandy or barrel-aged spirit such as bourbon
1 cup heavy cream
1 1/3 tablespoons soy sauce
2 sheets fillo dough
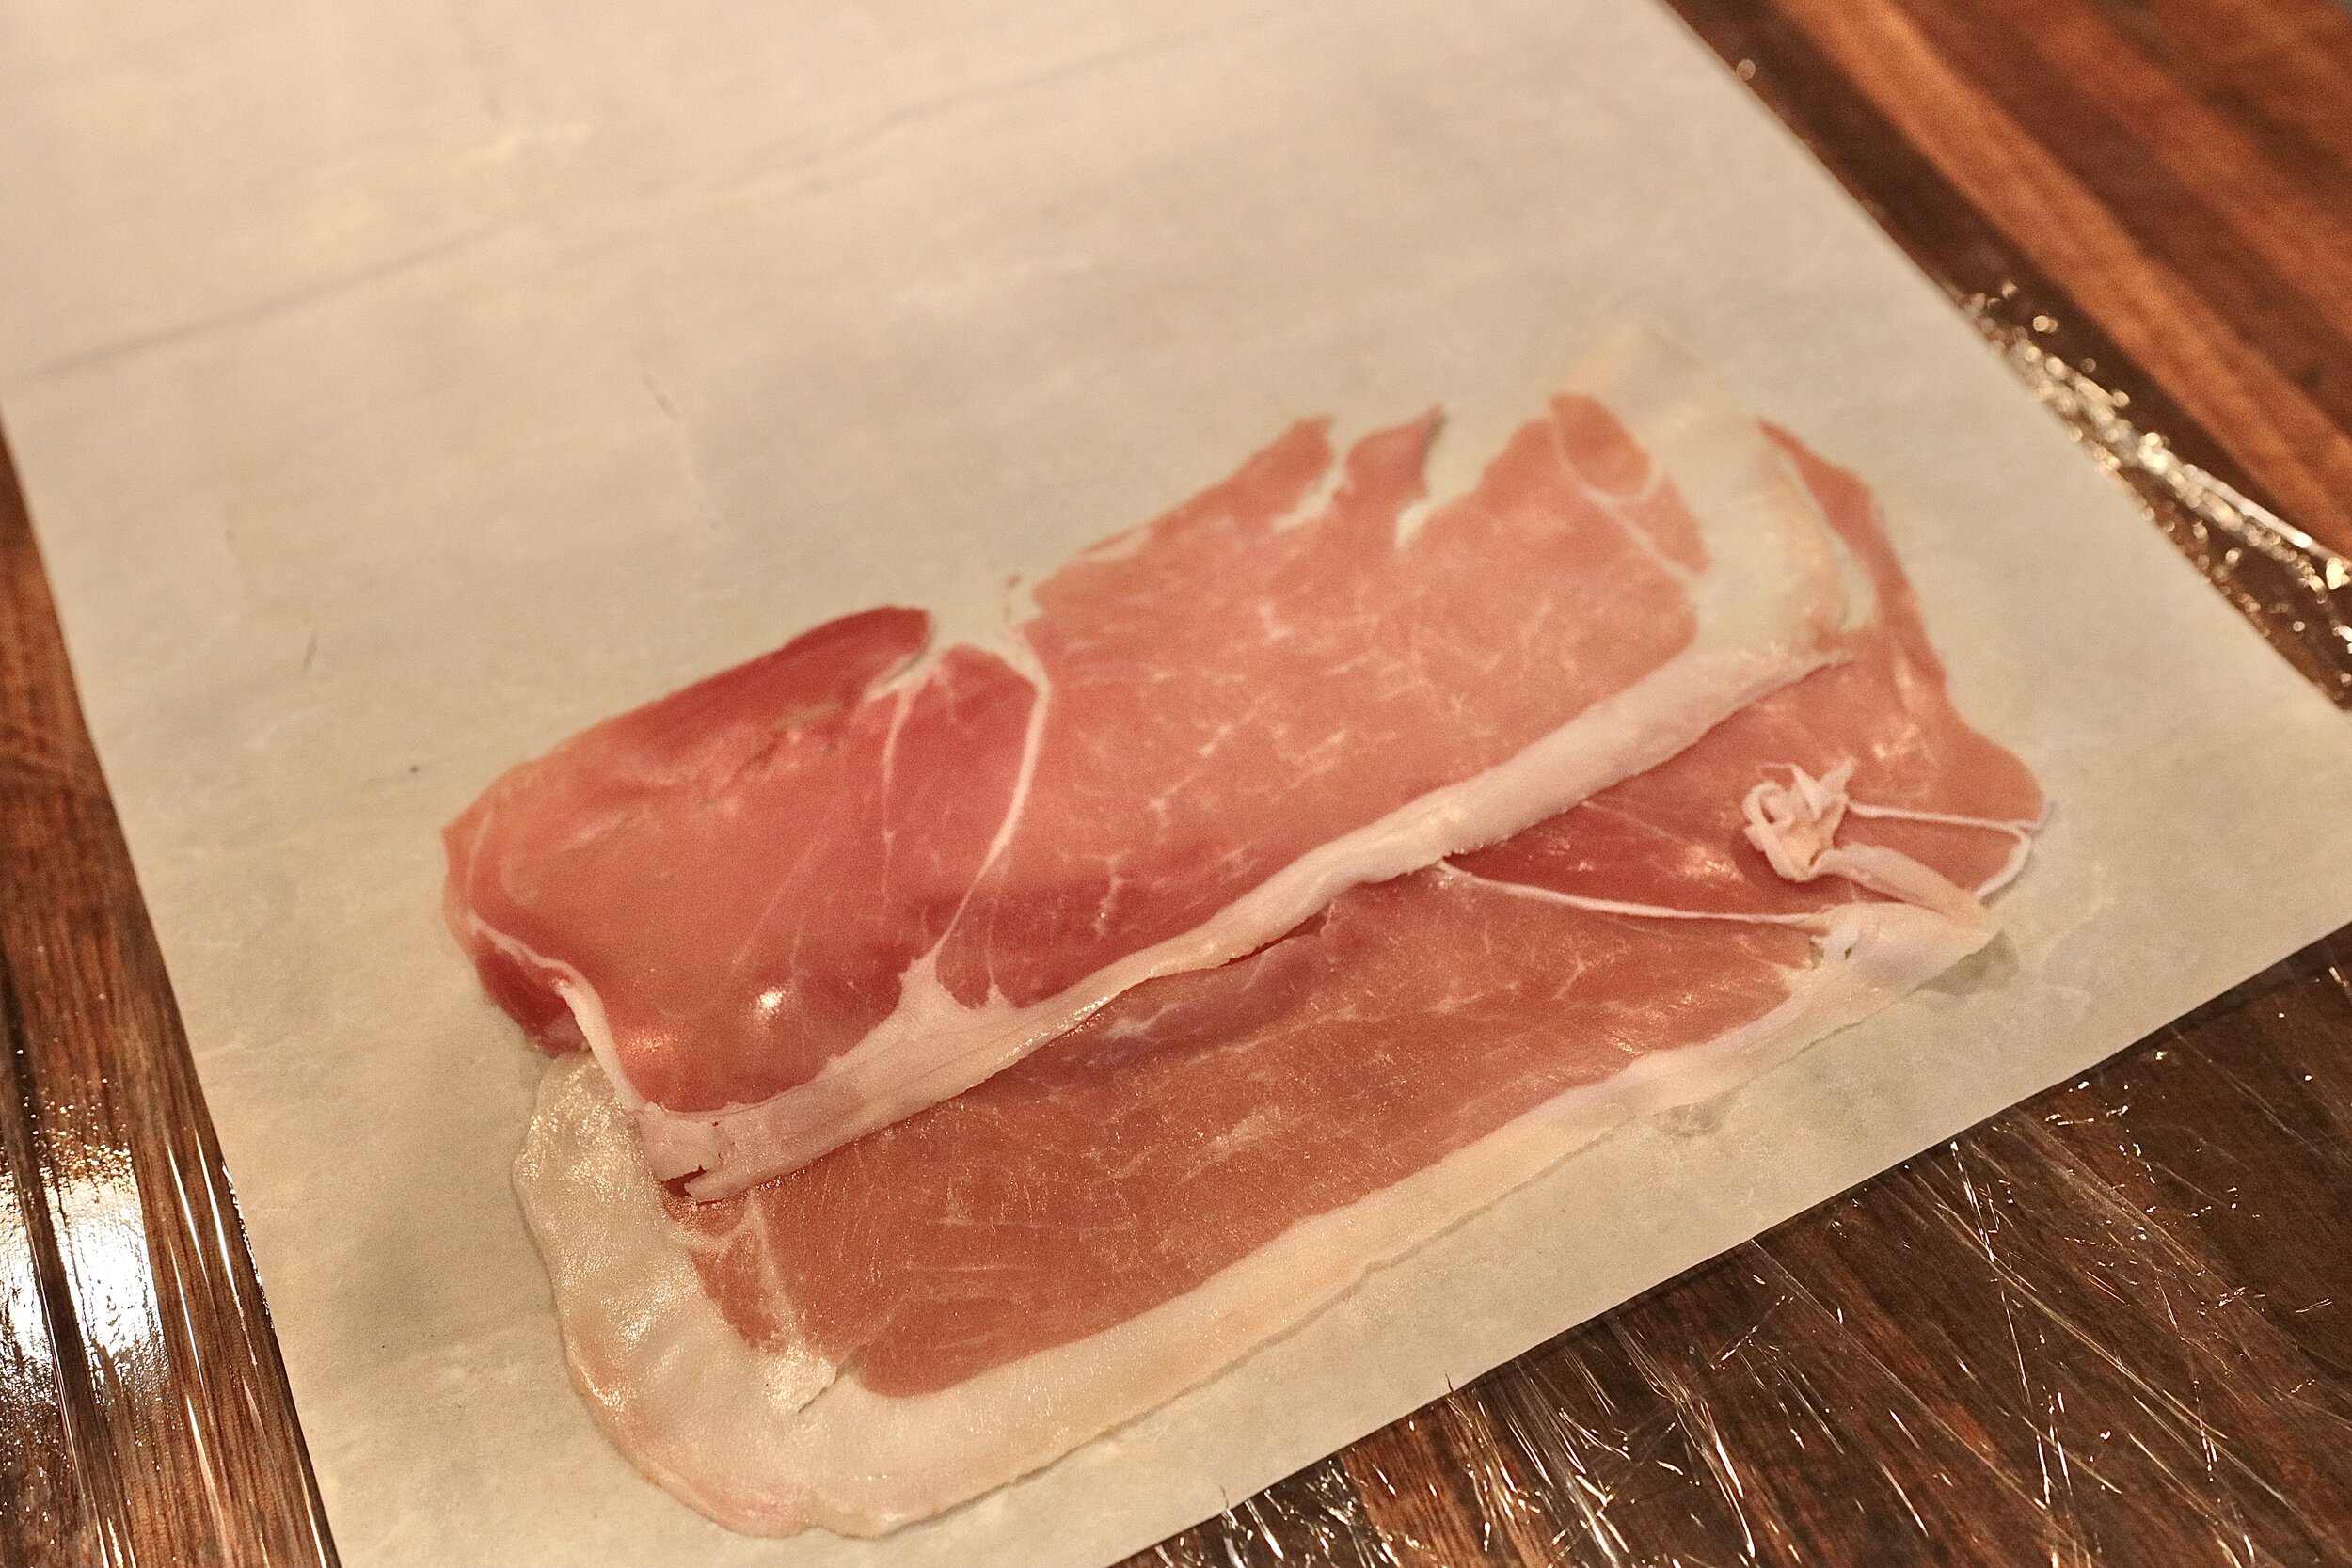
1/2 pound prosciutto, sliced paper thin
Flour for dusting
1 3/4 pounds frozen or homemade puff pastry, thawed
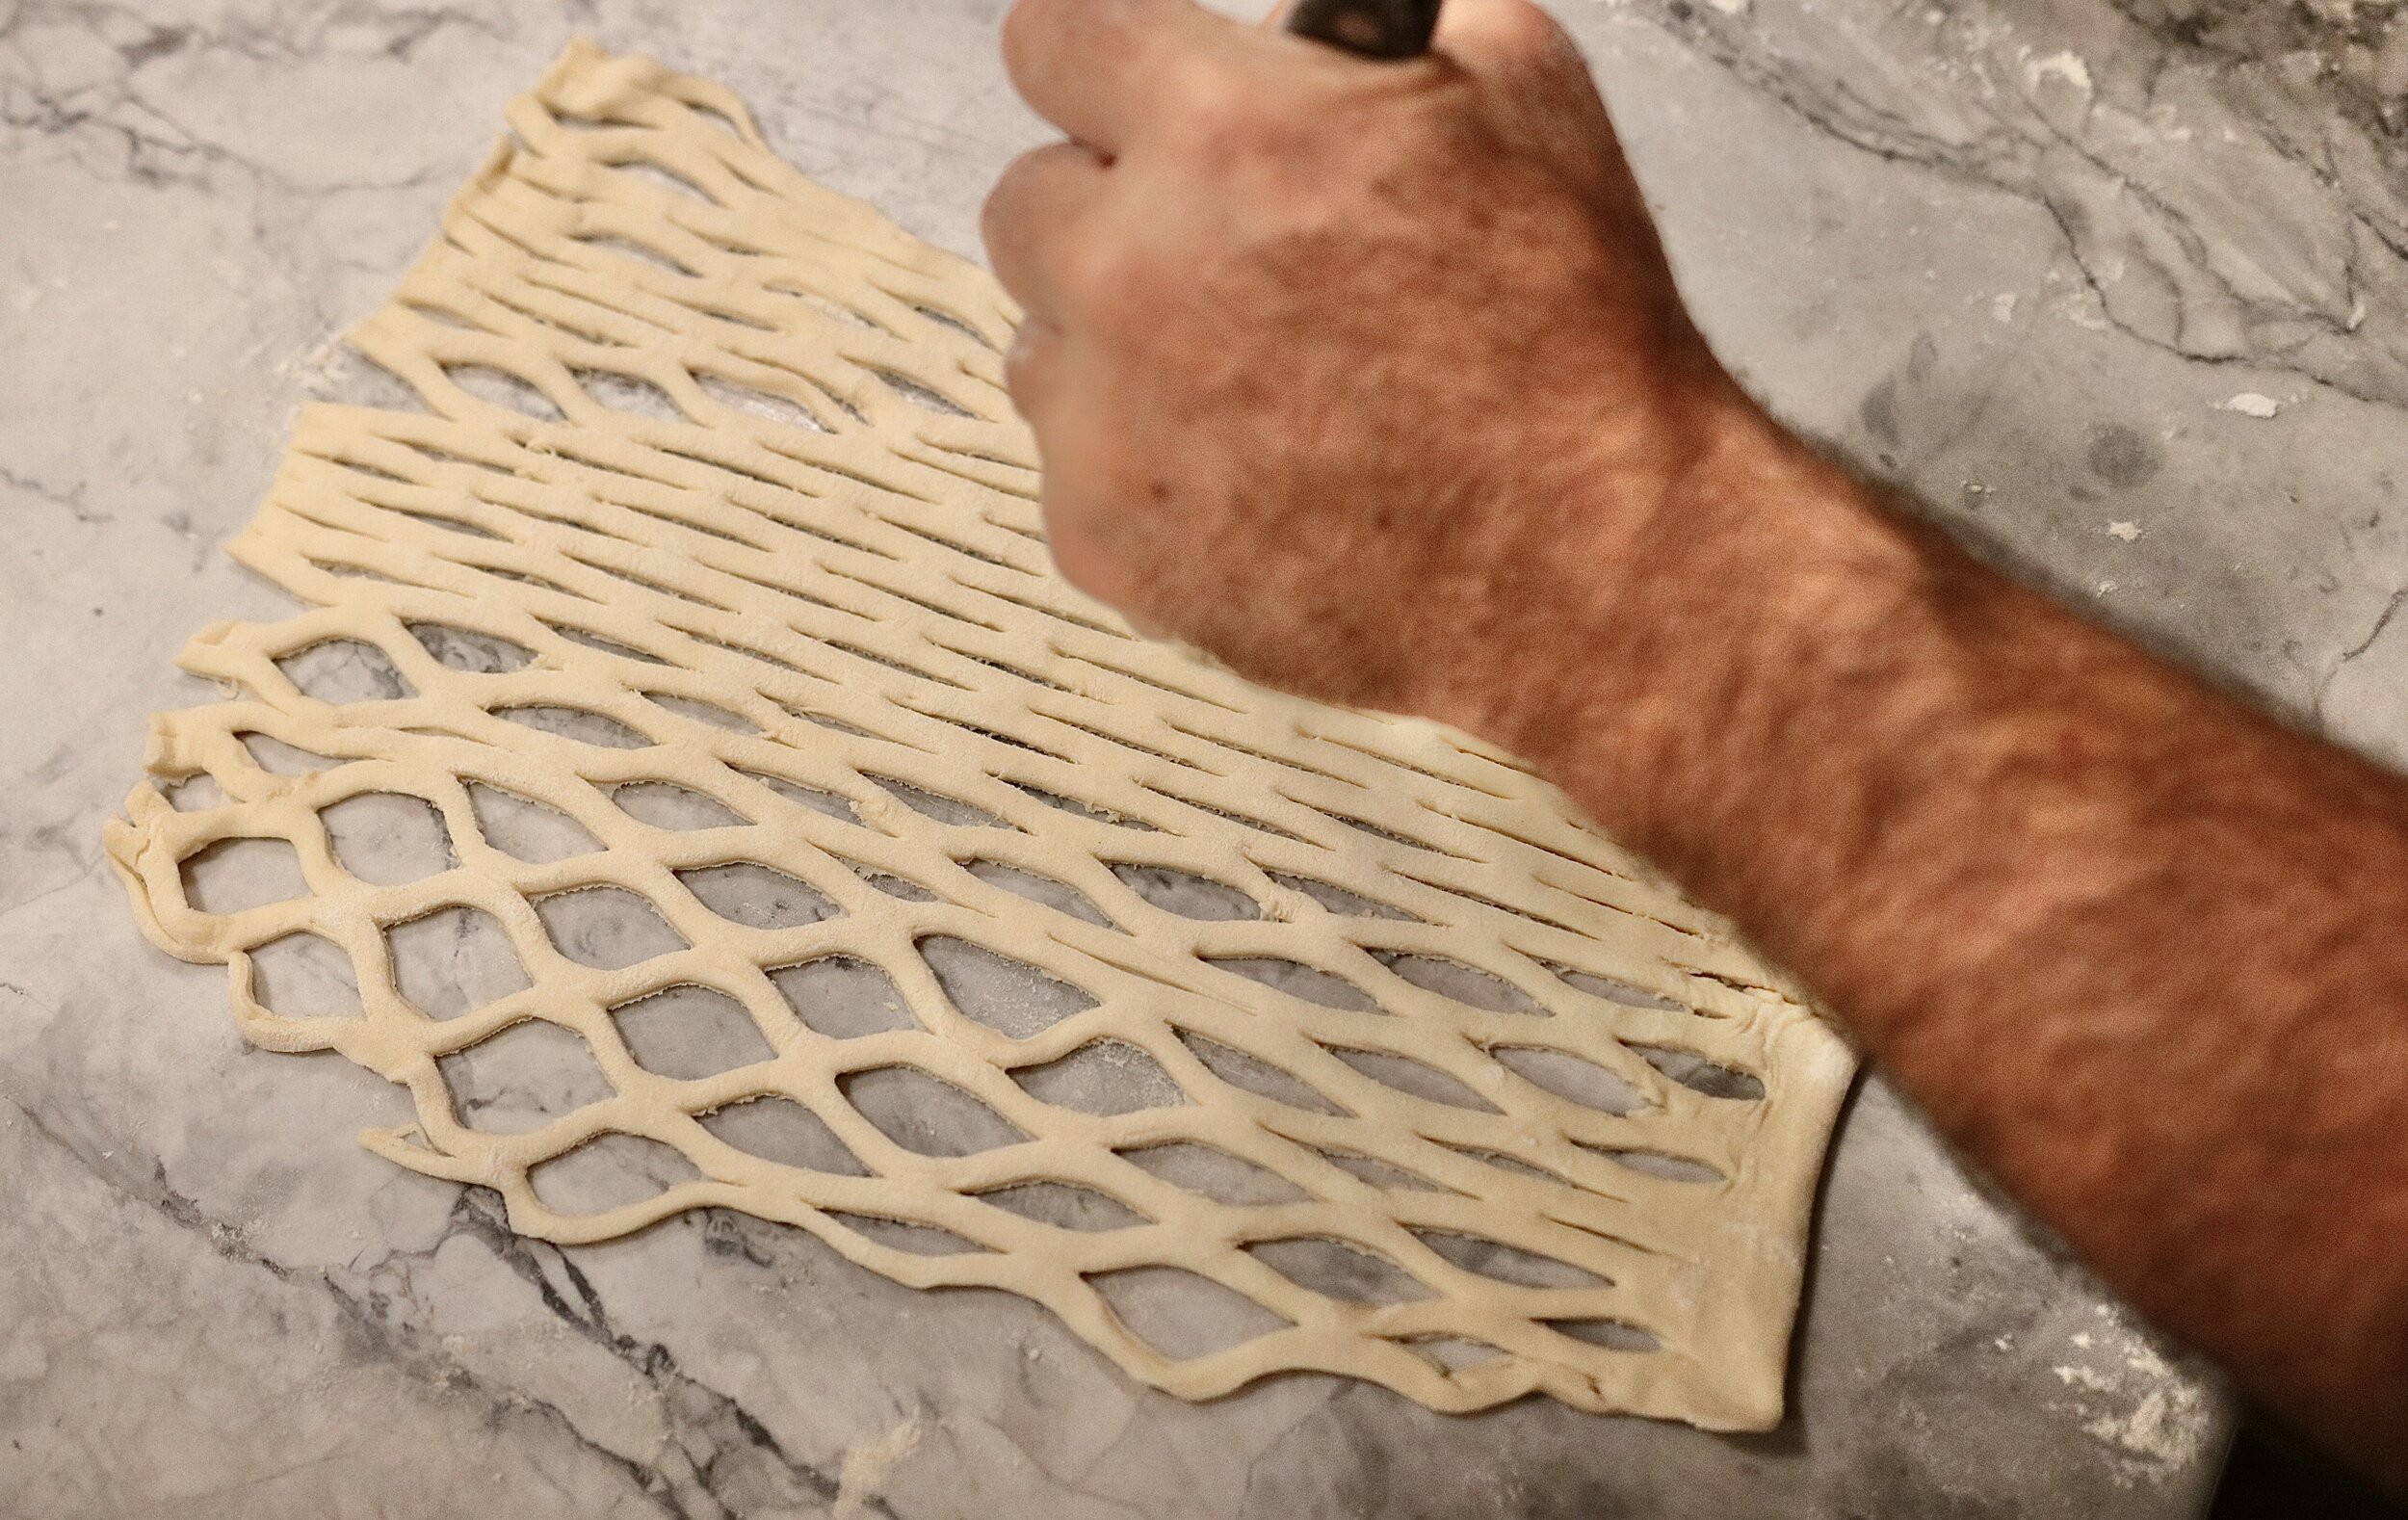
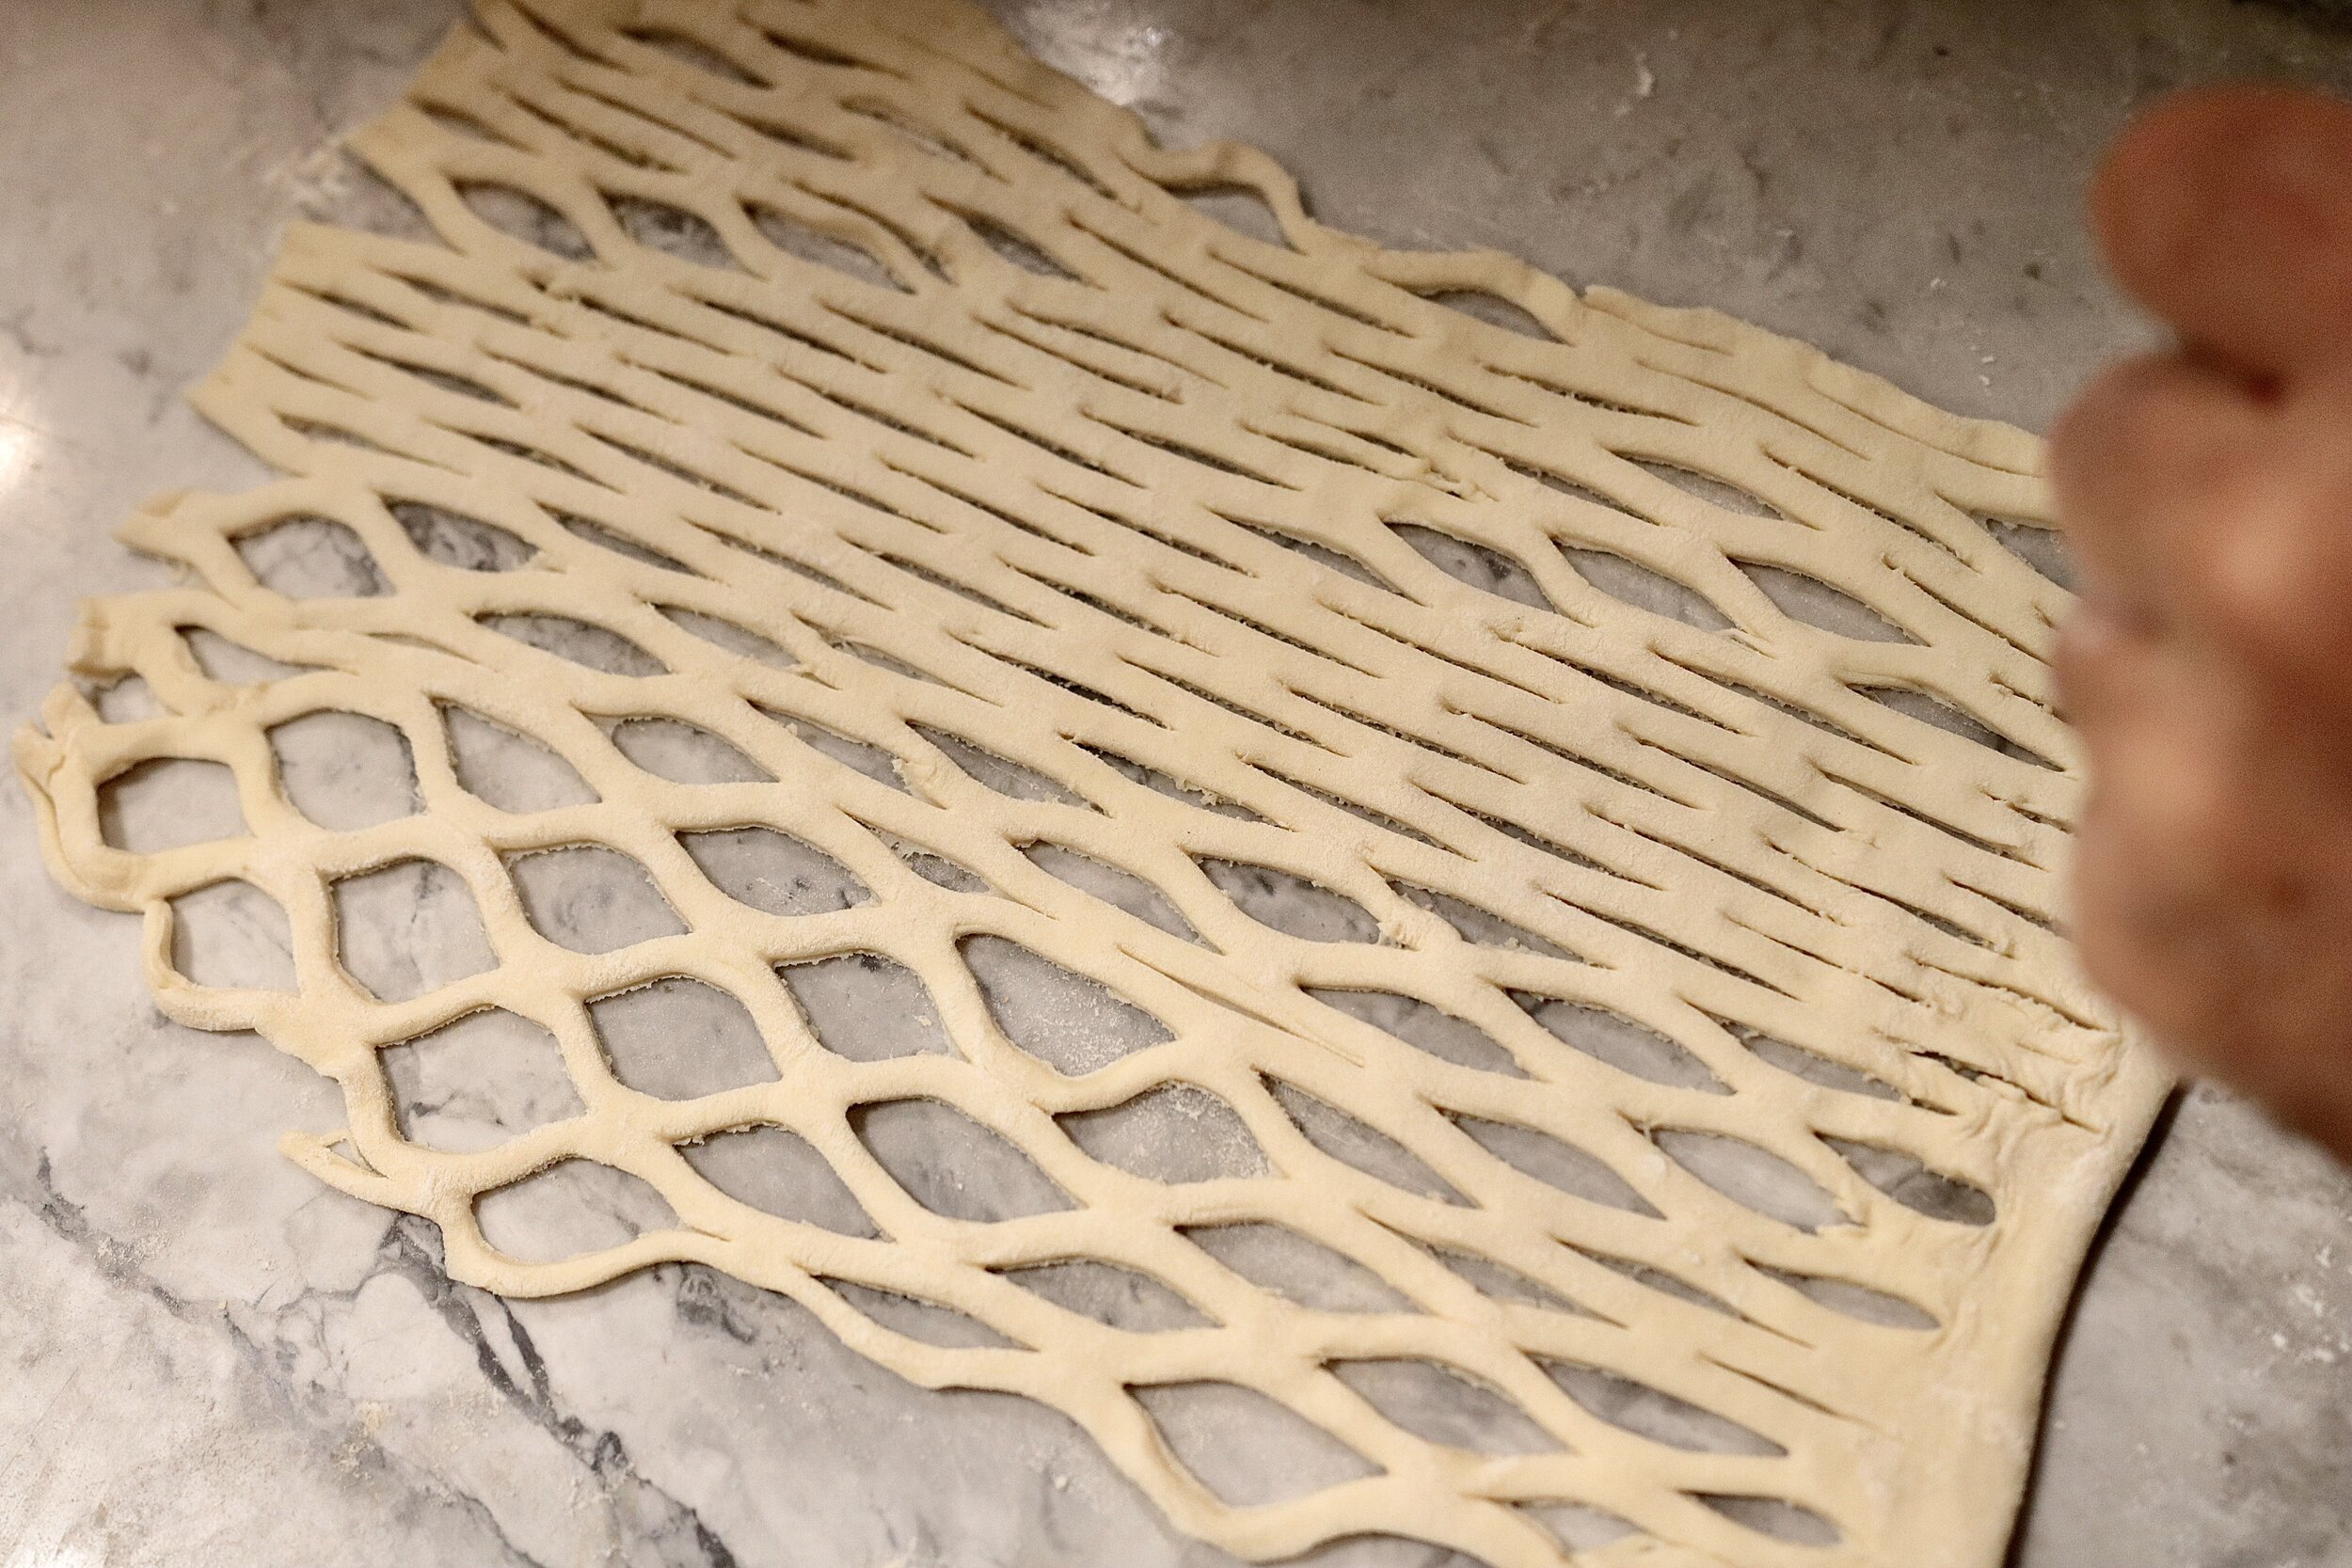
OPTIONAL decorative step: Second 1 3/4 pounds frozen or homemade puff pastry, thawed to use as lattice crust
2 egg, beaten
Coarse sea salt, such as Maldon or fleur de sel
2 bunches finely minced chives
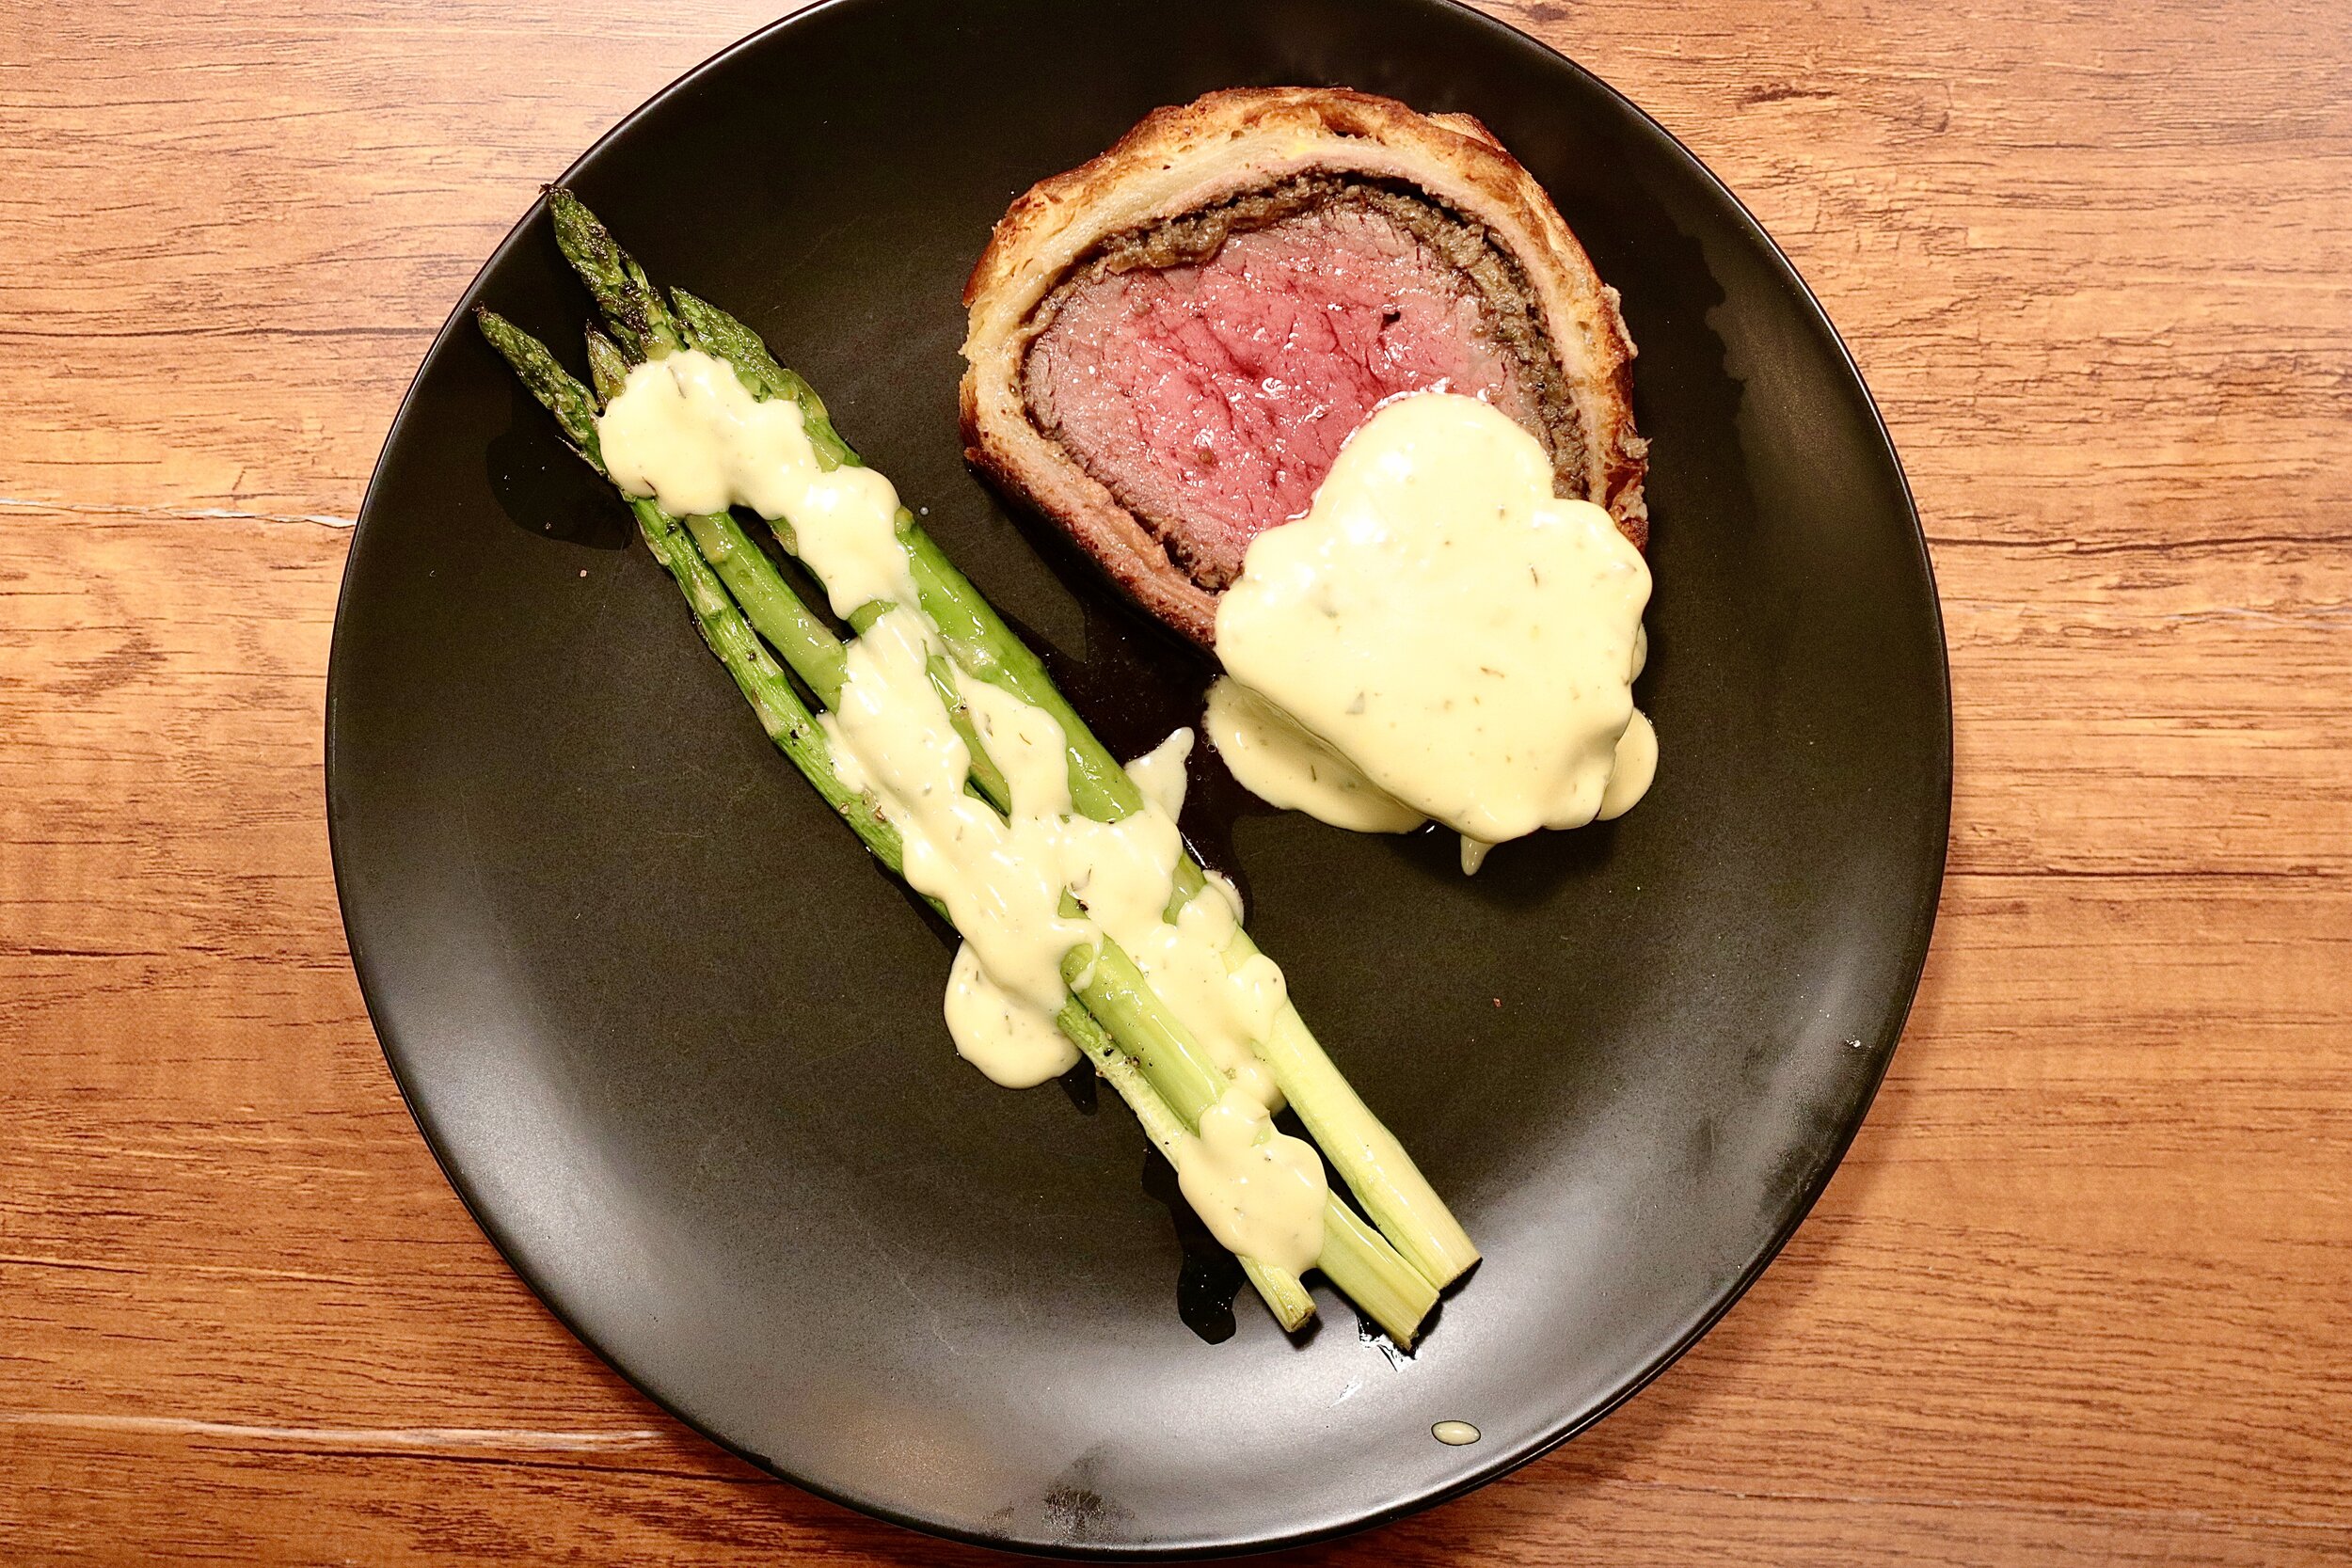
OPTIONAL CLASSIC FINISHING SAUCE (while pictured, it’s not in the video) - Link to Bearnaise Sauce
SPECIAL TOOLS/EQUIPMENT
Steakager Pro 40 - used to dry age the beef tenderloin in my own home (use affiliate code GC5 for a 5% discount on the Steakager Pro 40)
Wireless Probe Thermometer - ensure the right doneness
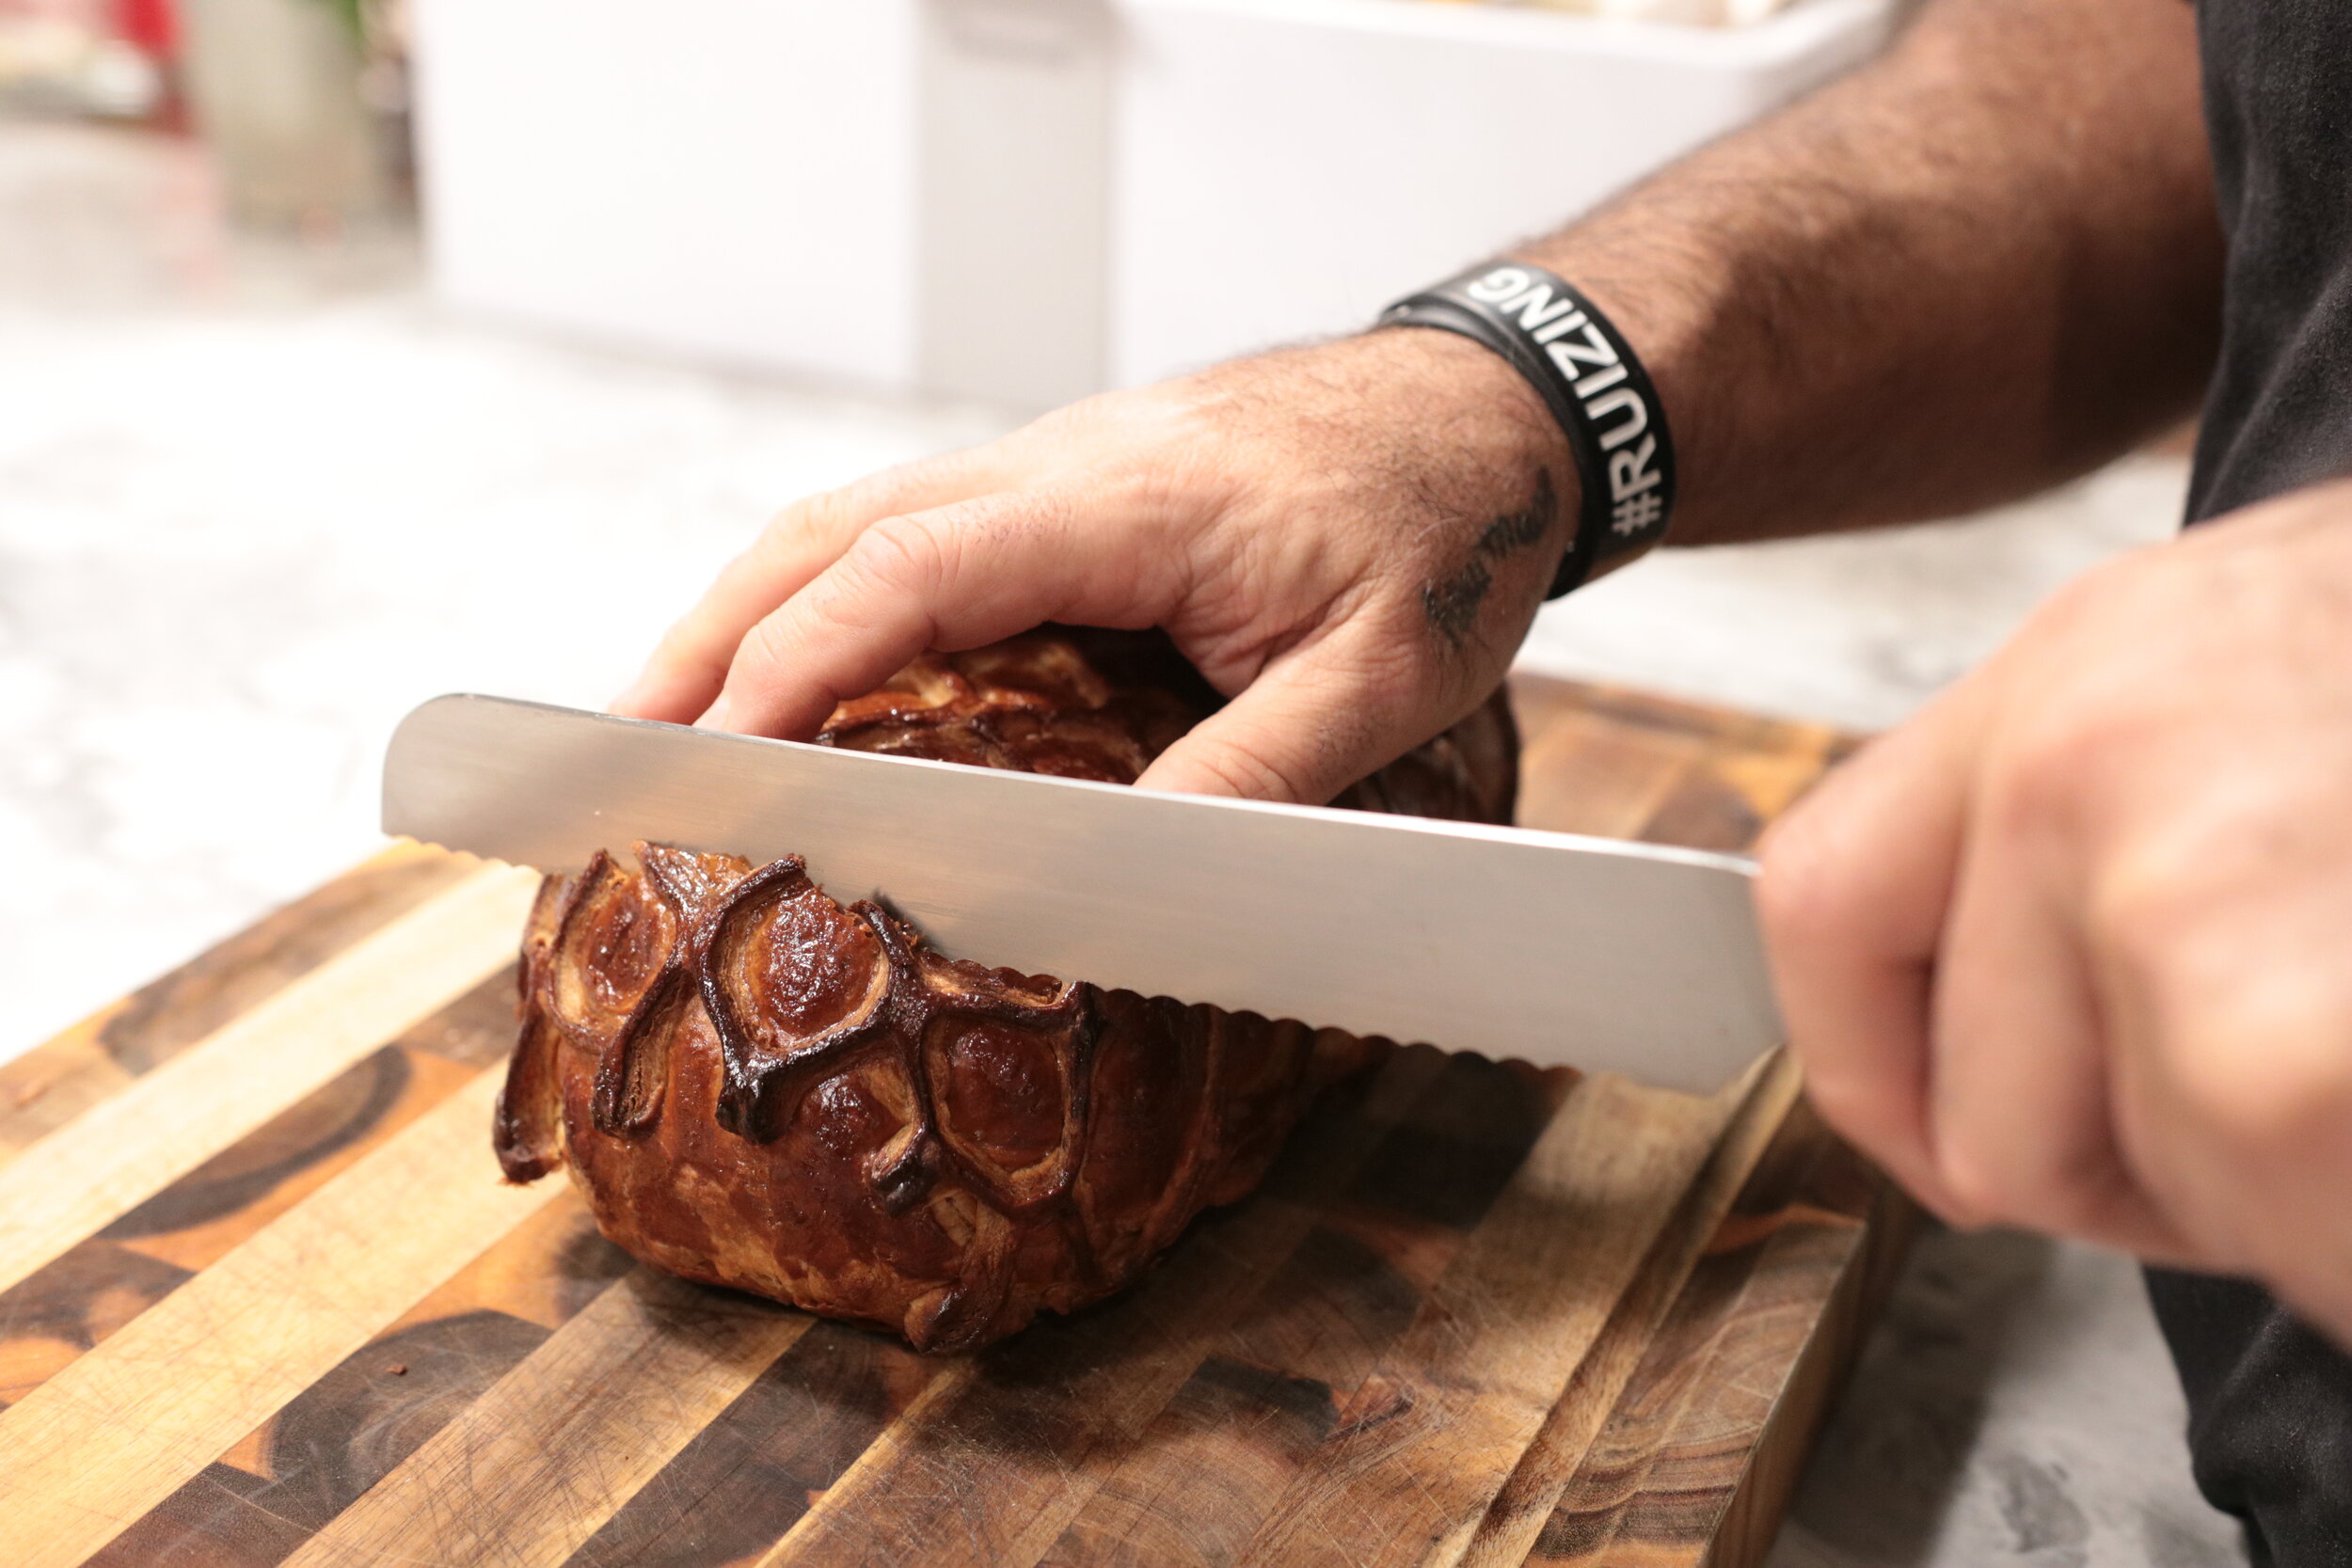
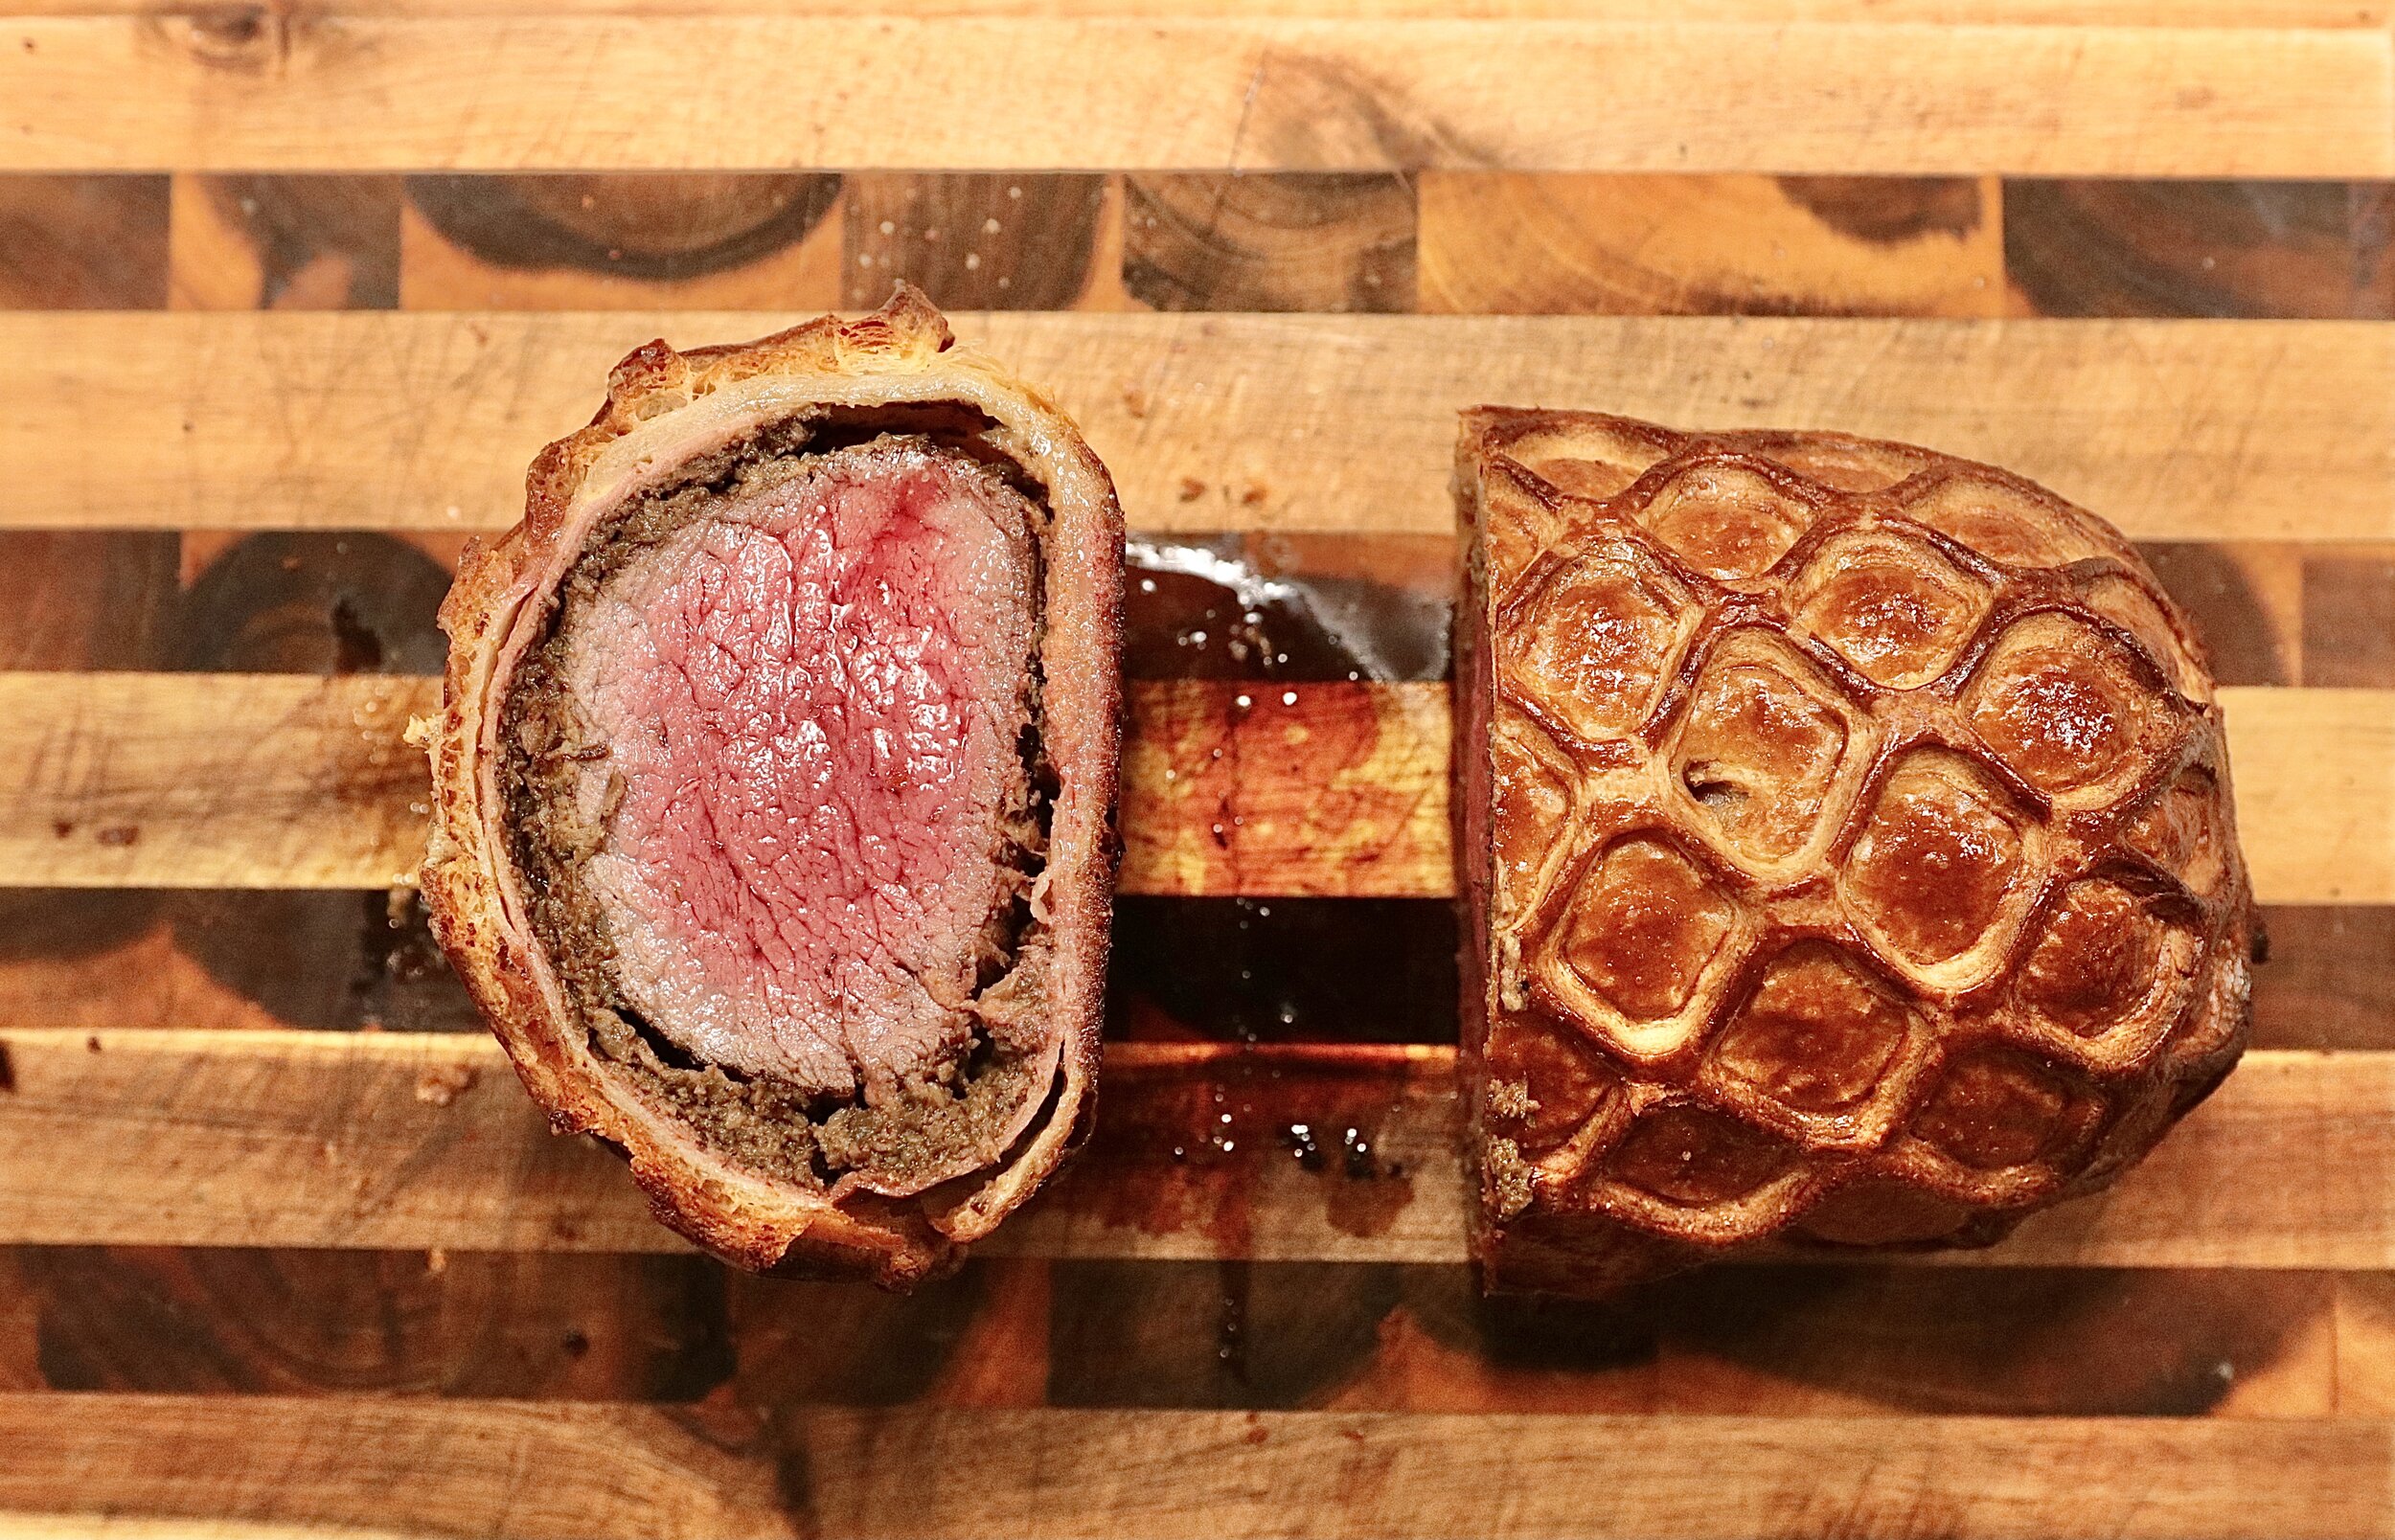
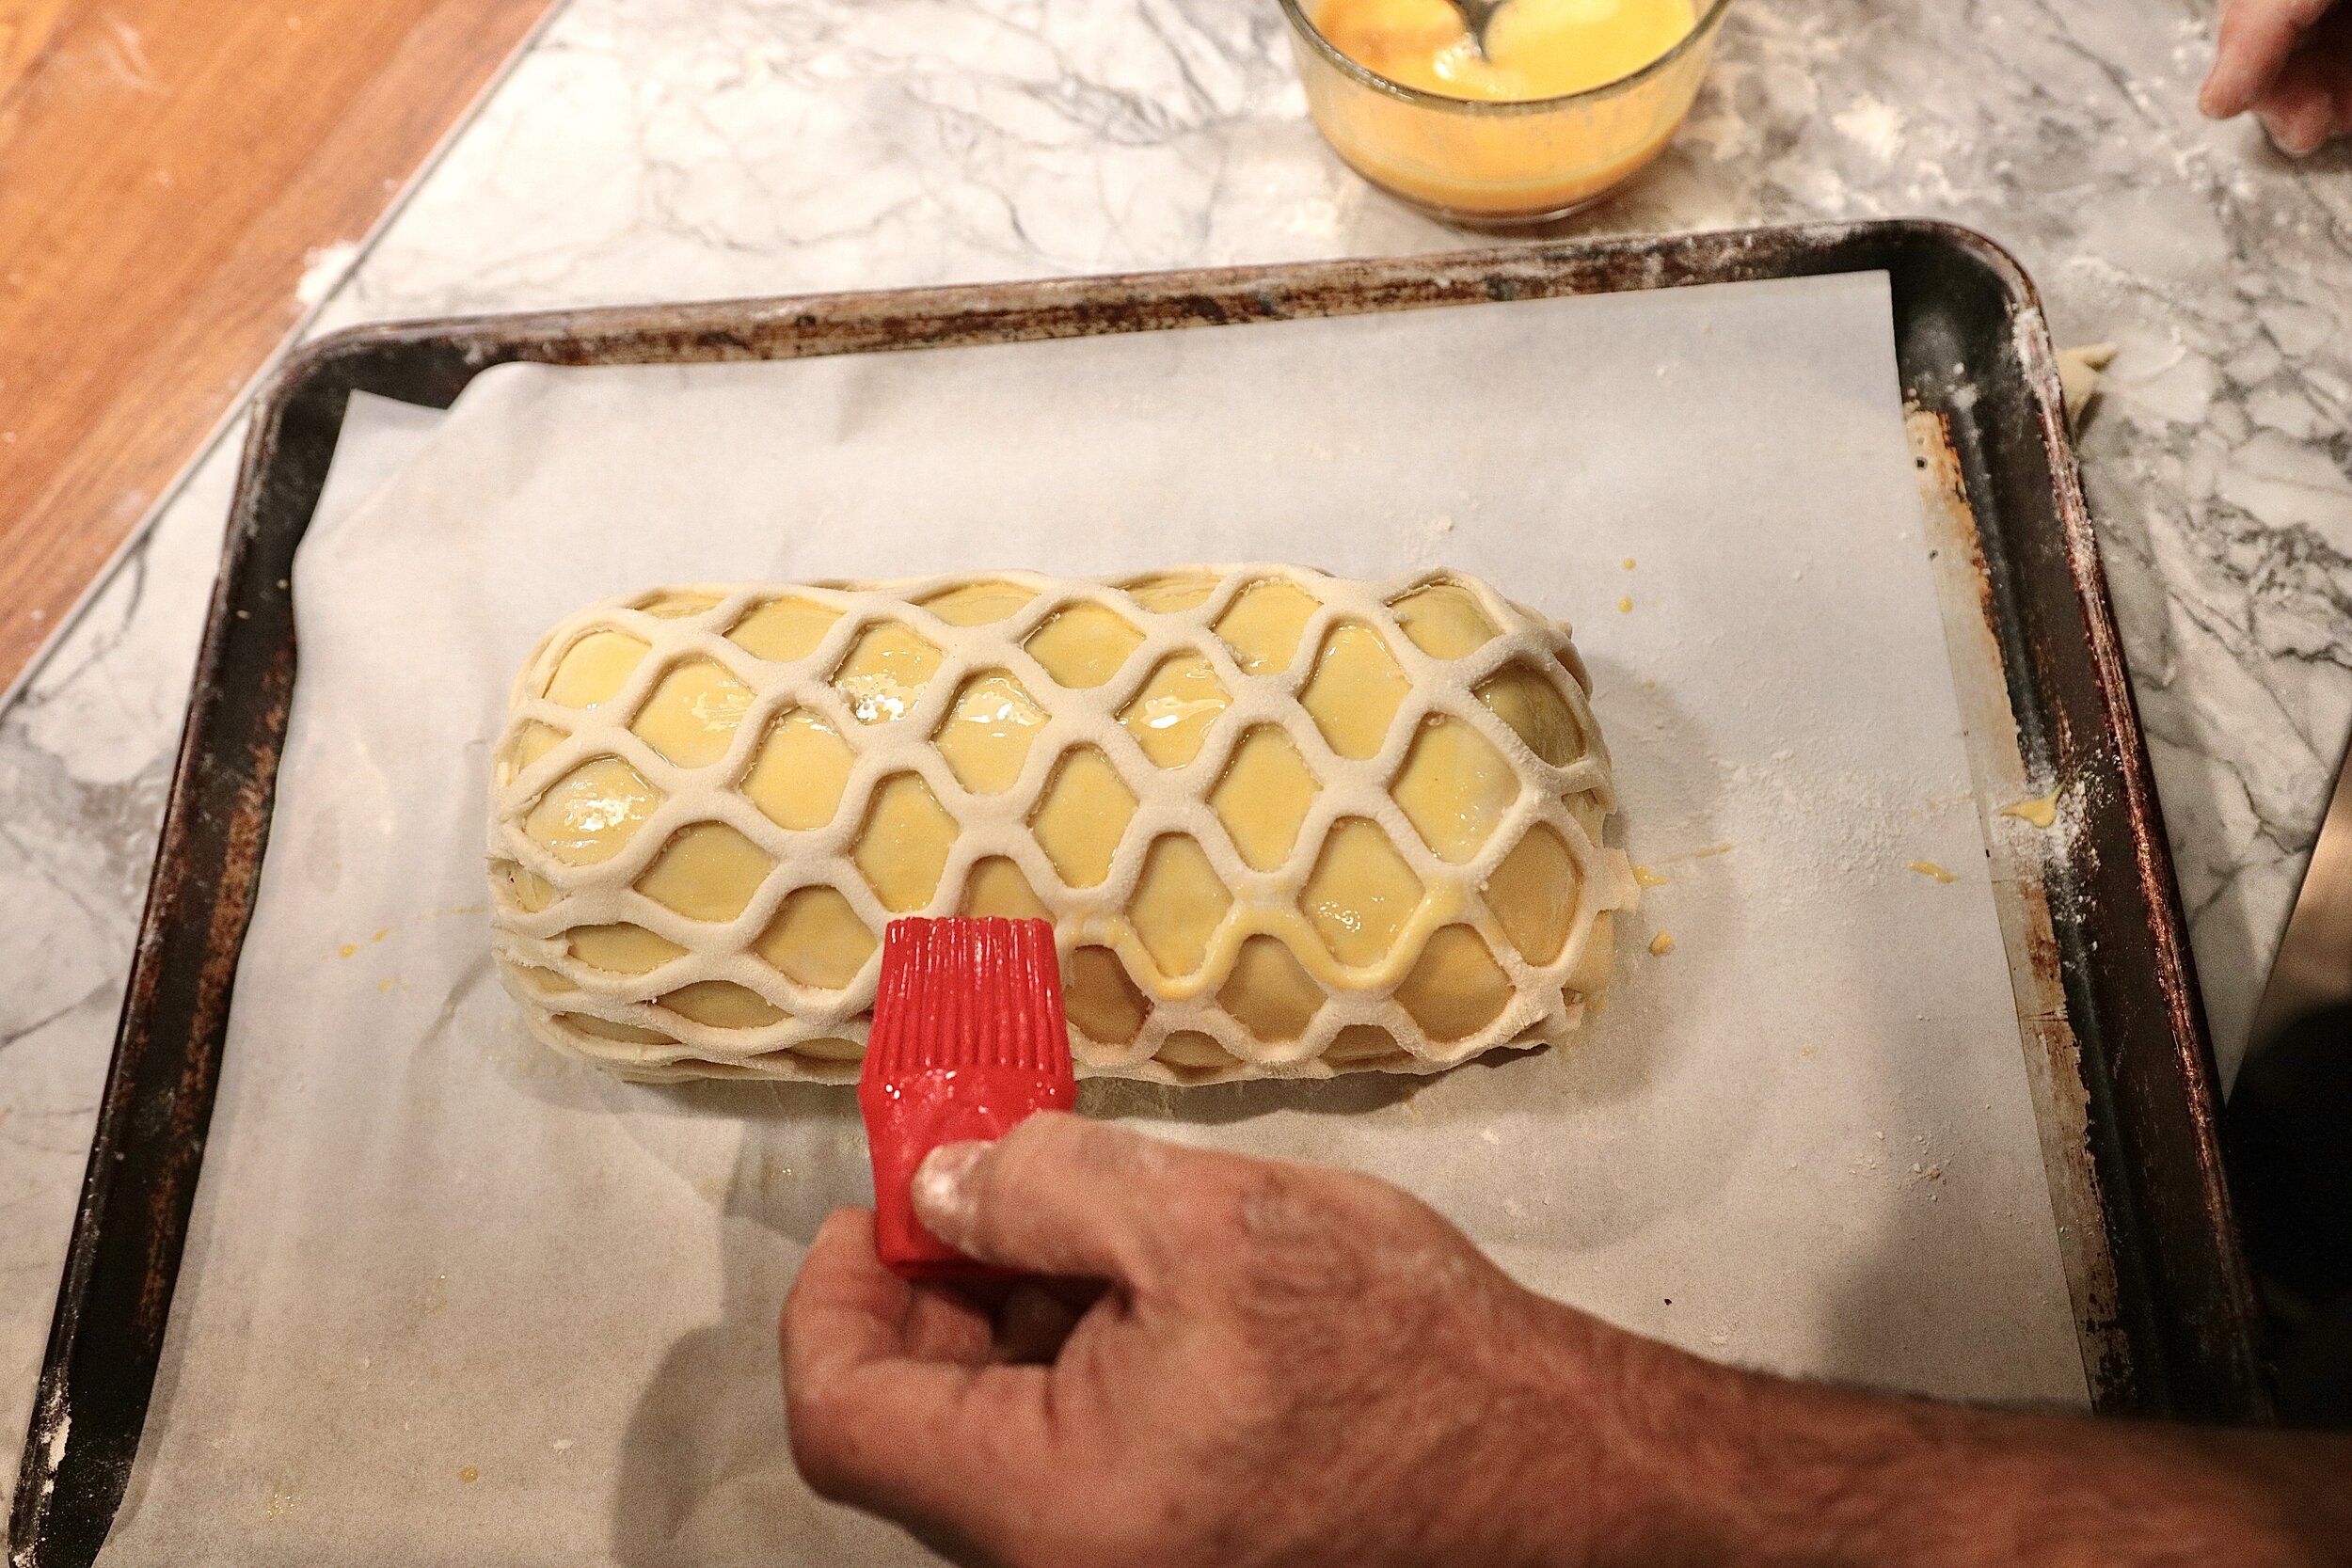
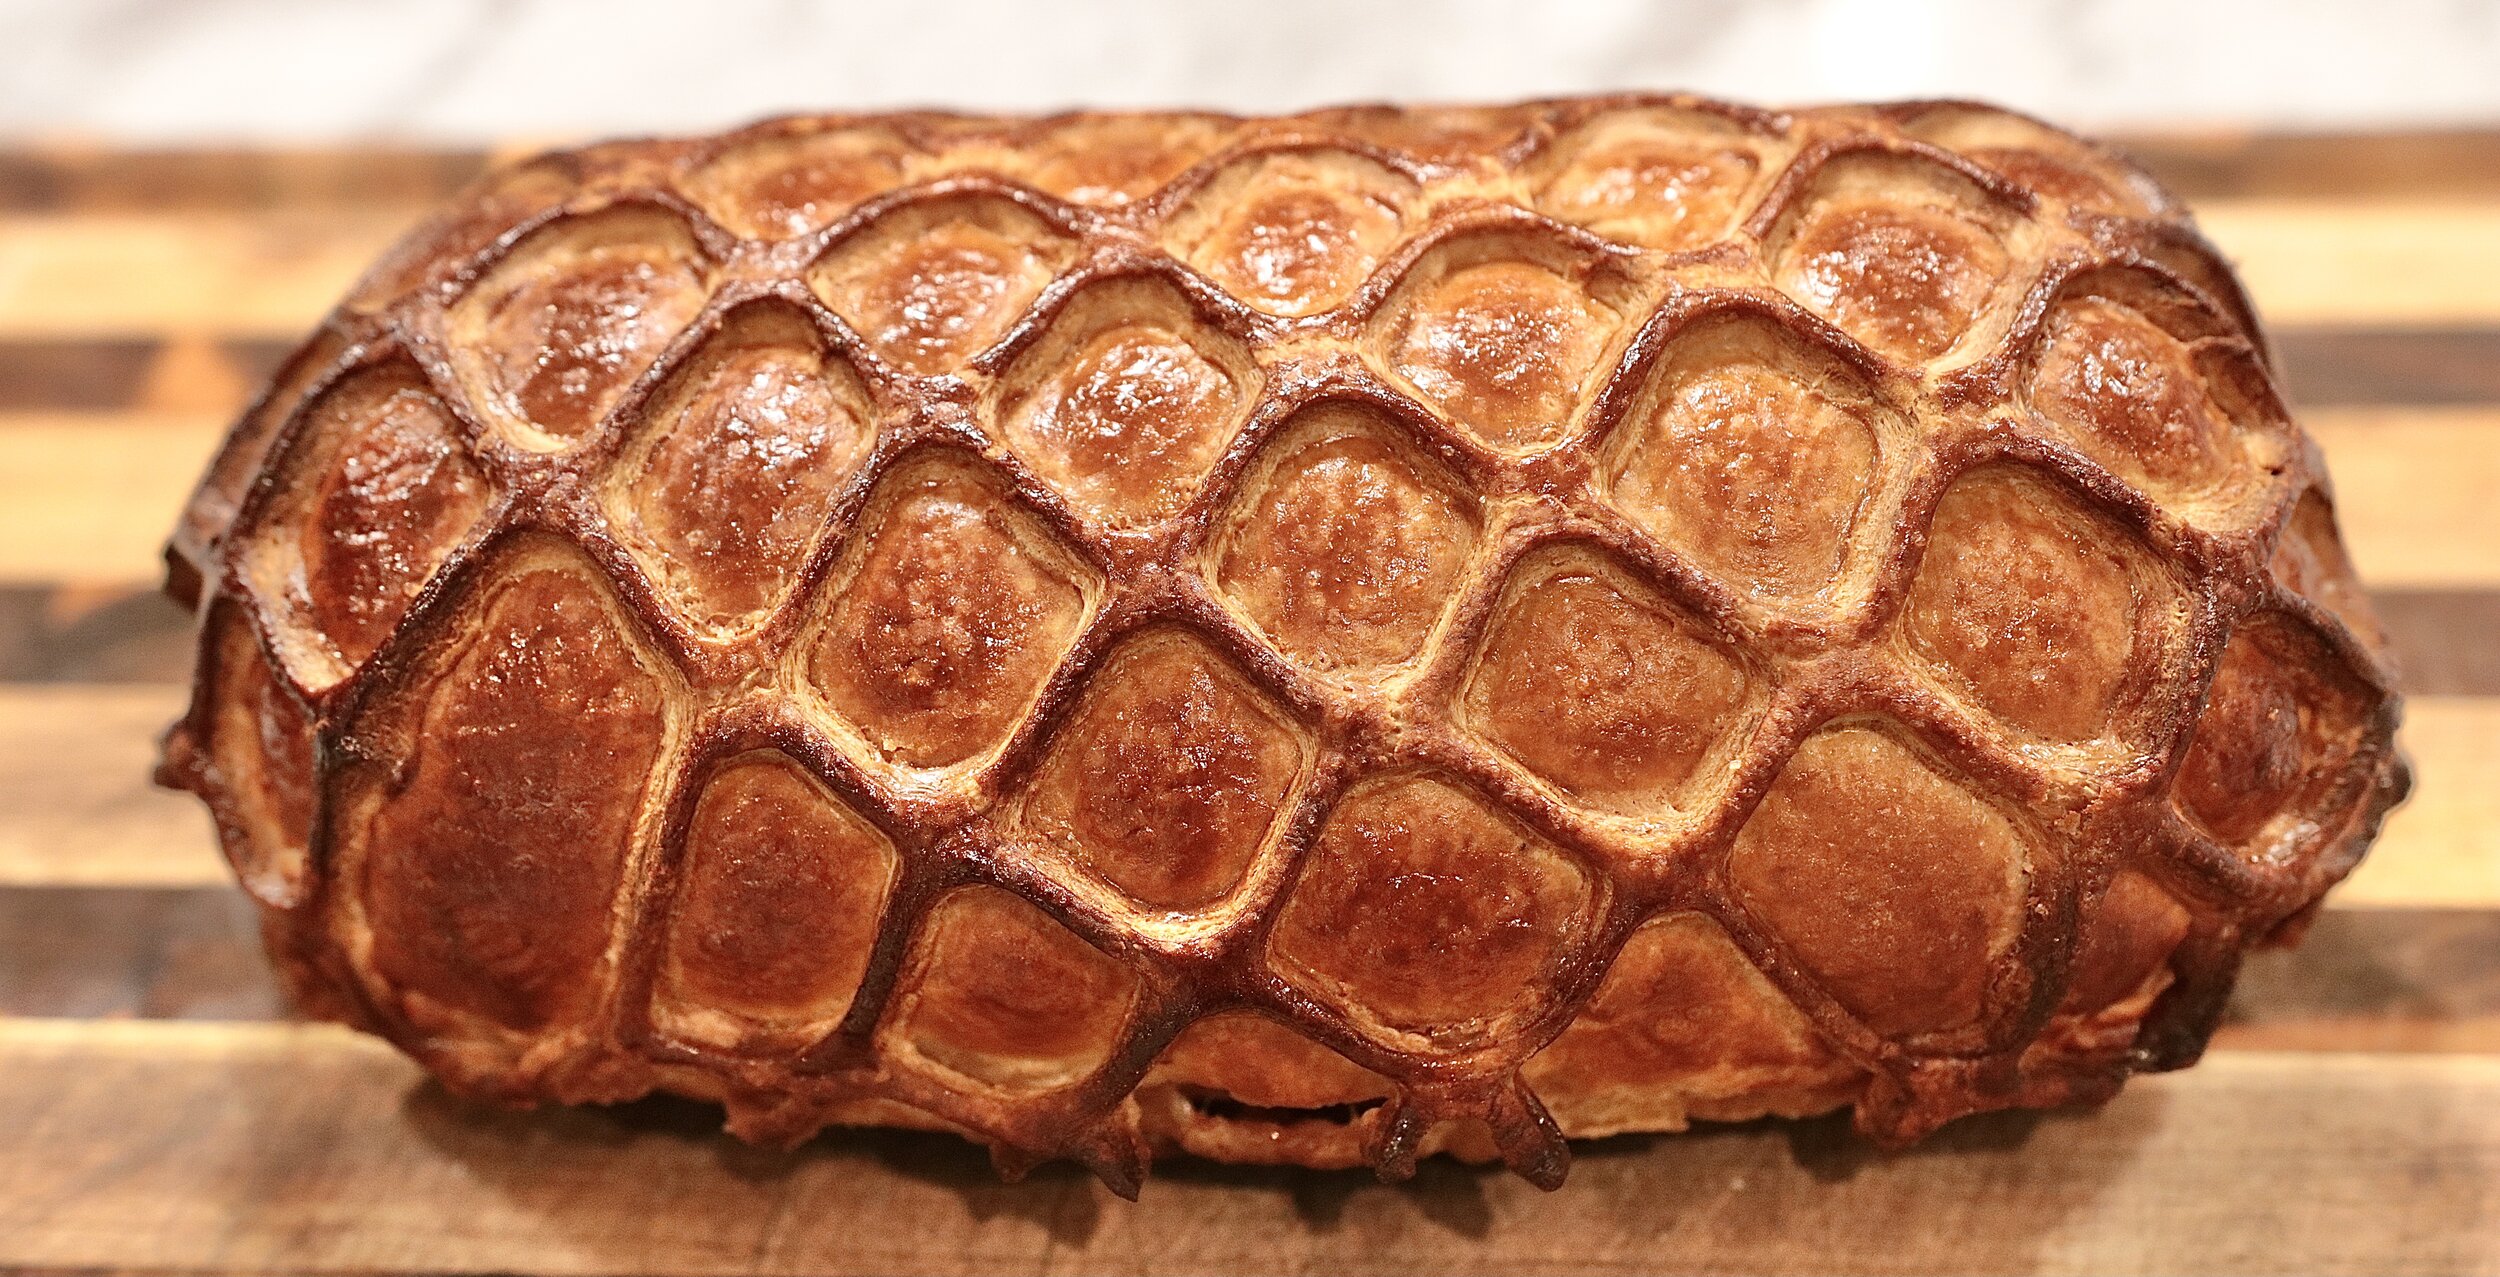
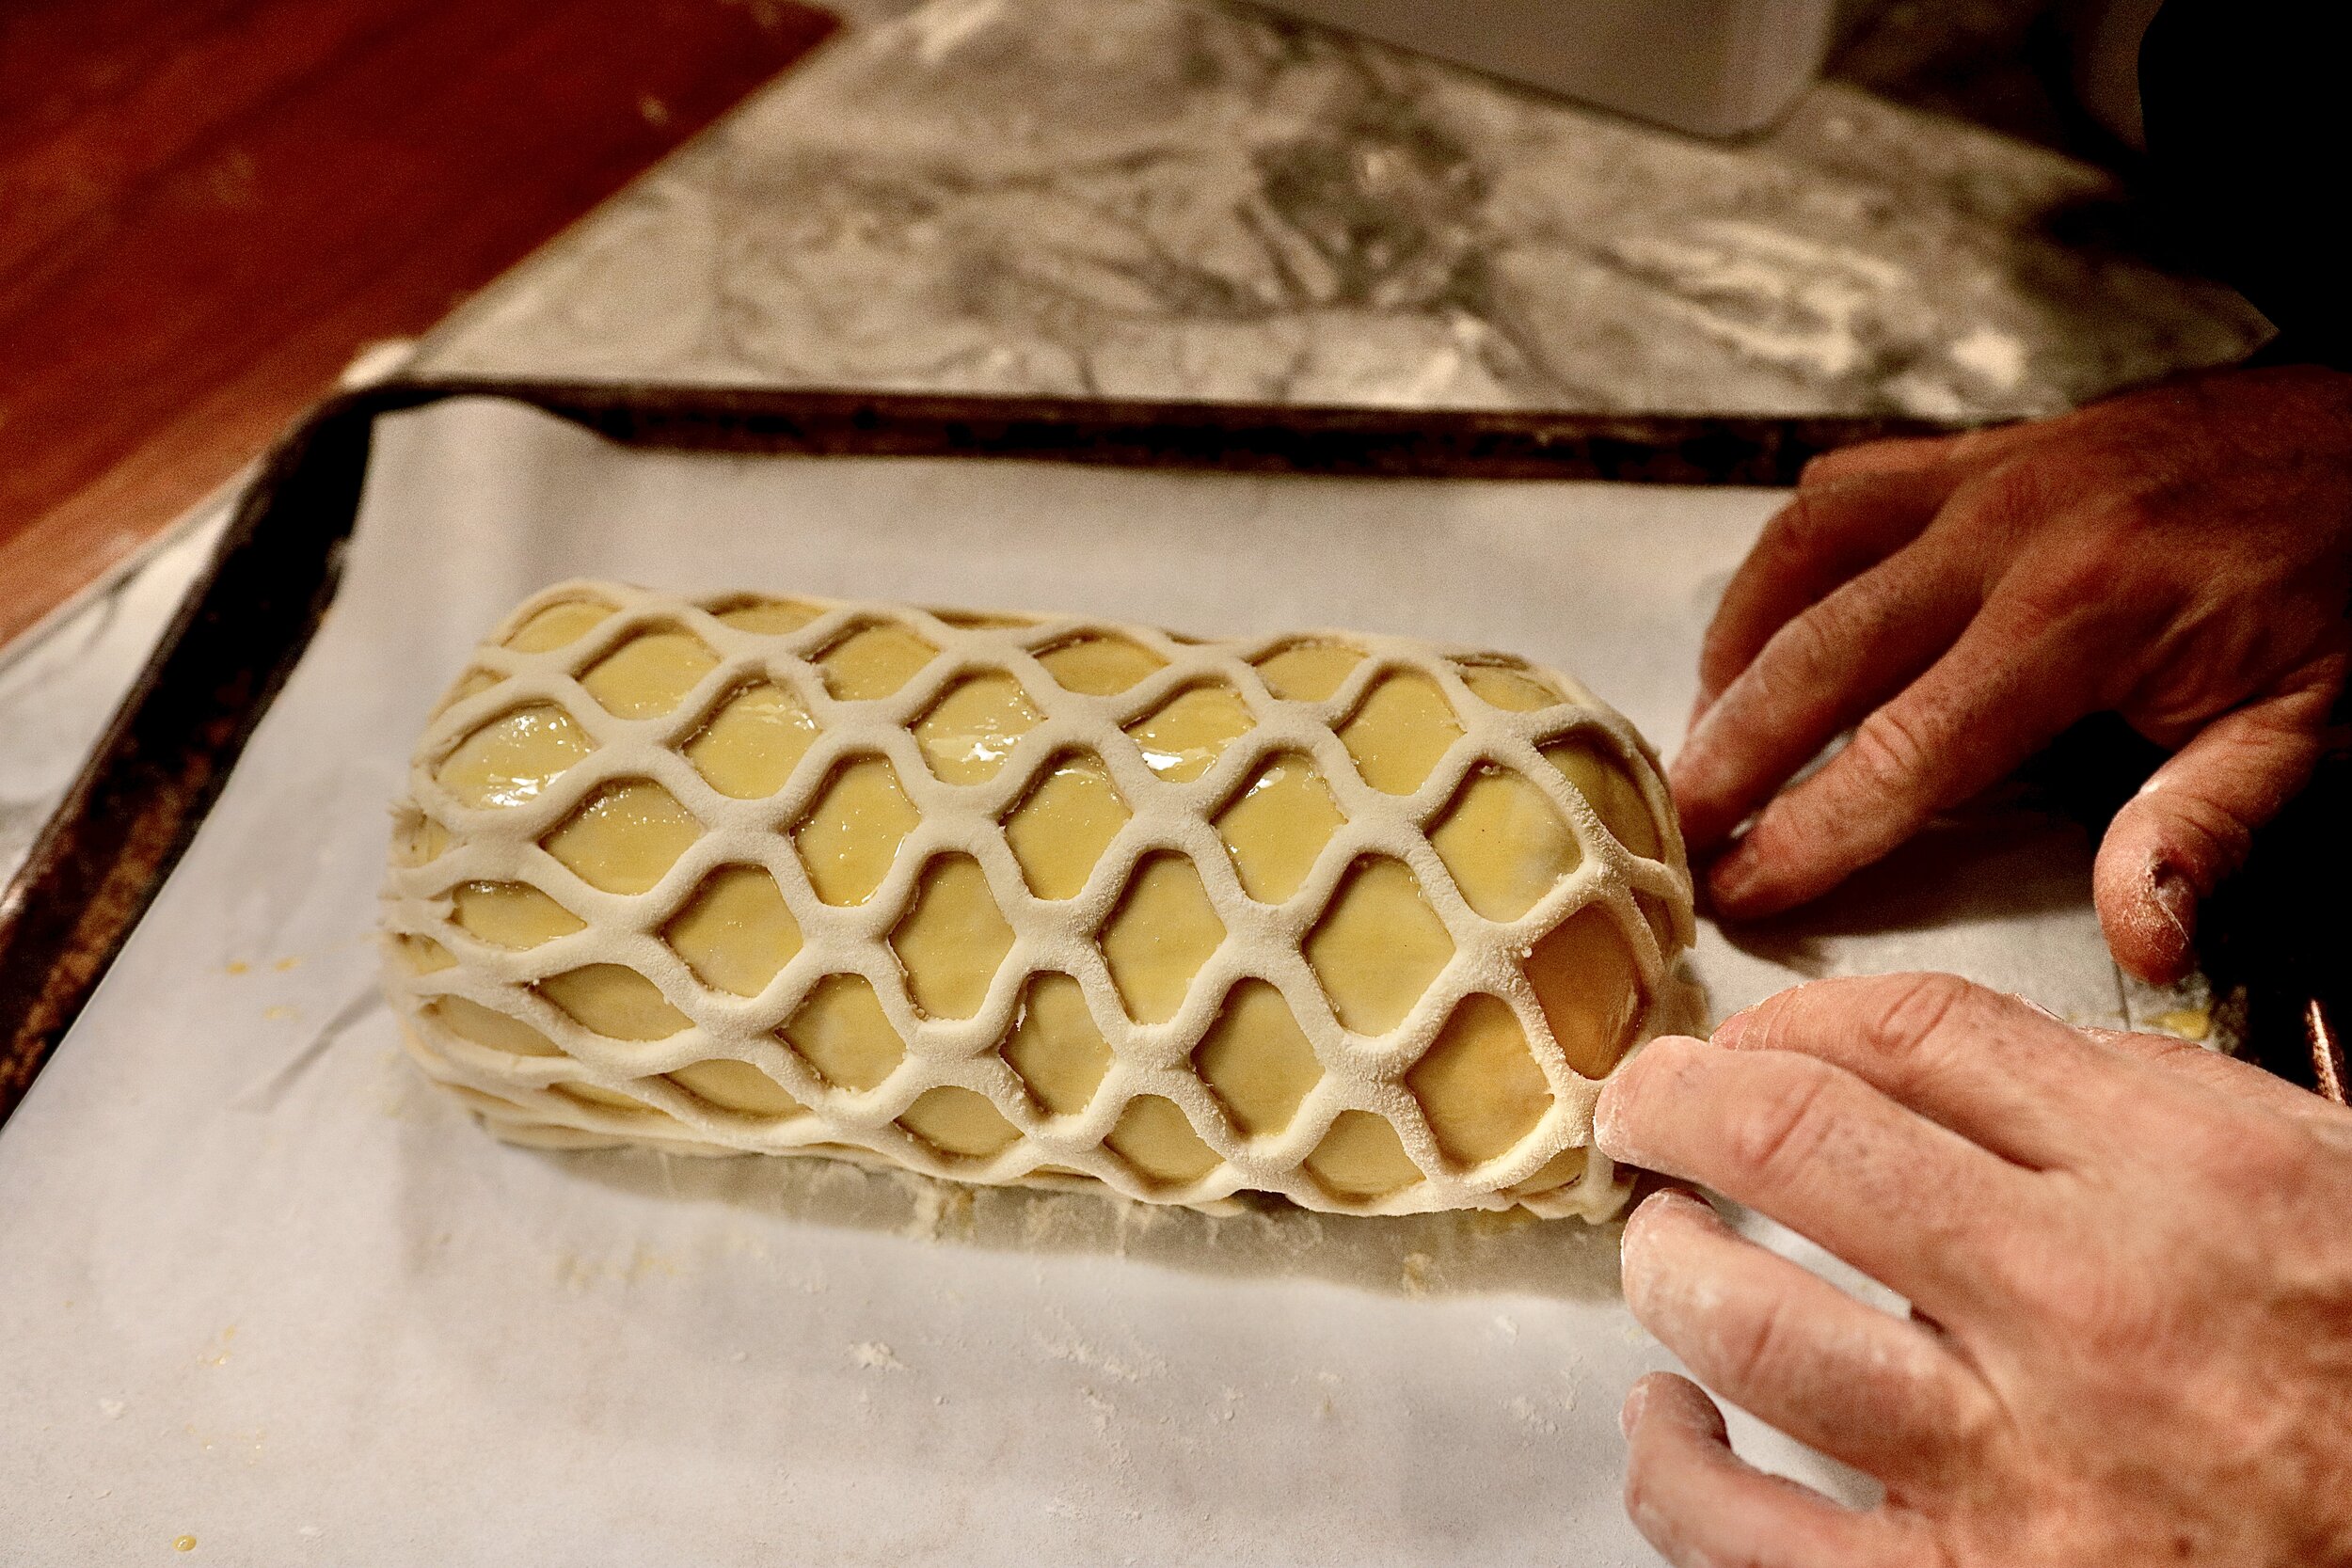
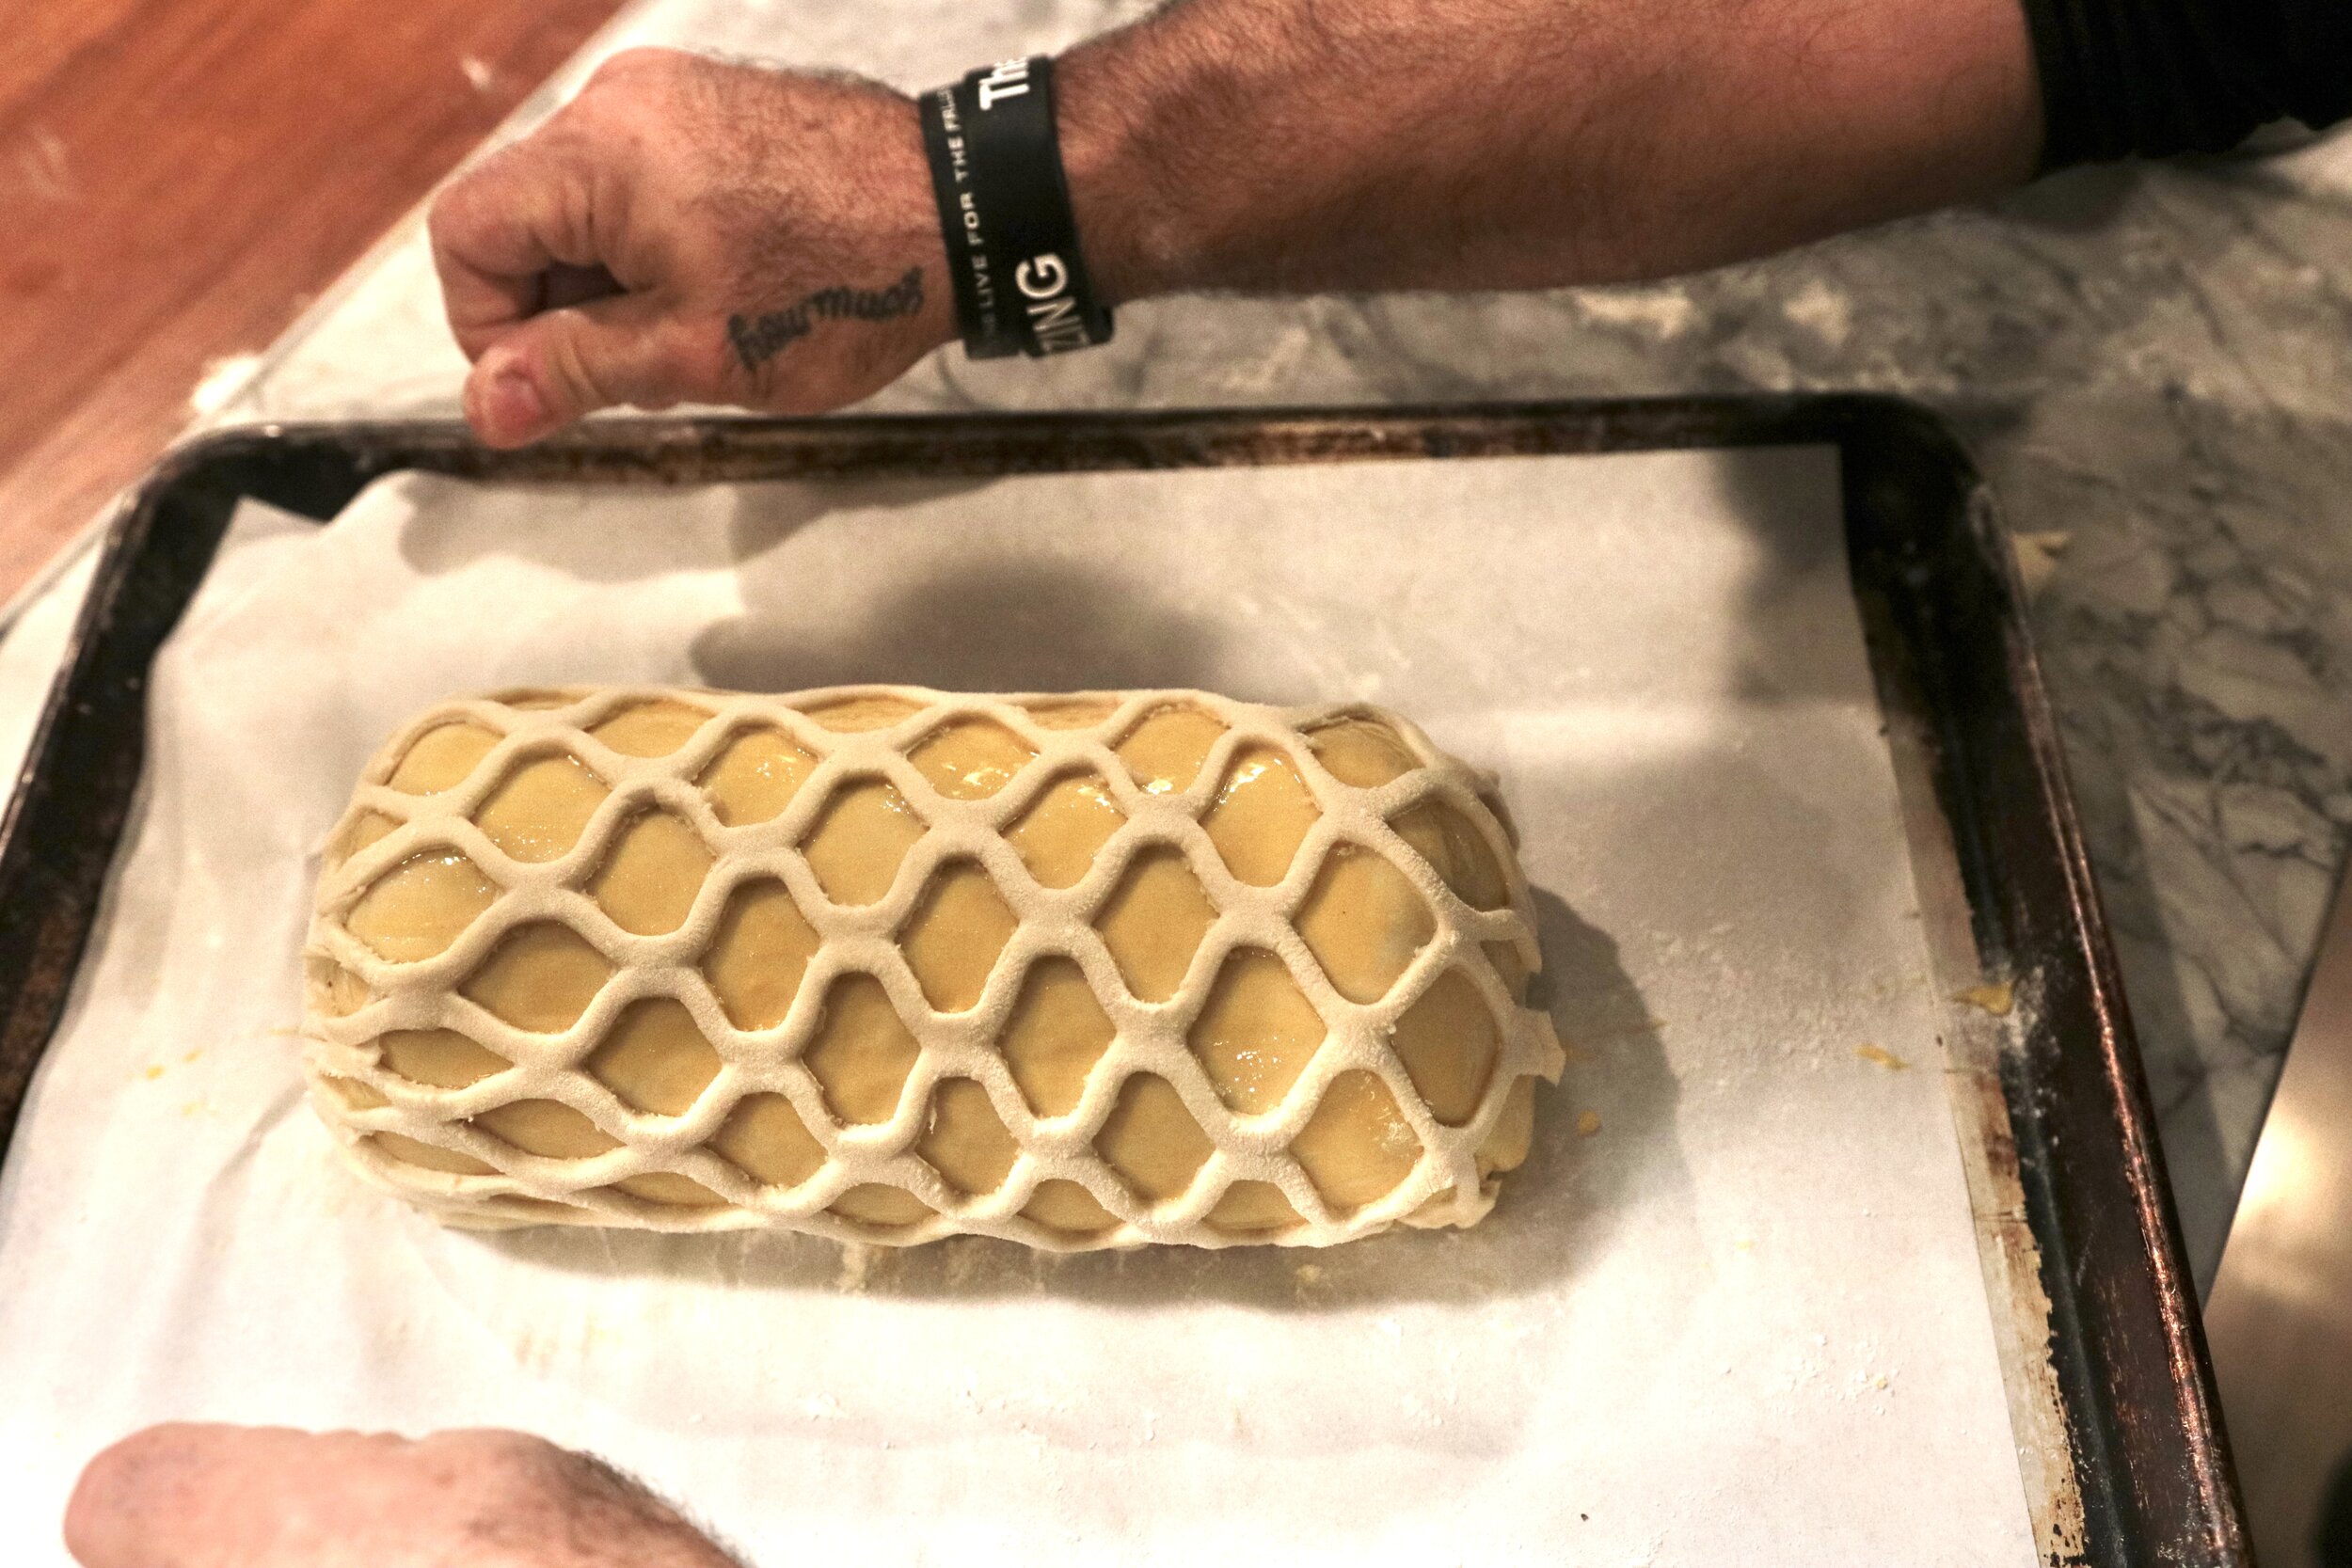
Pastry Lattice Cutter - as an optional step, I used this lattice cutter to decorate the beef wellington. I took a second puff pastry sheet and rolled the lattice cotter to create the design you see in the pictures. This step is not shown on the video
<<<< video and pictures were taken at different times, technique the same >>>>
DIRECTIONS
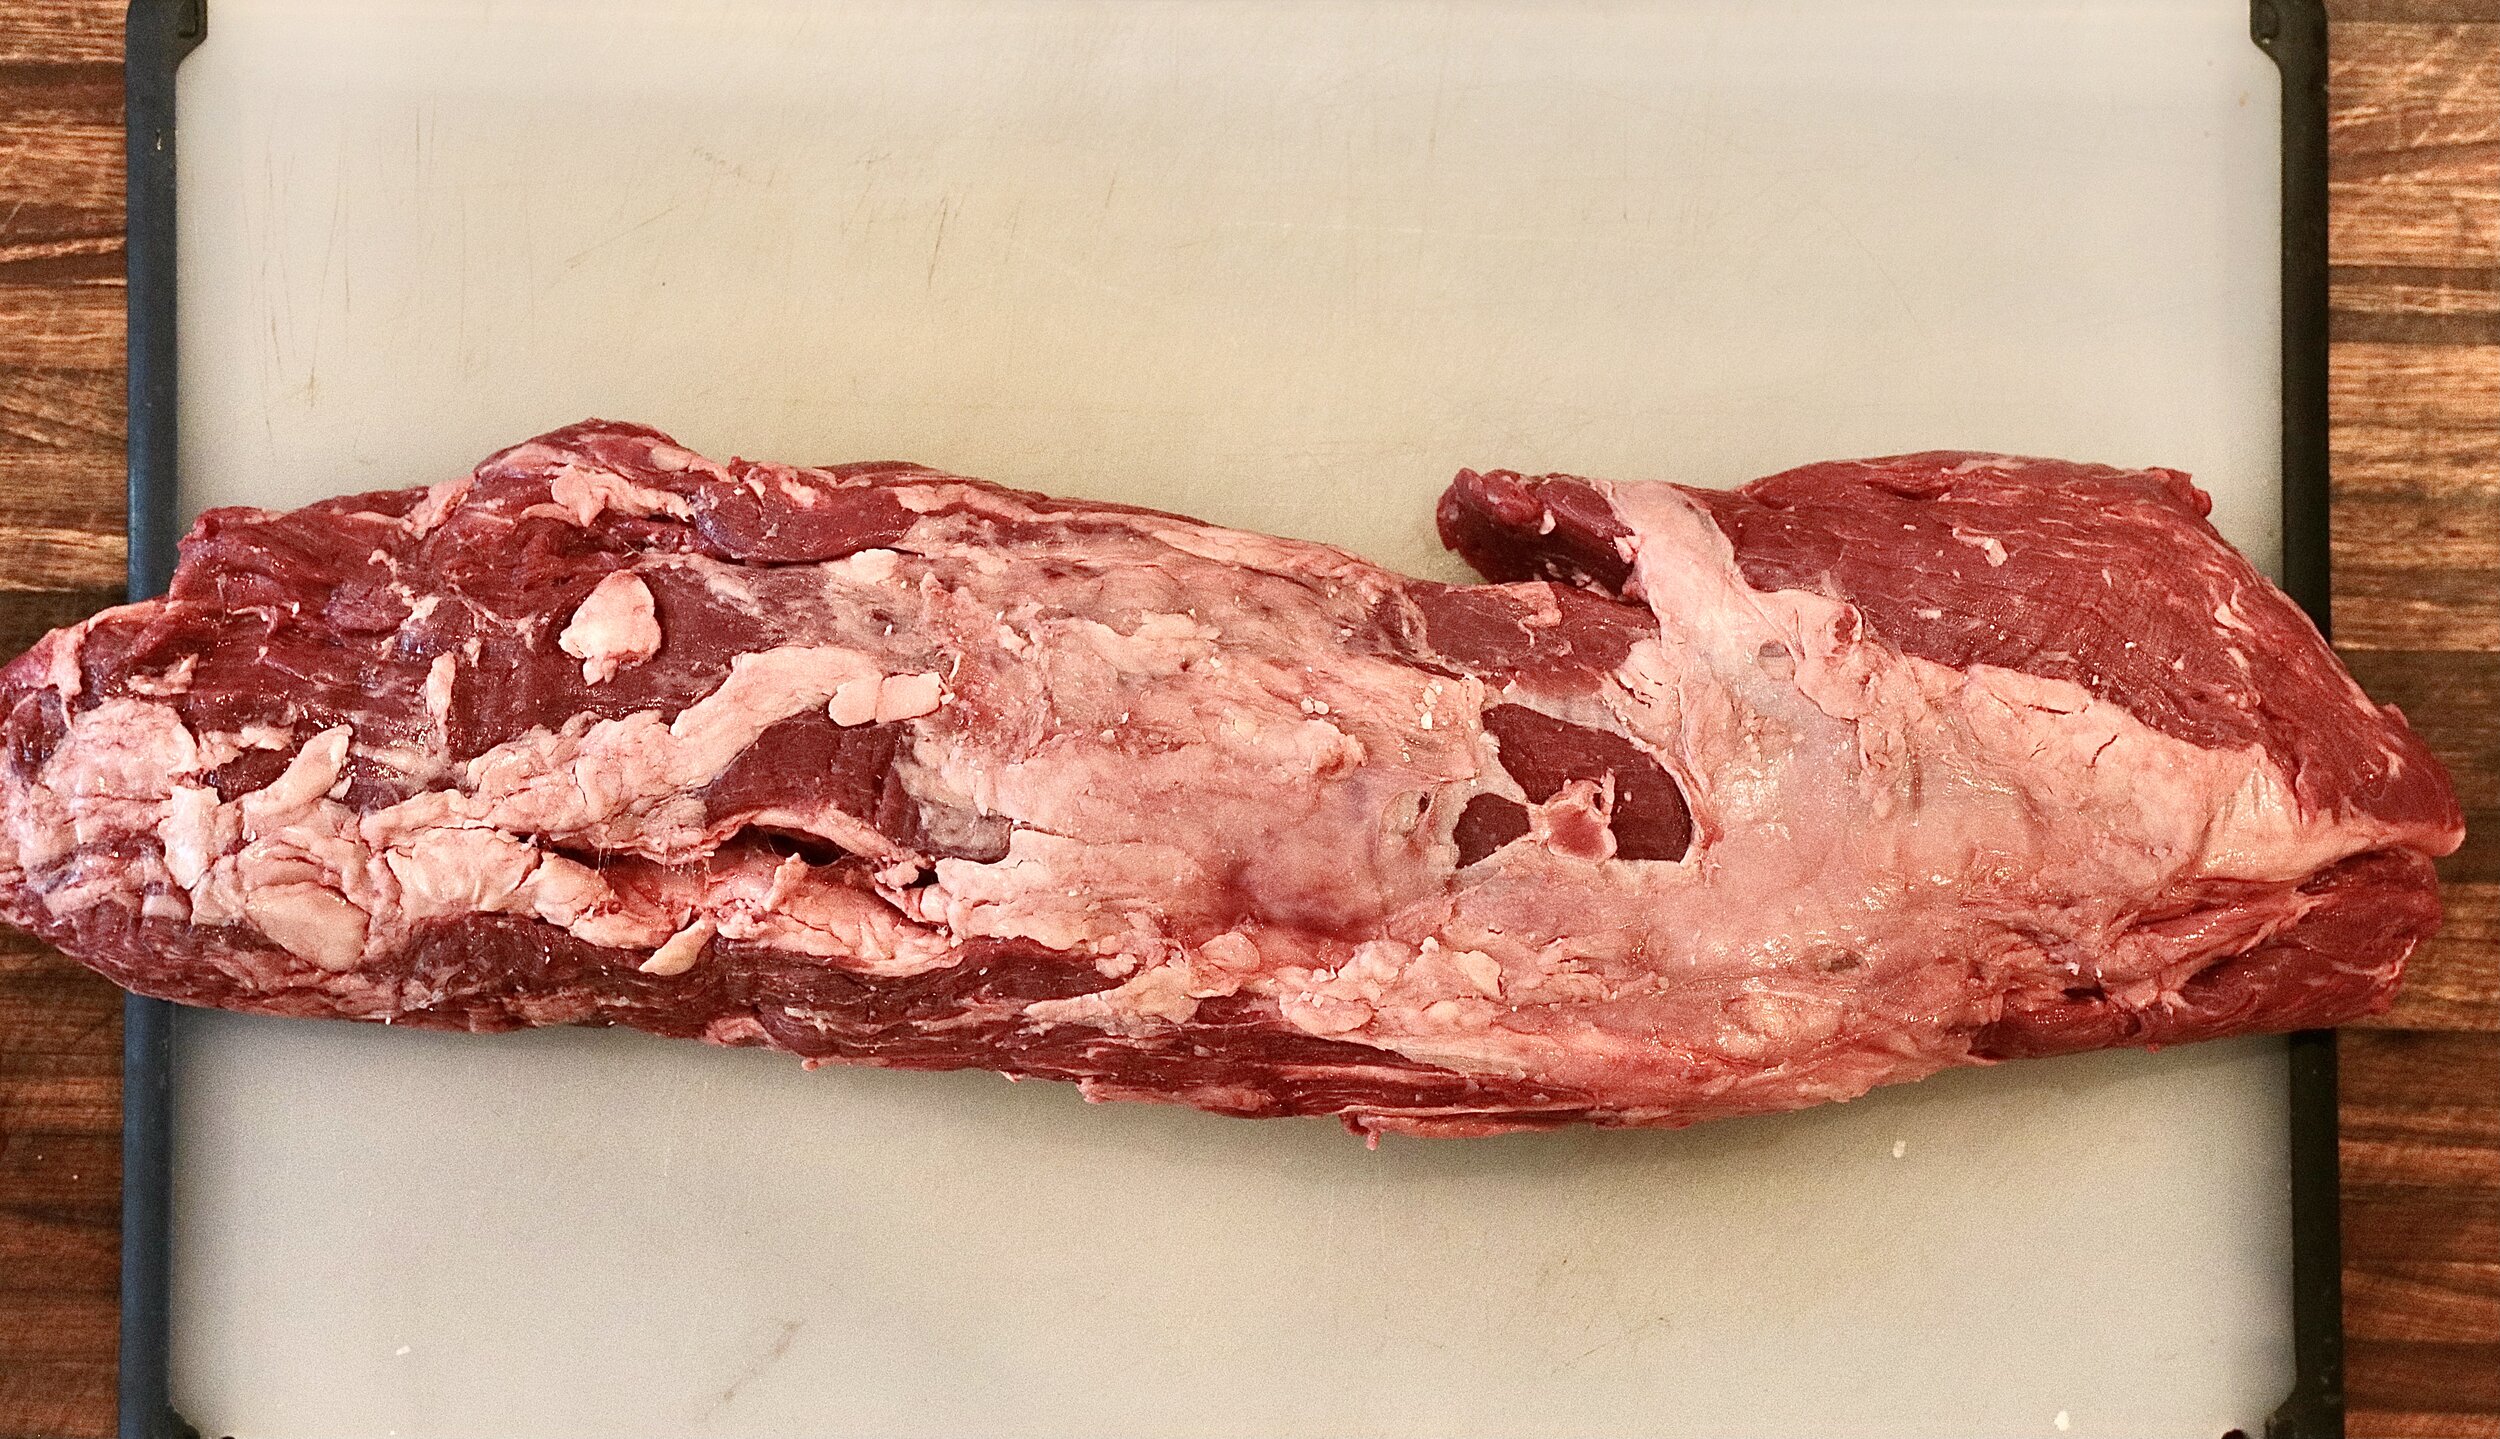
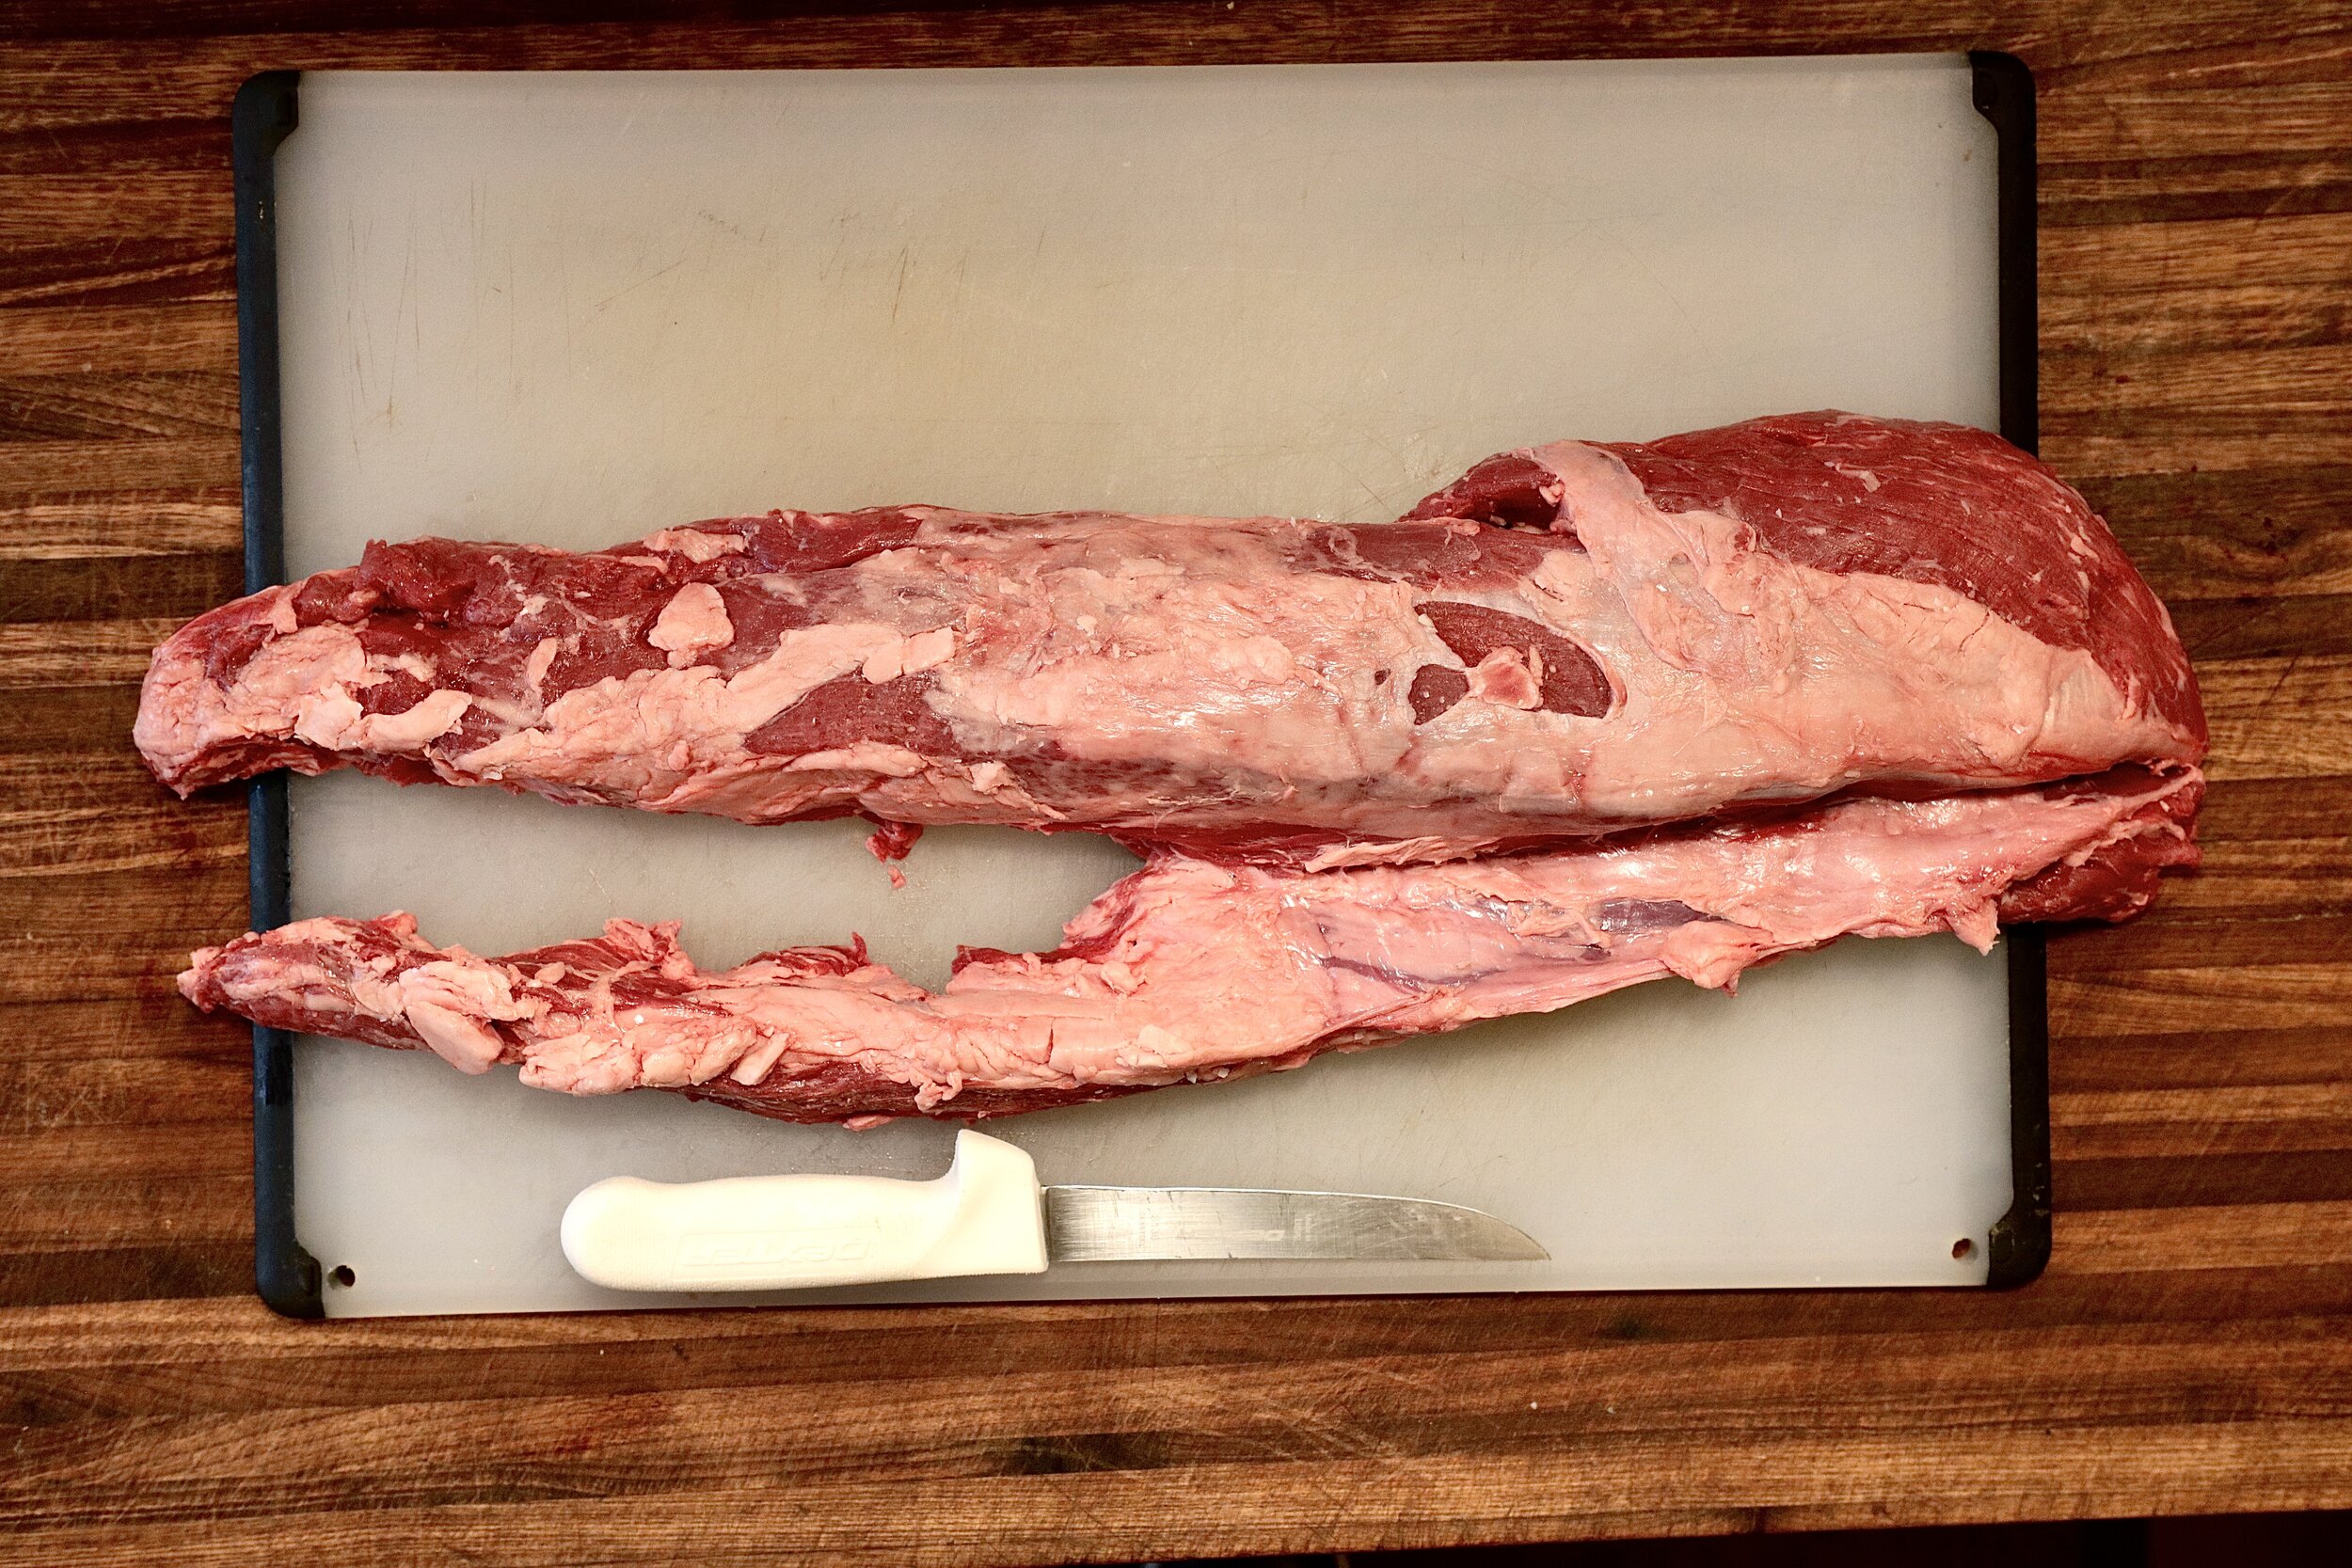
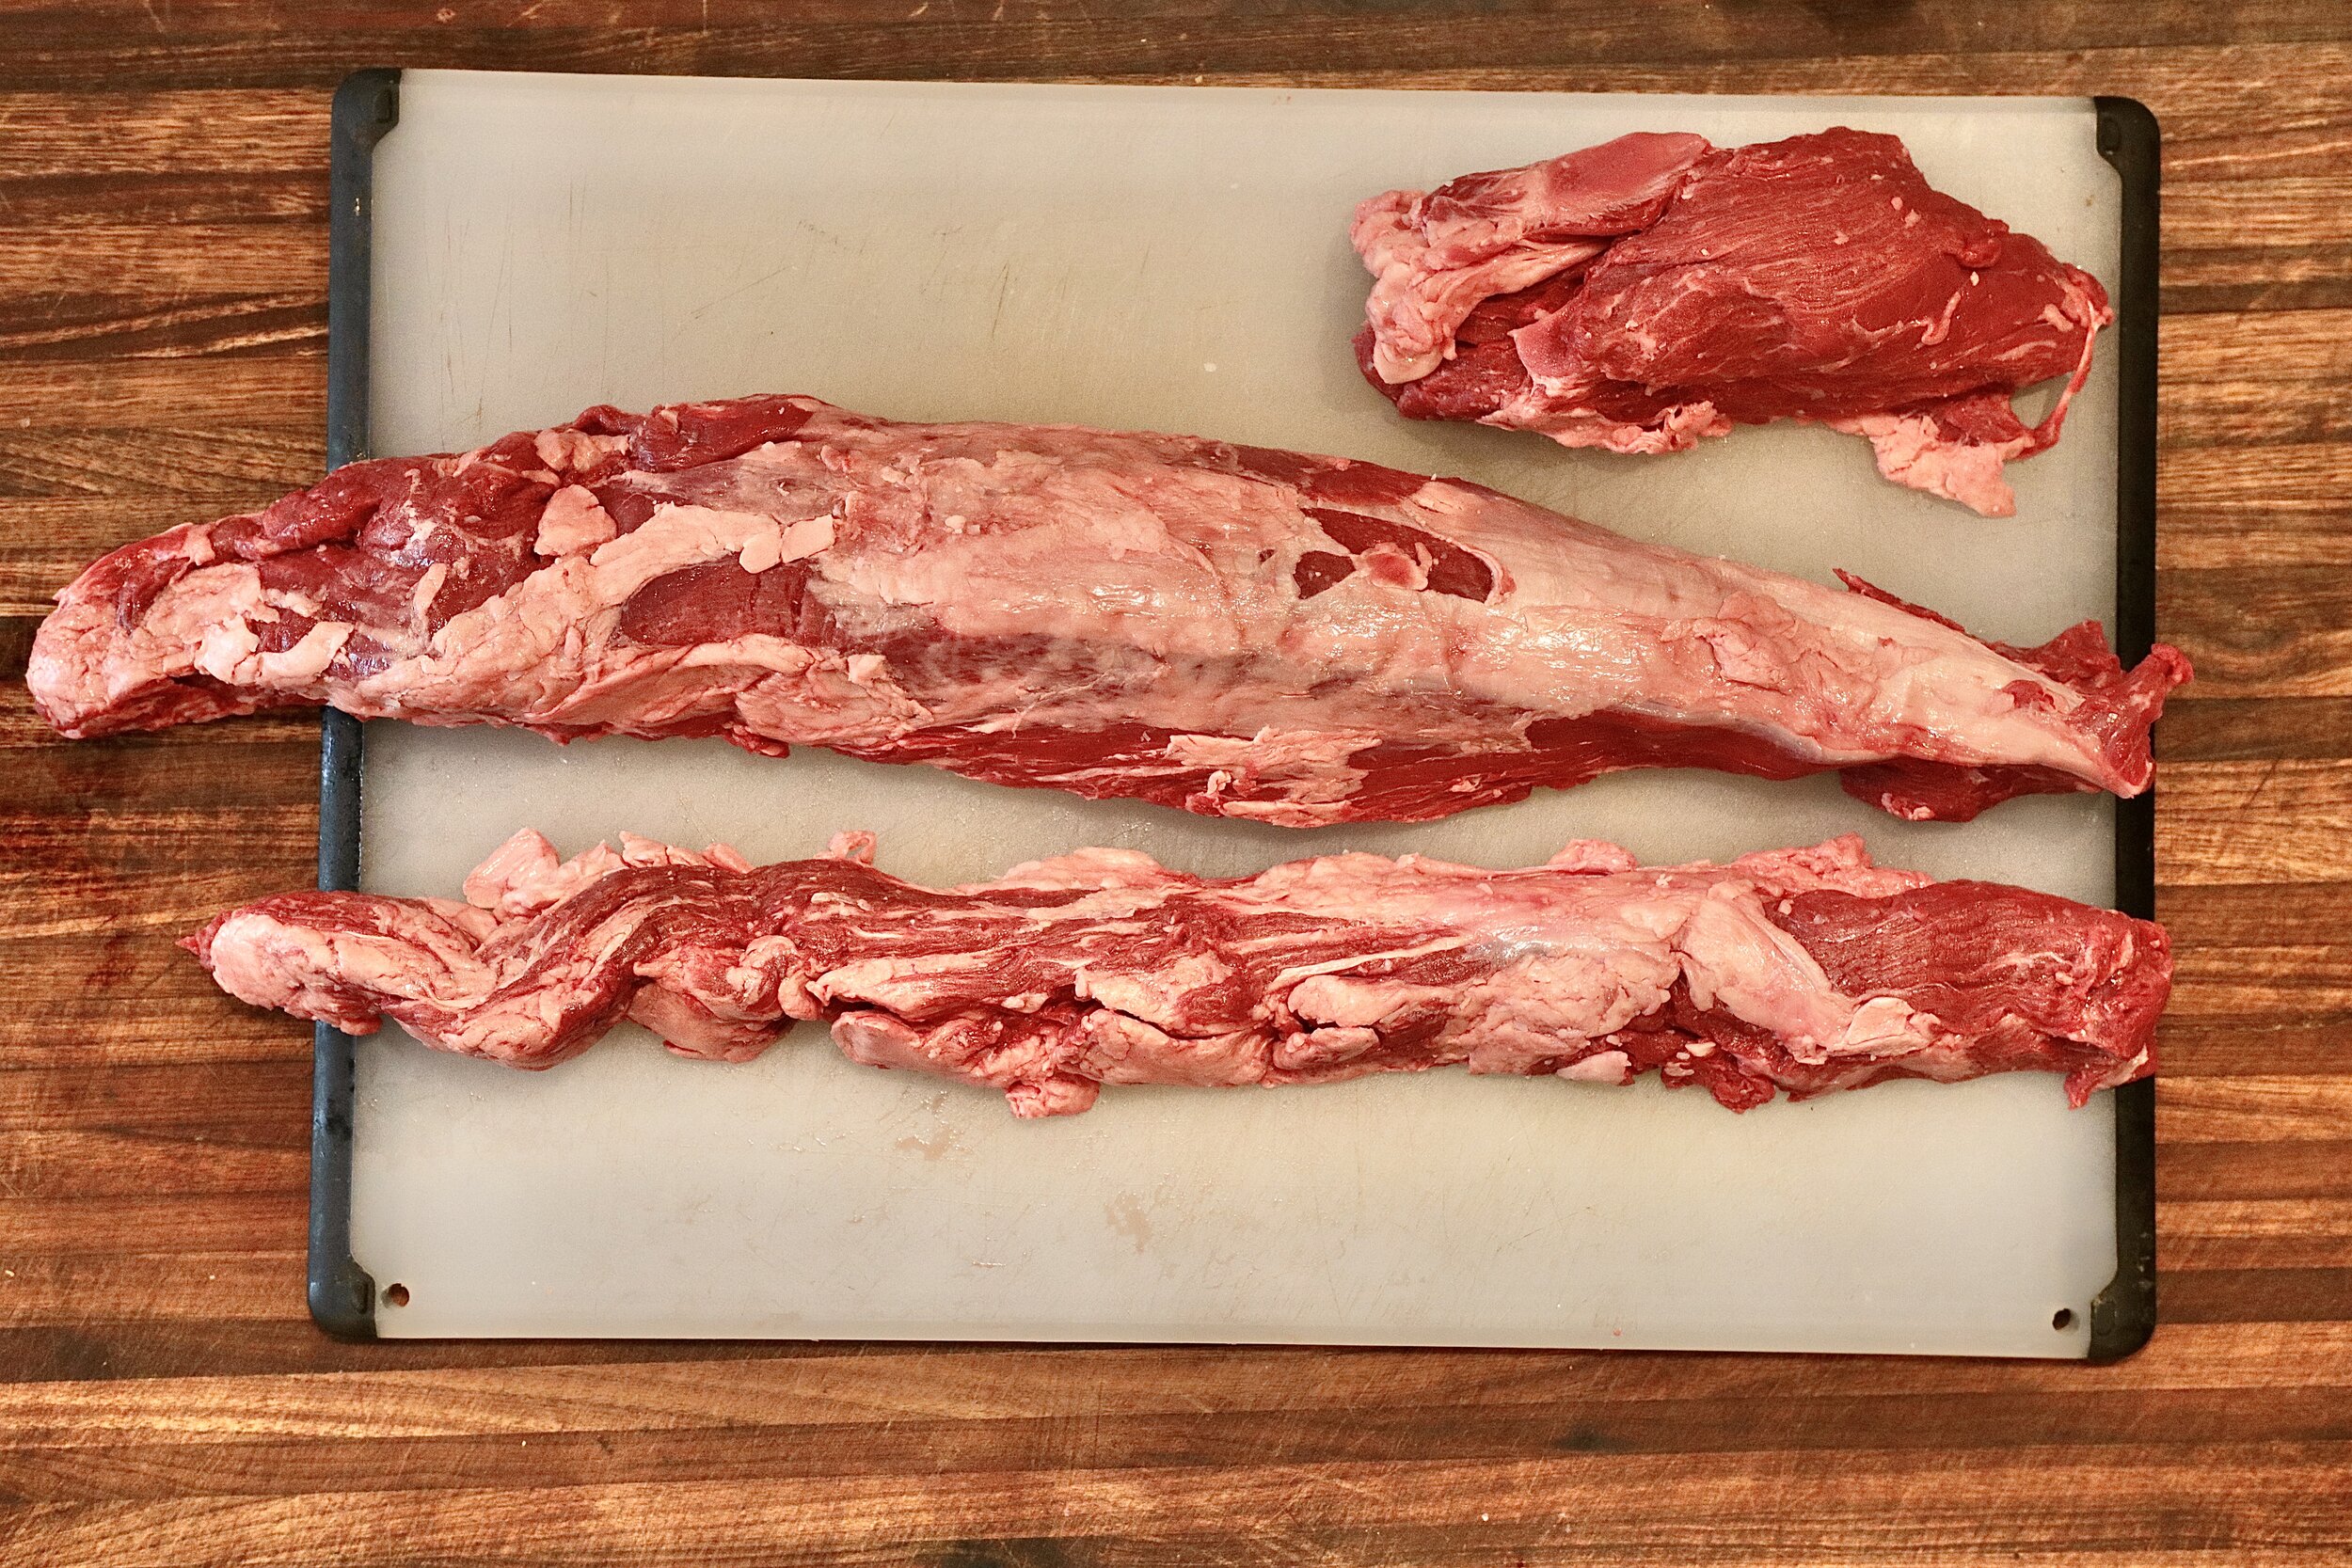
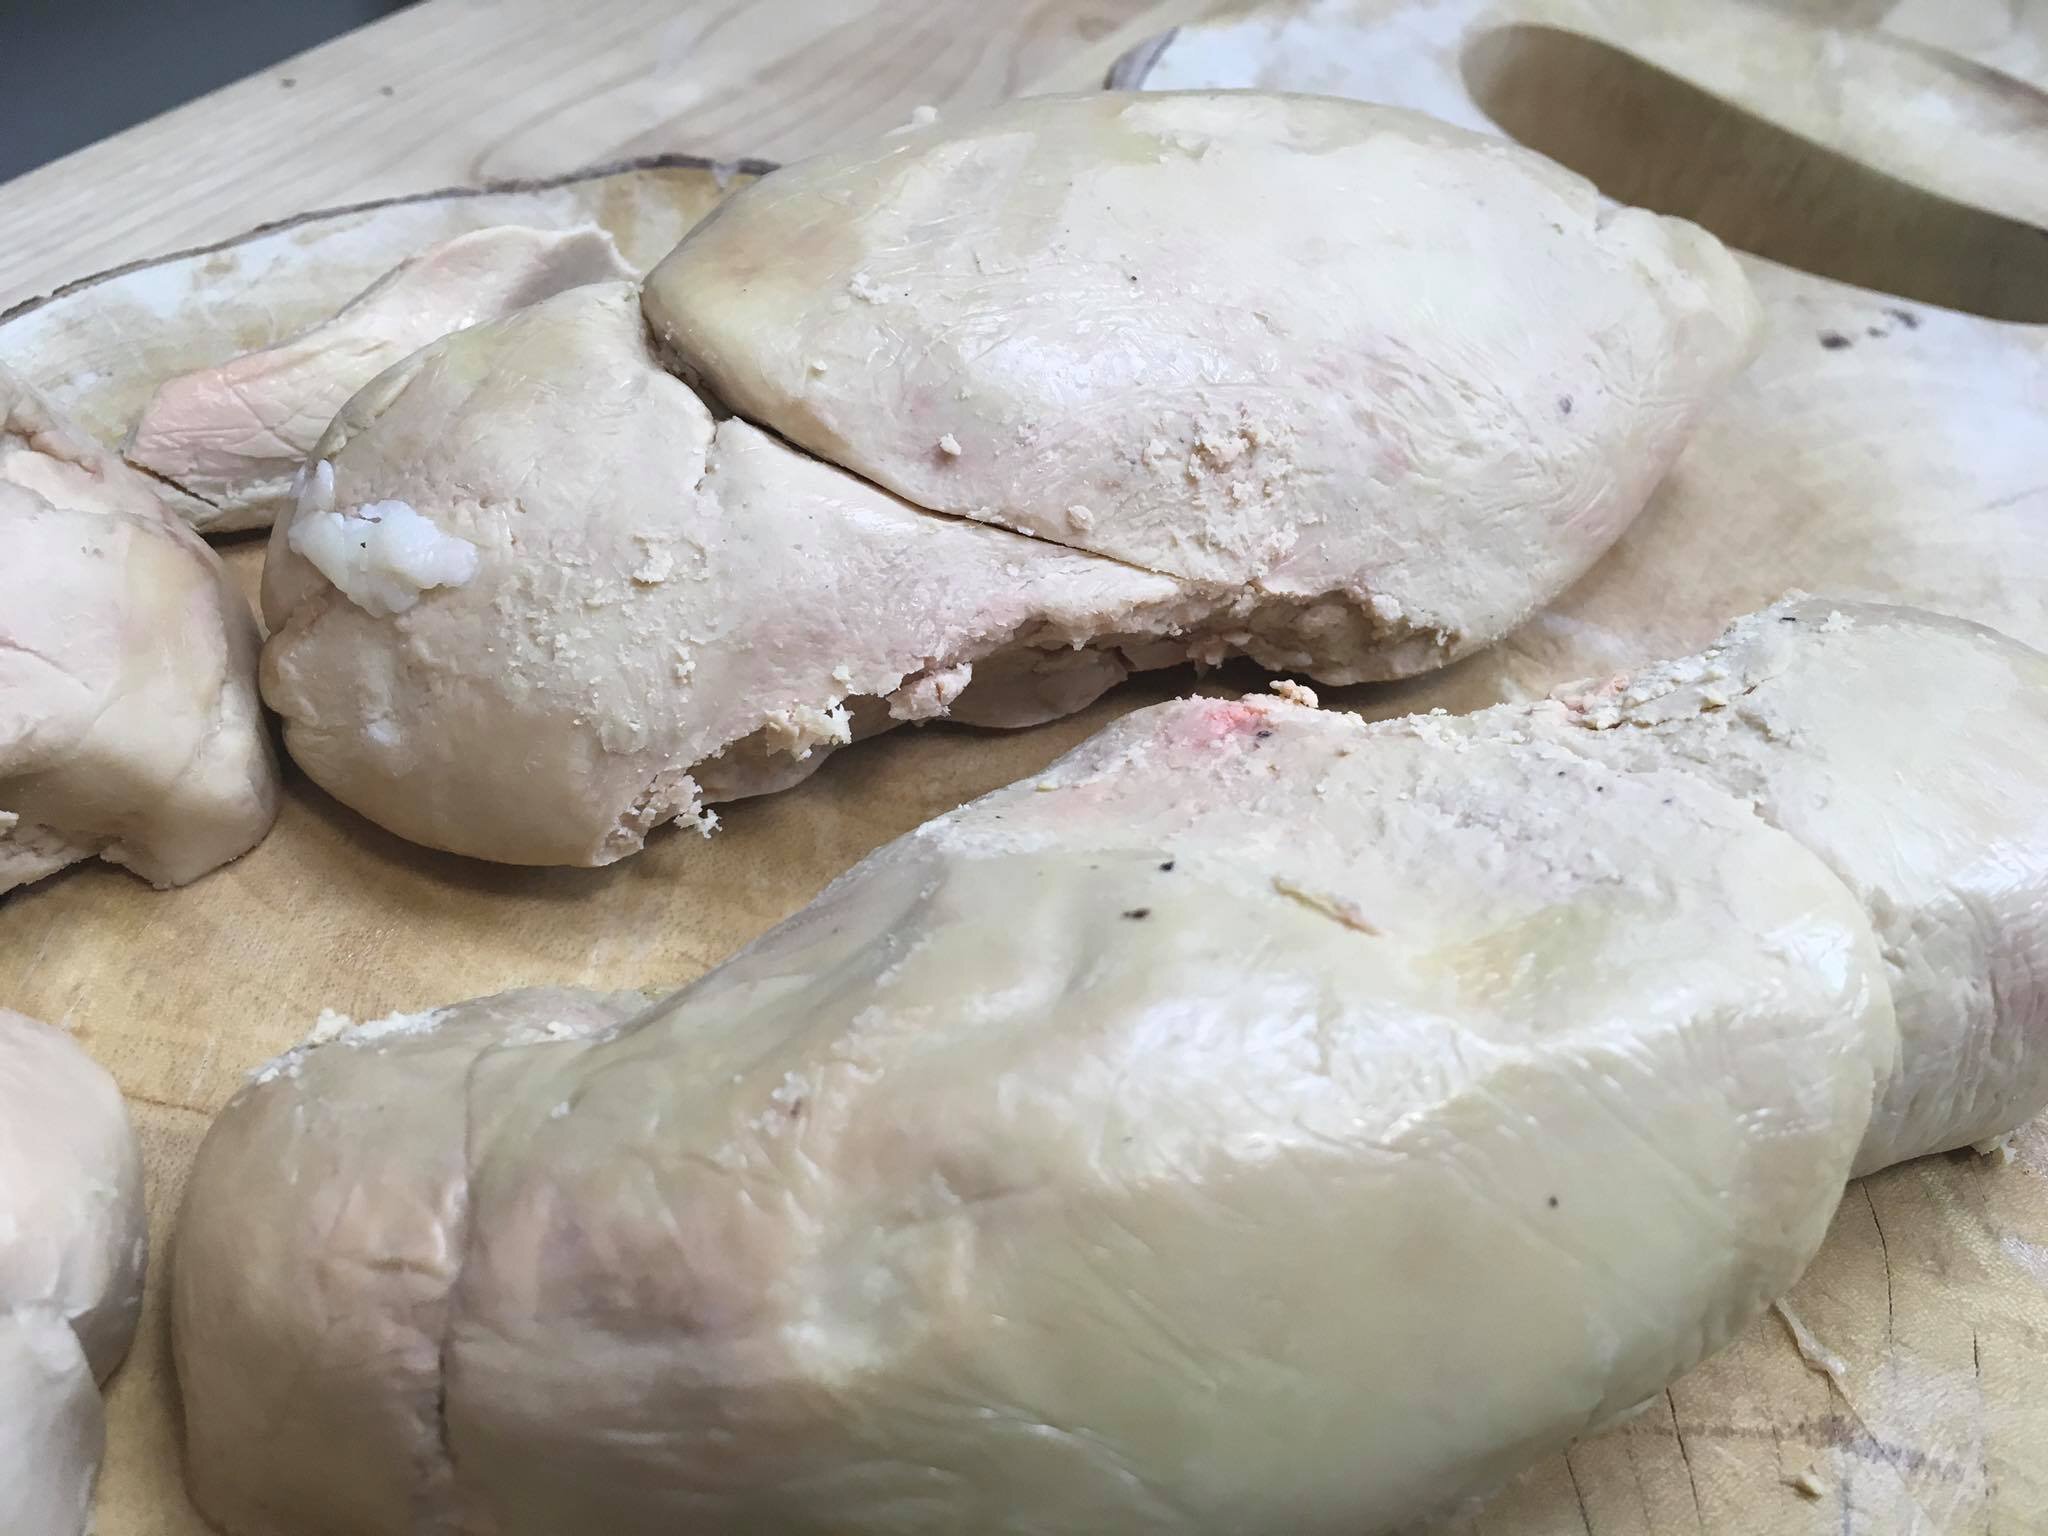
1. Trim beef tenderloin, removed the chain (the chain has a lot of connective tissue & silver skin) and side muscle. You can scrape “spoon meat” from the chain": this is often used as steak tartar

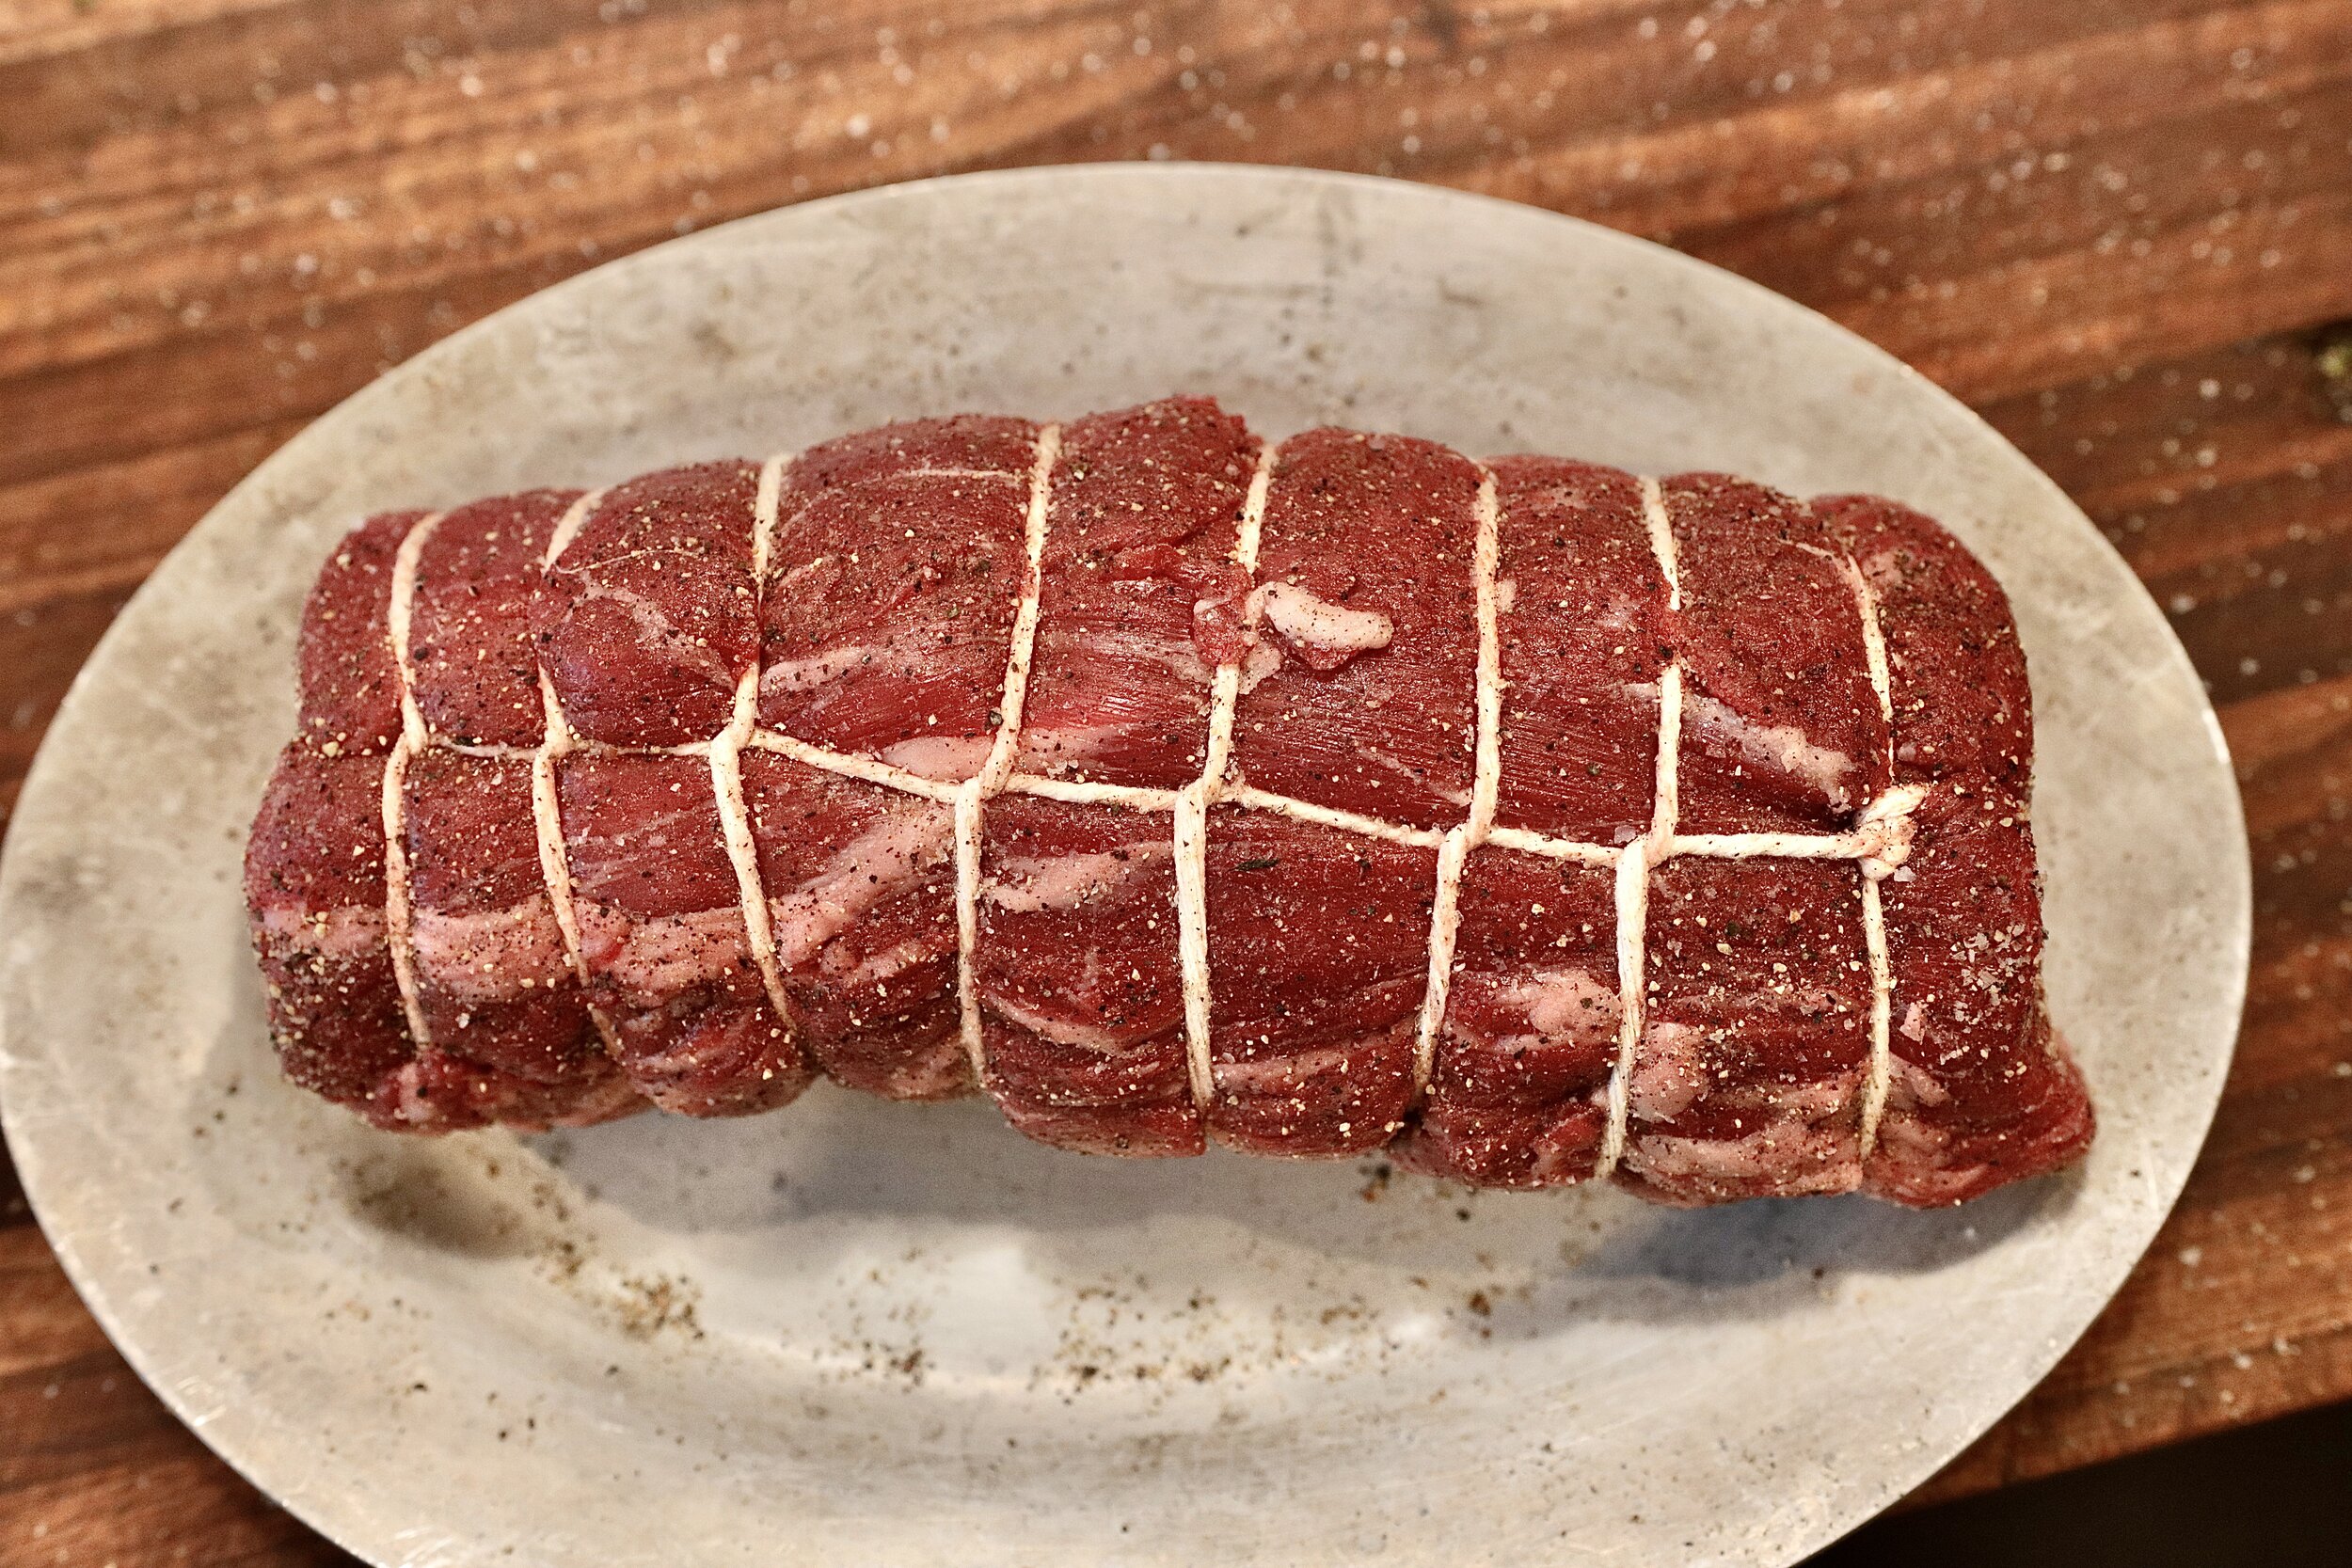
2. Using butcher's twine, tie tenderloin at 1-inch intervals (note: I highly recommend using twine, even though on the below I didn’t use twine). Trim ends of twine. Season liberally with salt and pepper.
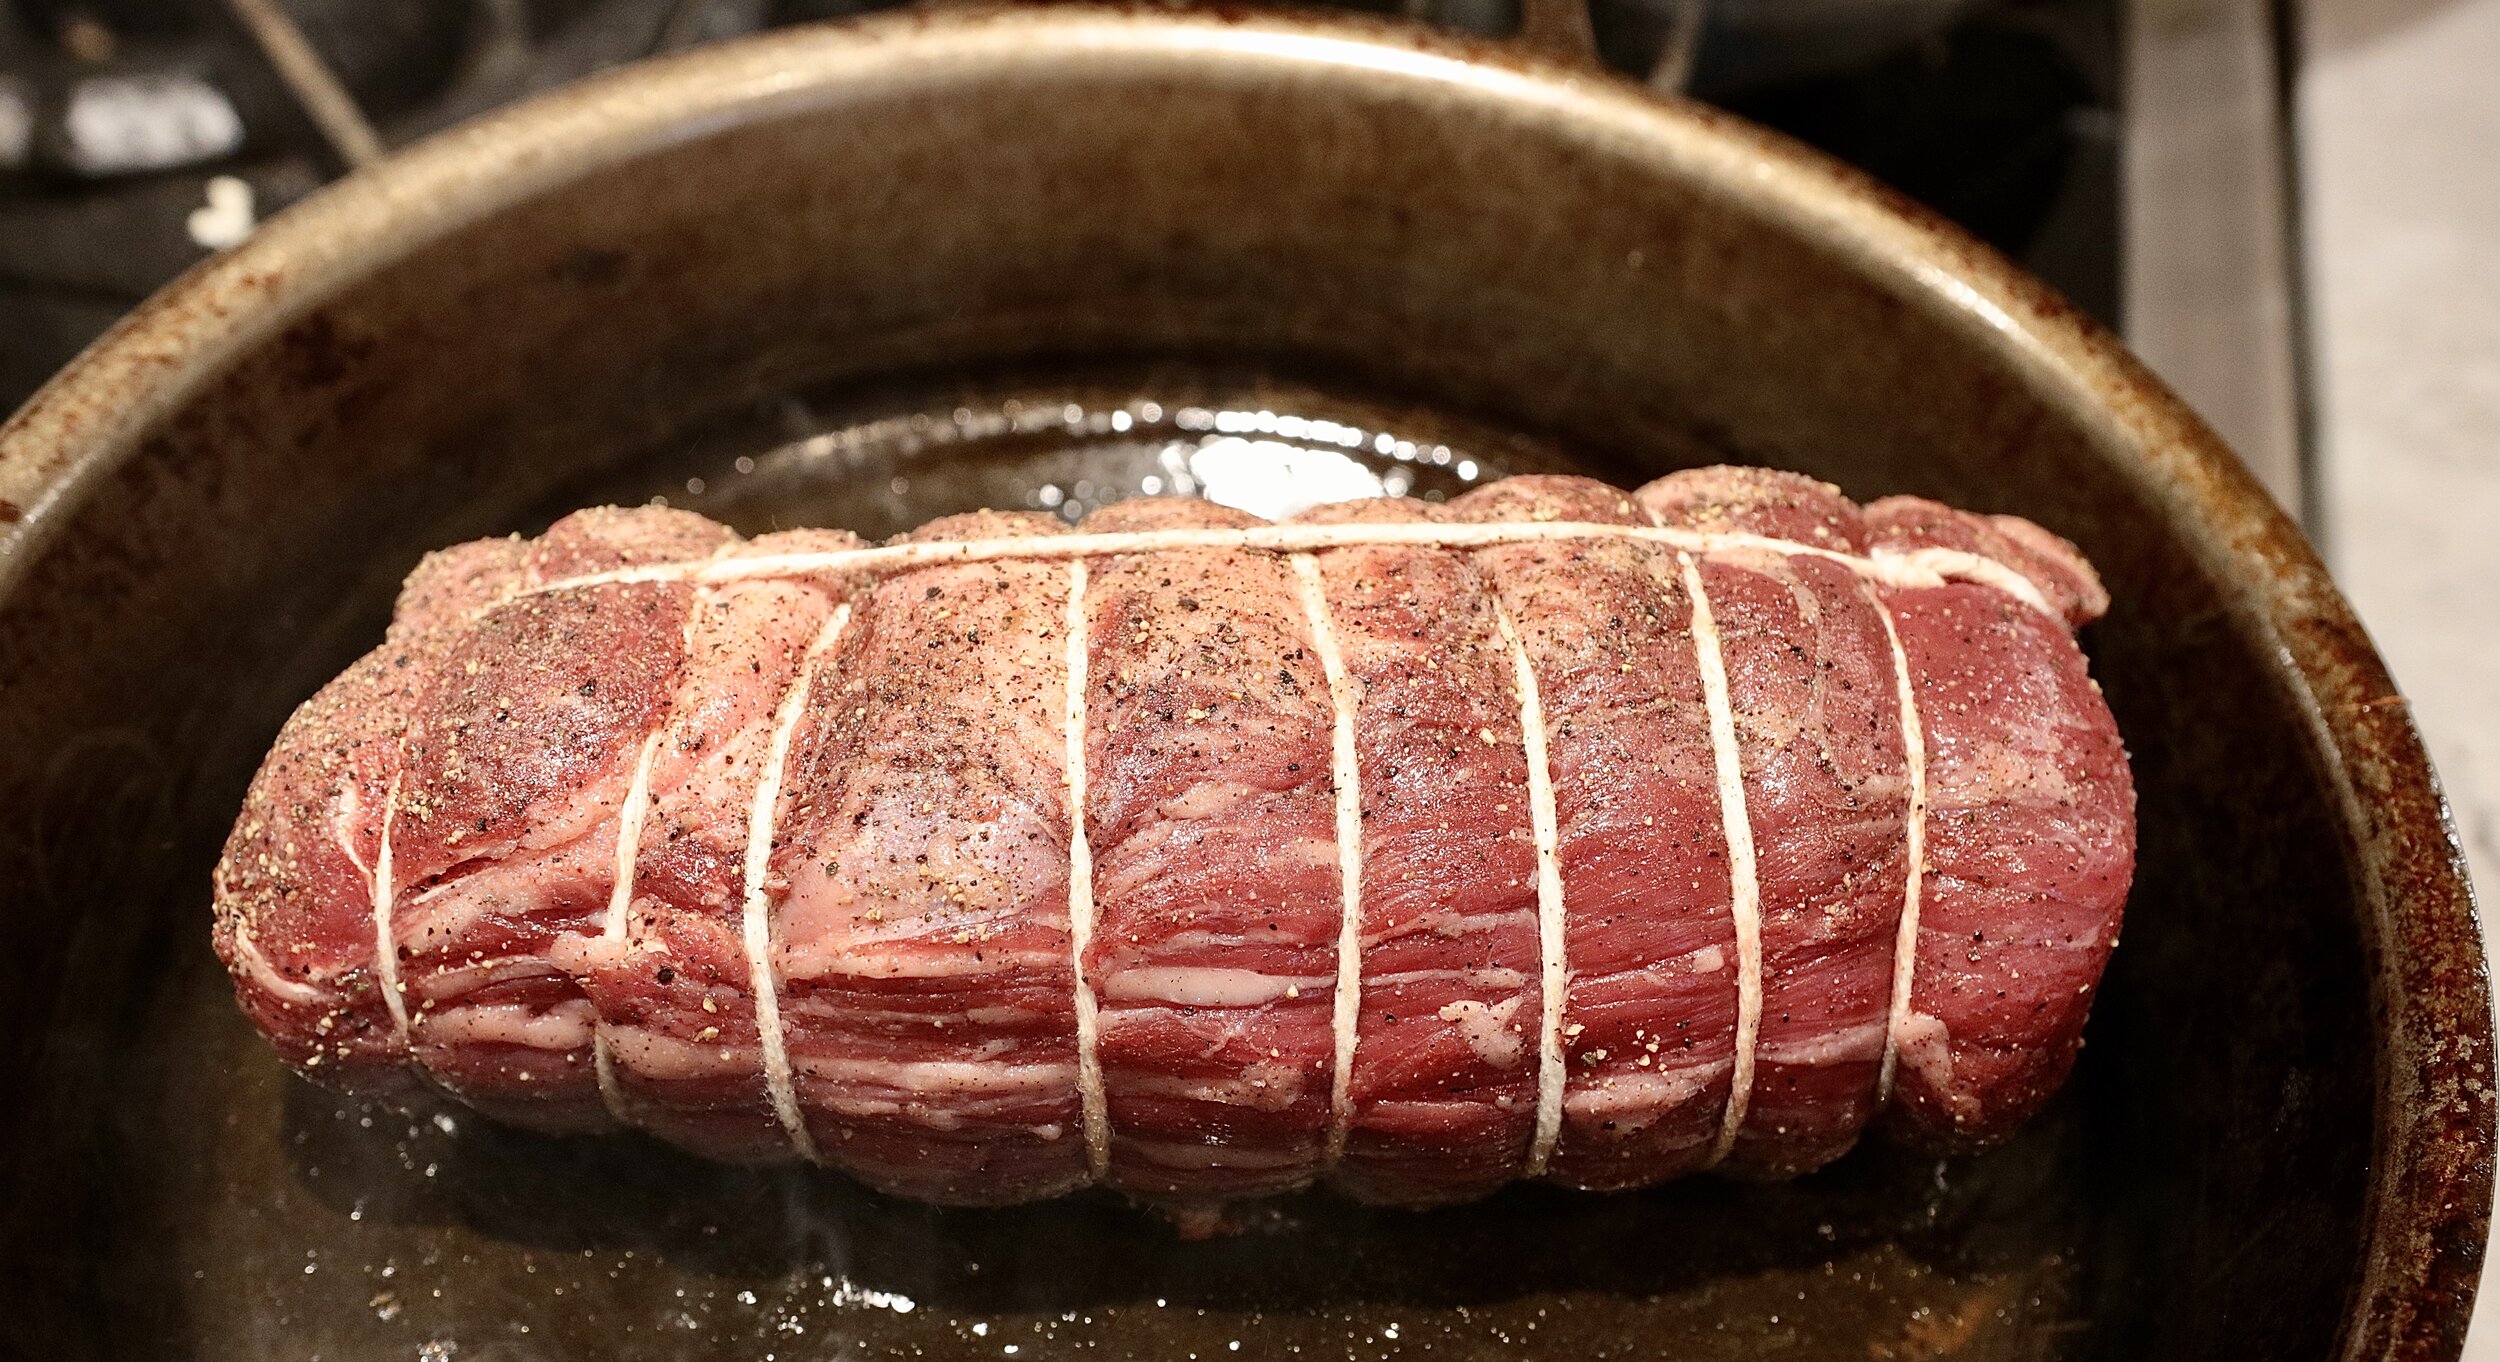
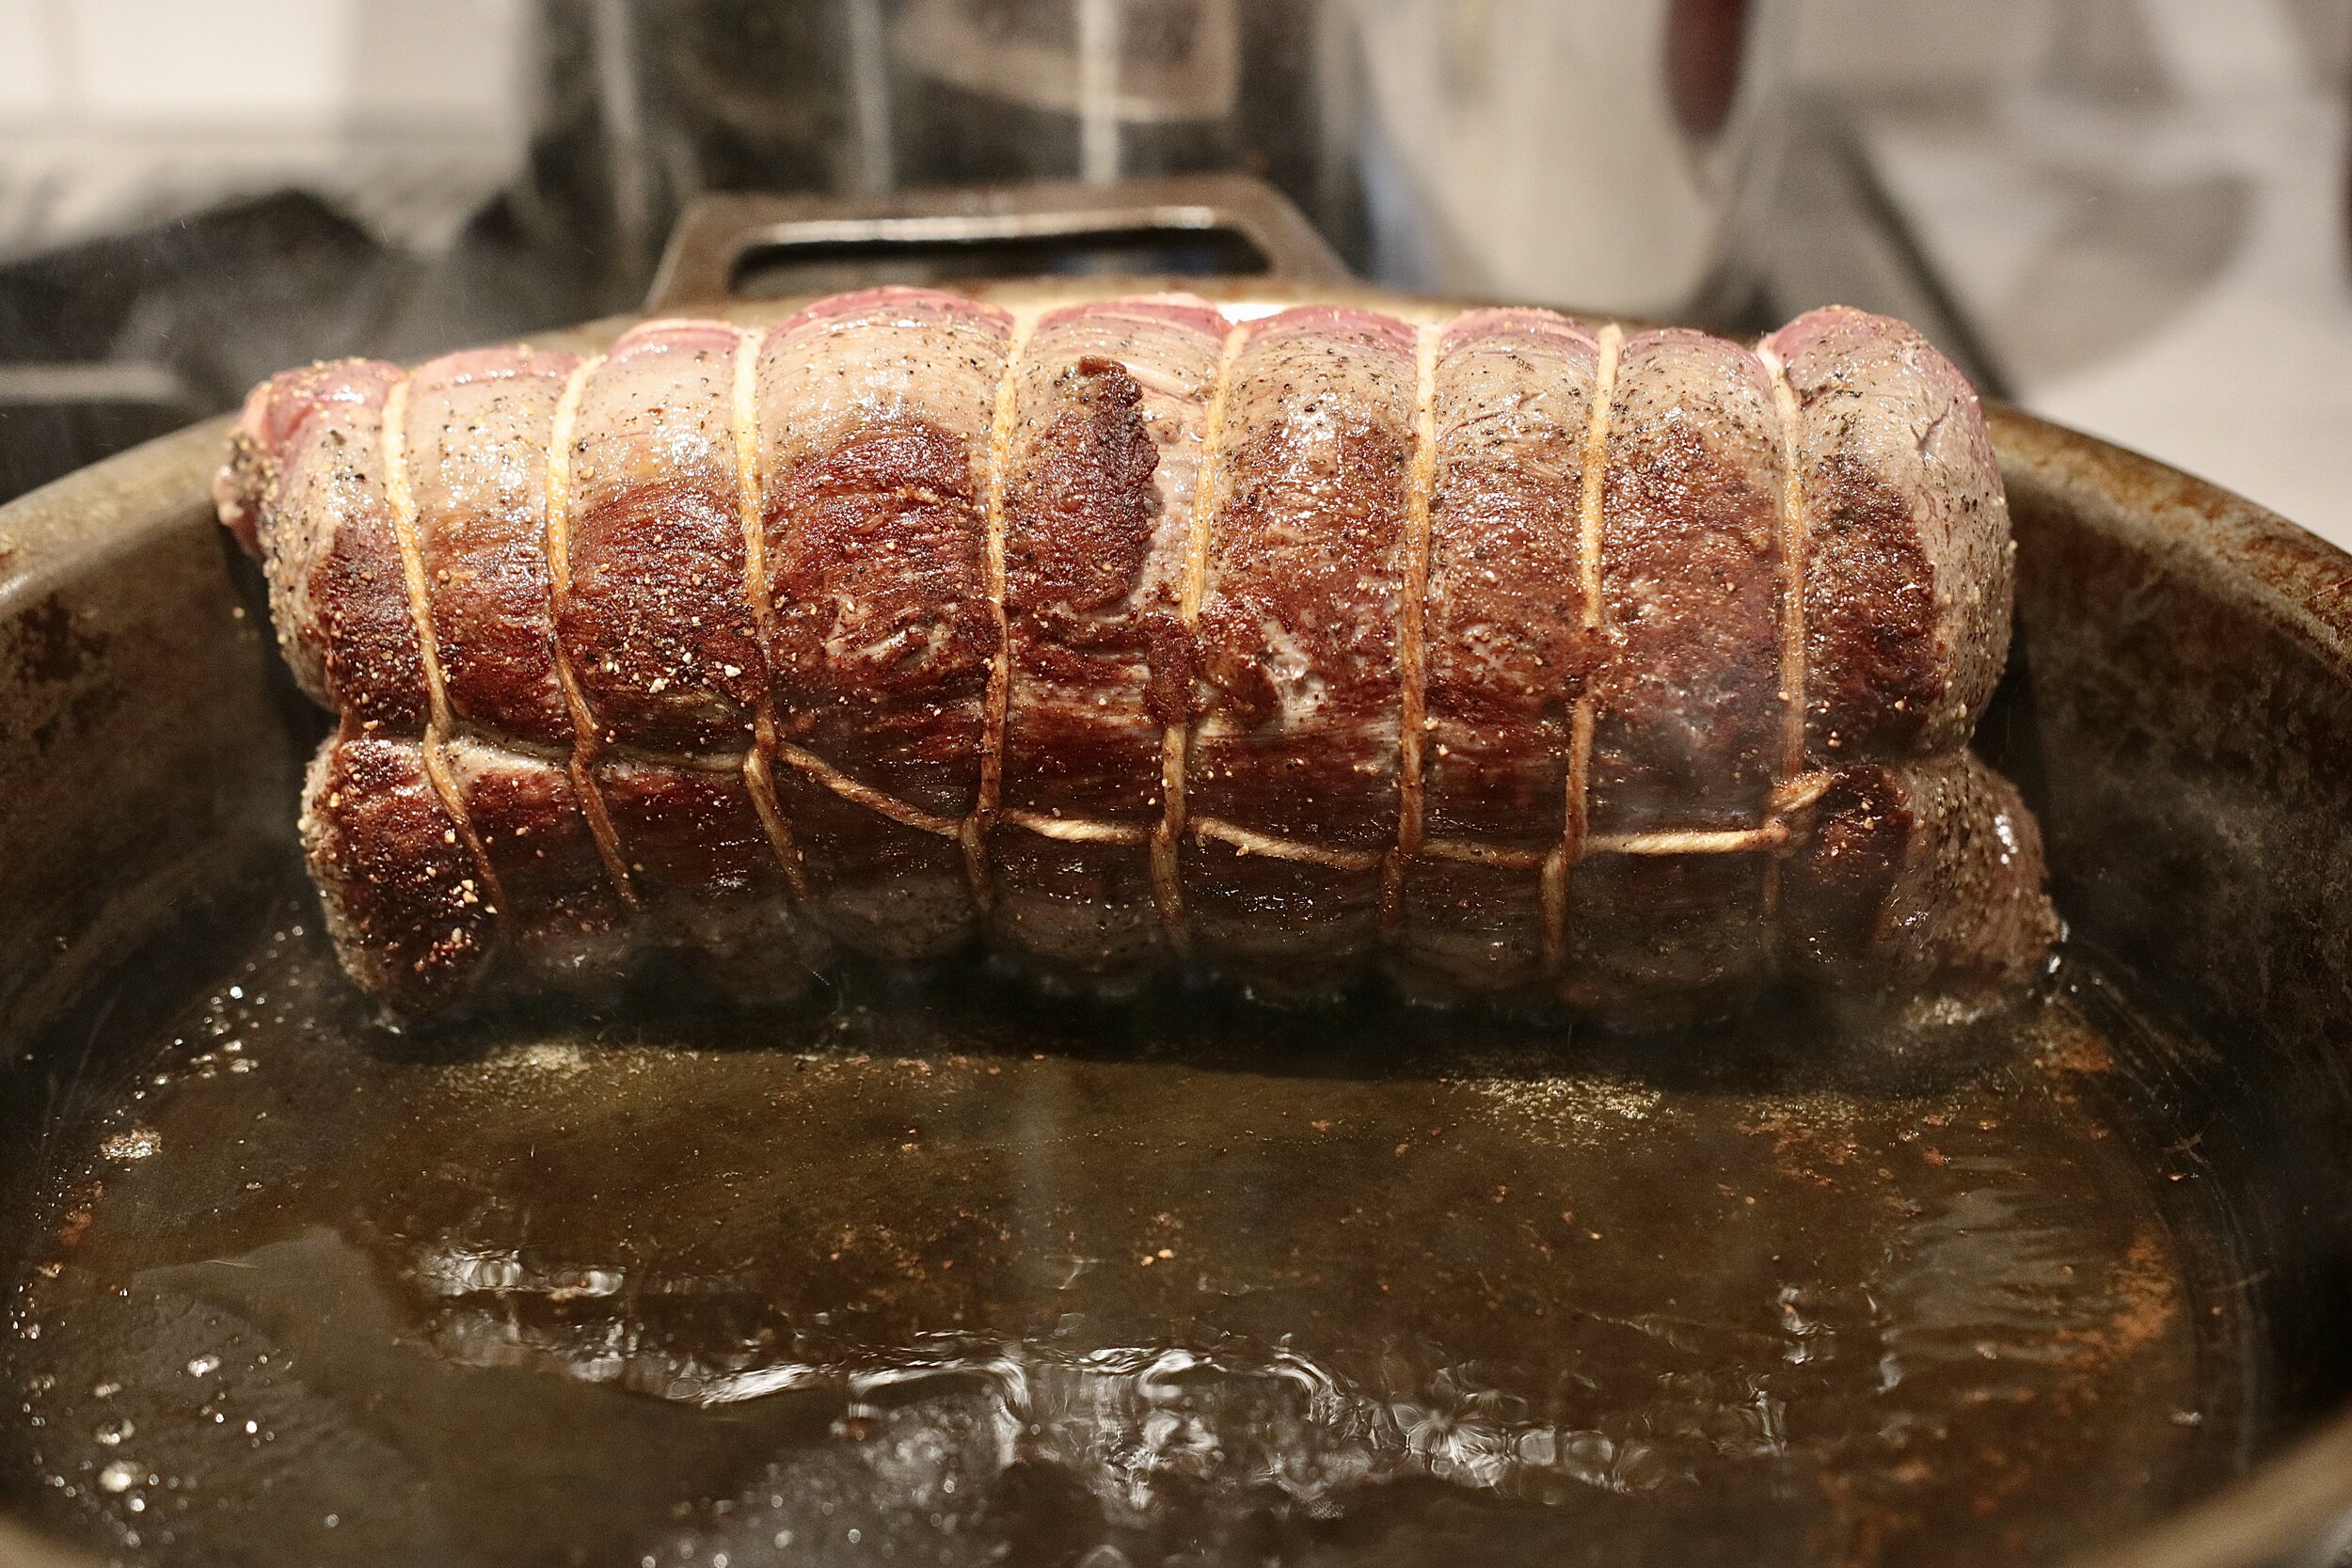
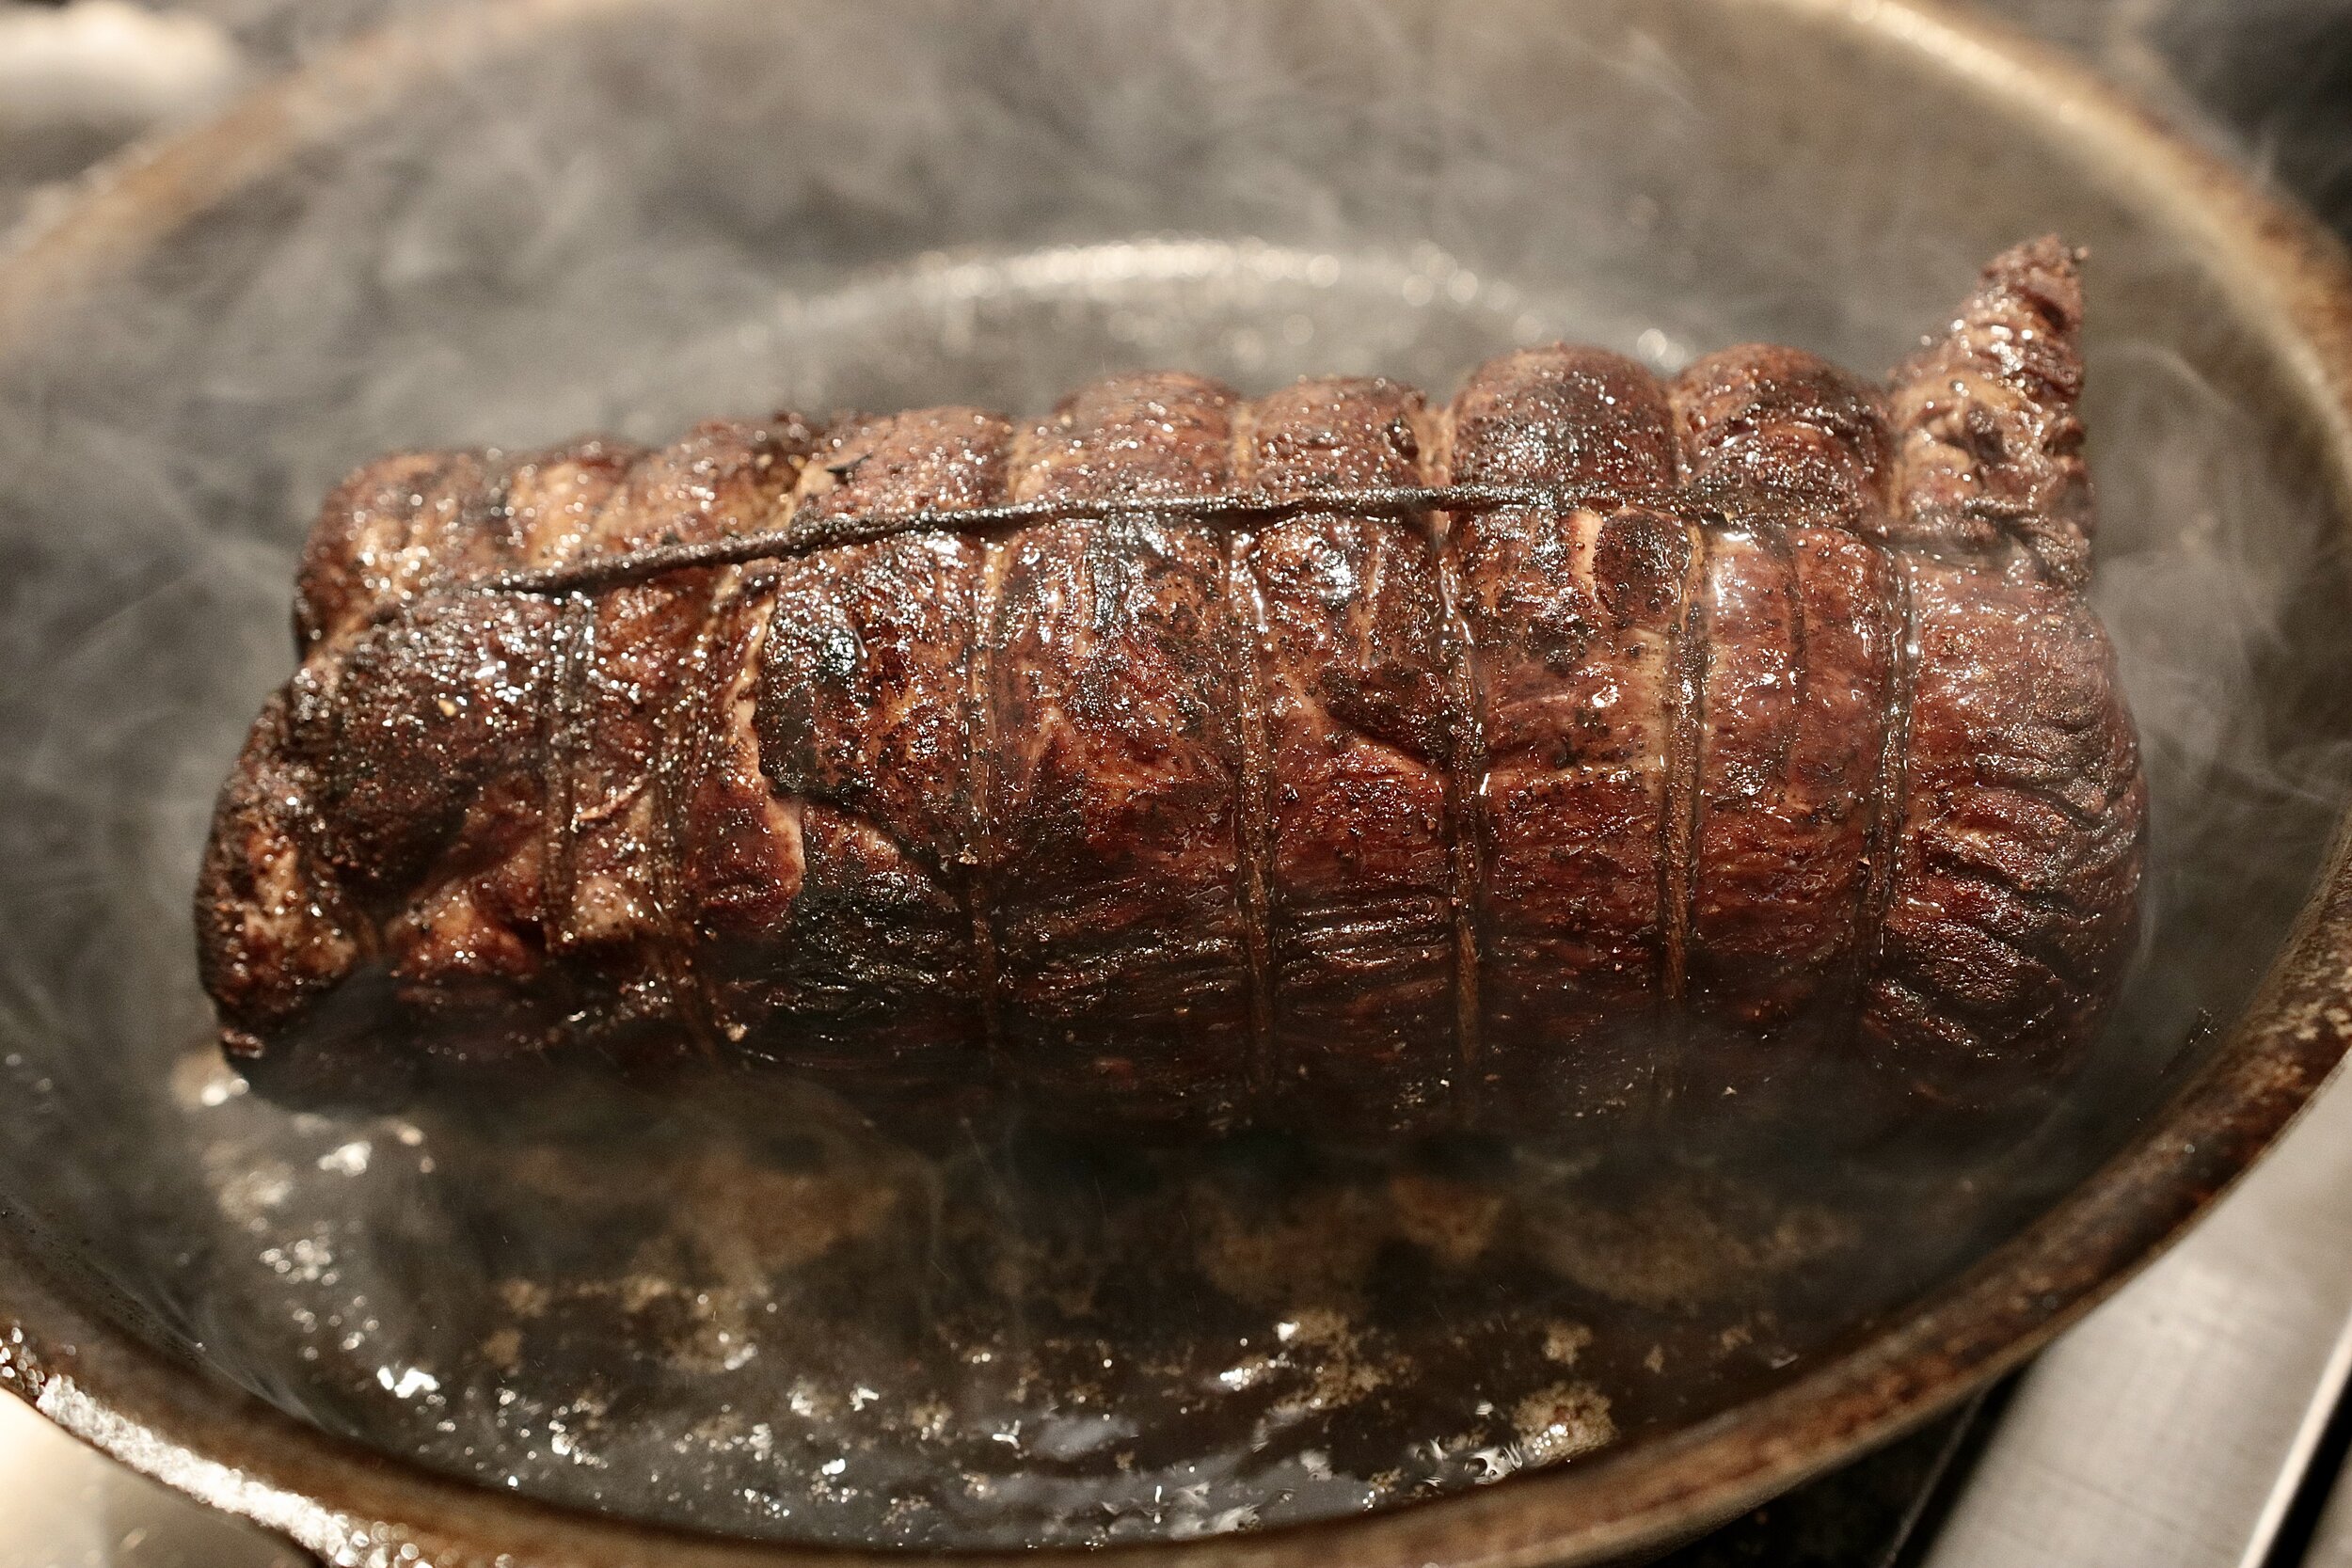
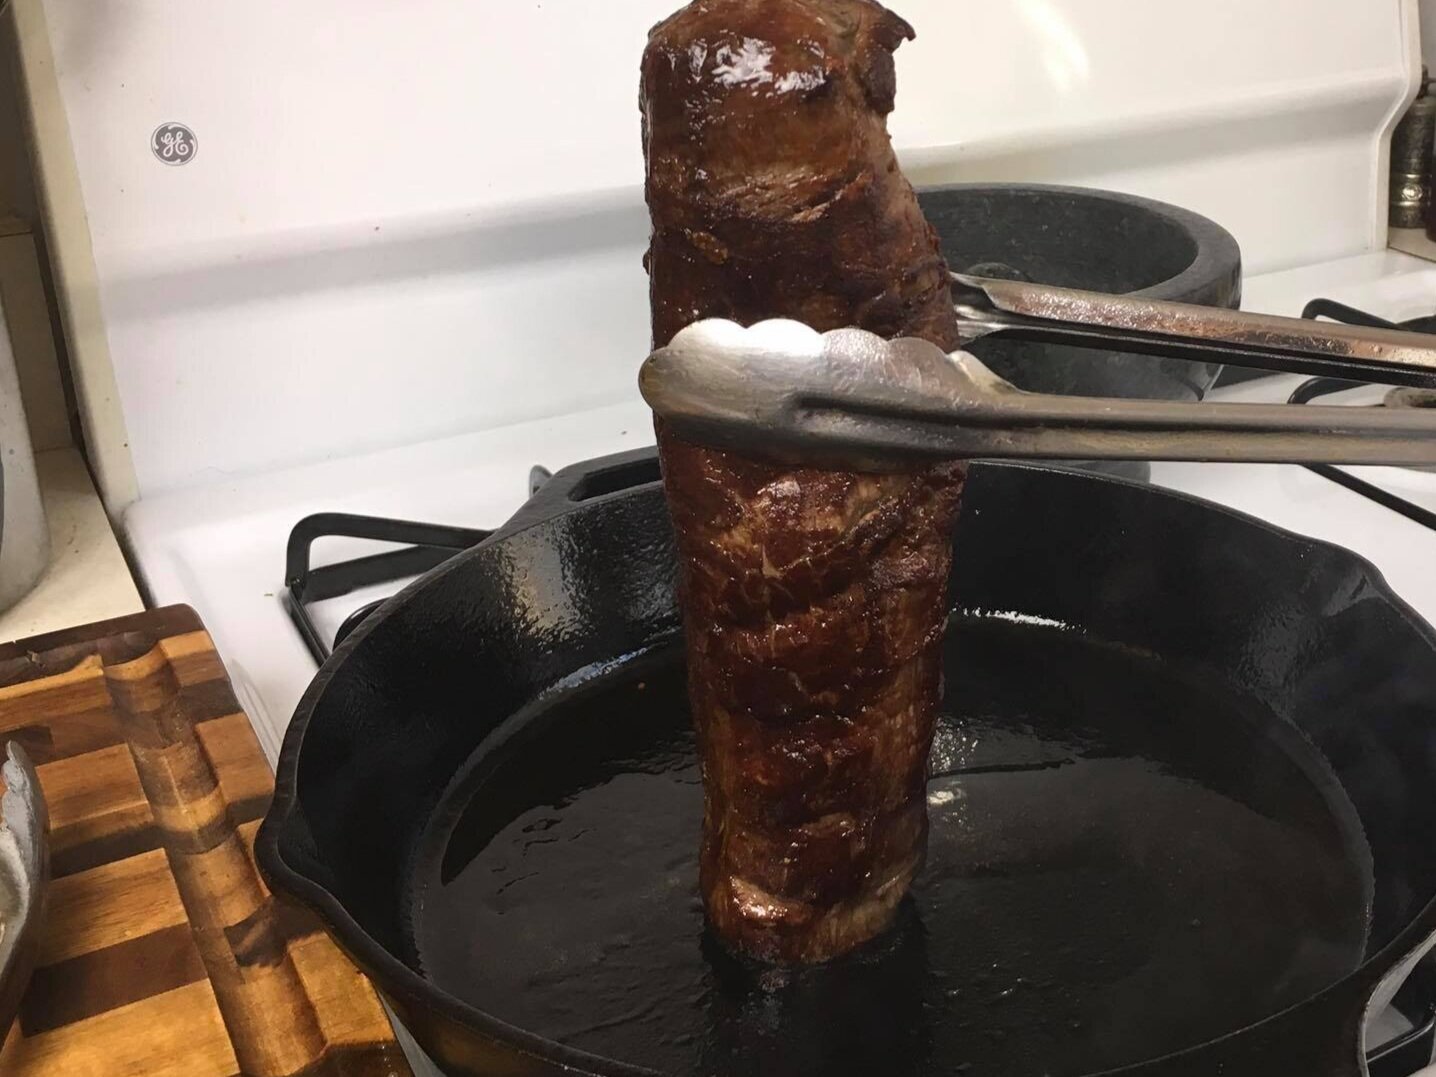
3. Heat 2 tablespoons oil in a cast iron or stainless steel skillet over high heat until smoking. Add tenderloin and cook without moving until well-browned on first side, about 2 minutes. Rotate tenderloin and continue cooking until browned on all sides, about 10 minutes total. Transfer to a large plate.
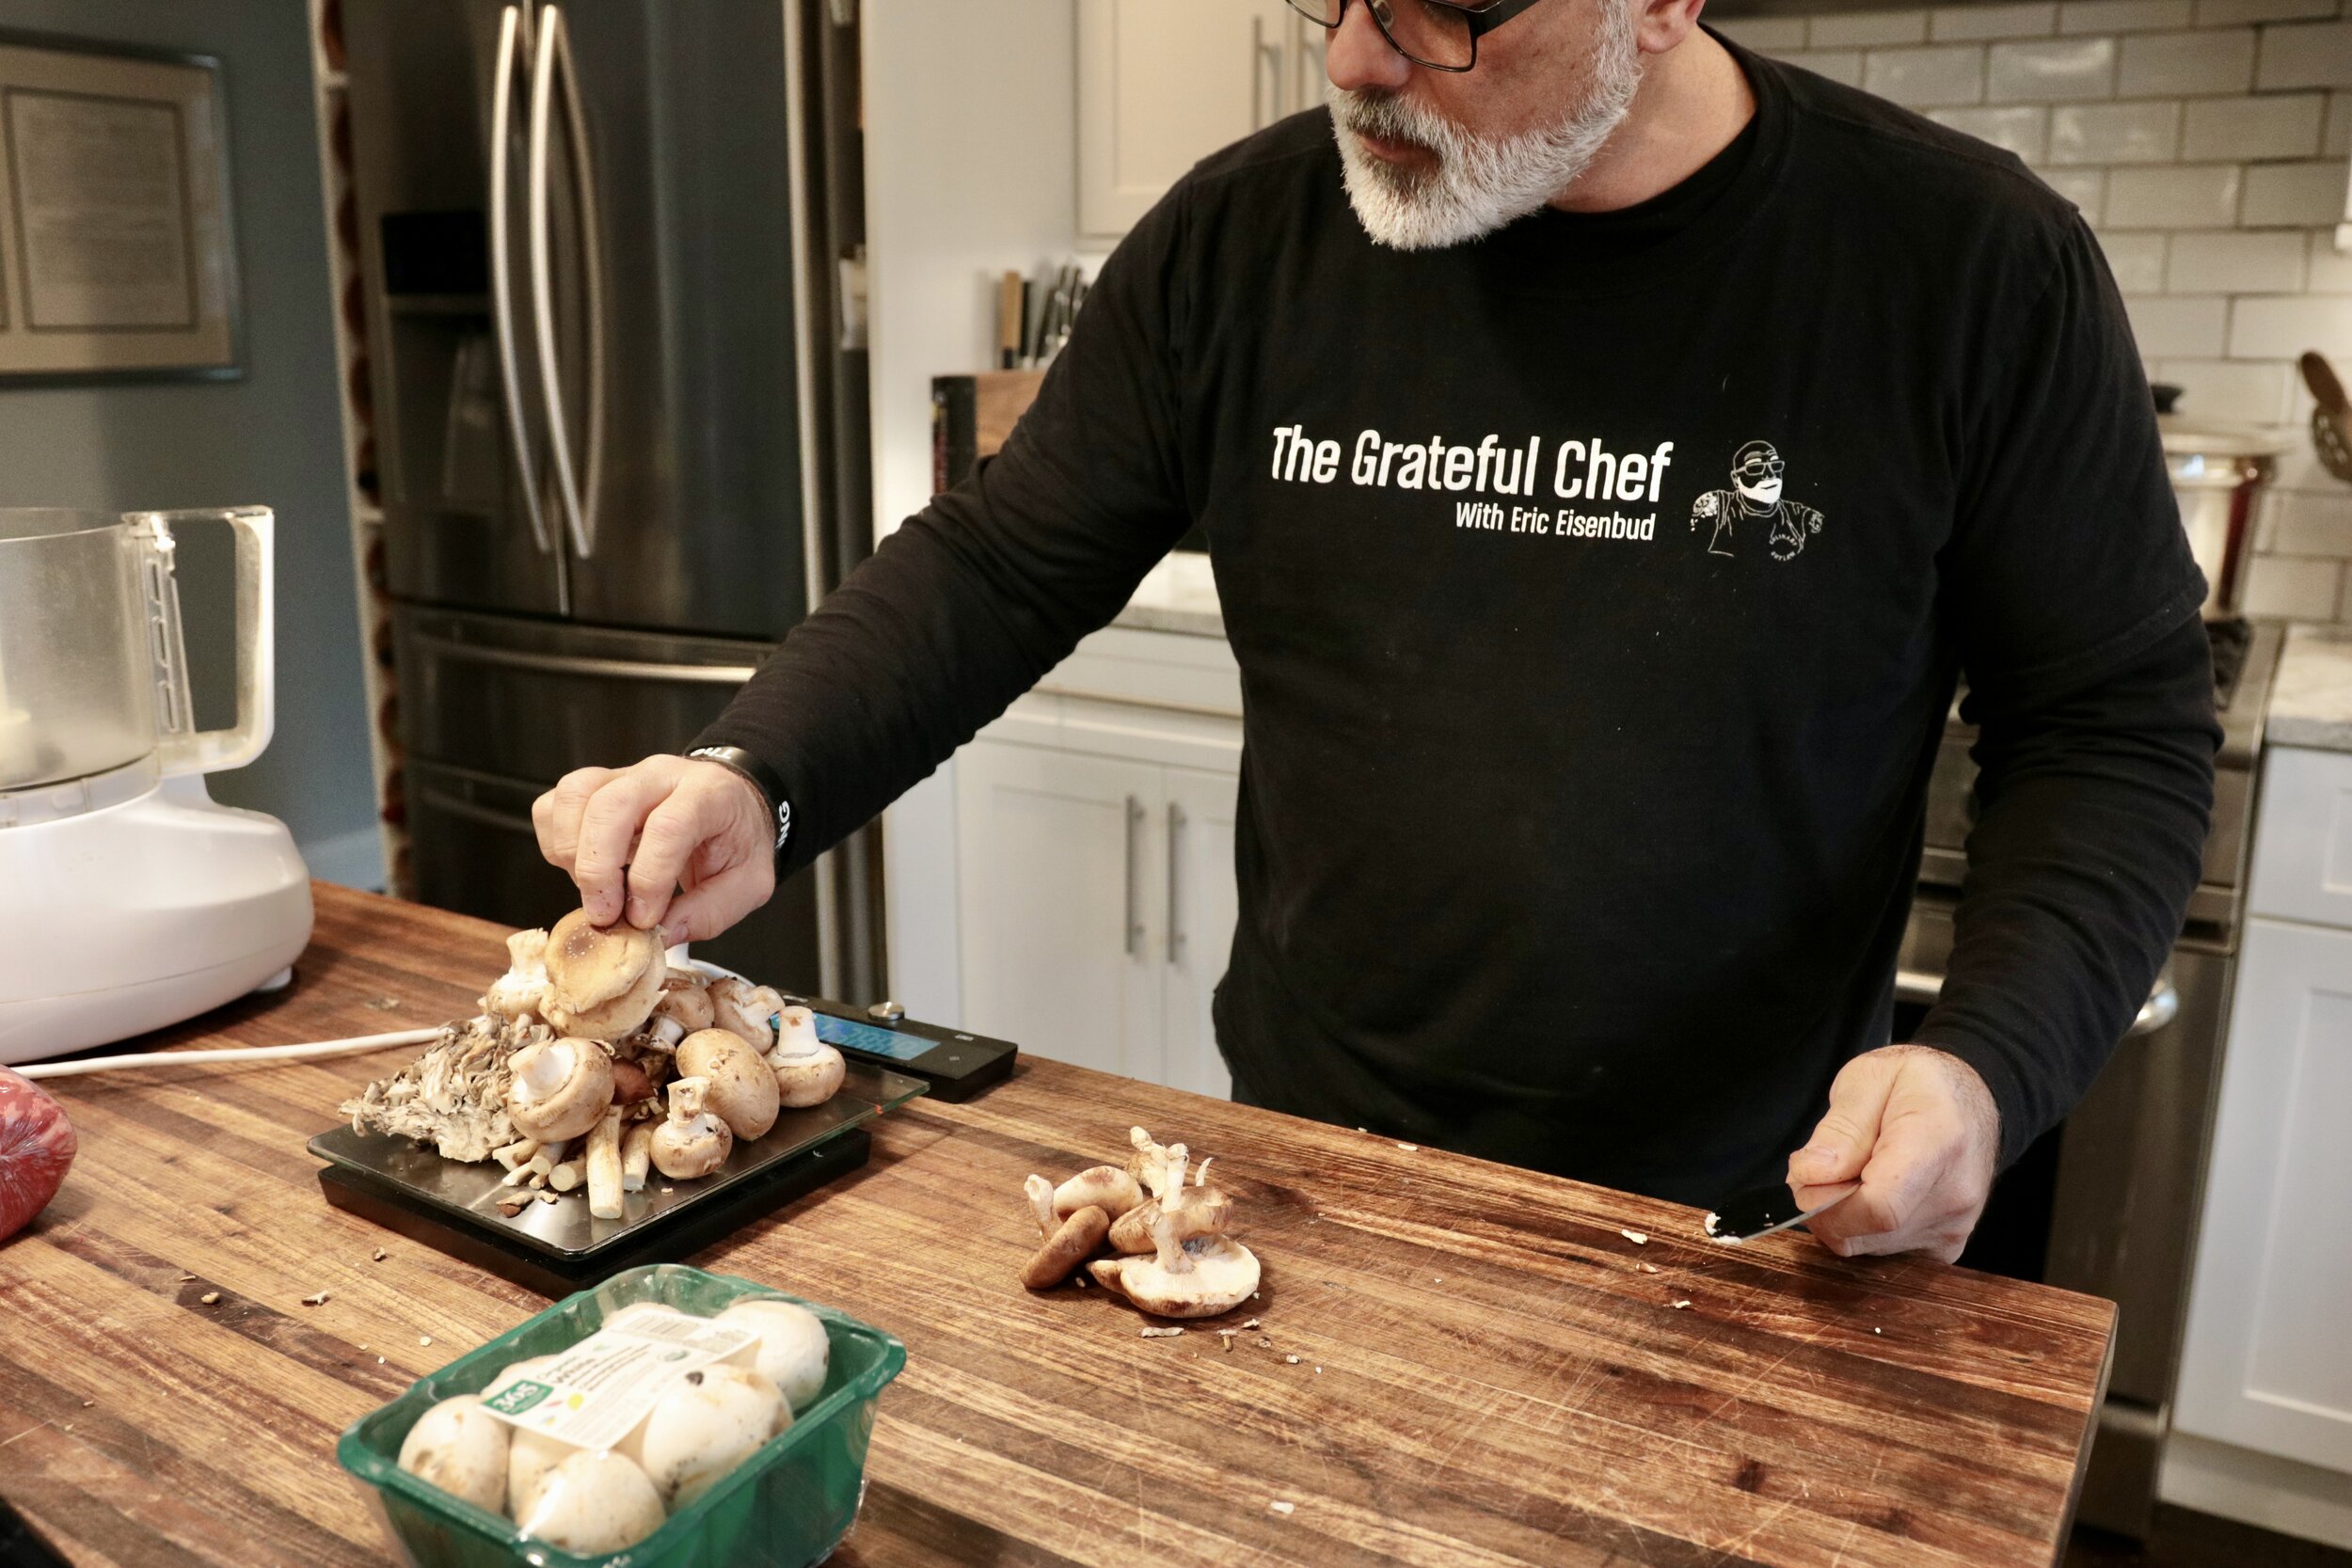
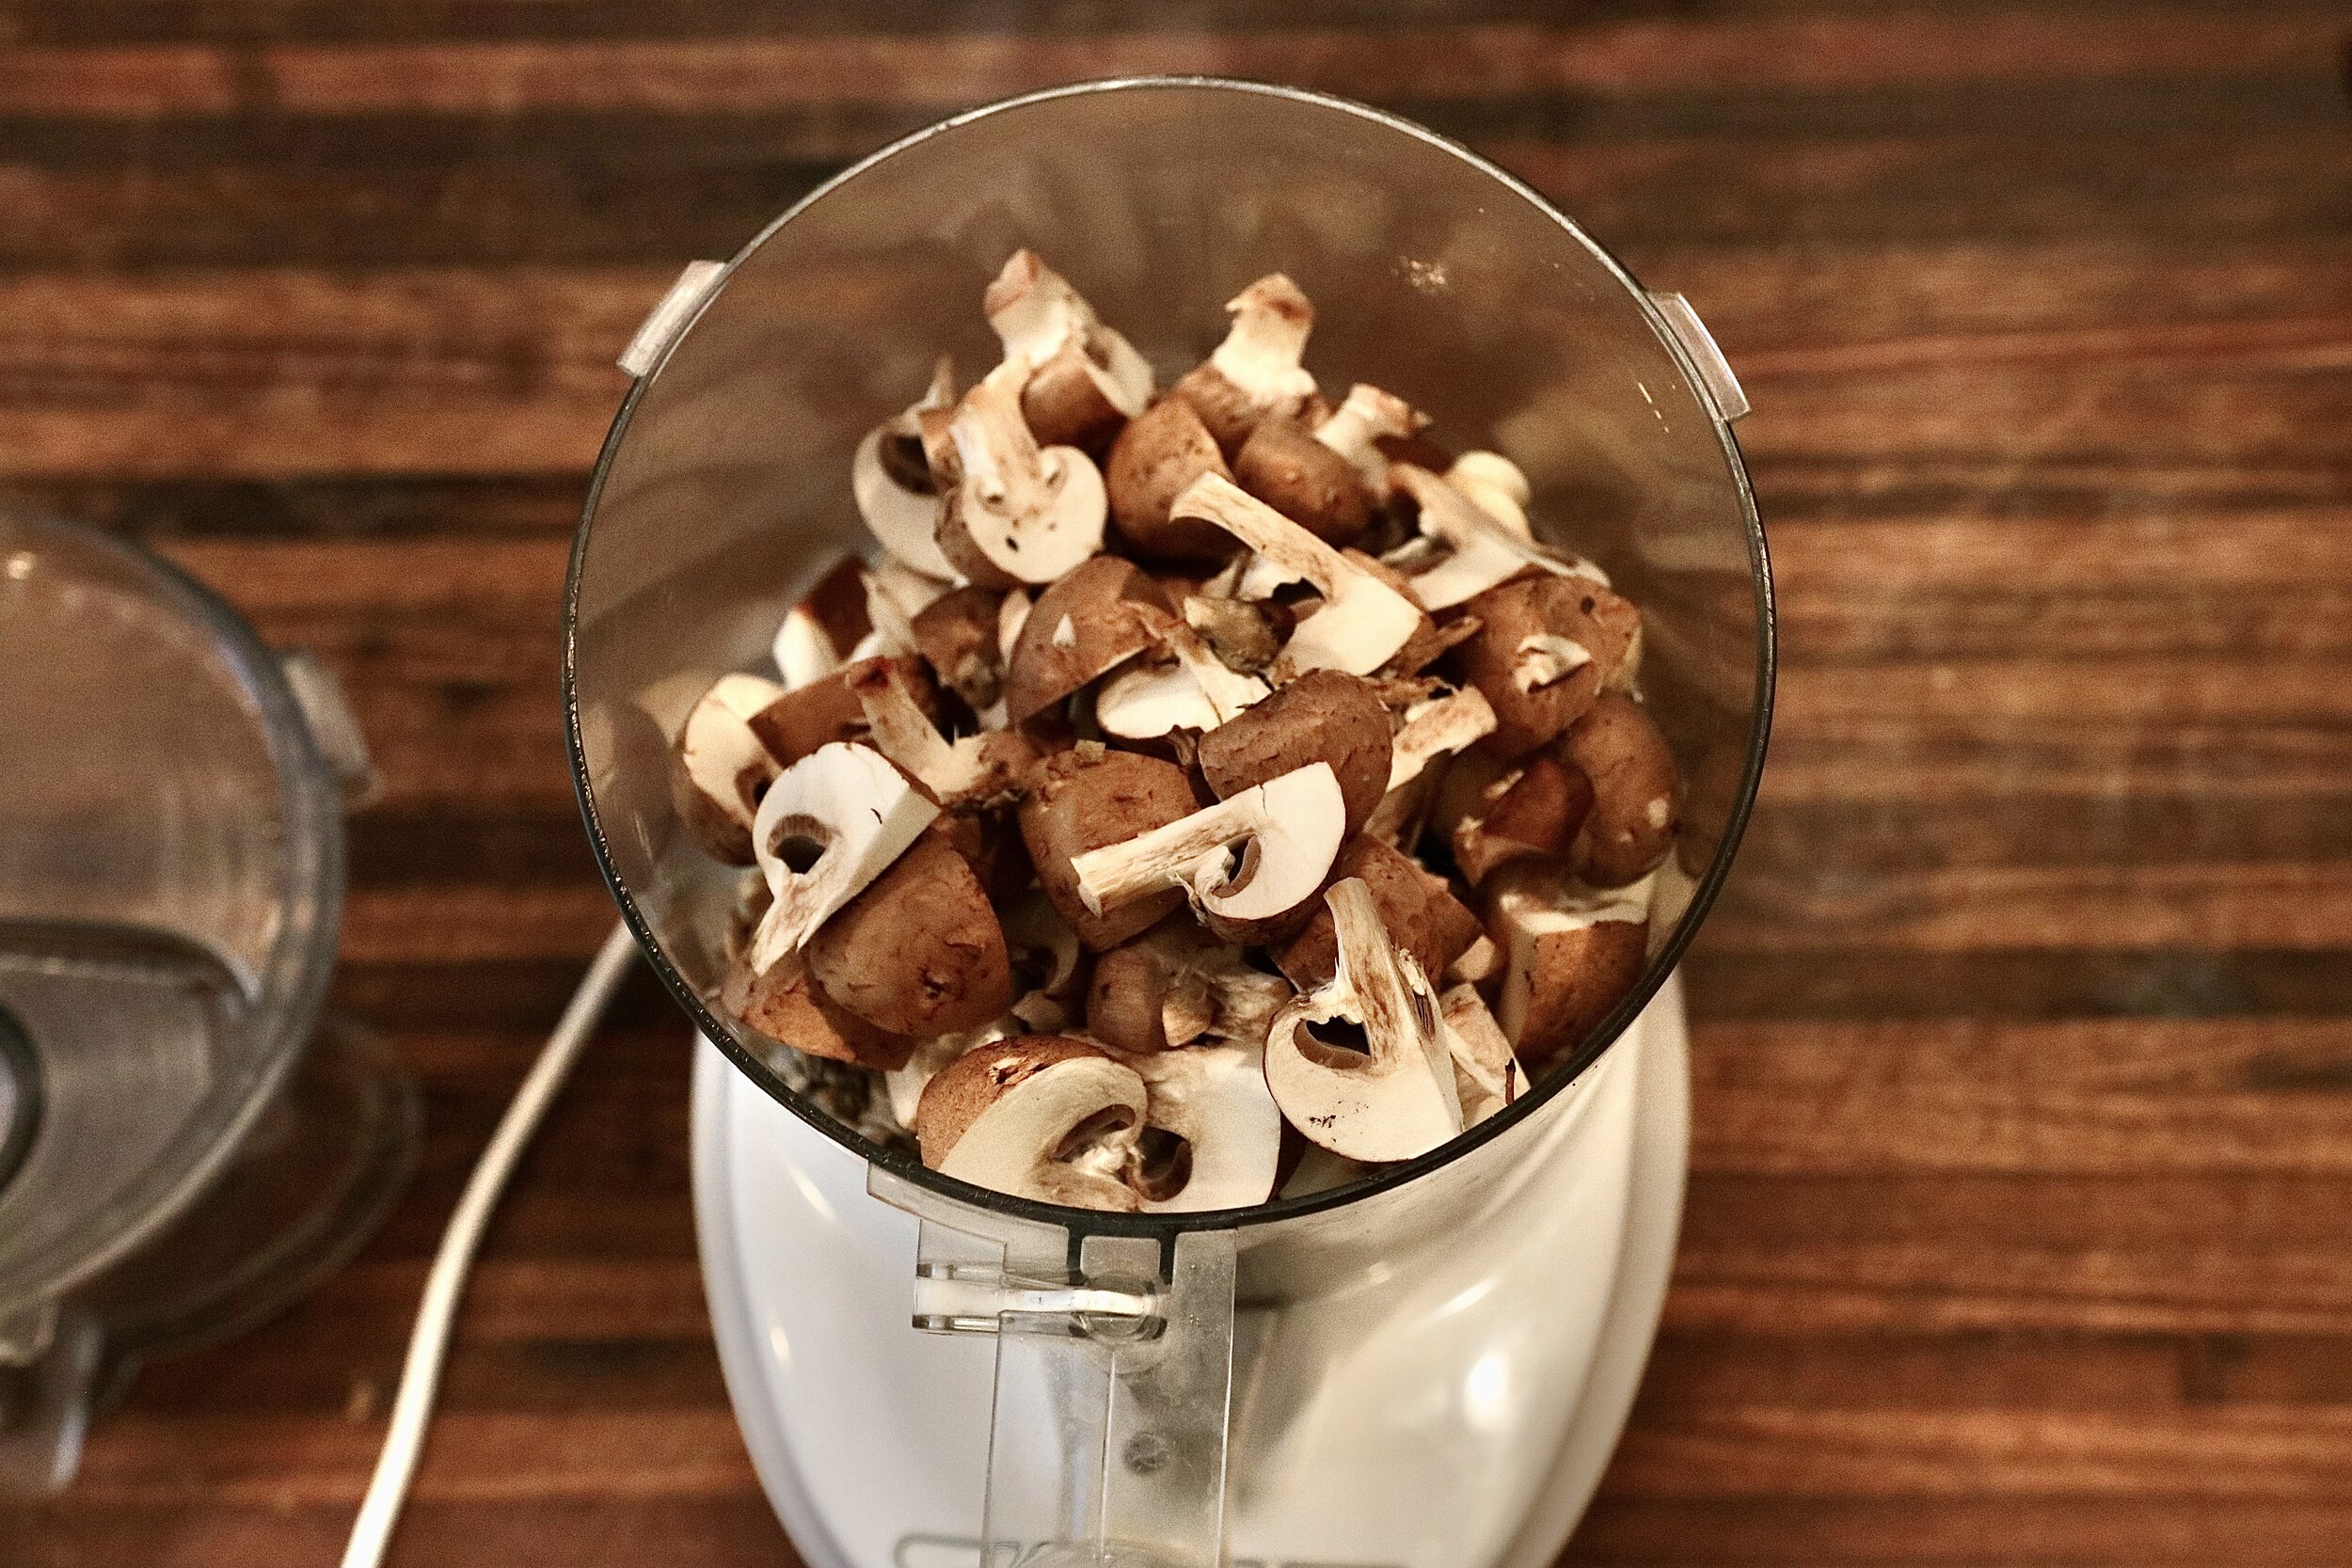
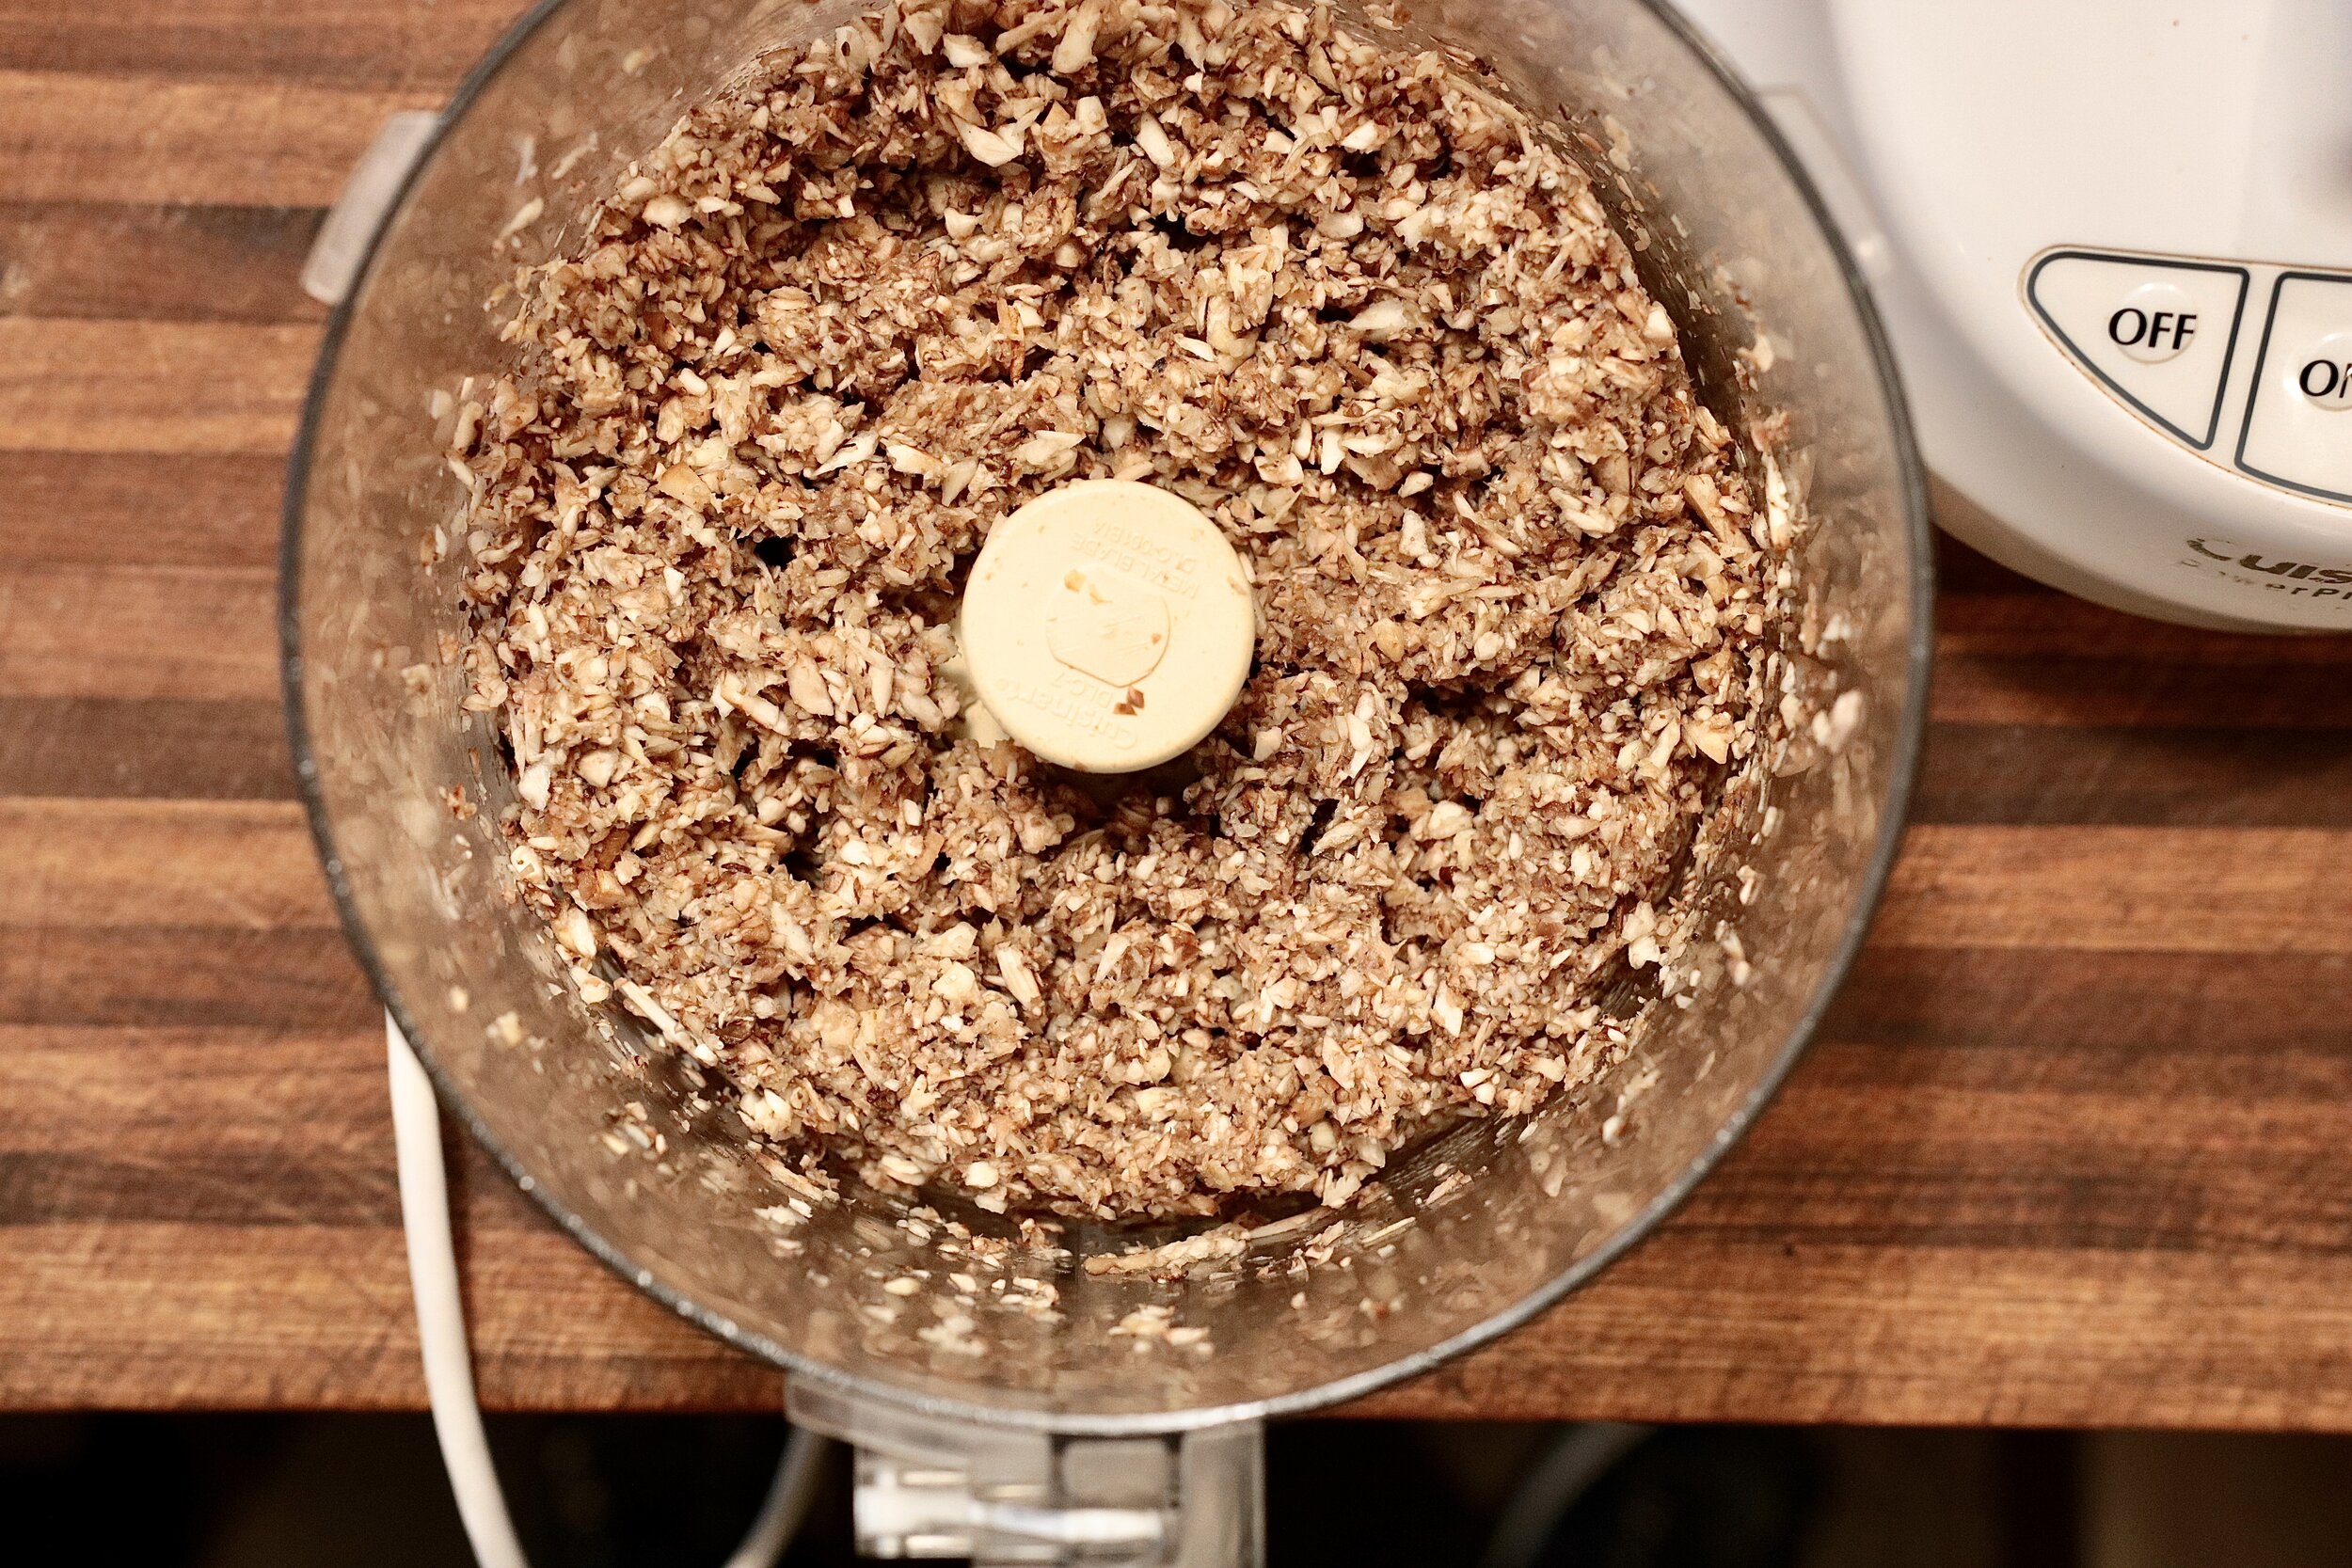
4. Place half the mushrooms in the bowl of a food processor and pules until very finely chopped, scraping down sides and redistributing mushrooms with spatula as necessary, about 10 short pulses. Transfer to a bowl. Repeat with remaining mushrooms.
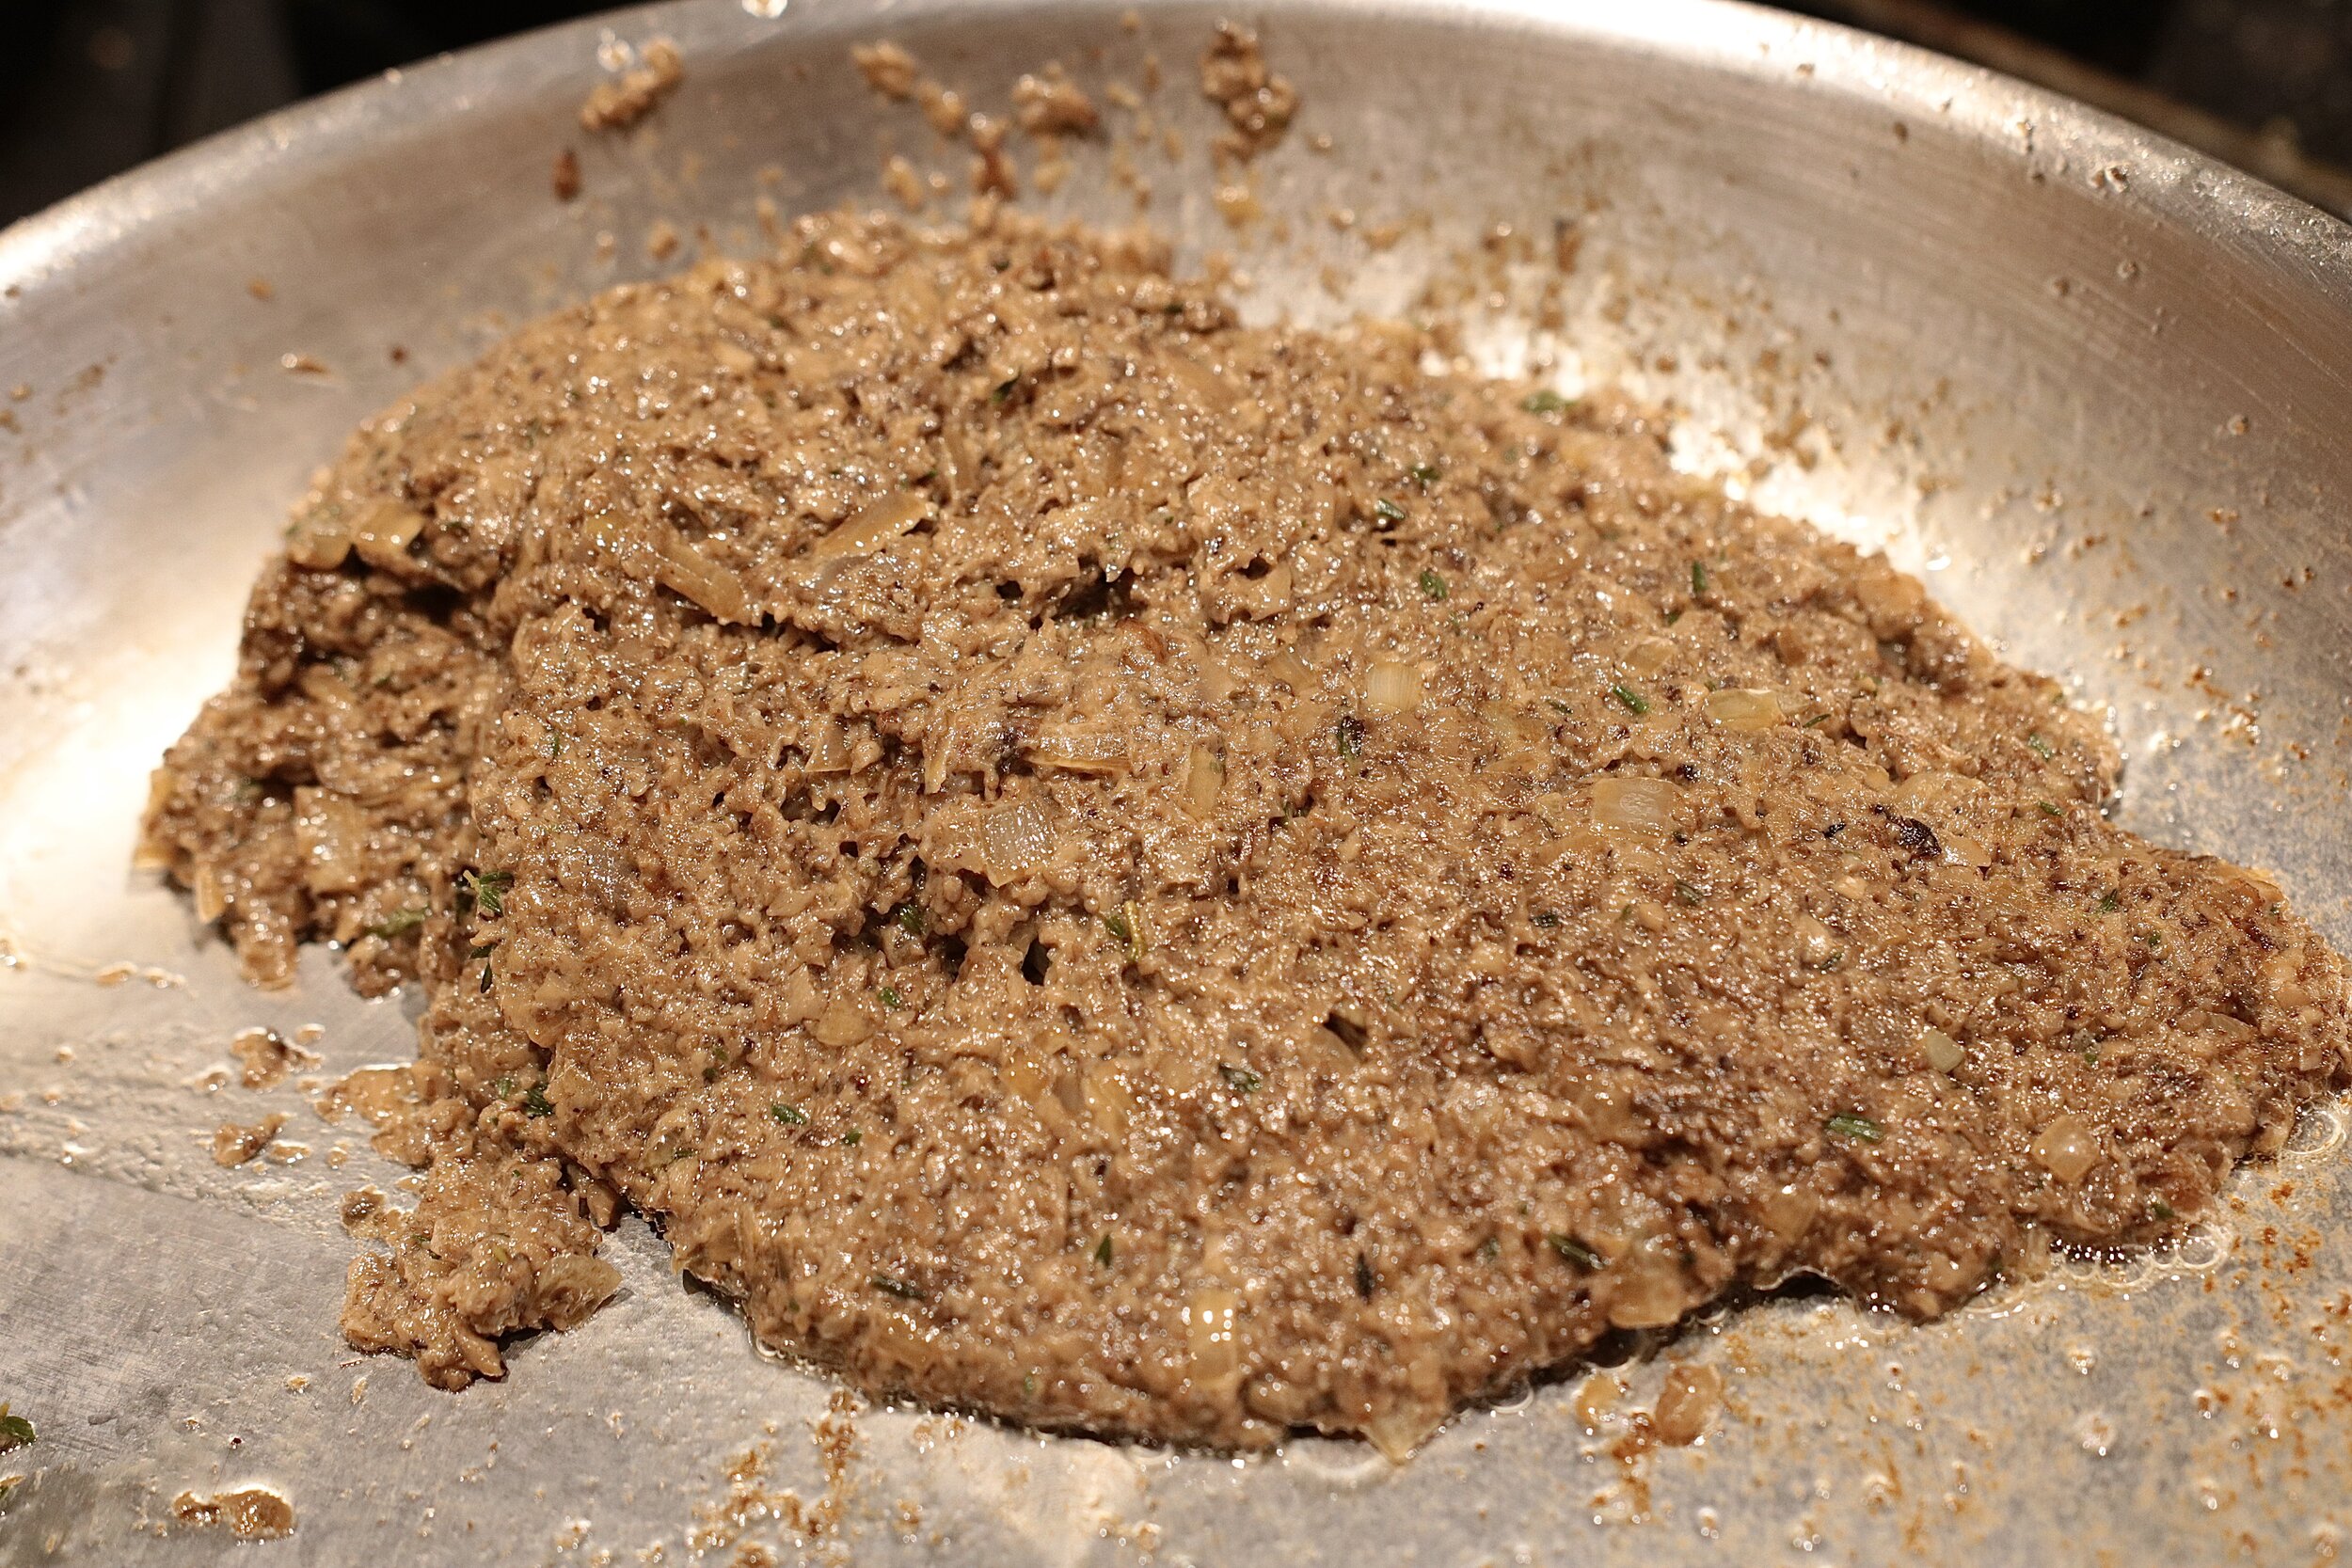
5. Heat butter in a 12-inch skillet over medium-high heat until melted. Add mushrooms and cook, stirring occasionally, until mushrooms have exuded all their liquid and start to sizzle, about 8 minutes. Continue cooking until mushrooms begin to brown and leave browned bits stuck to bottom of pan, about 4 minutes longer. Add shallots and thyme and cook, stirring frequently, until softened, about 2 minutes.
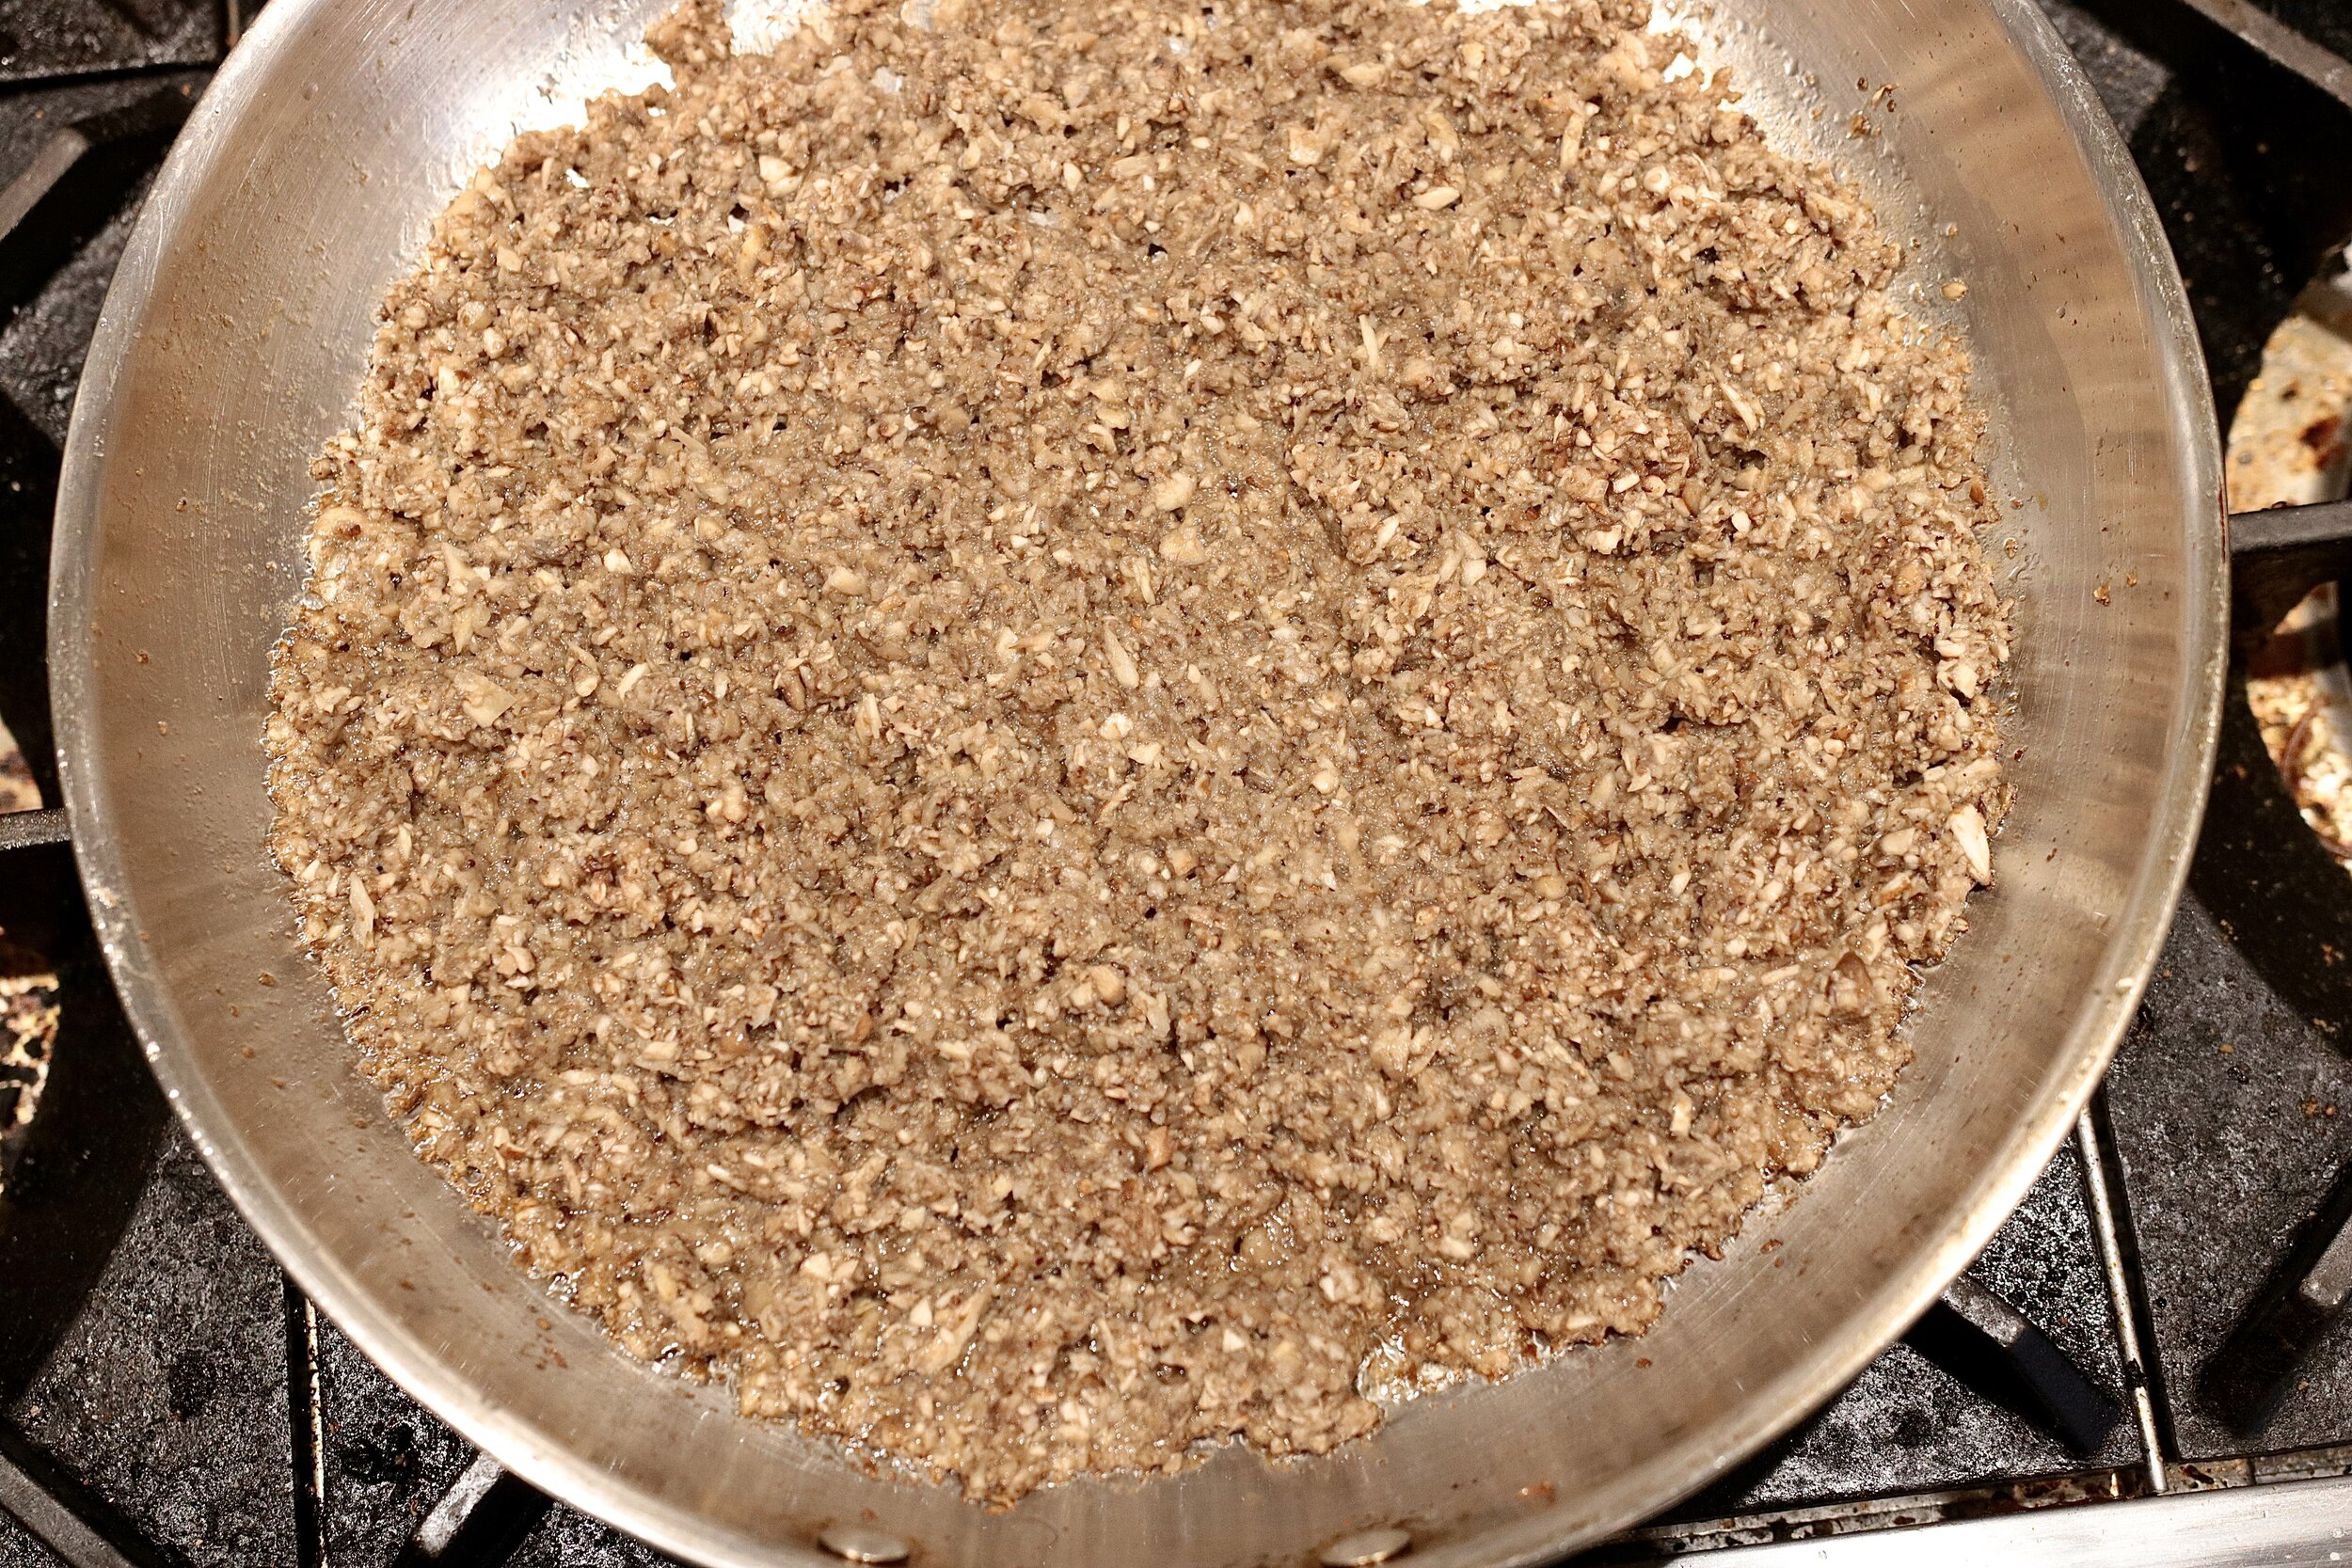
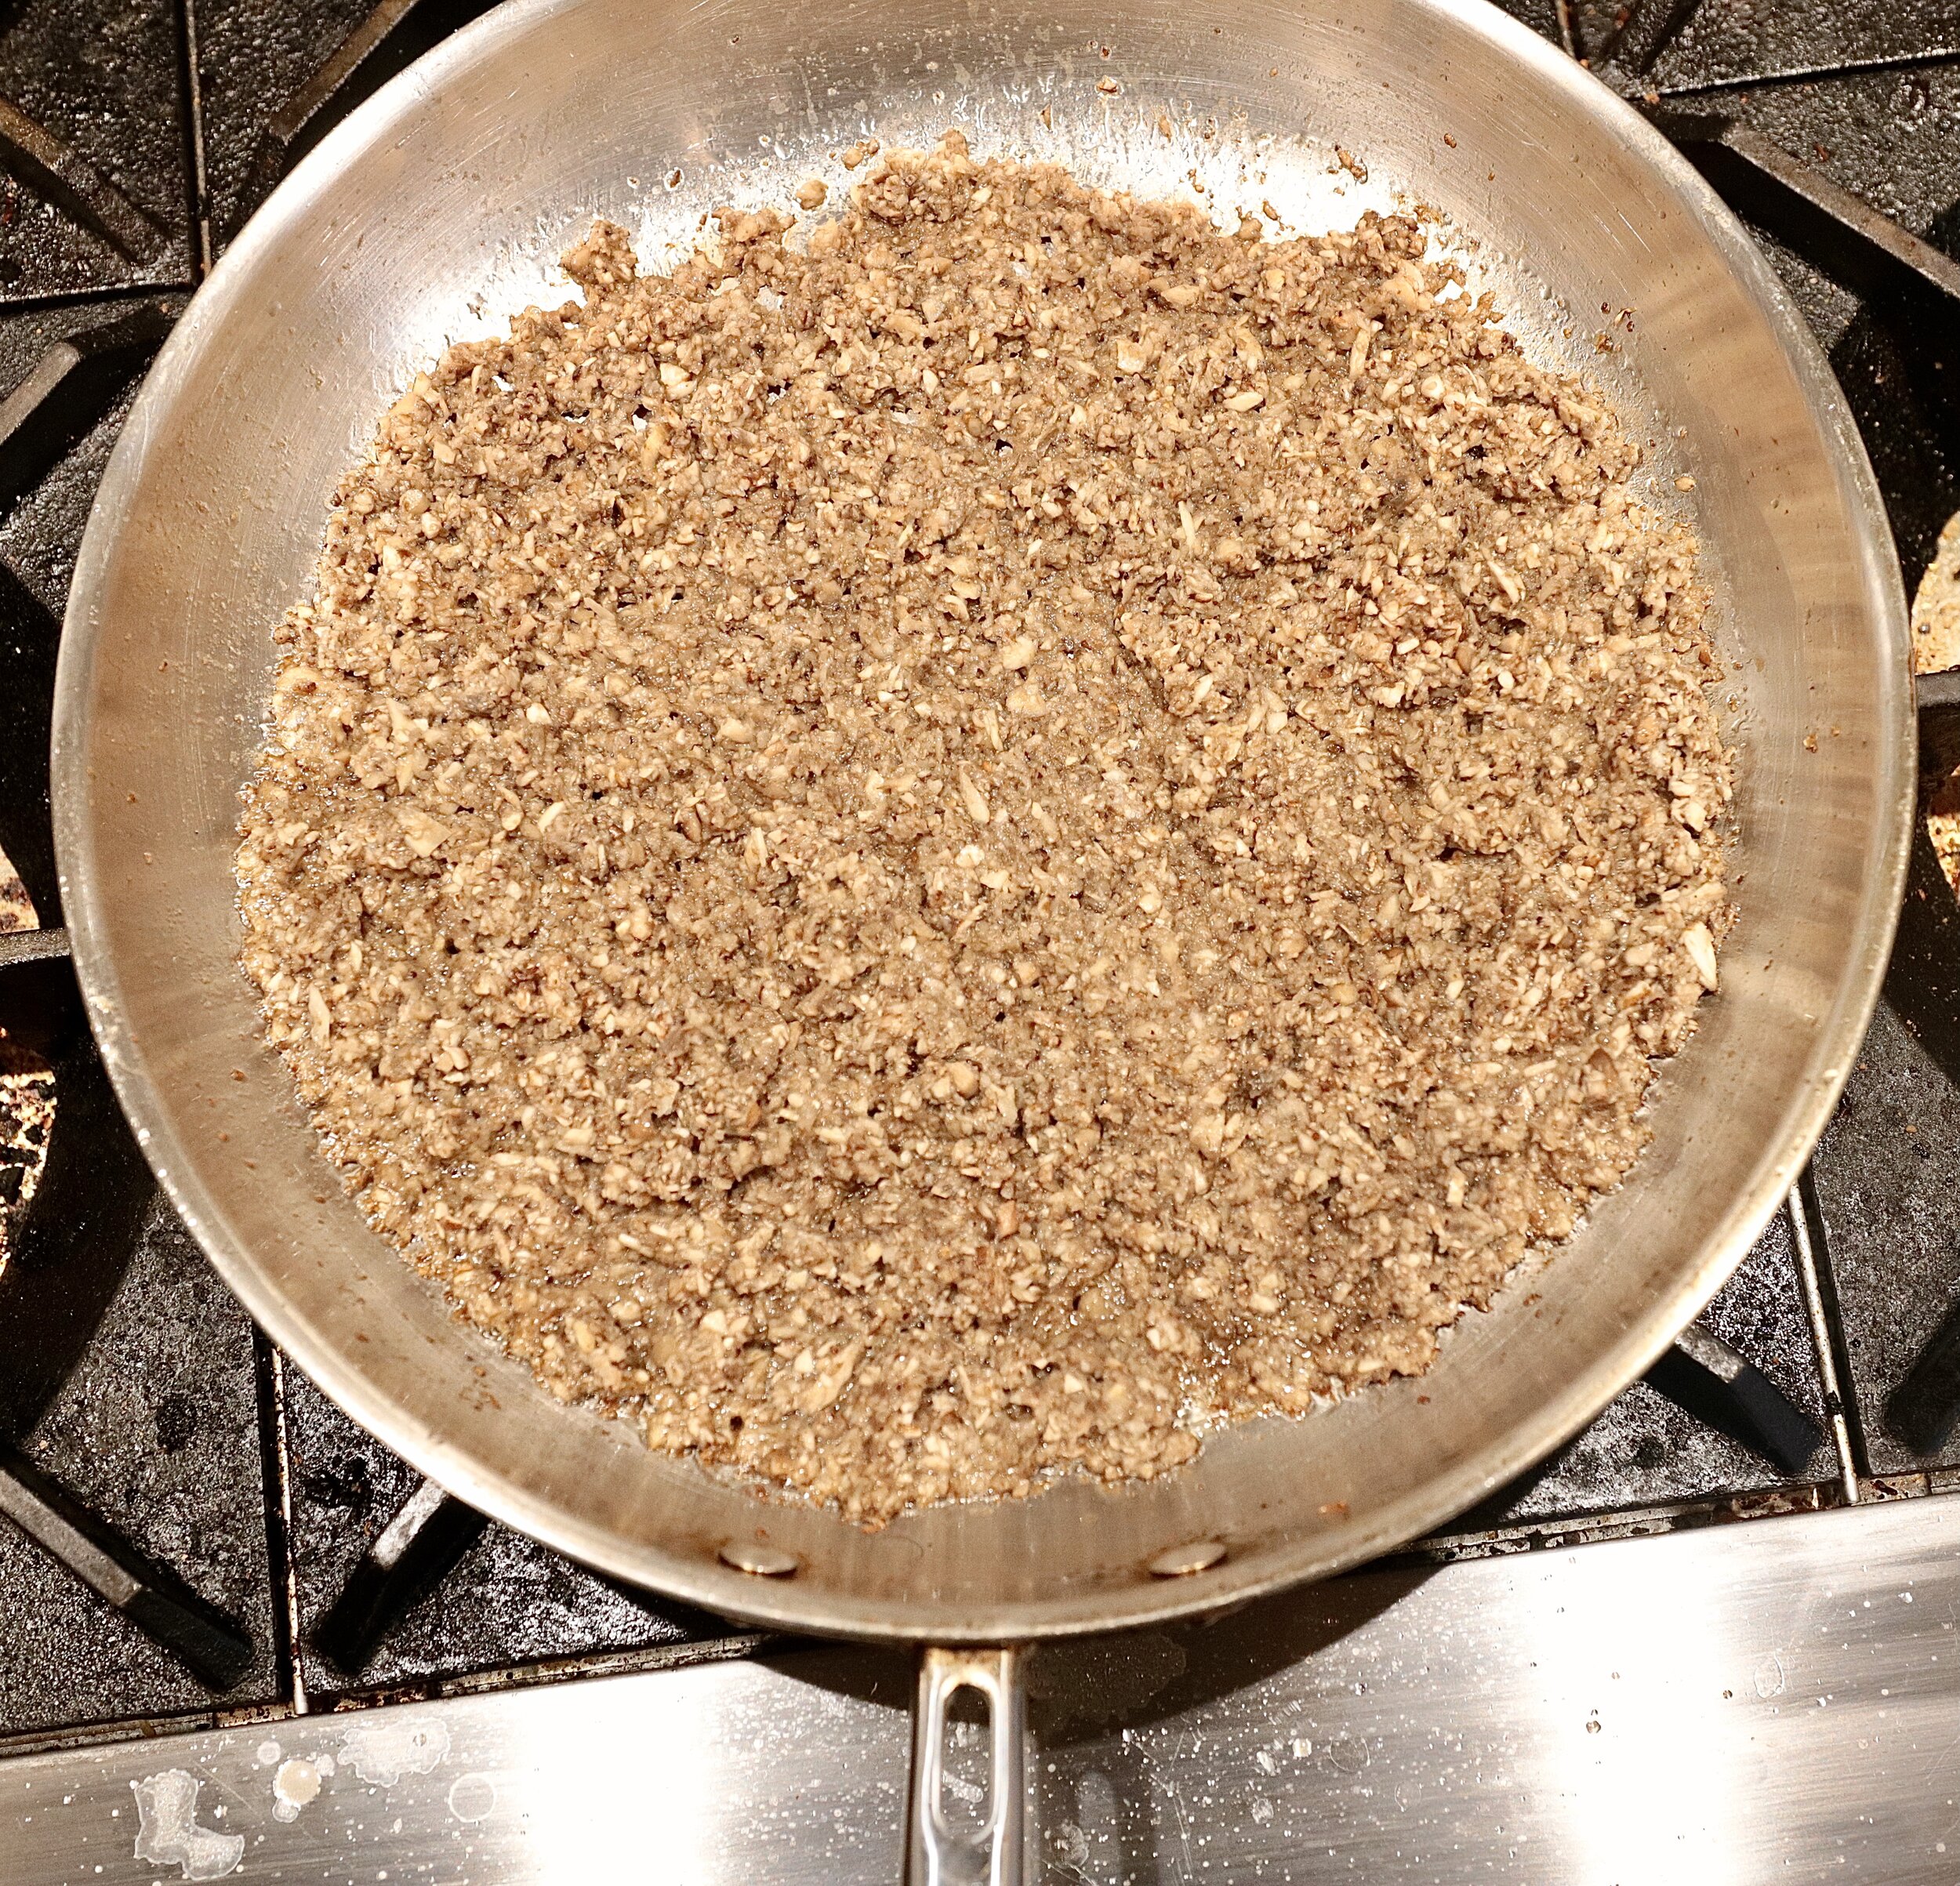
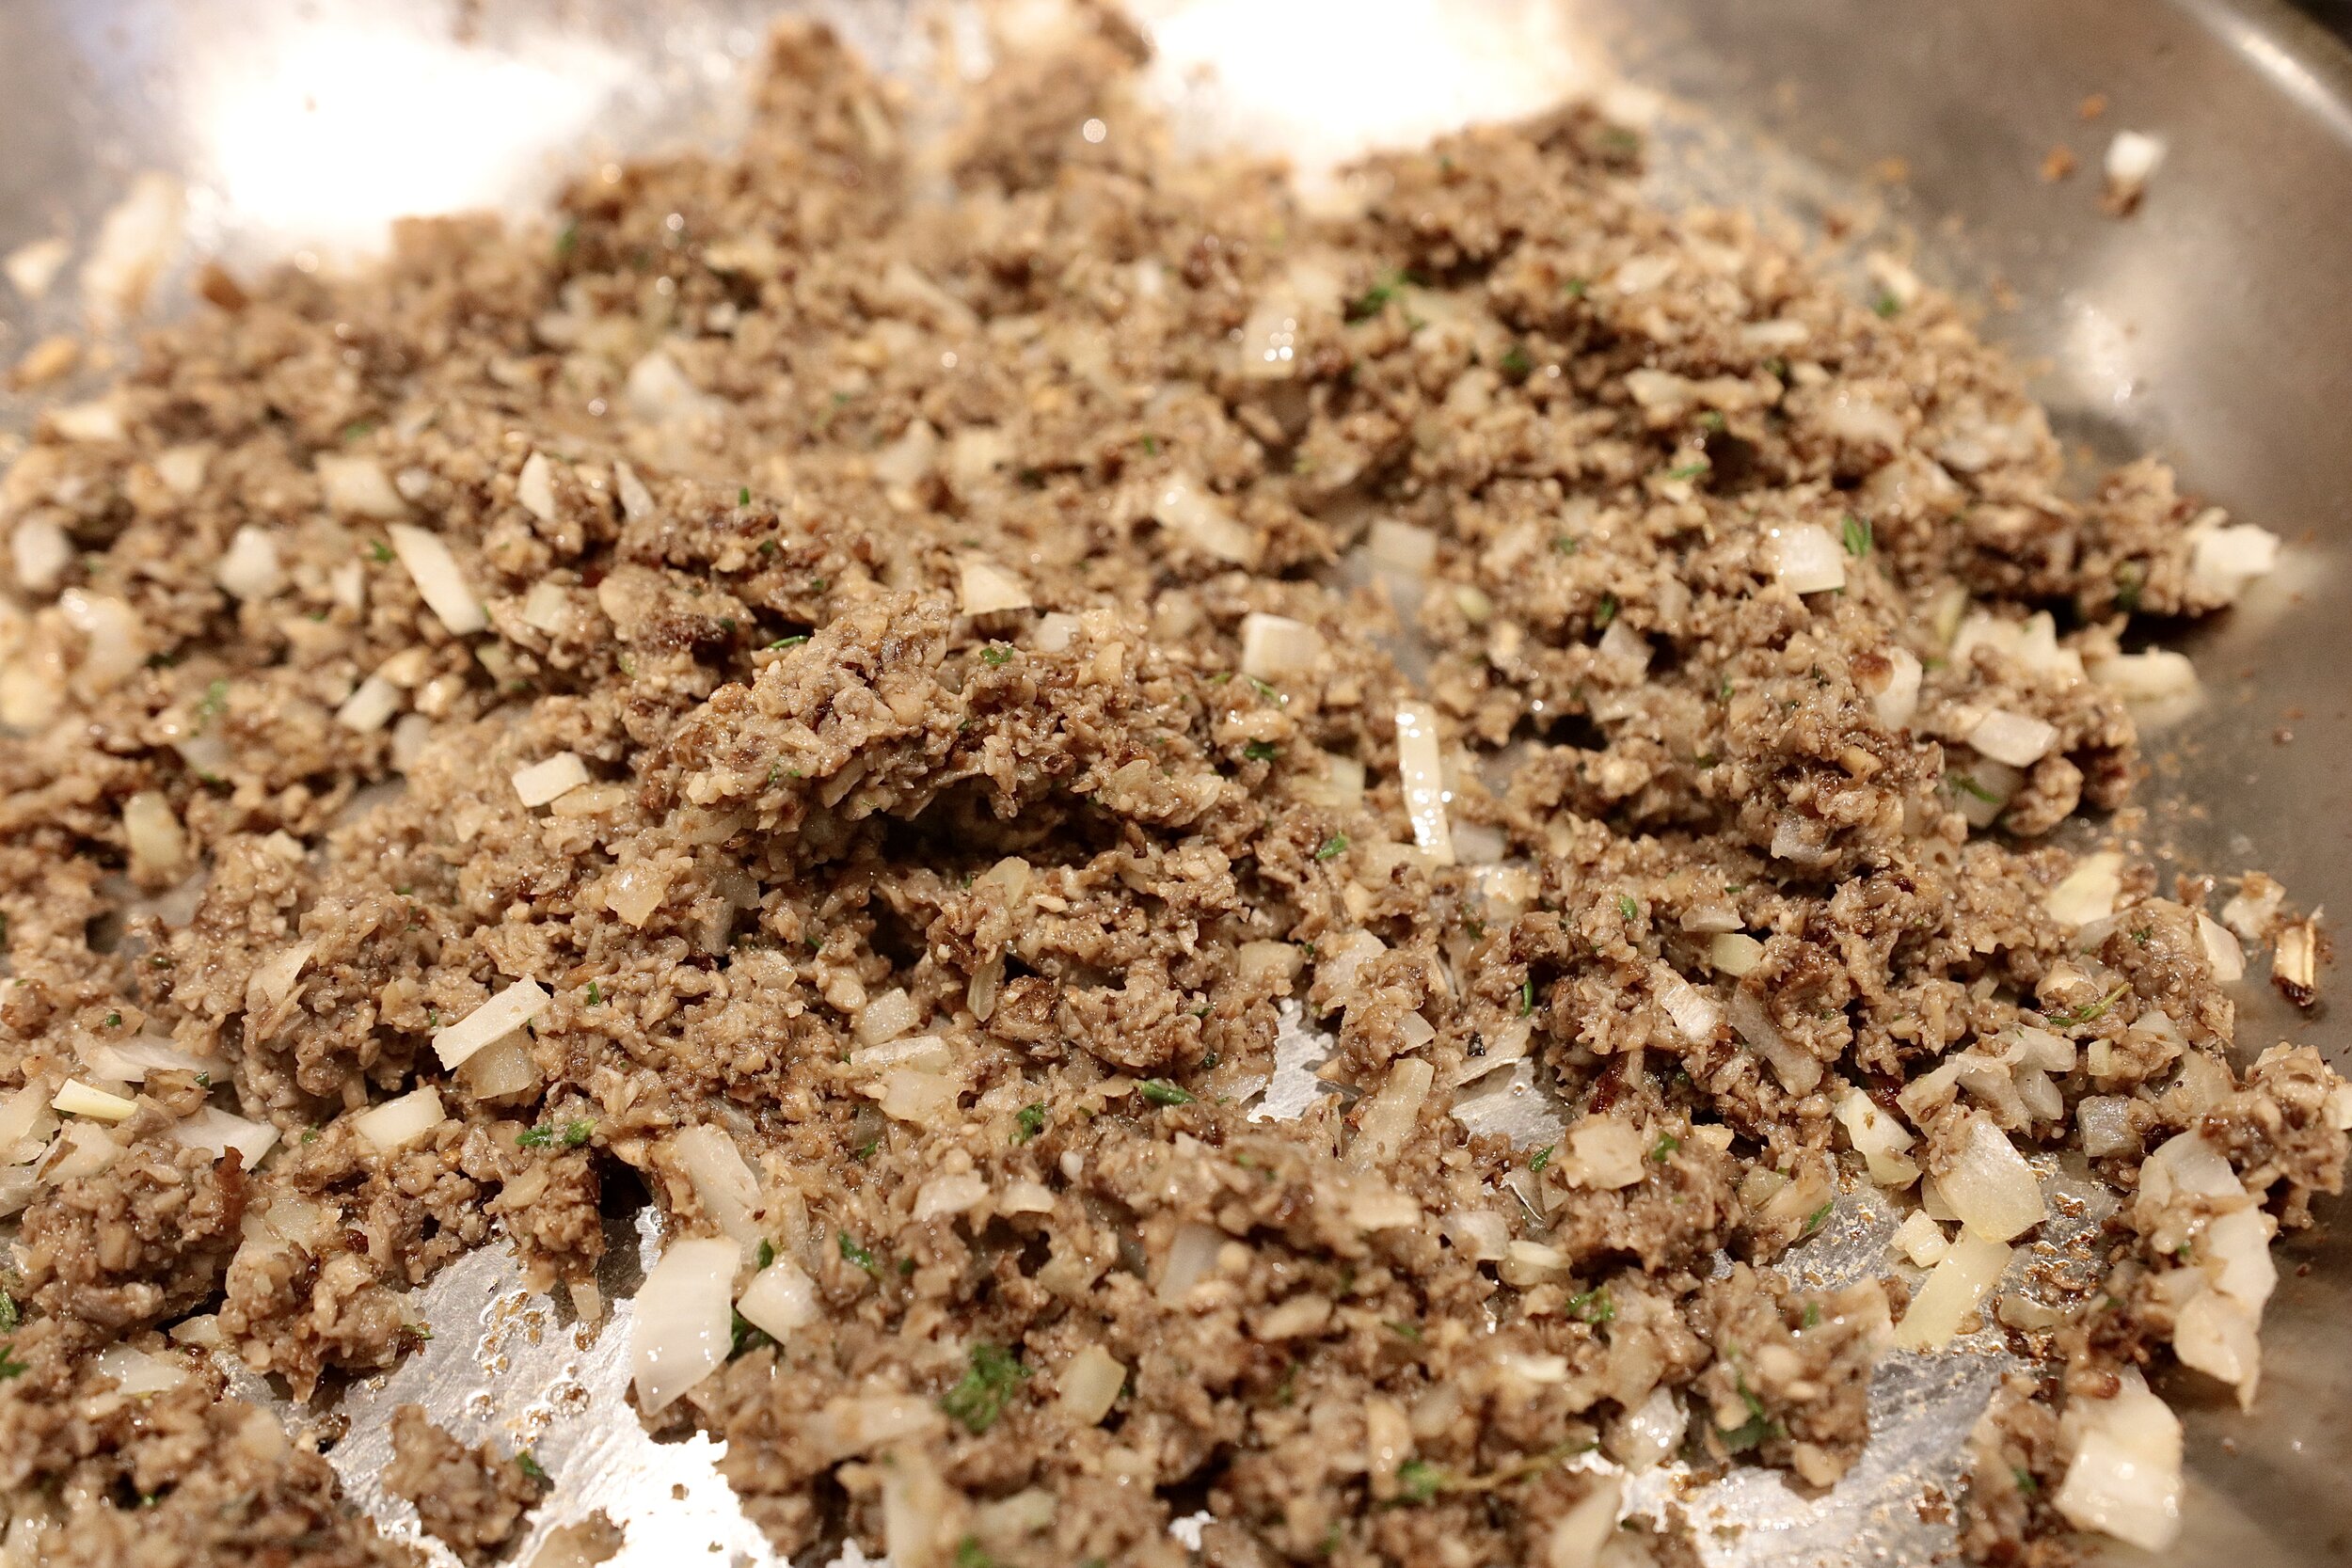
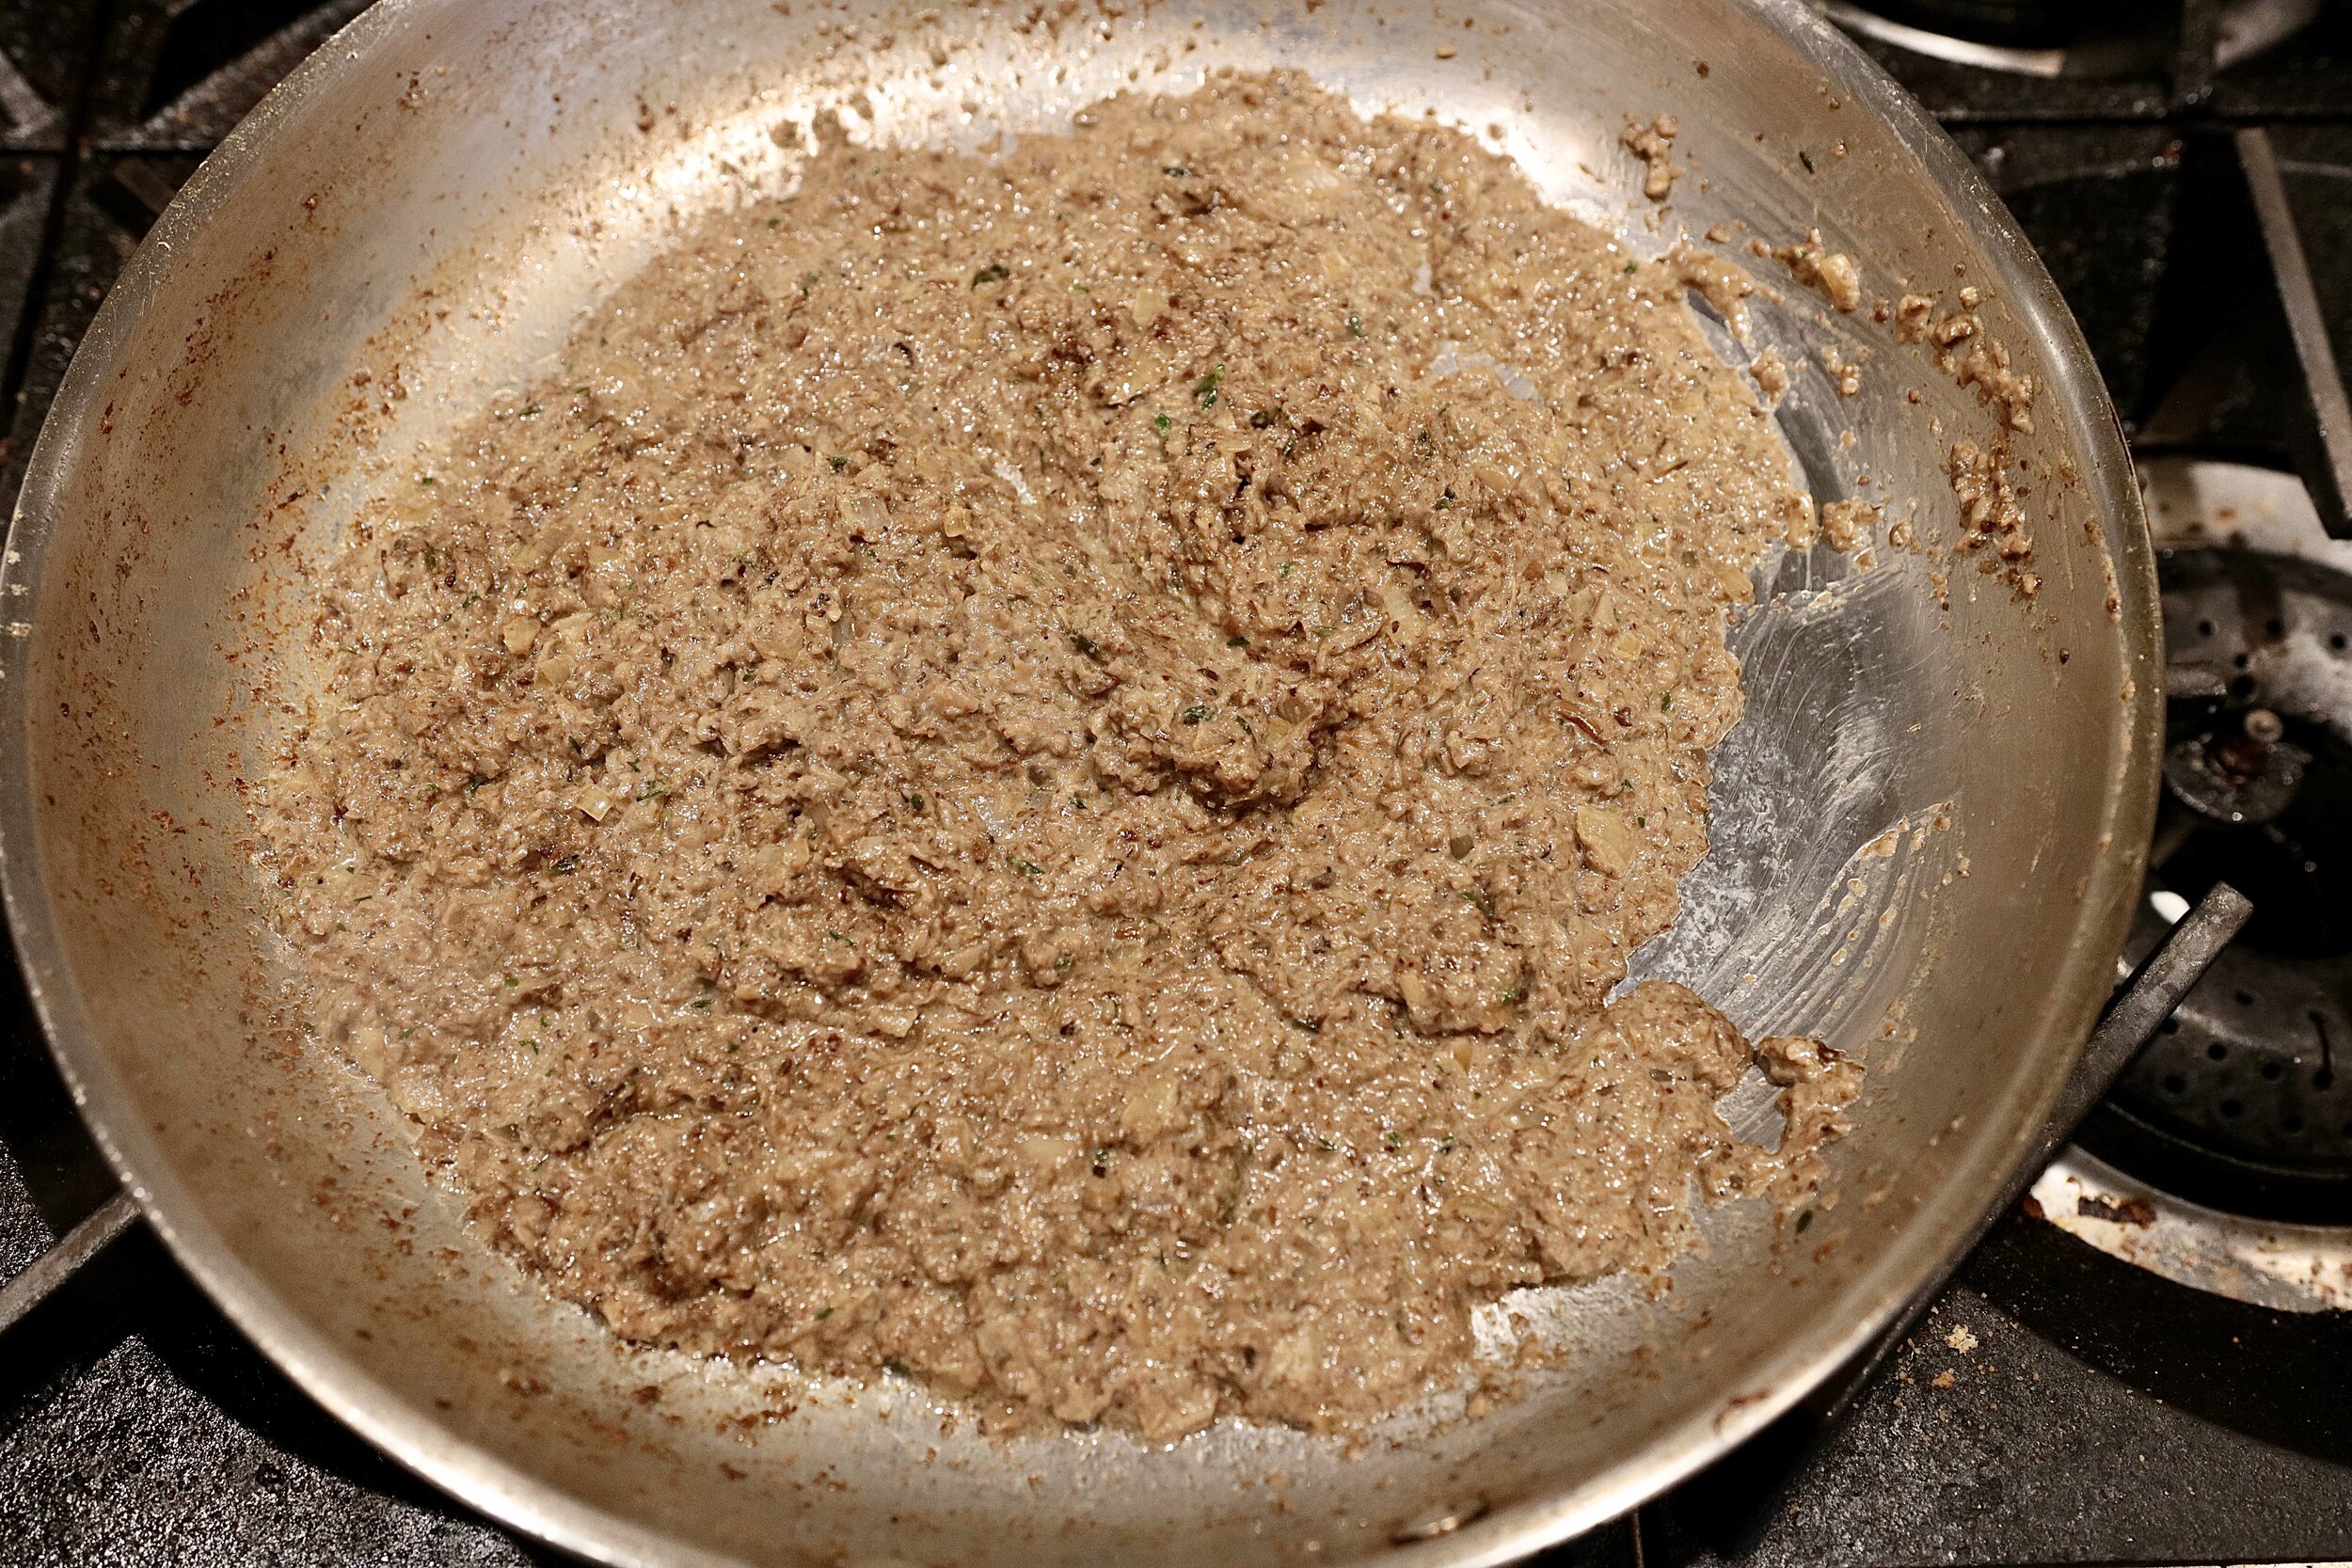
6. Add brandy. Scrape bottom of skillet with a silicone spatula or wooden spoon to release browned bits. Continue to cook until brandy is nearly dry, about 4 minutes. Add heavy cream and soy sauce and continue to cook, stirring frequently until mixture is thick and collects in one large mass when you shake the skillet. Season to taste with salt and pepper. Transfer to a bowl and place in the refrigerator.

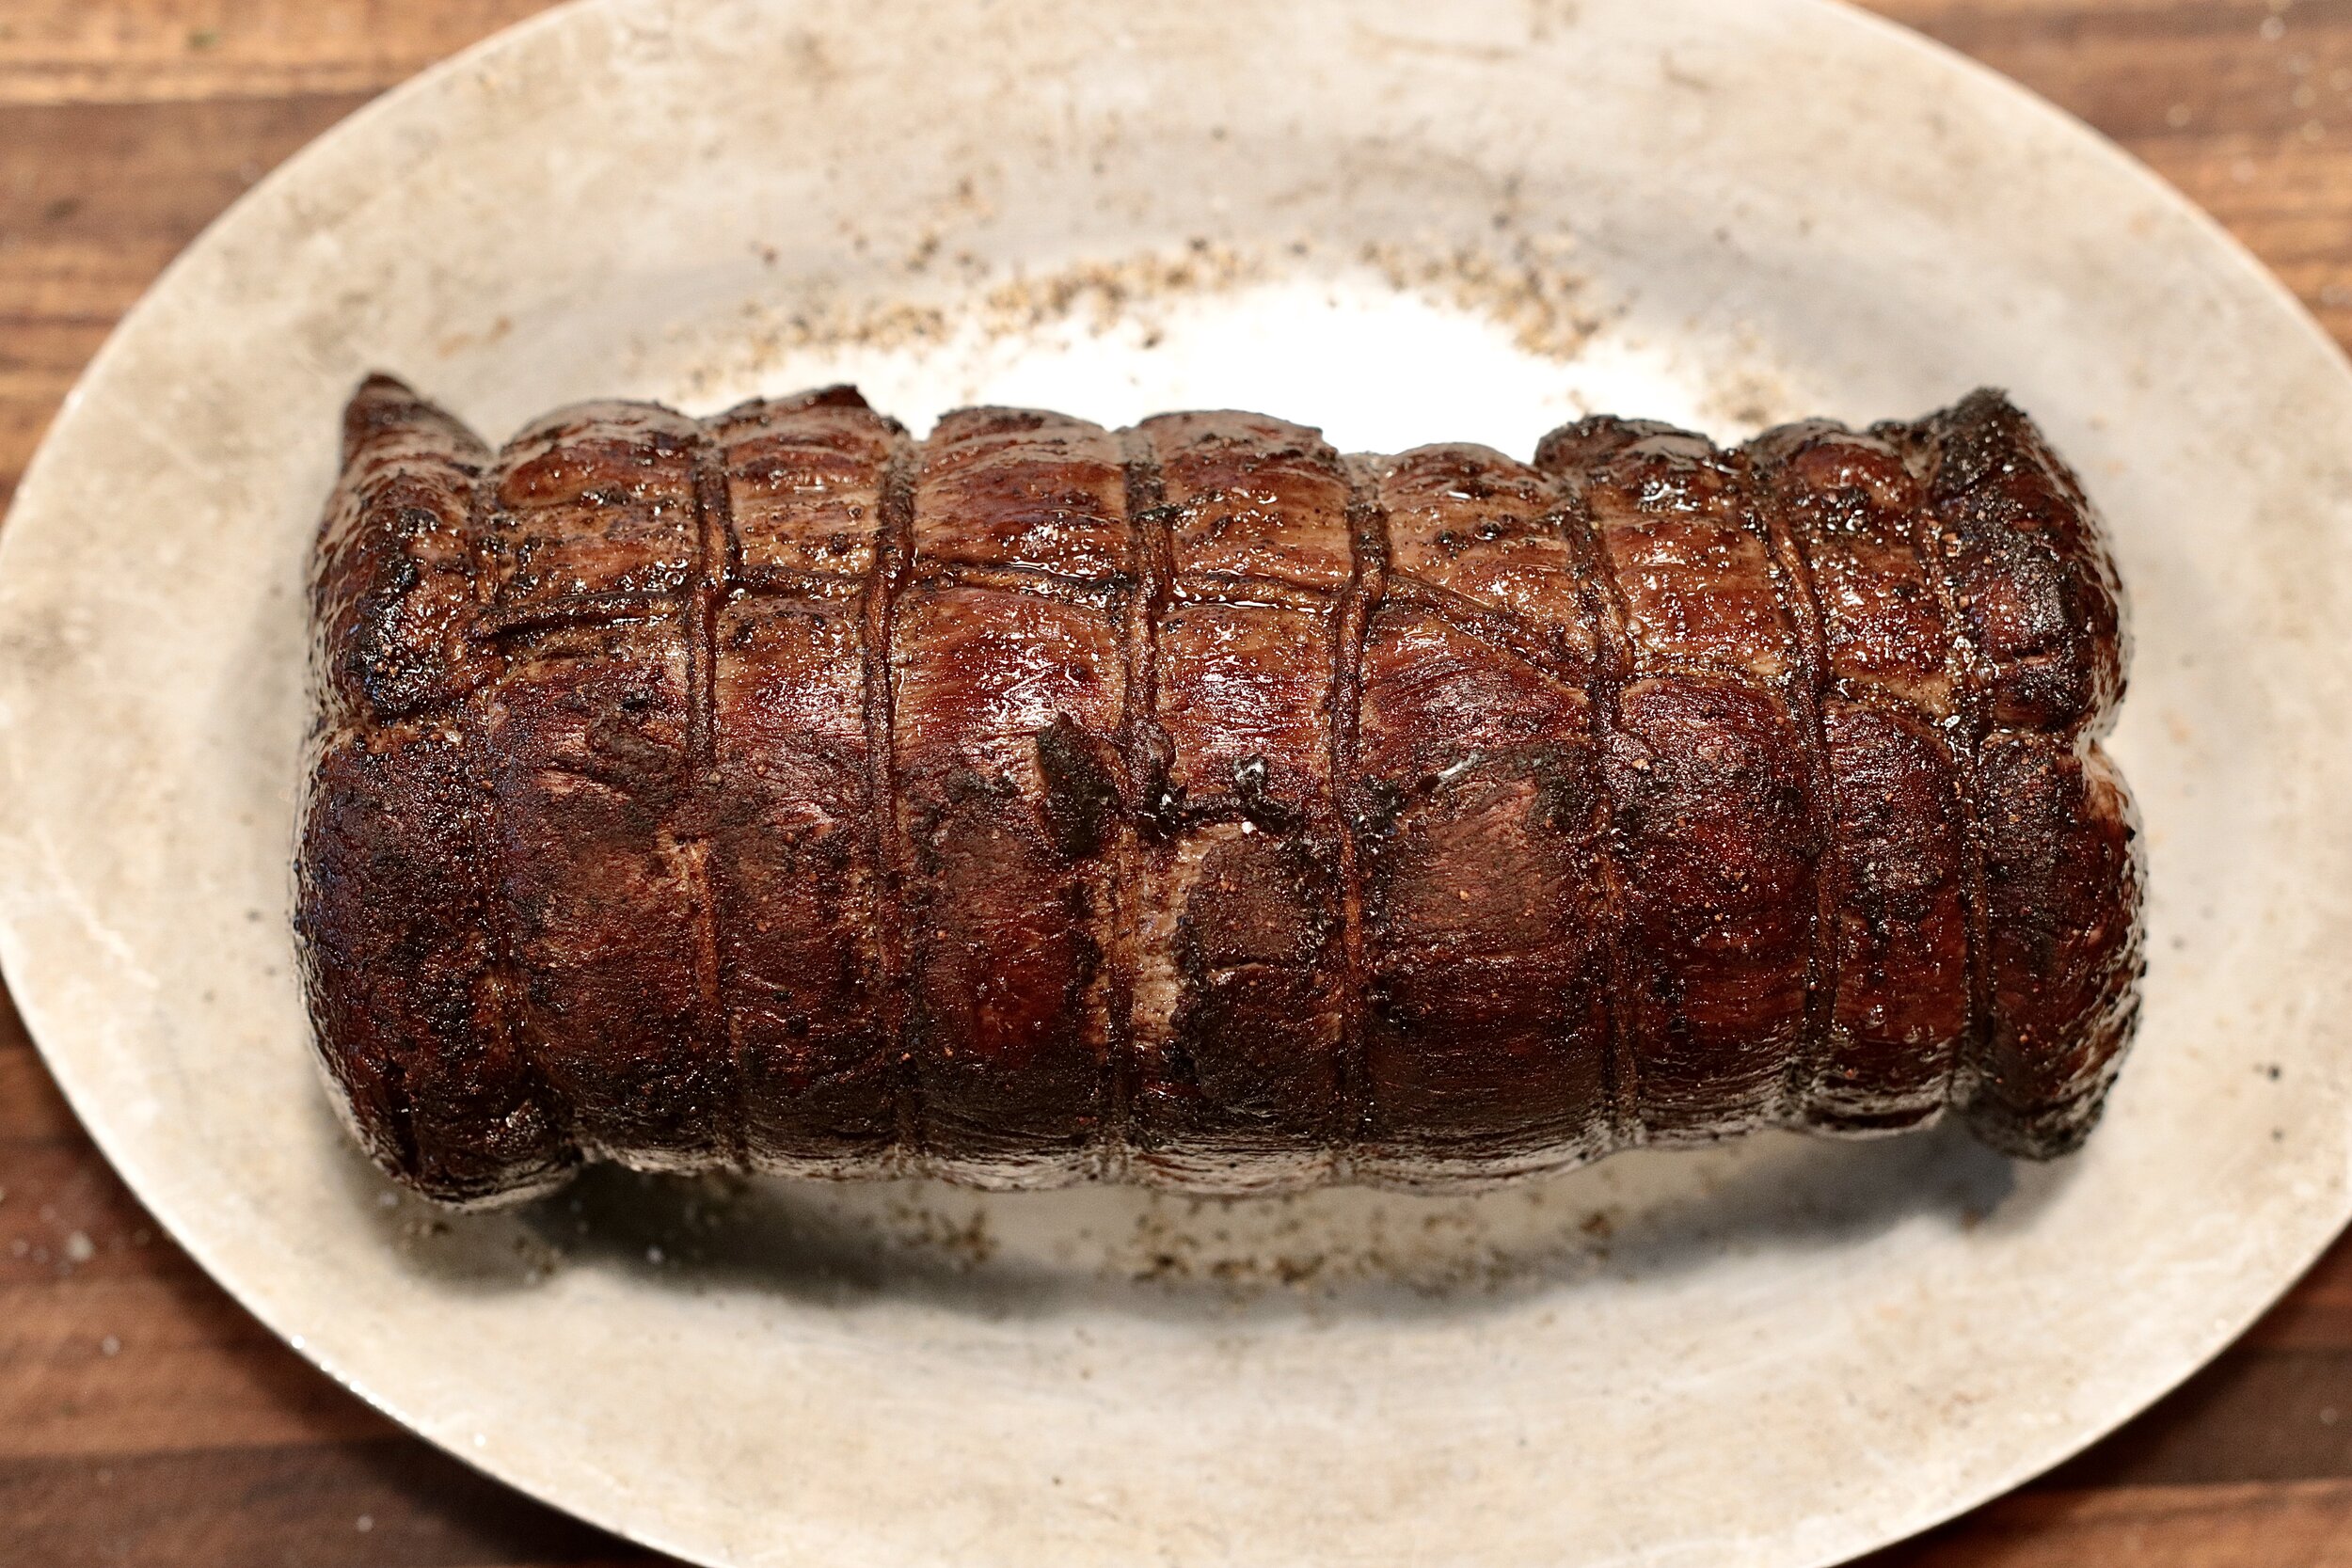
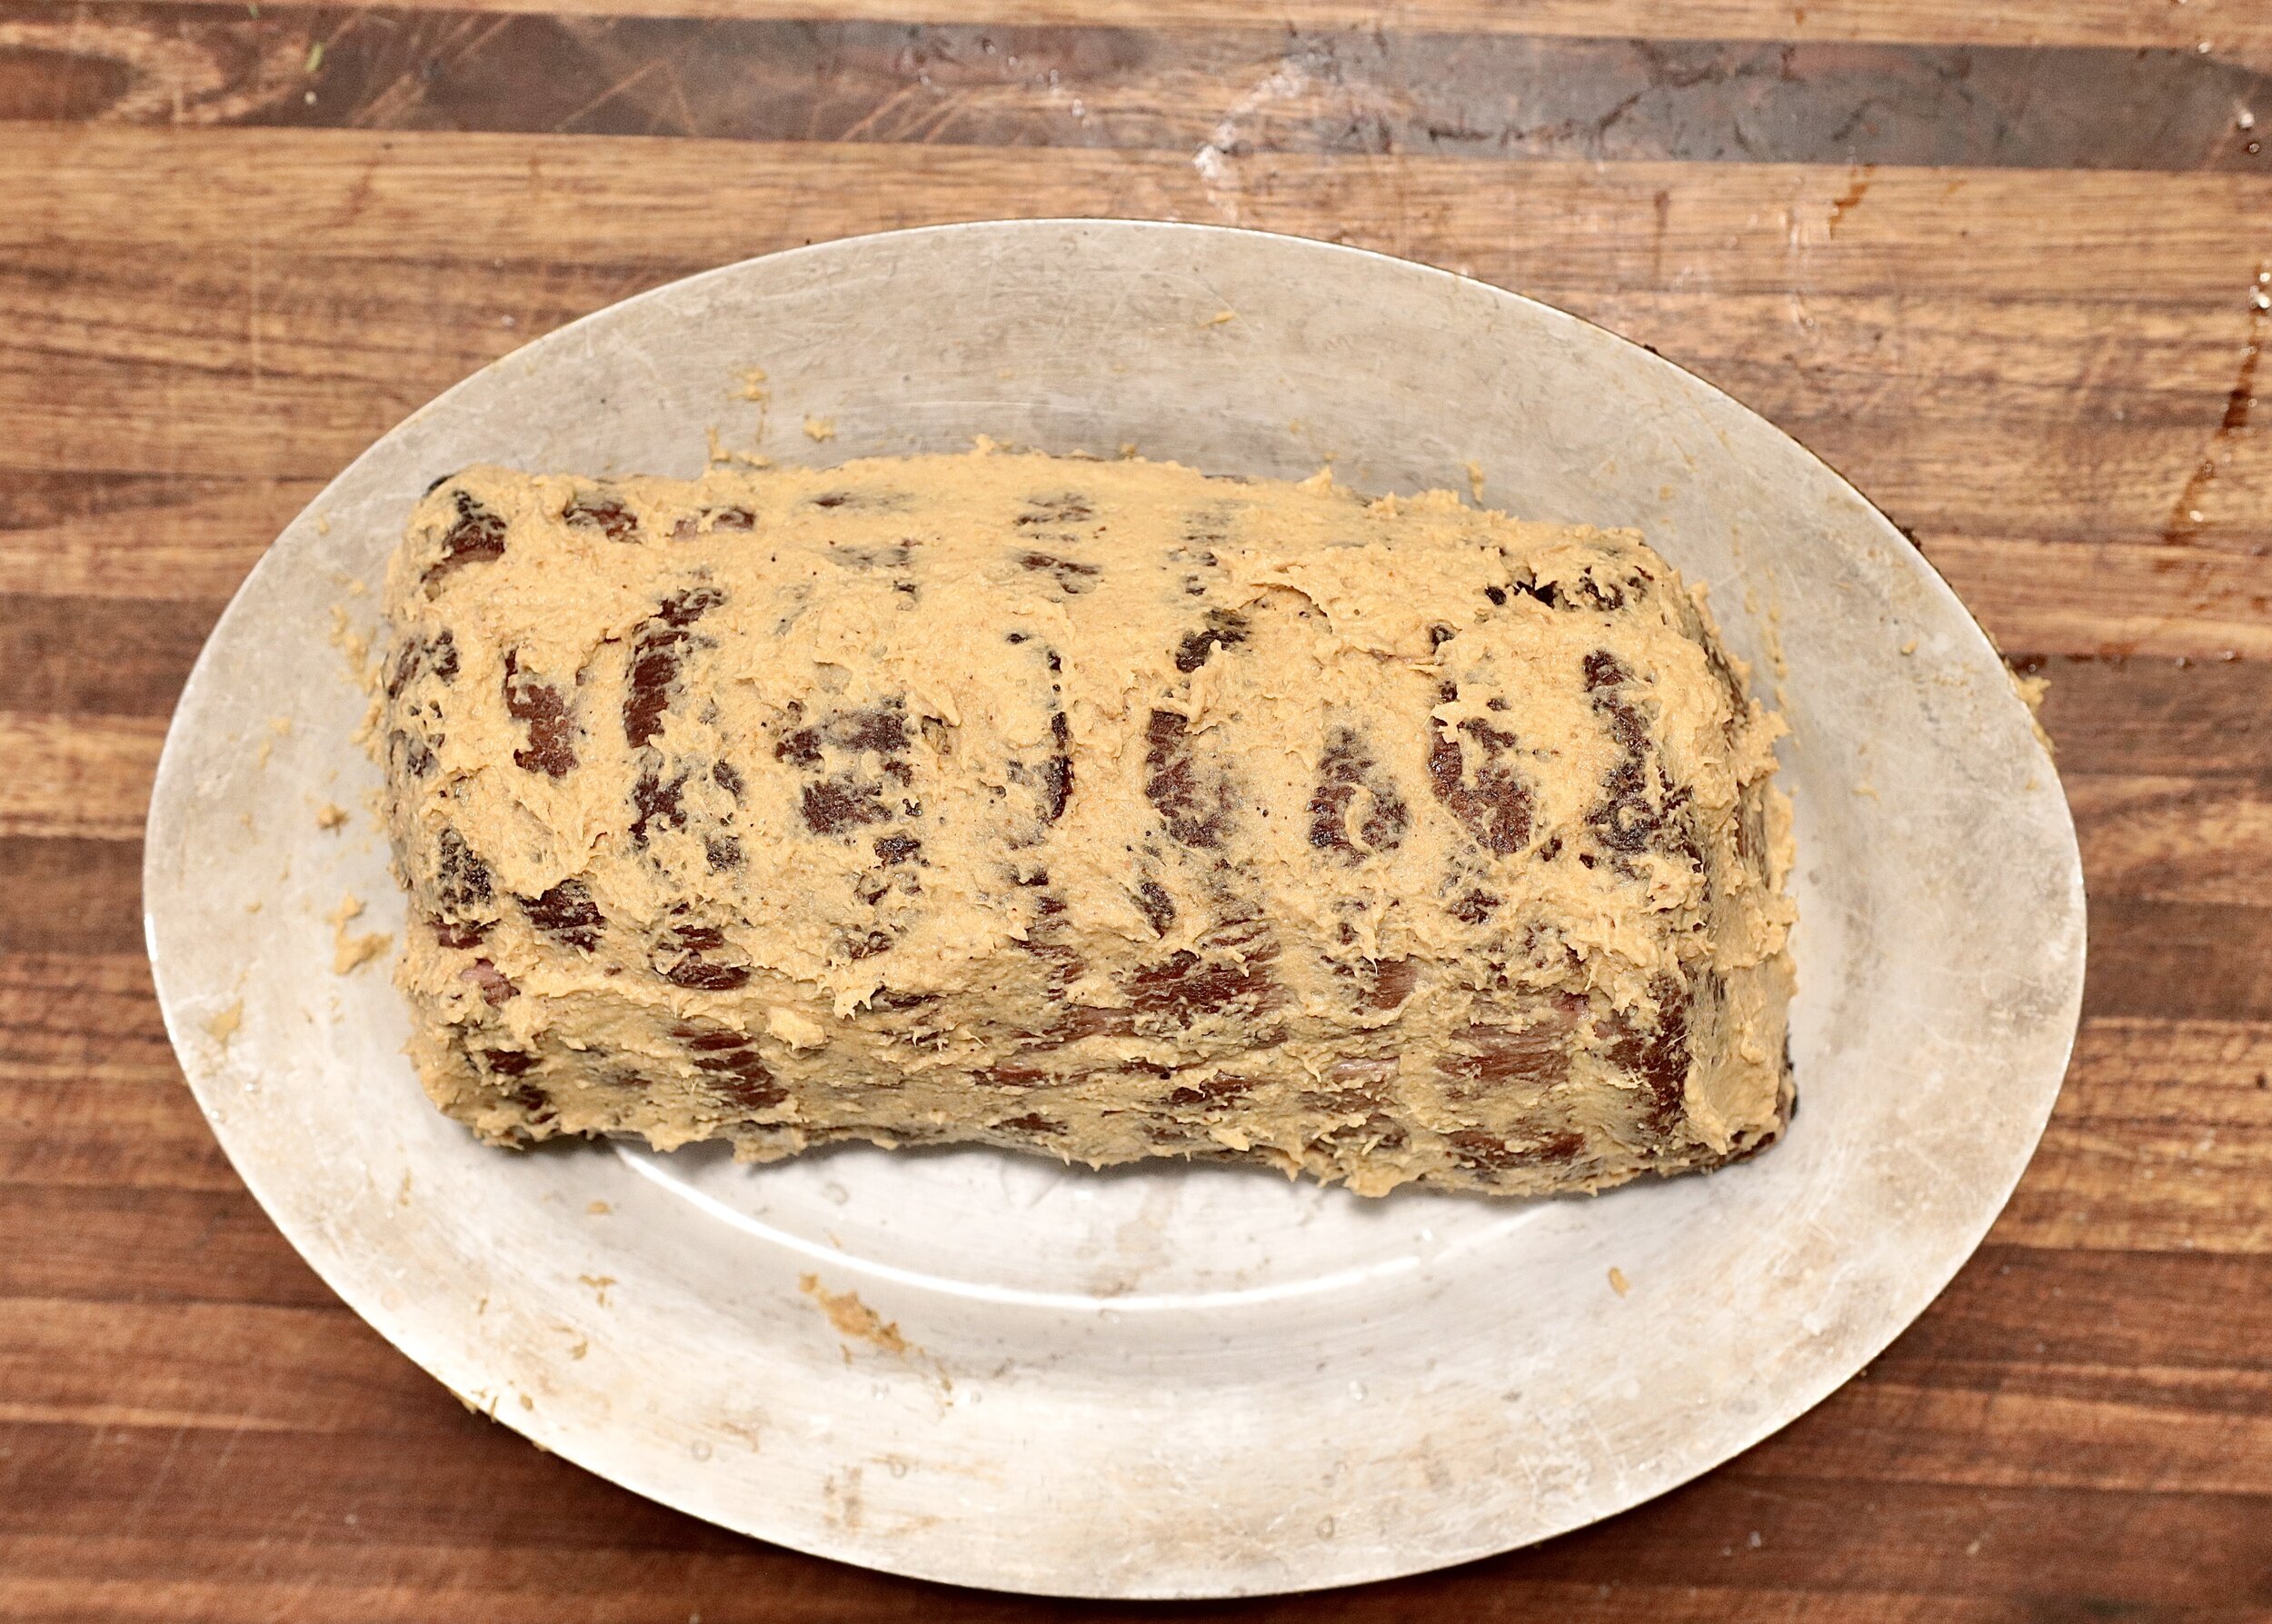
7. Combine horseradish, mustard, and 1 teaspoon black pepper in a small bowl. When tenderloin is cool enough to handle, cut off and discard twine, then rub on all surfaces with horseradish/mustard mixture. Place in refrigerator, uncovered.

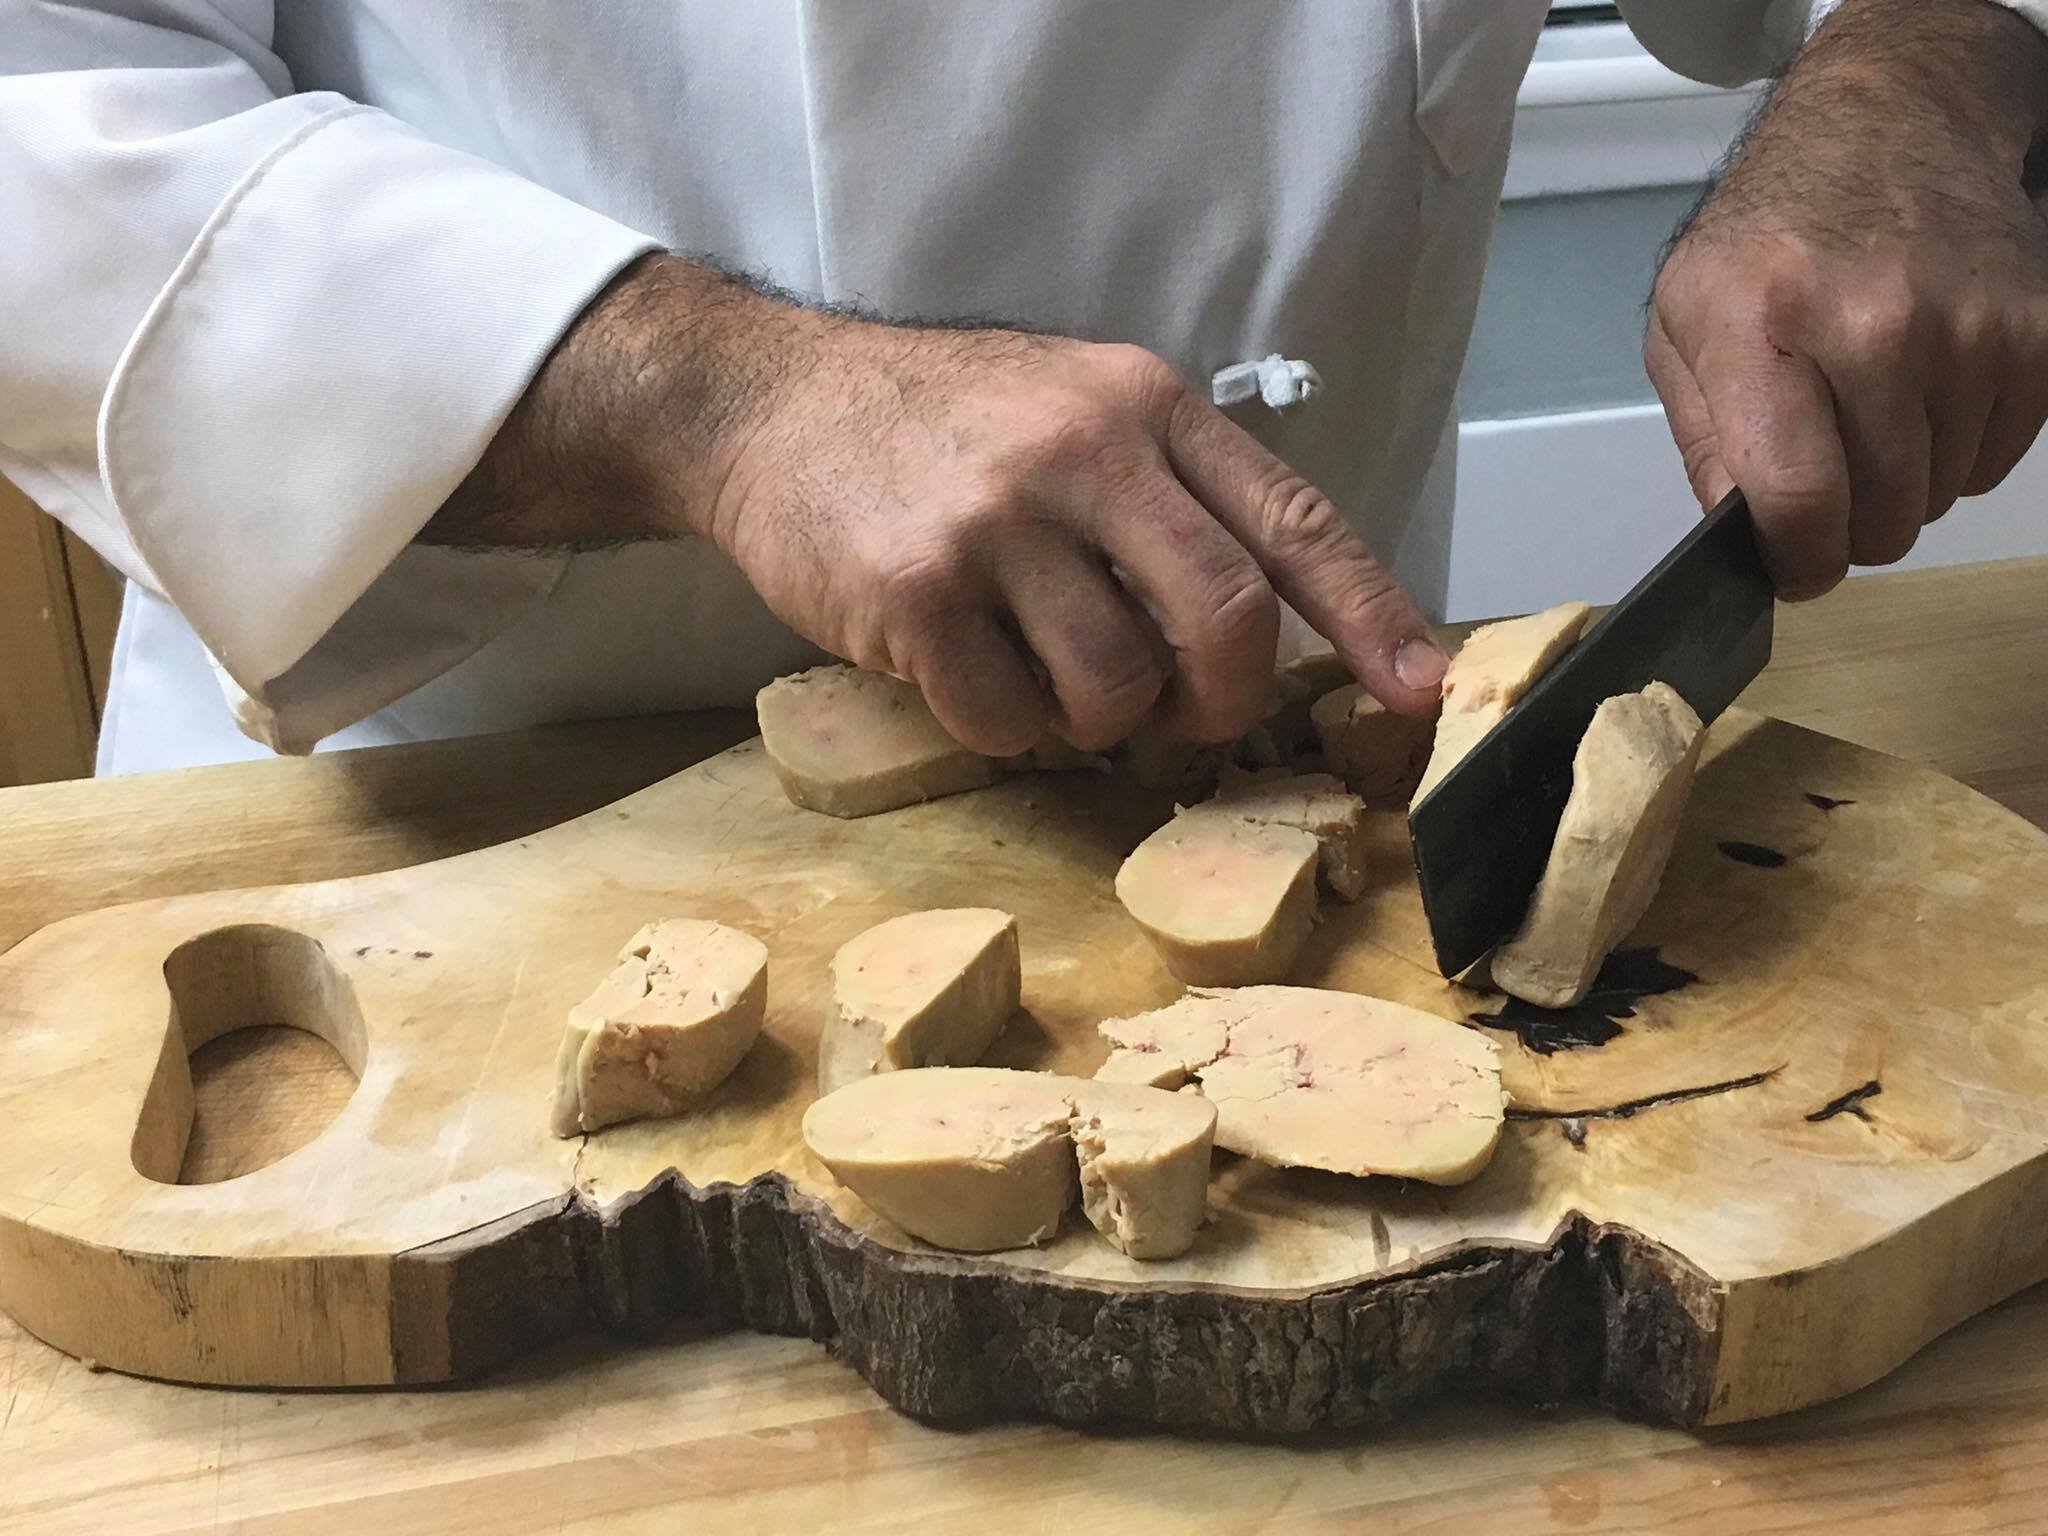
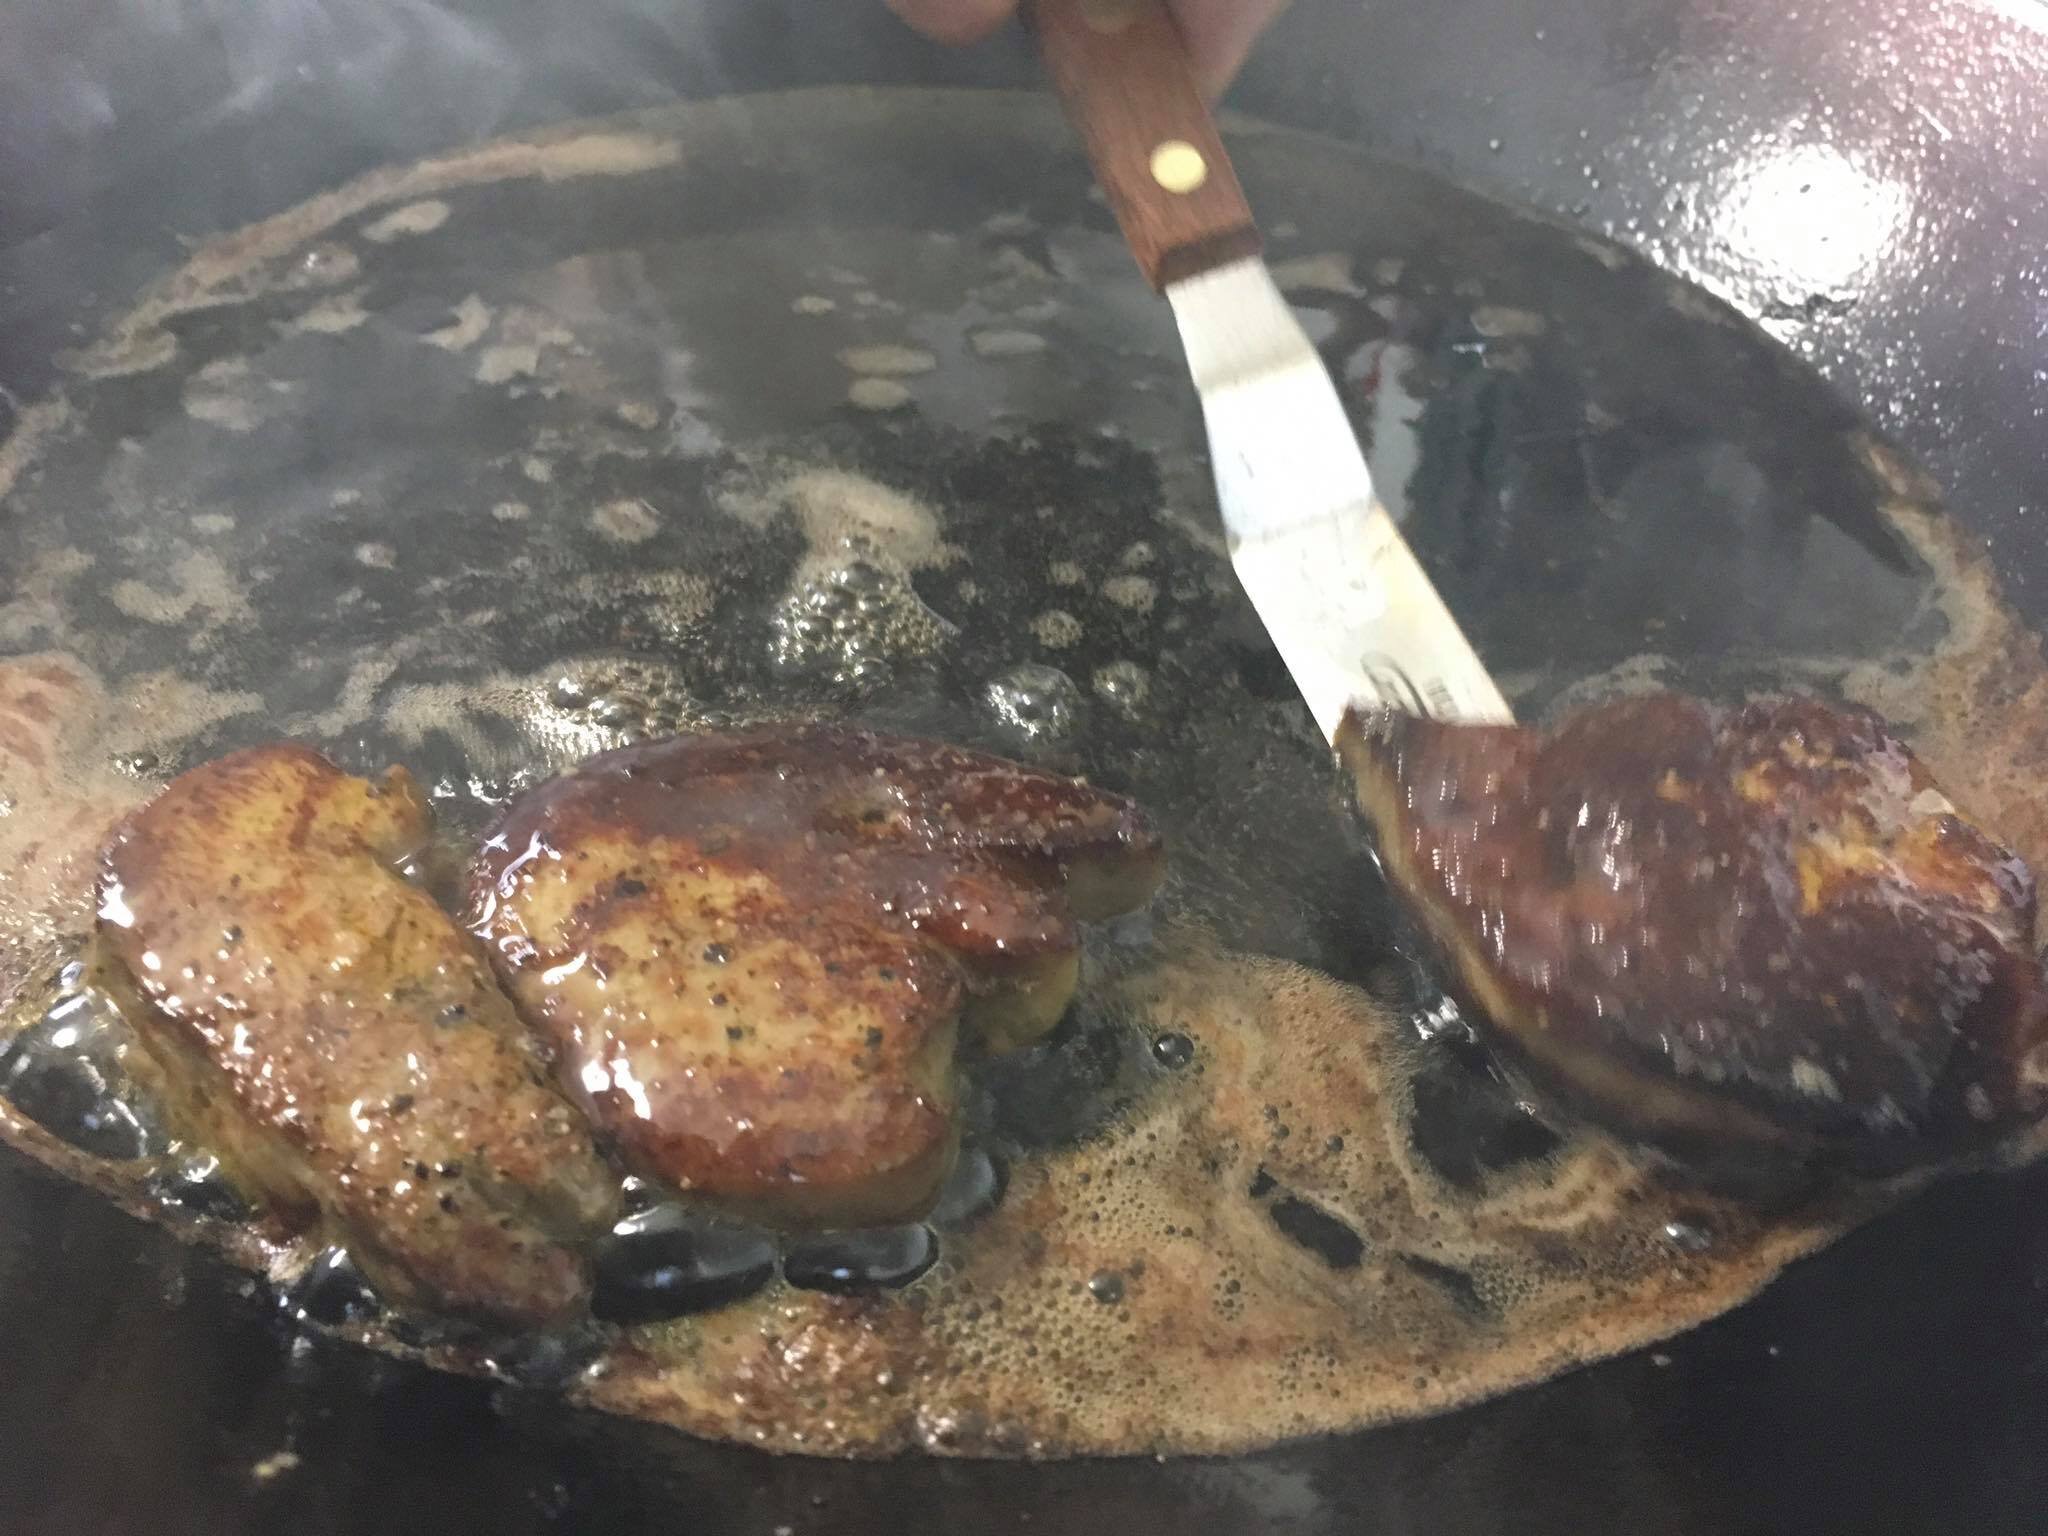
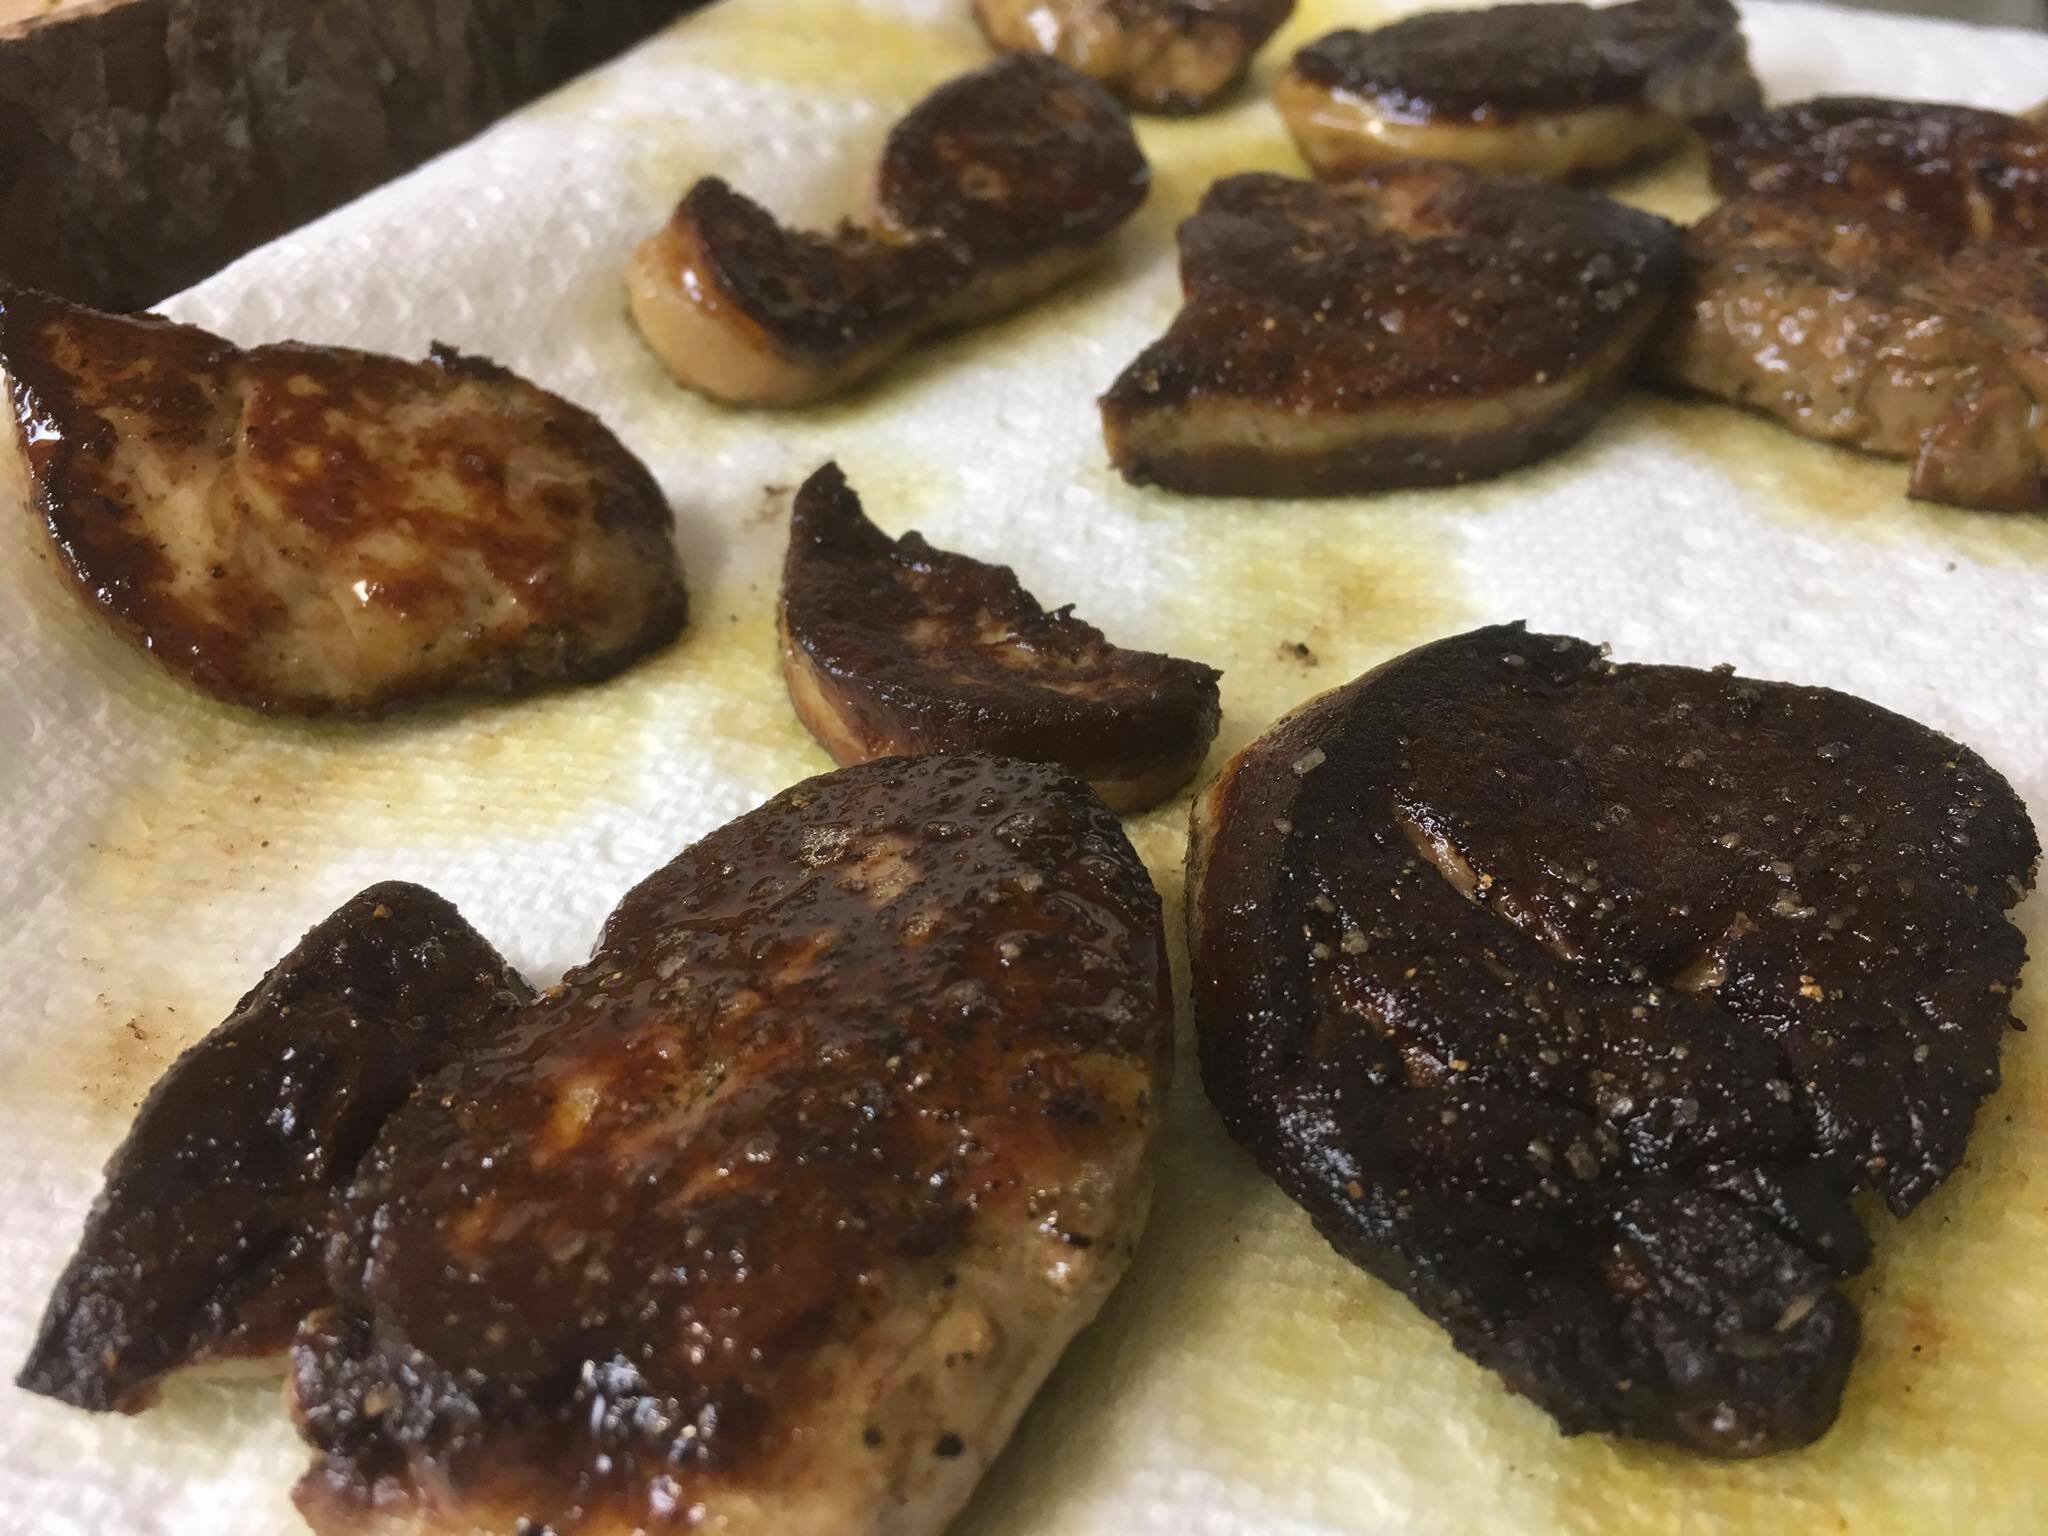
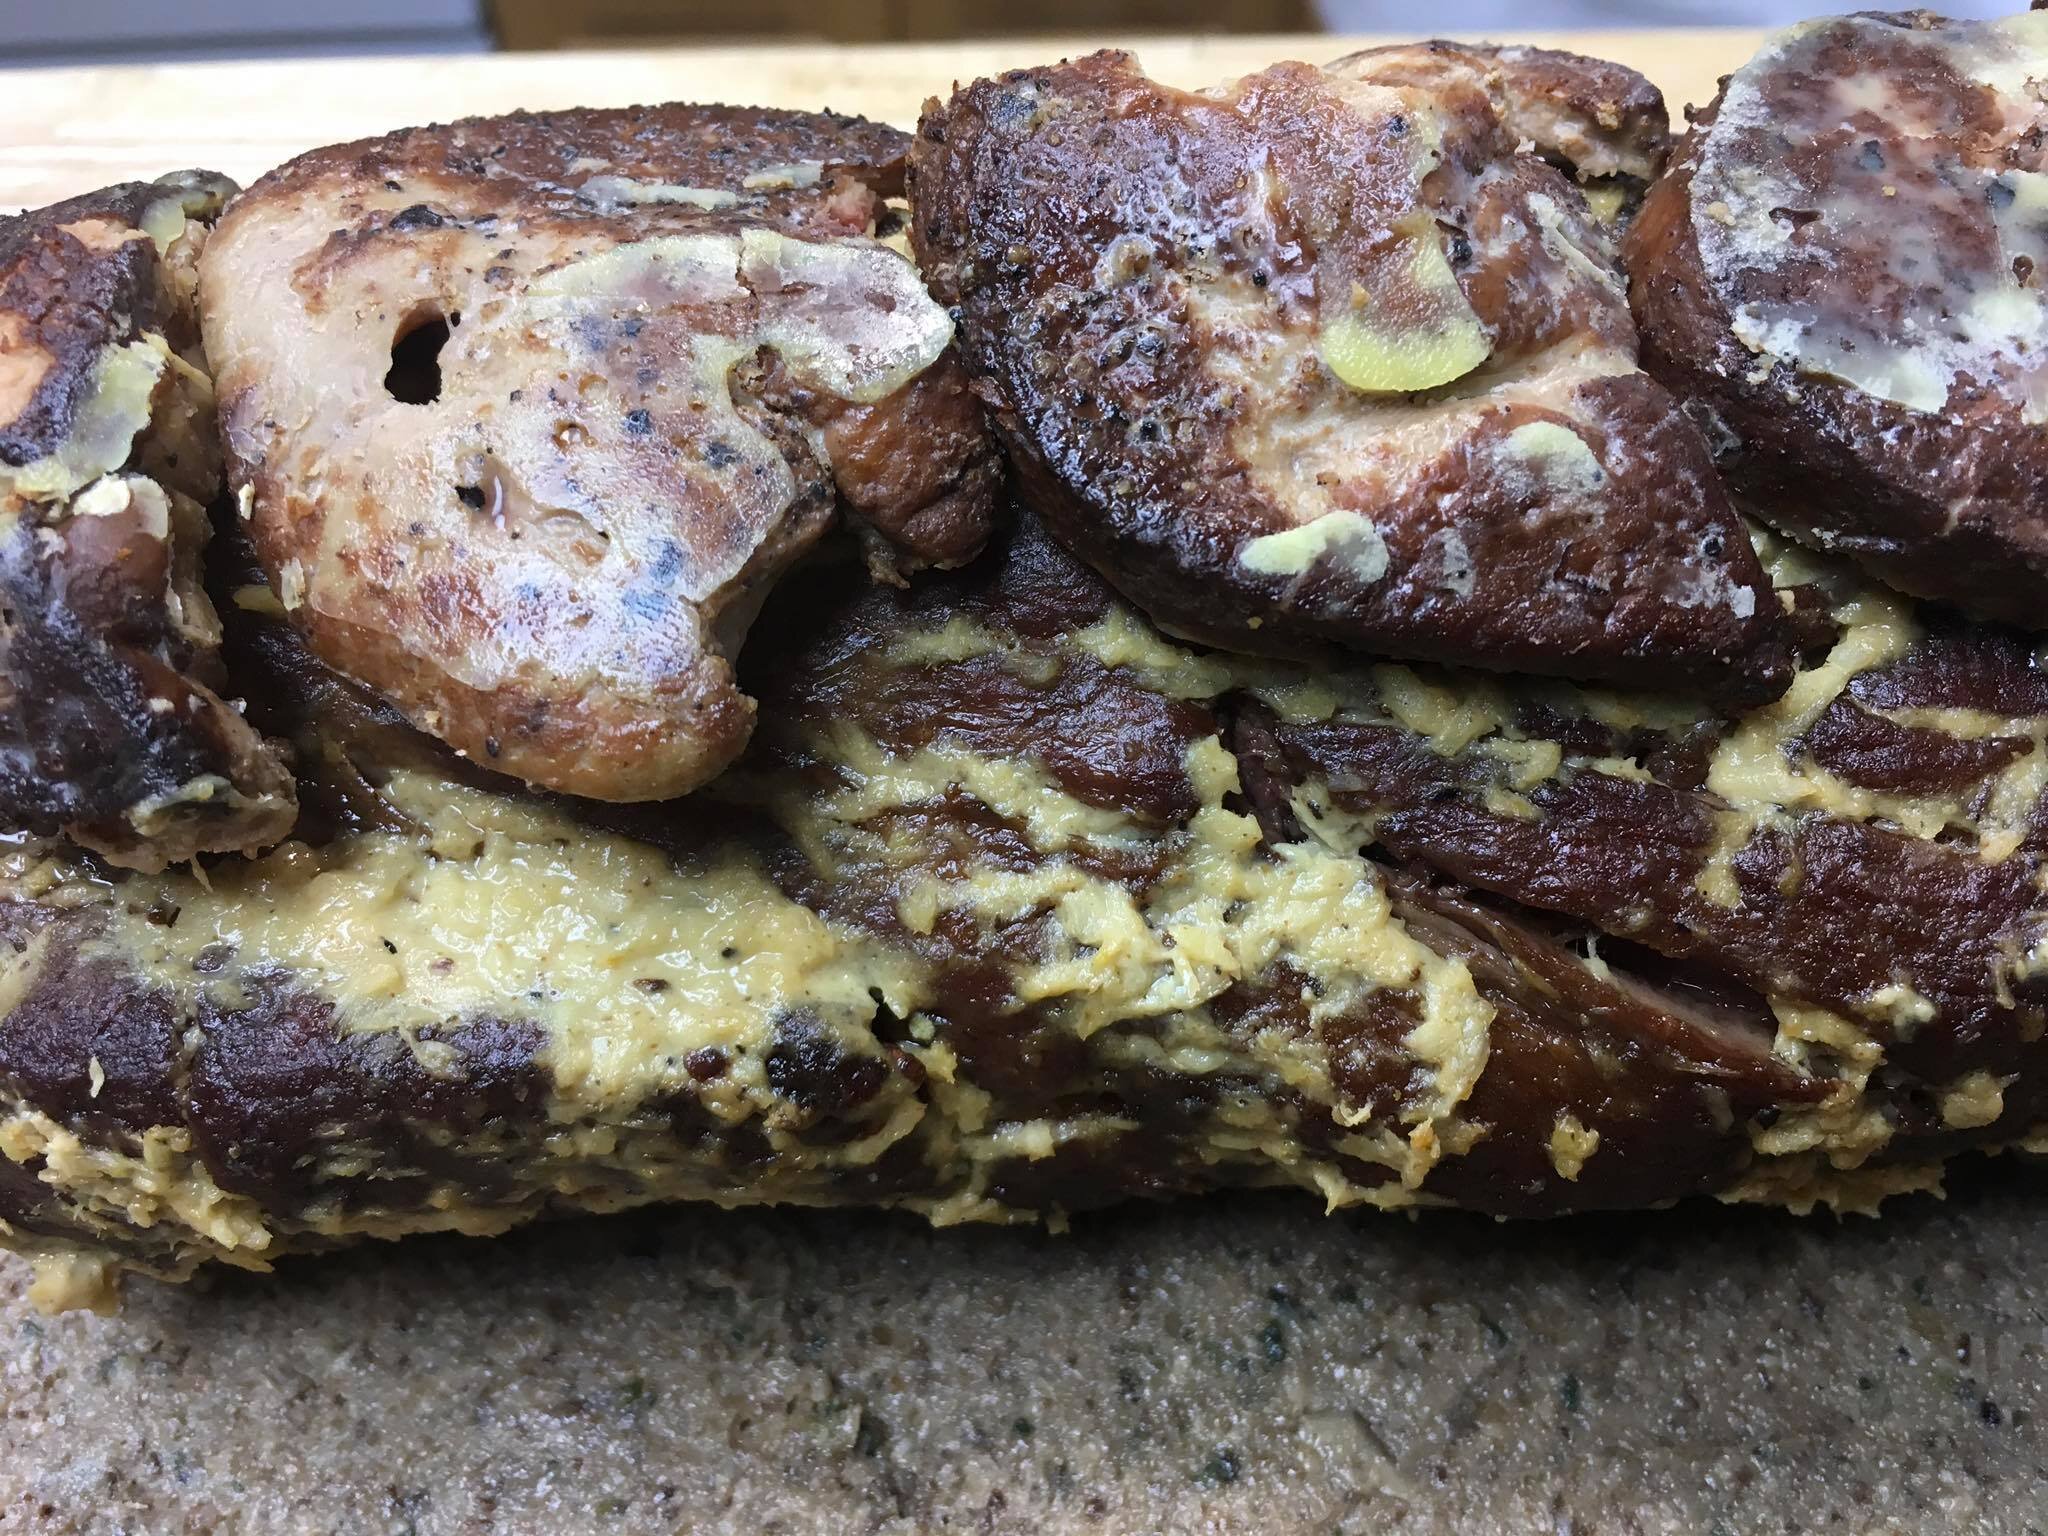
8. If using foie gras, slice it into 1/2 inch slices. Then sear, using the 2 pan method ensuring the pan is ripping hot with each sear. Put foie gras in ripping hot pan 1, searing side 1. Then flip to other side in pan 2 that’s ripping hot. This gives pan 1, then pan 2 time to heat up again to ripping hot levels when you sear the next slice of foie gras. Let cool. Once cooled, slice in half again, creating a thinner slice, each with one seared side.
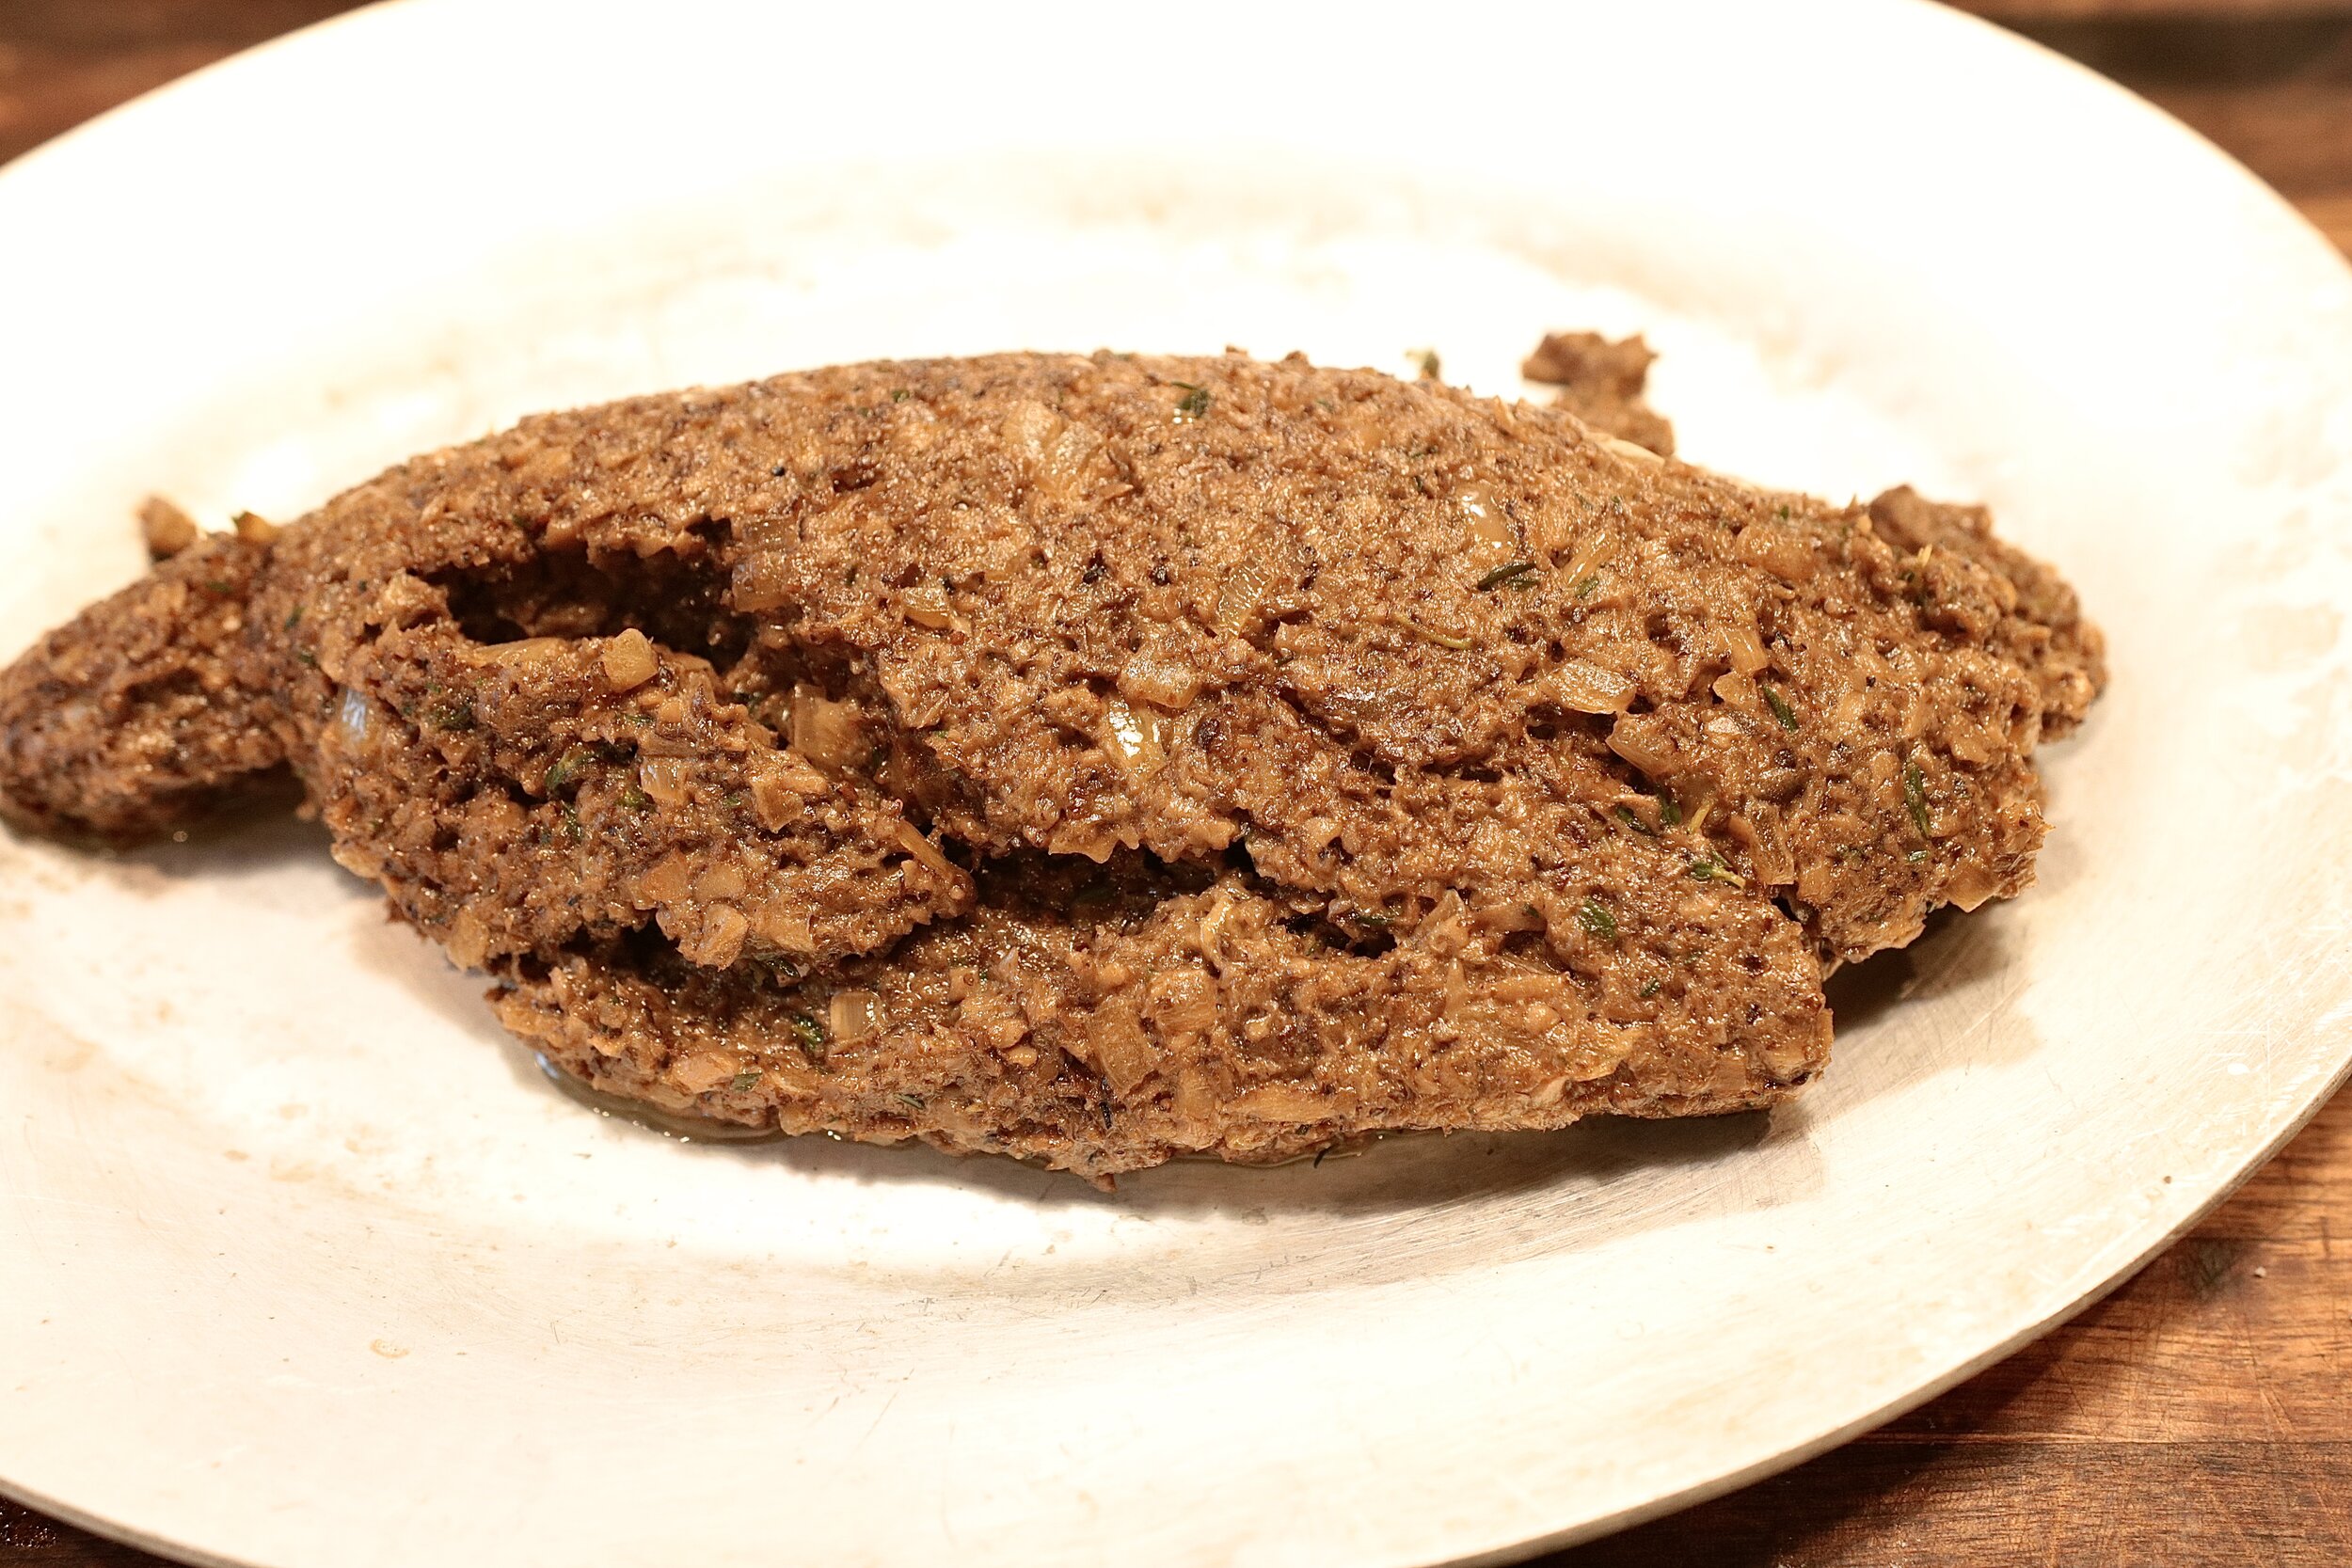
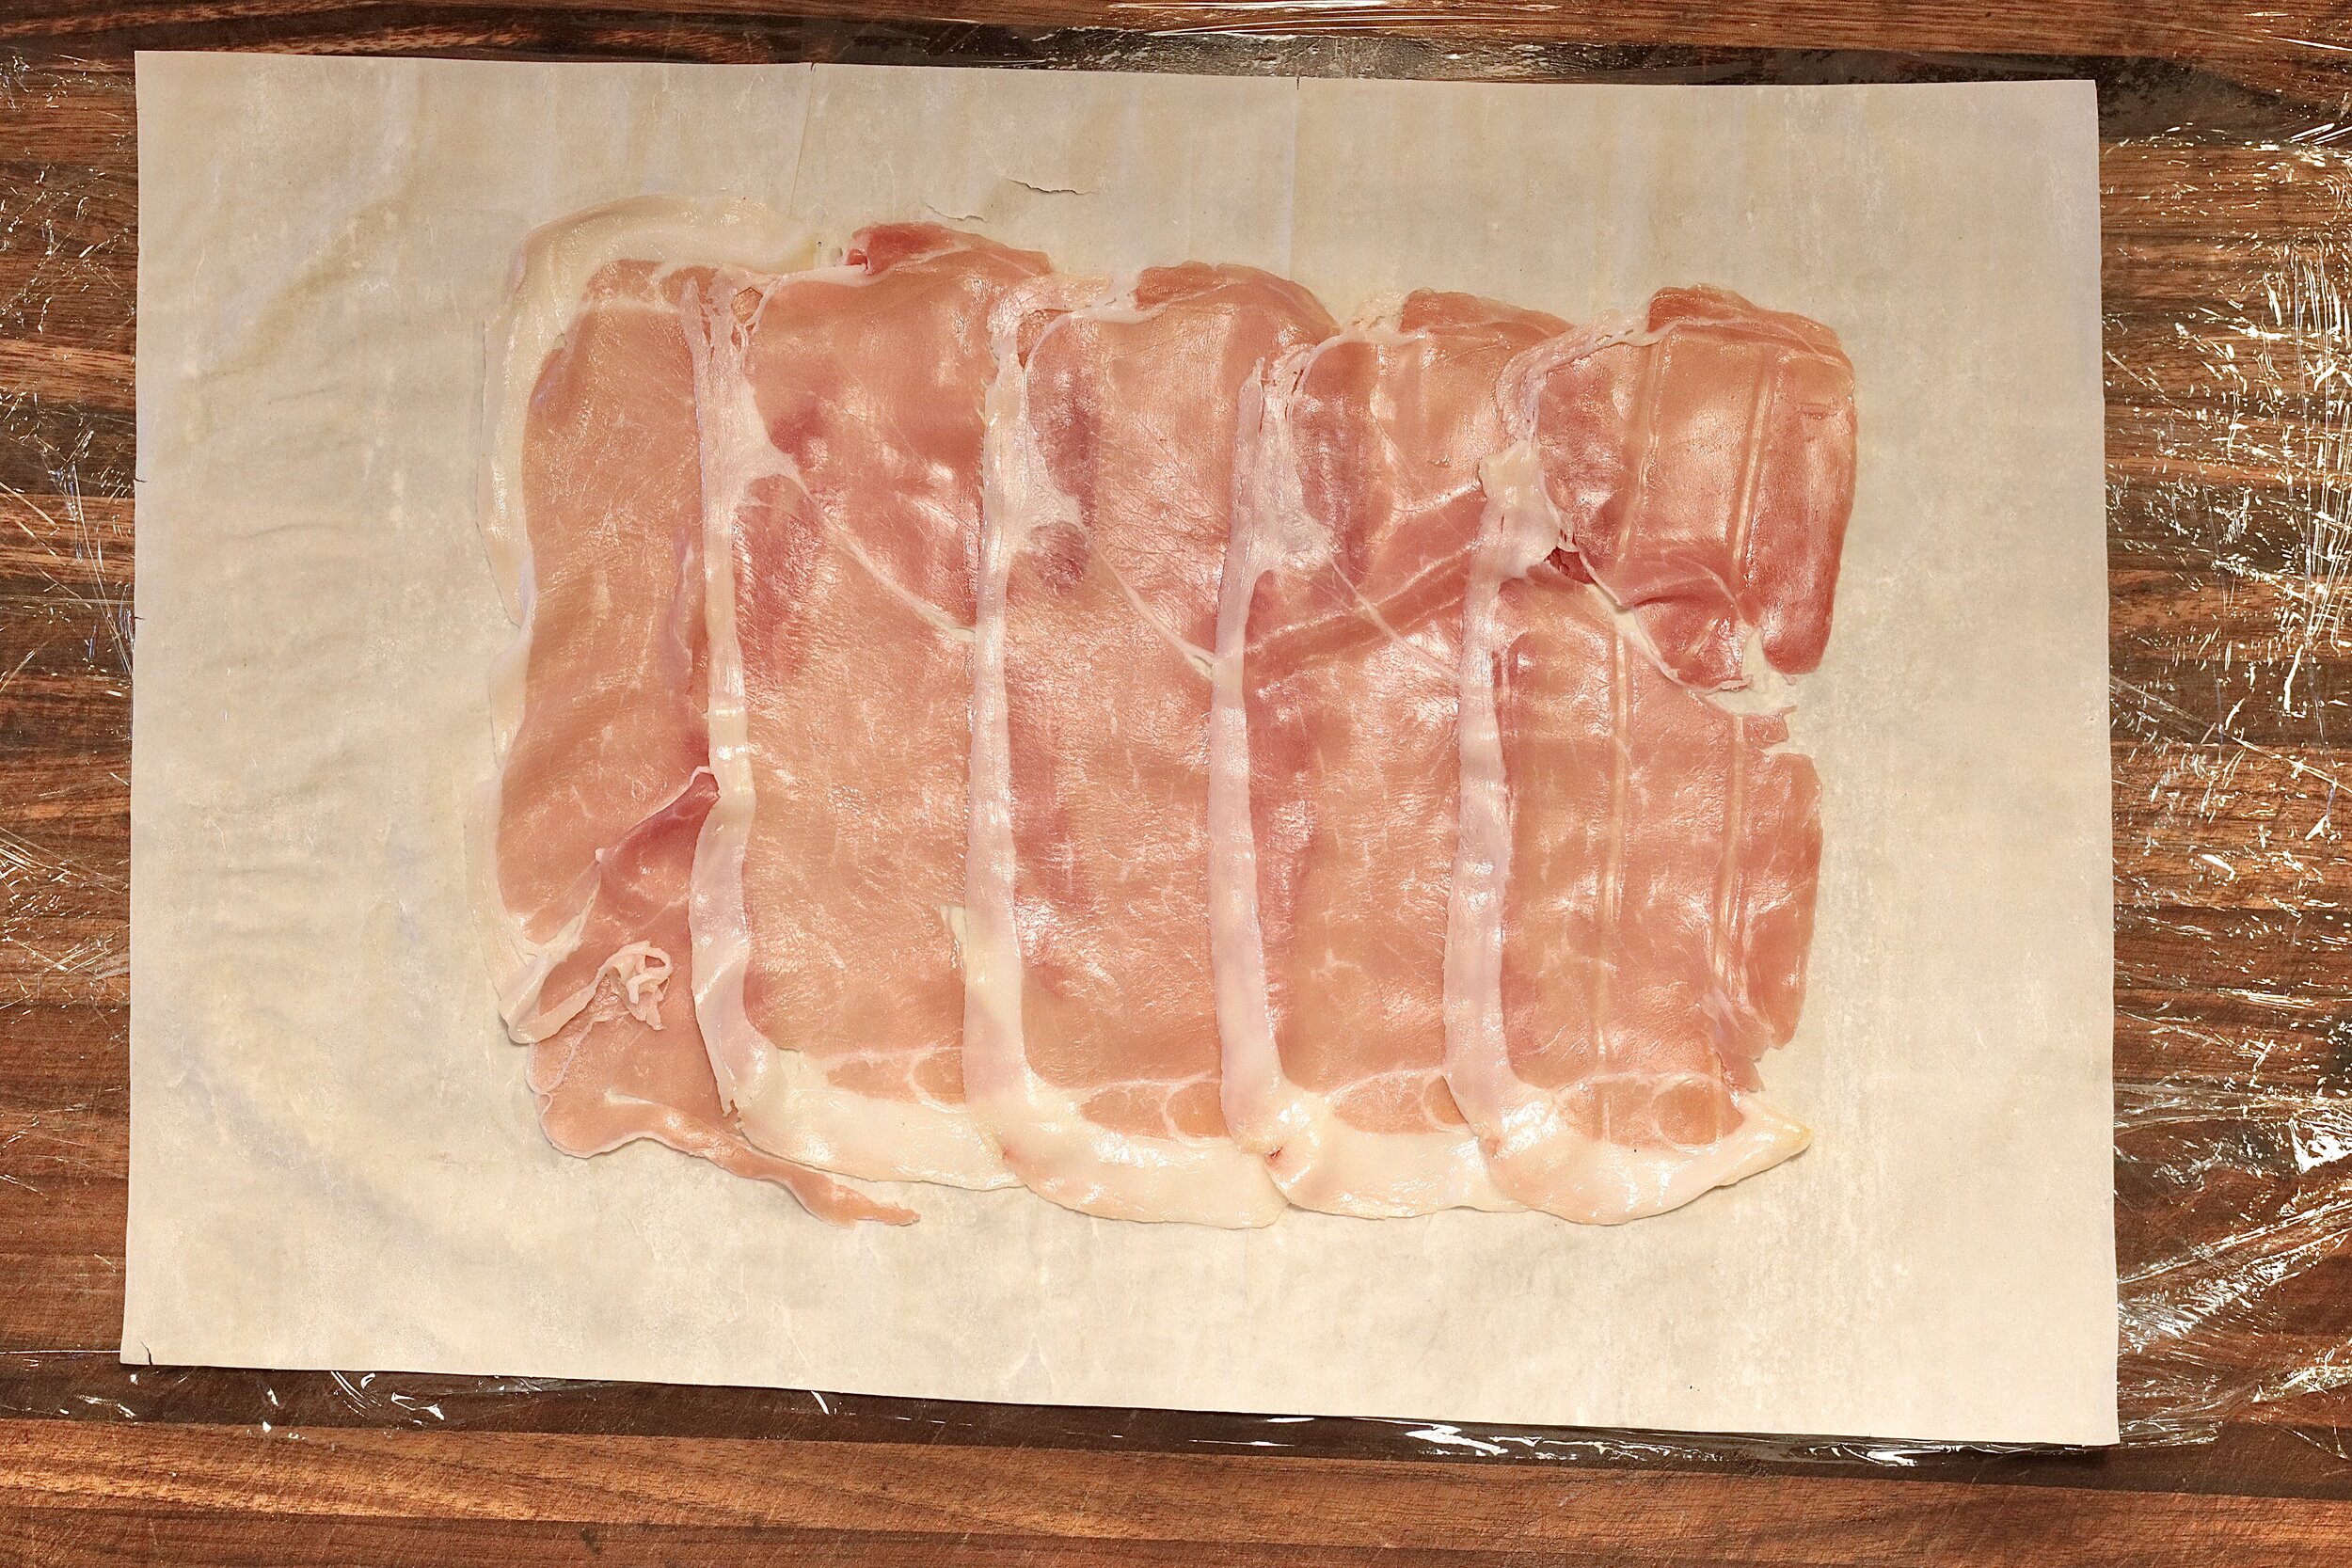
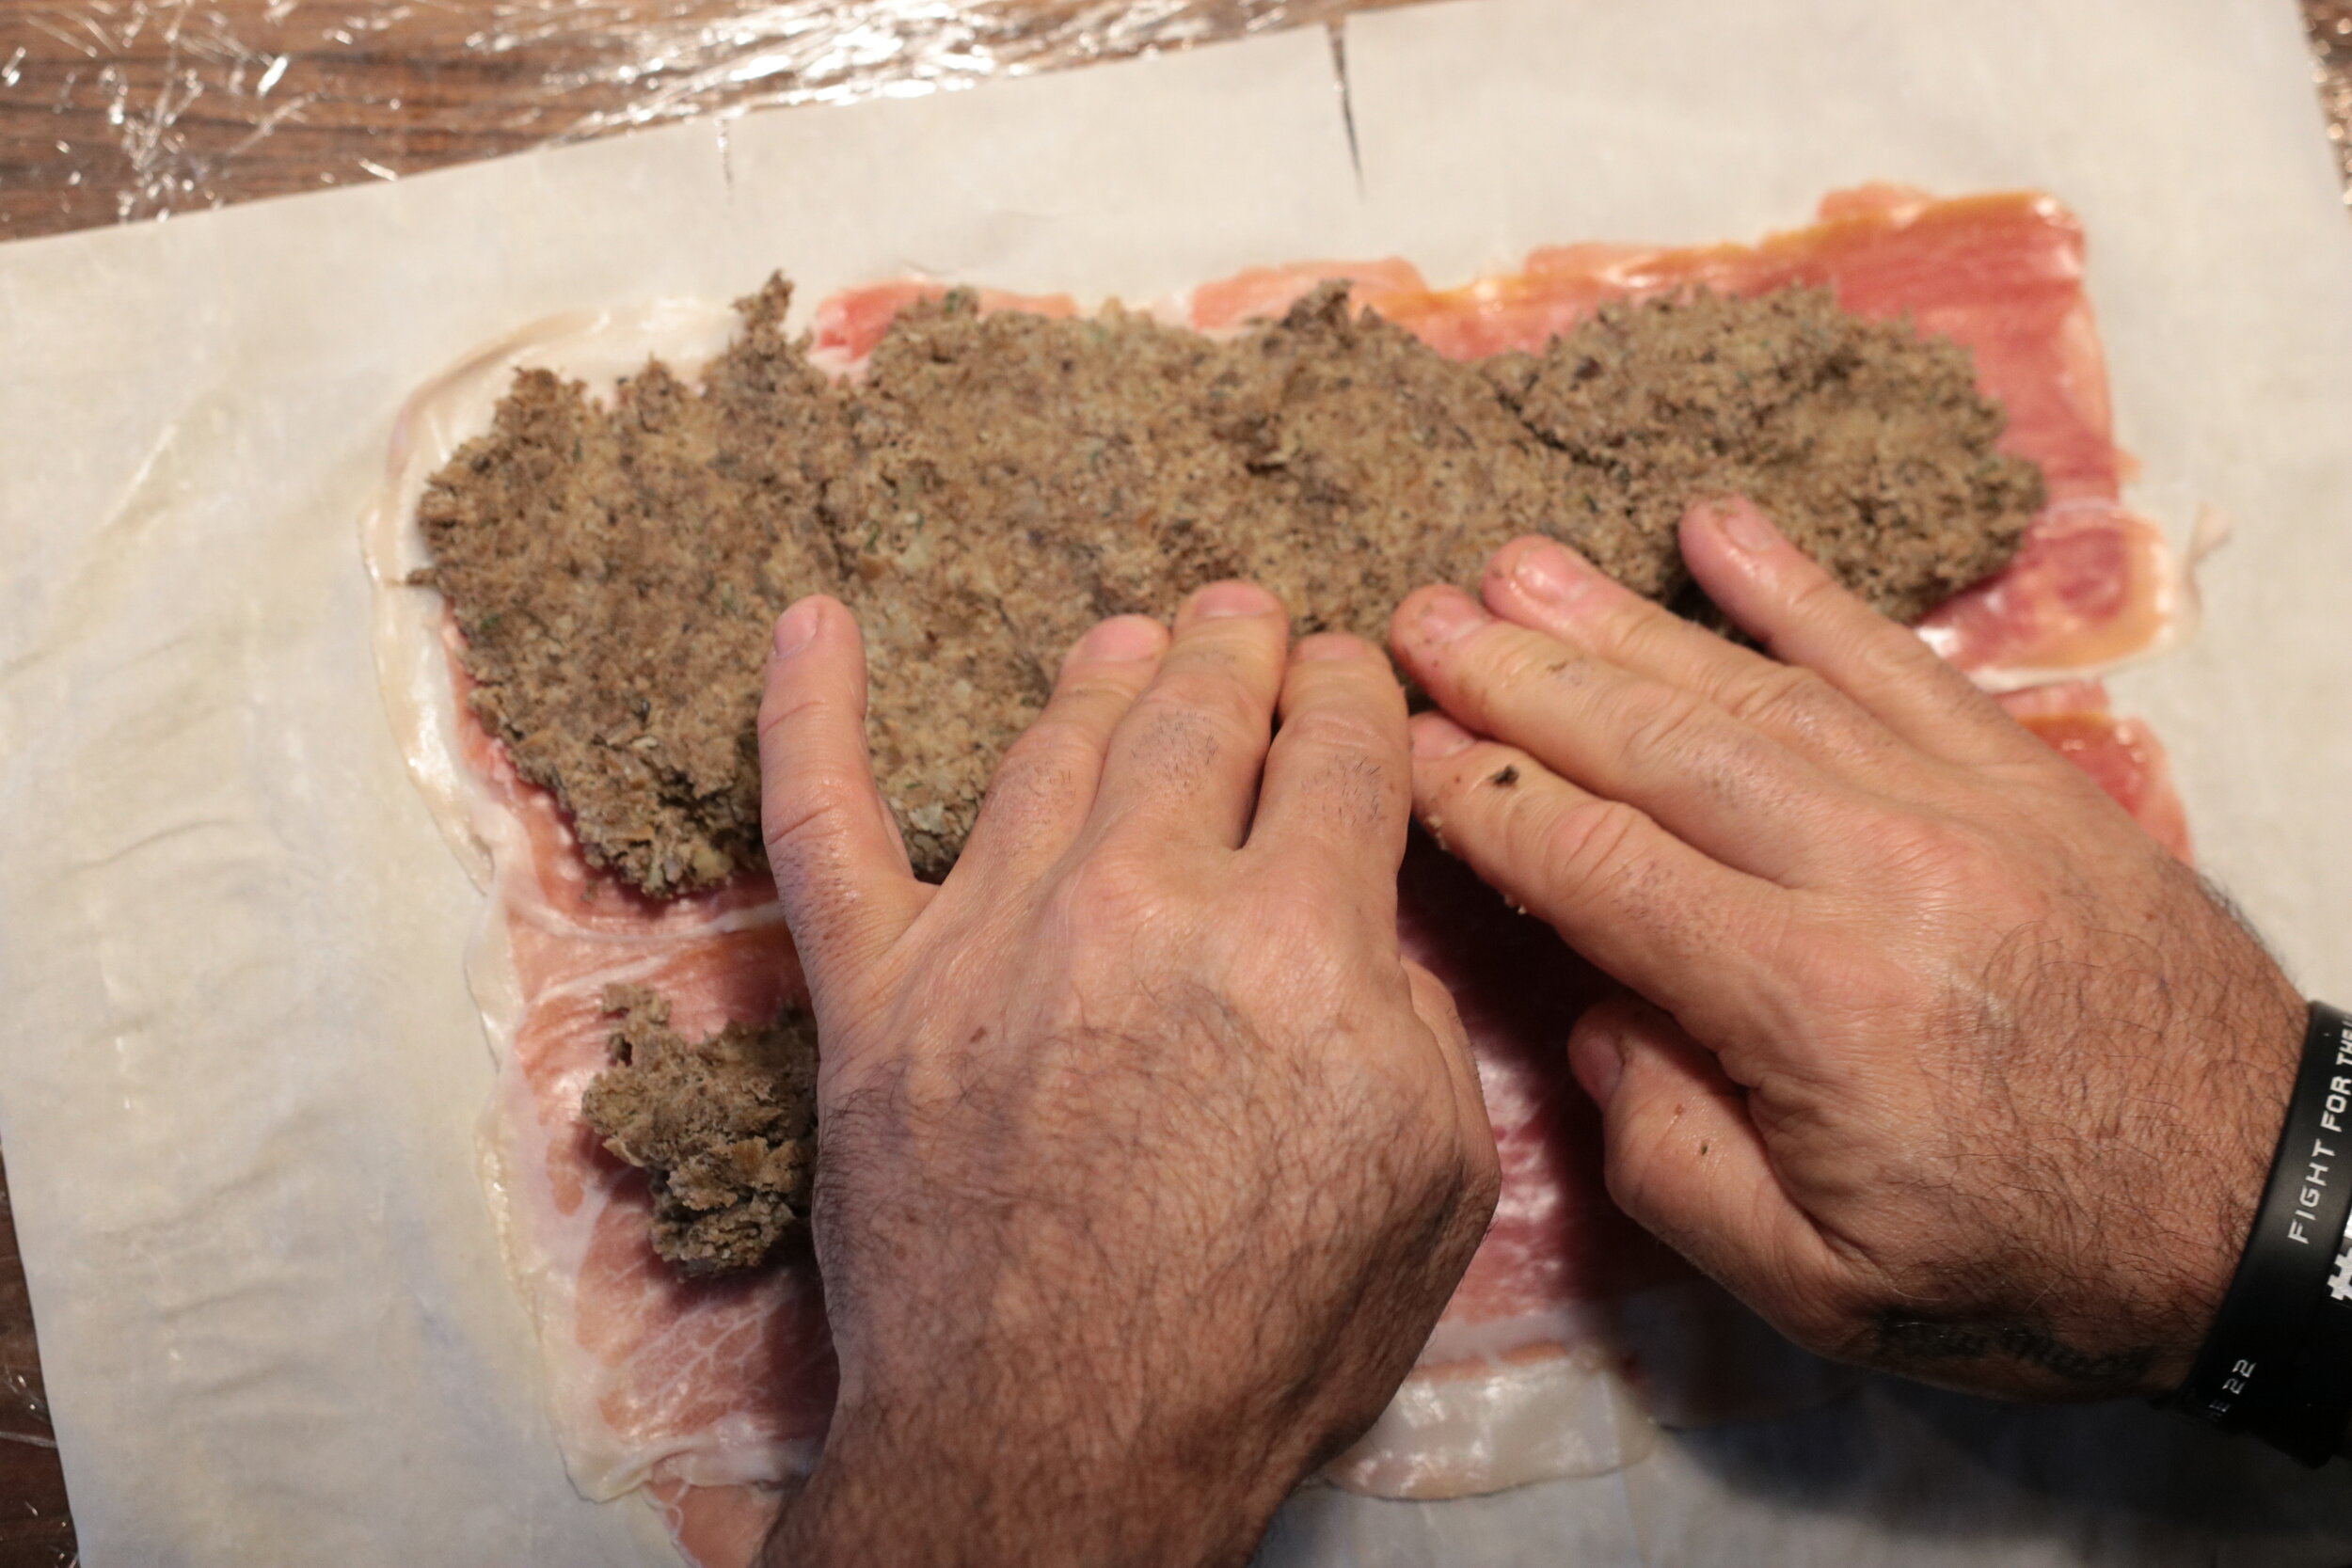
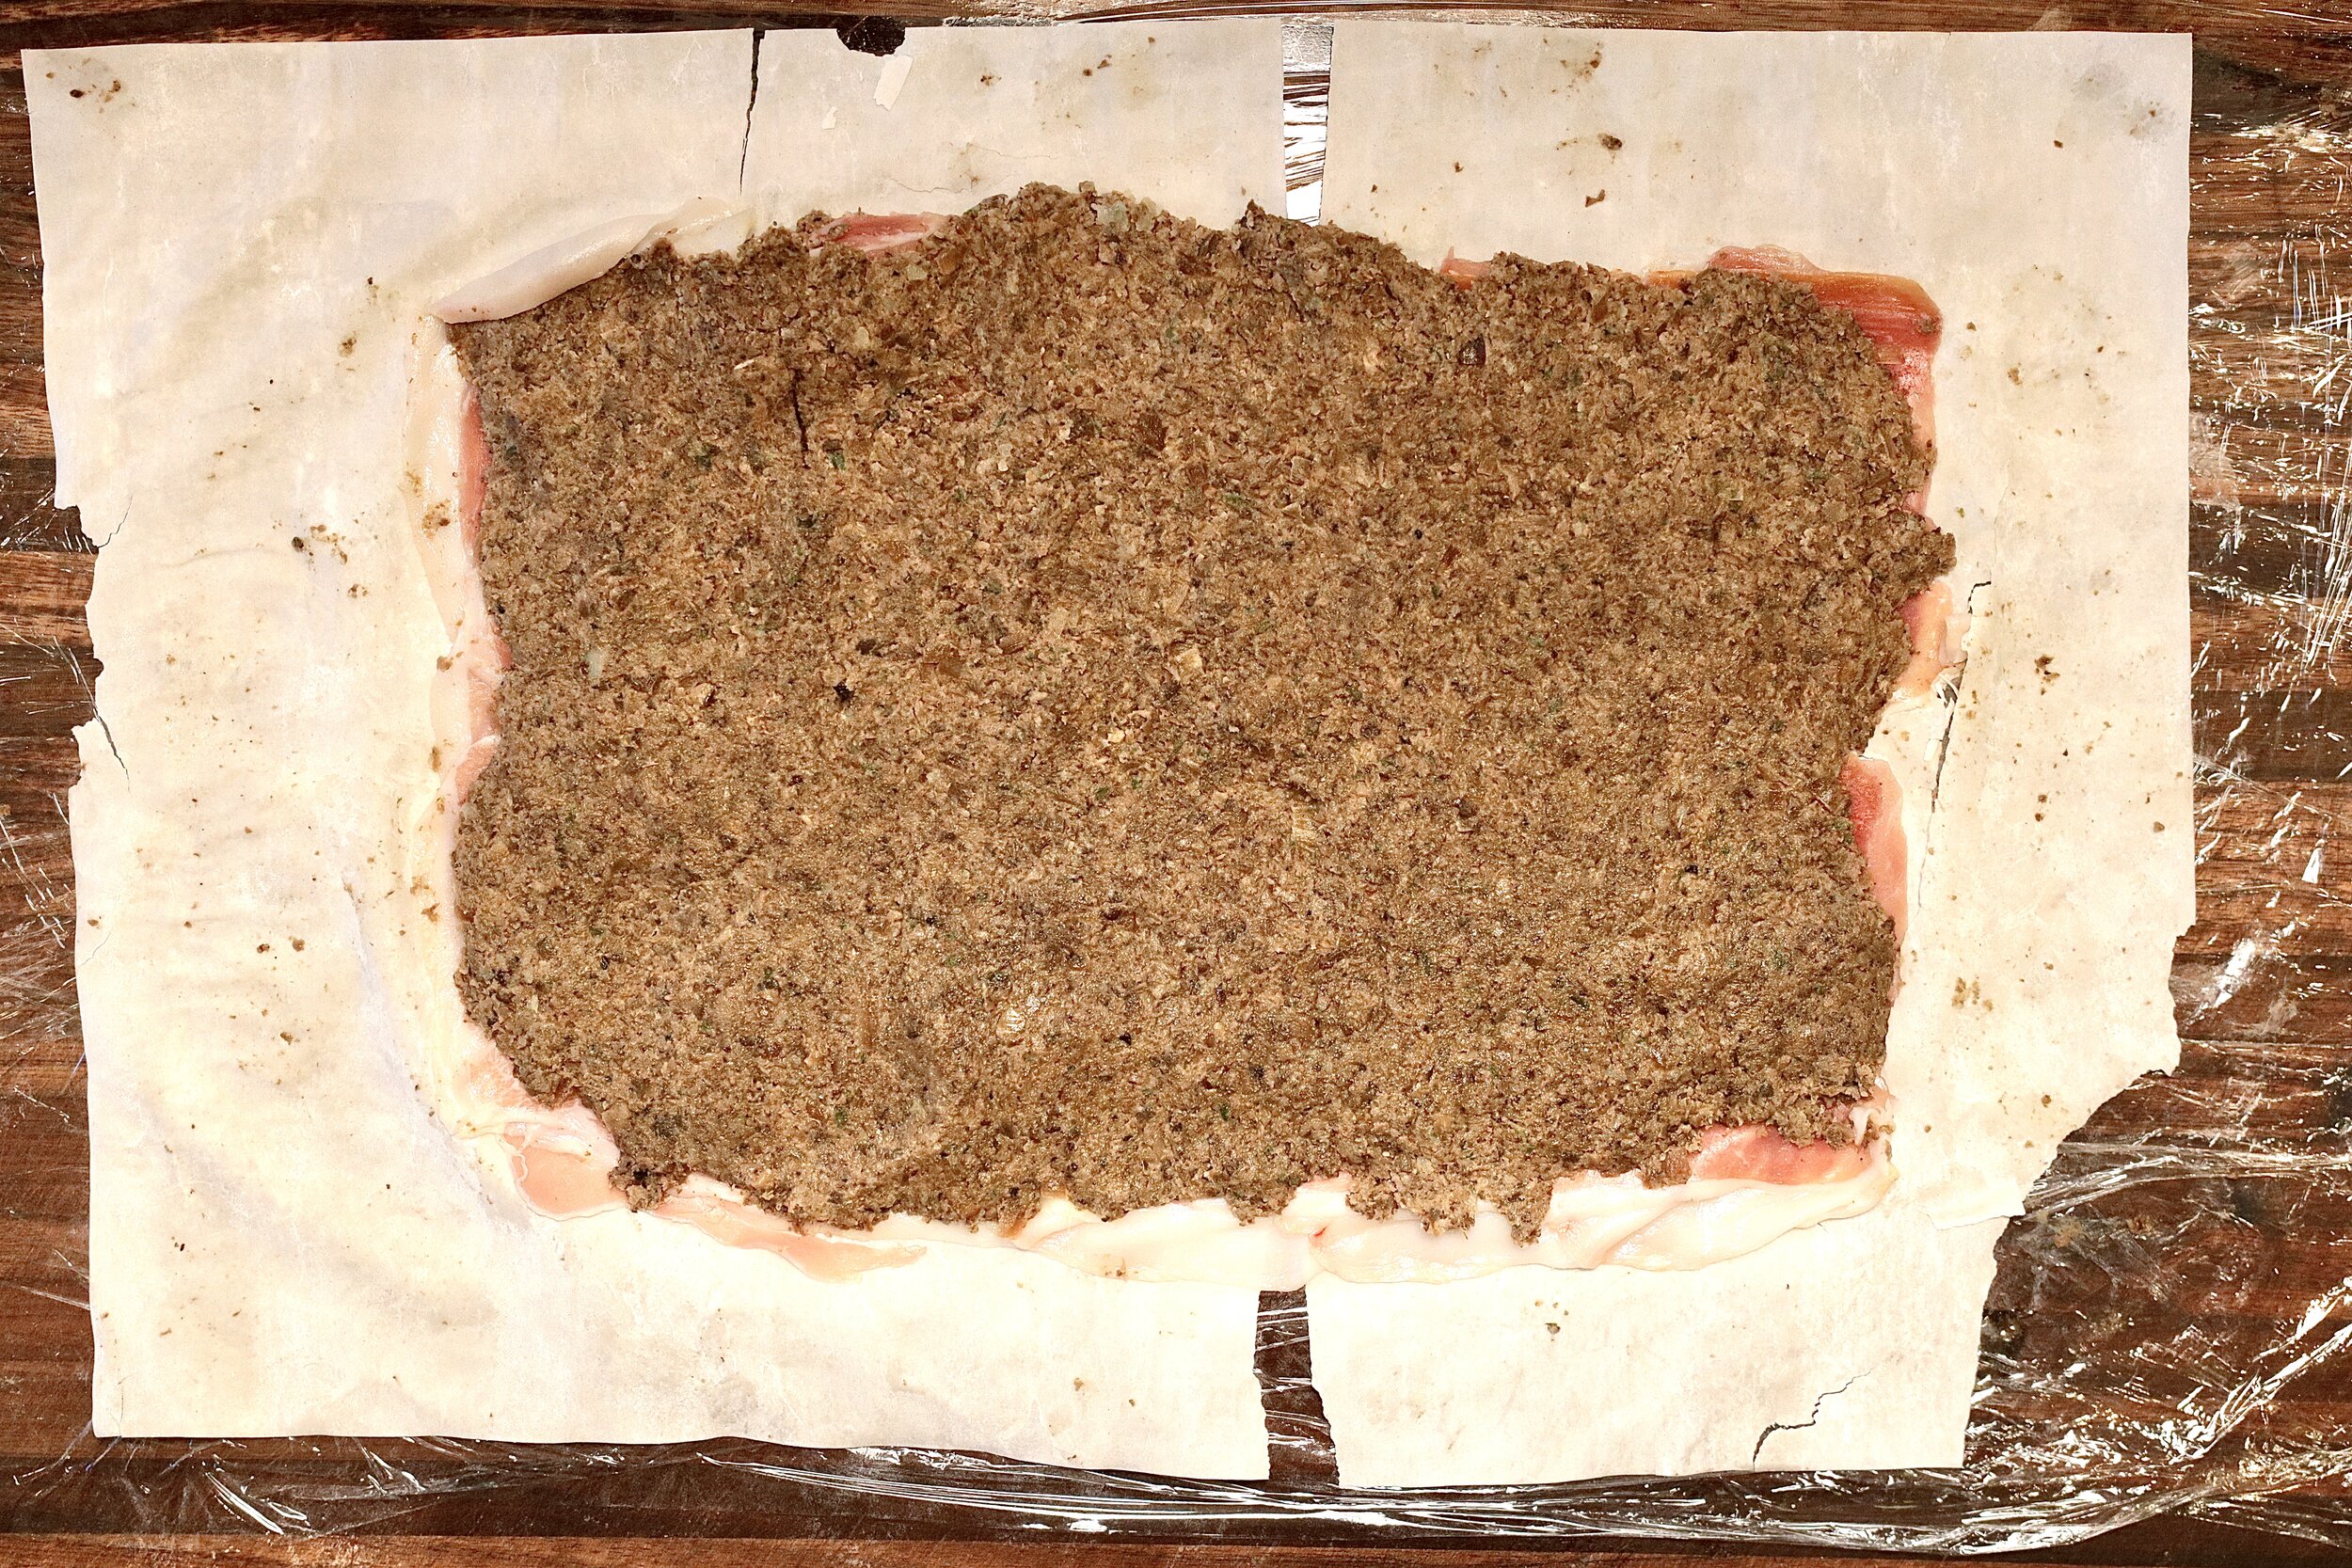
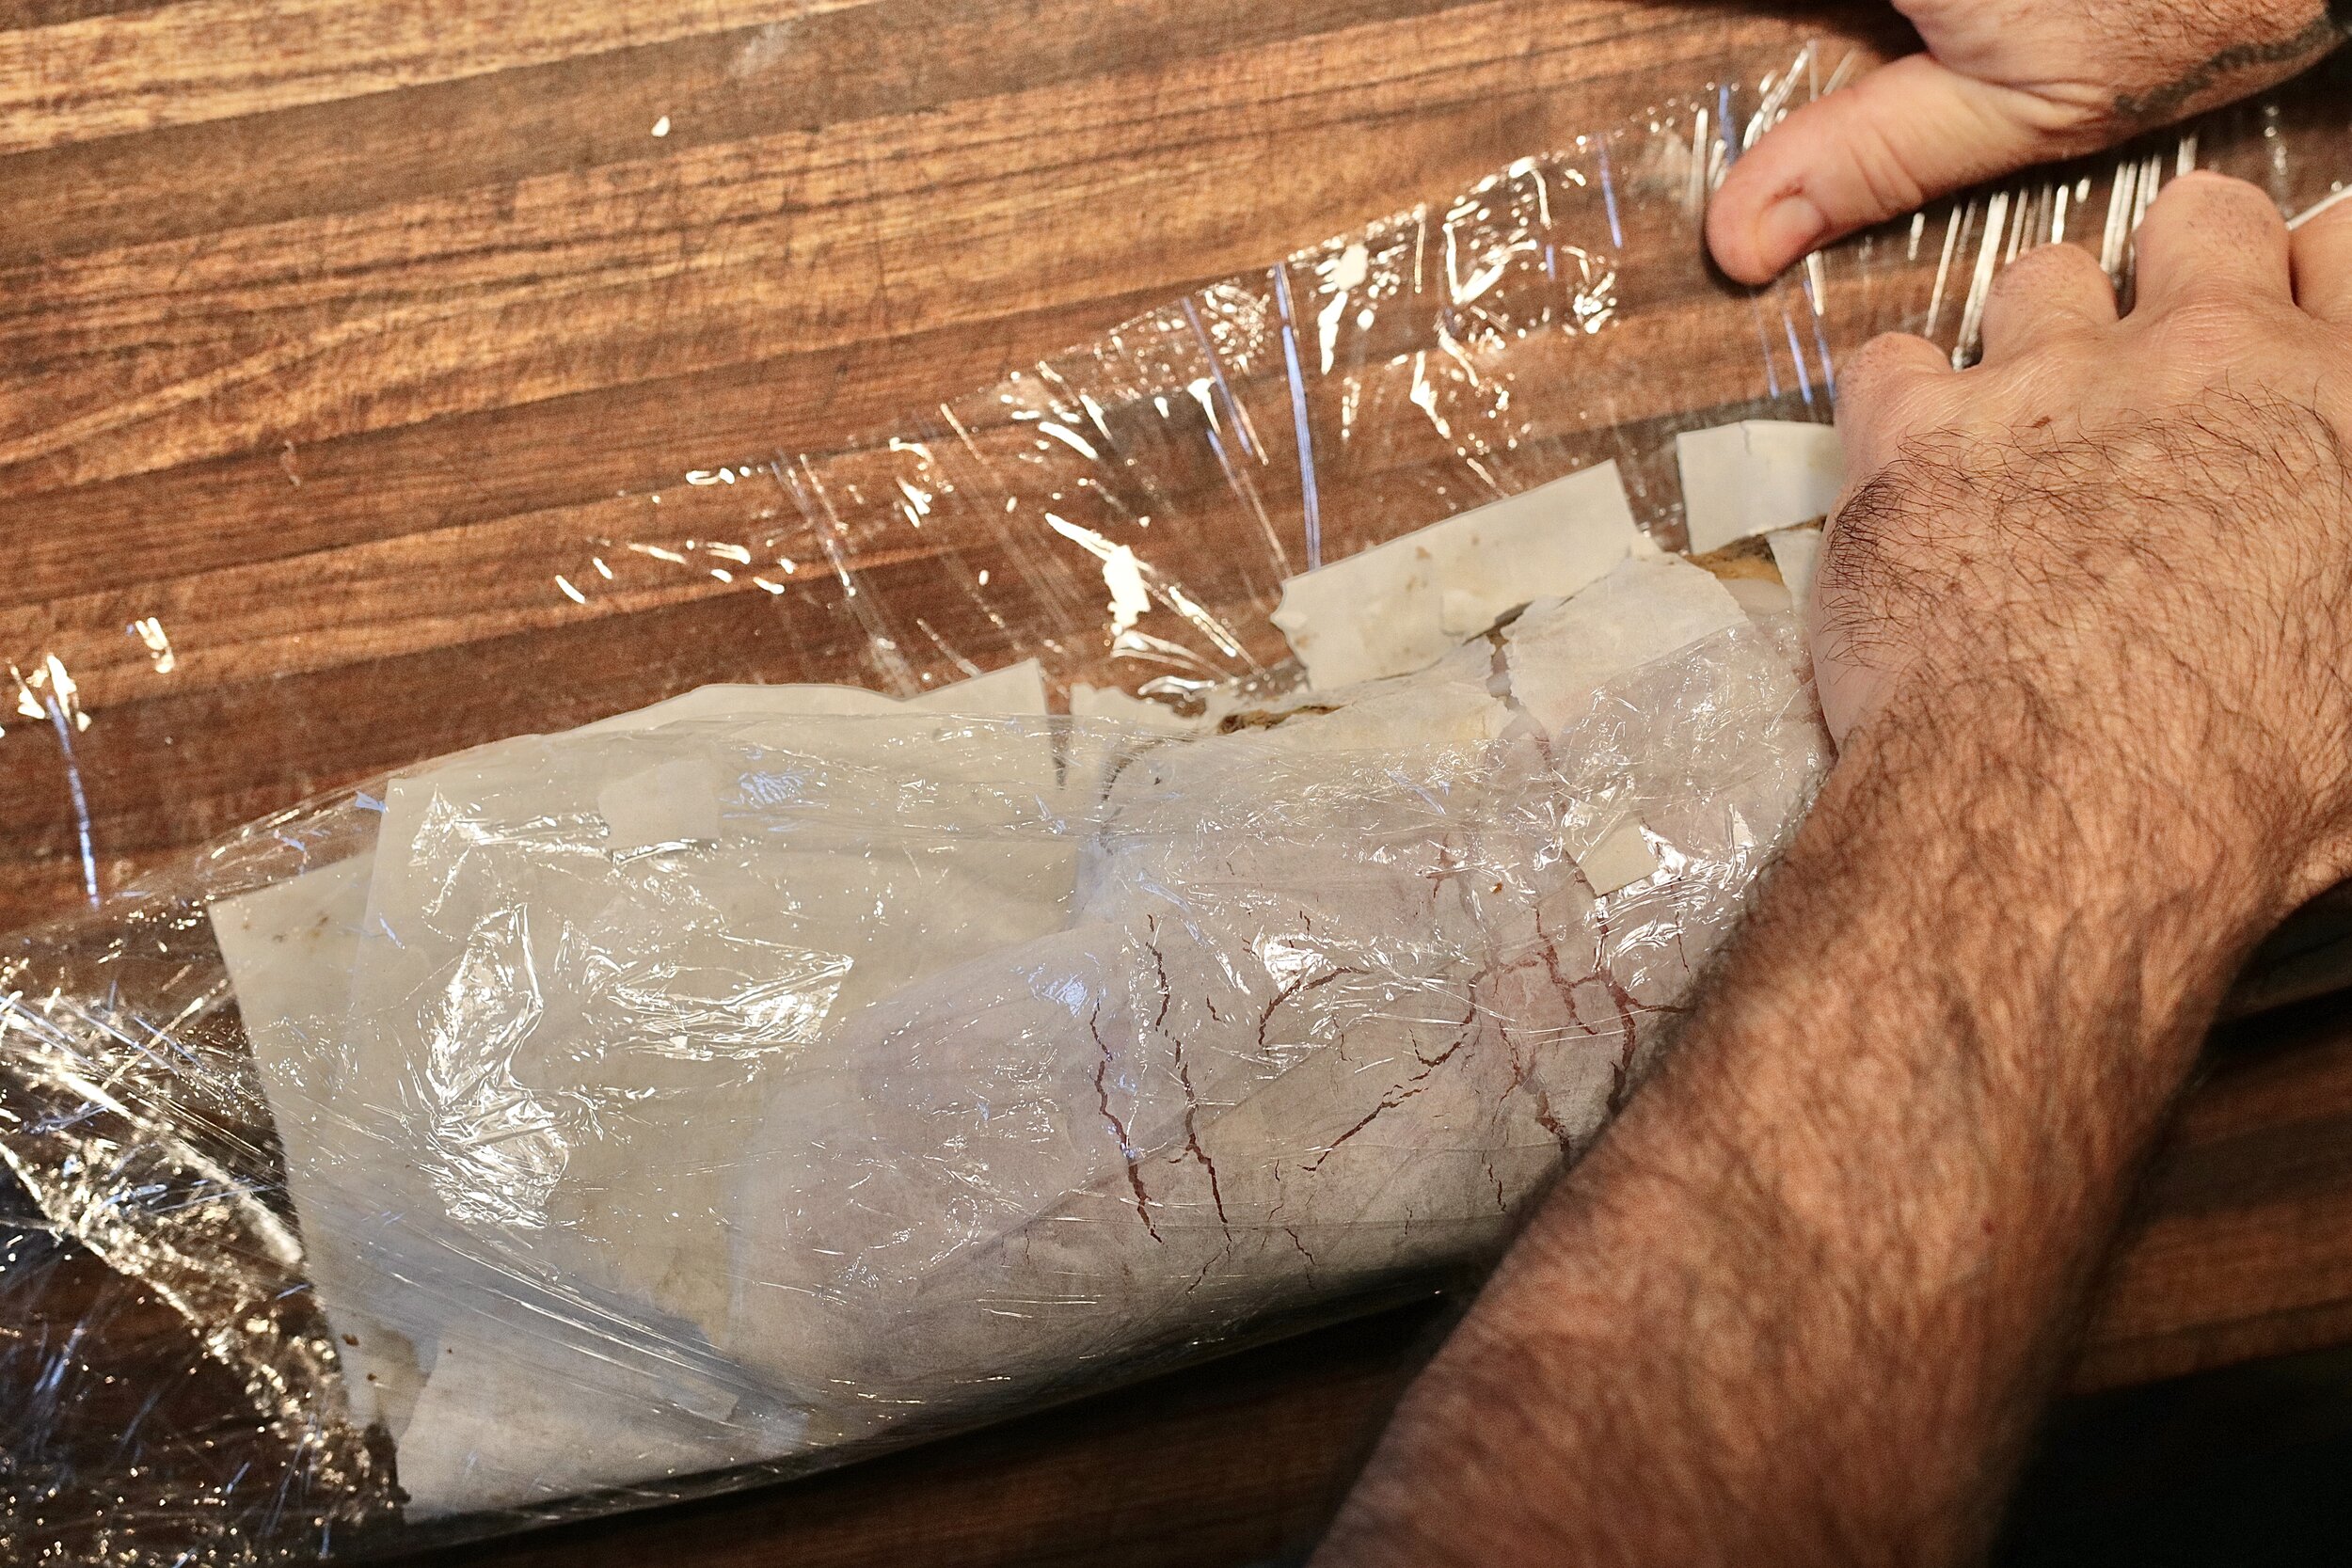
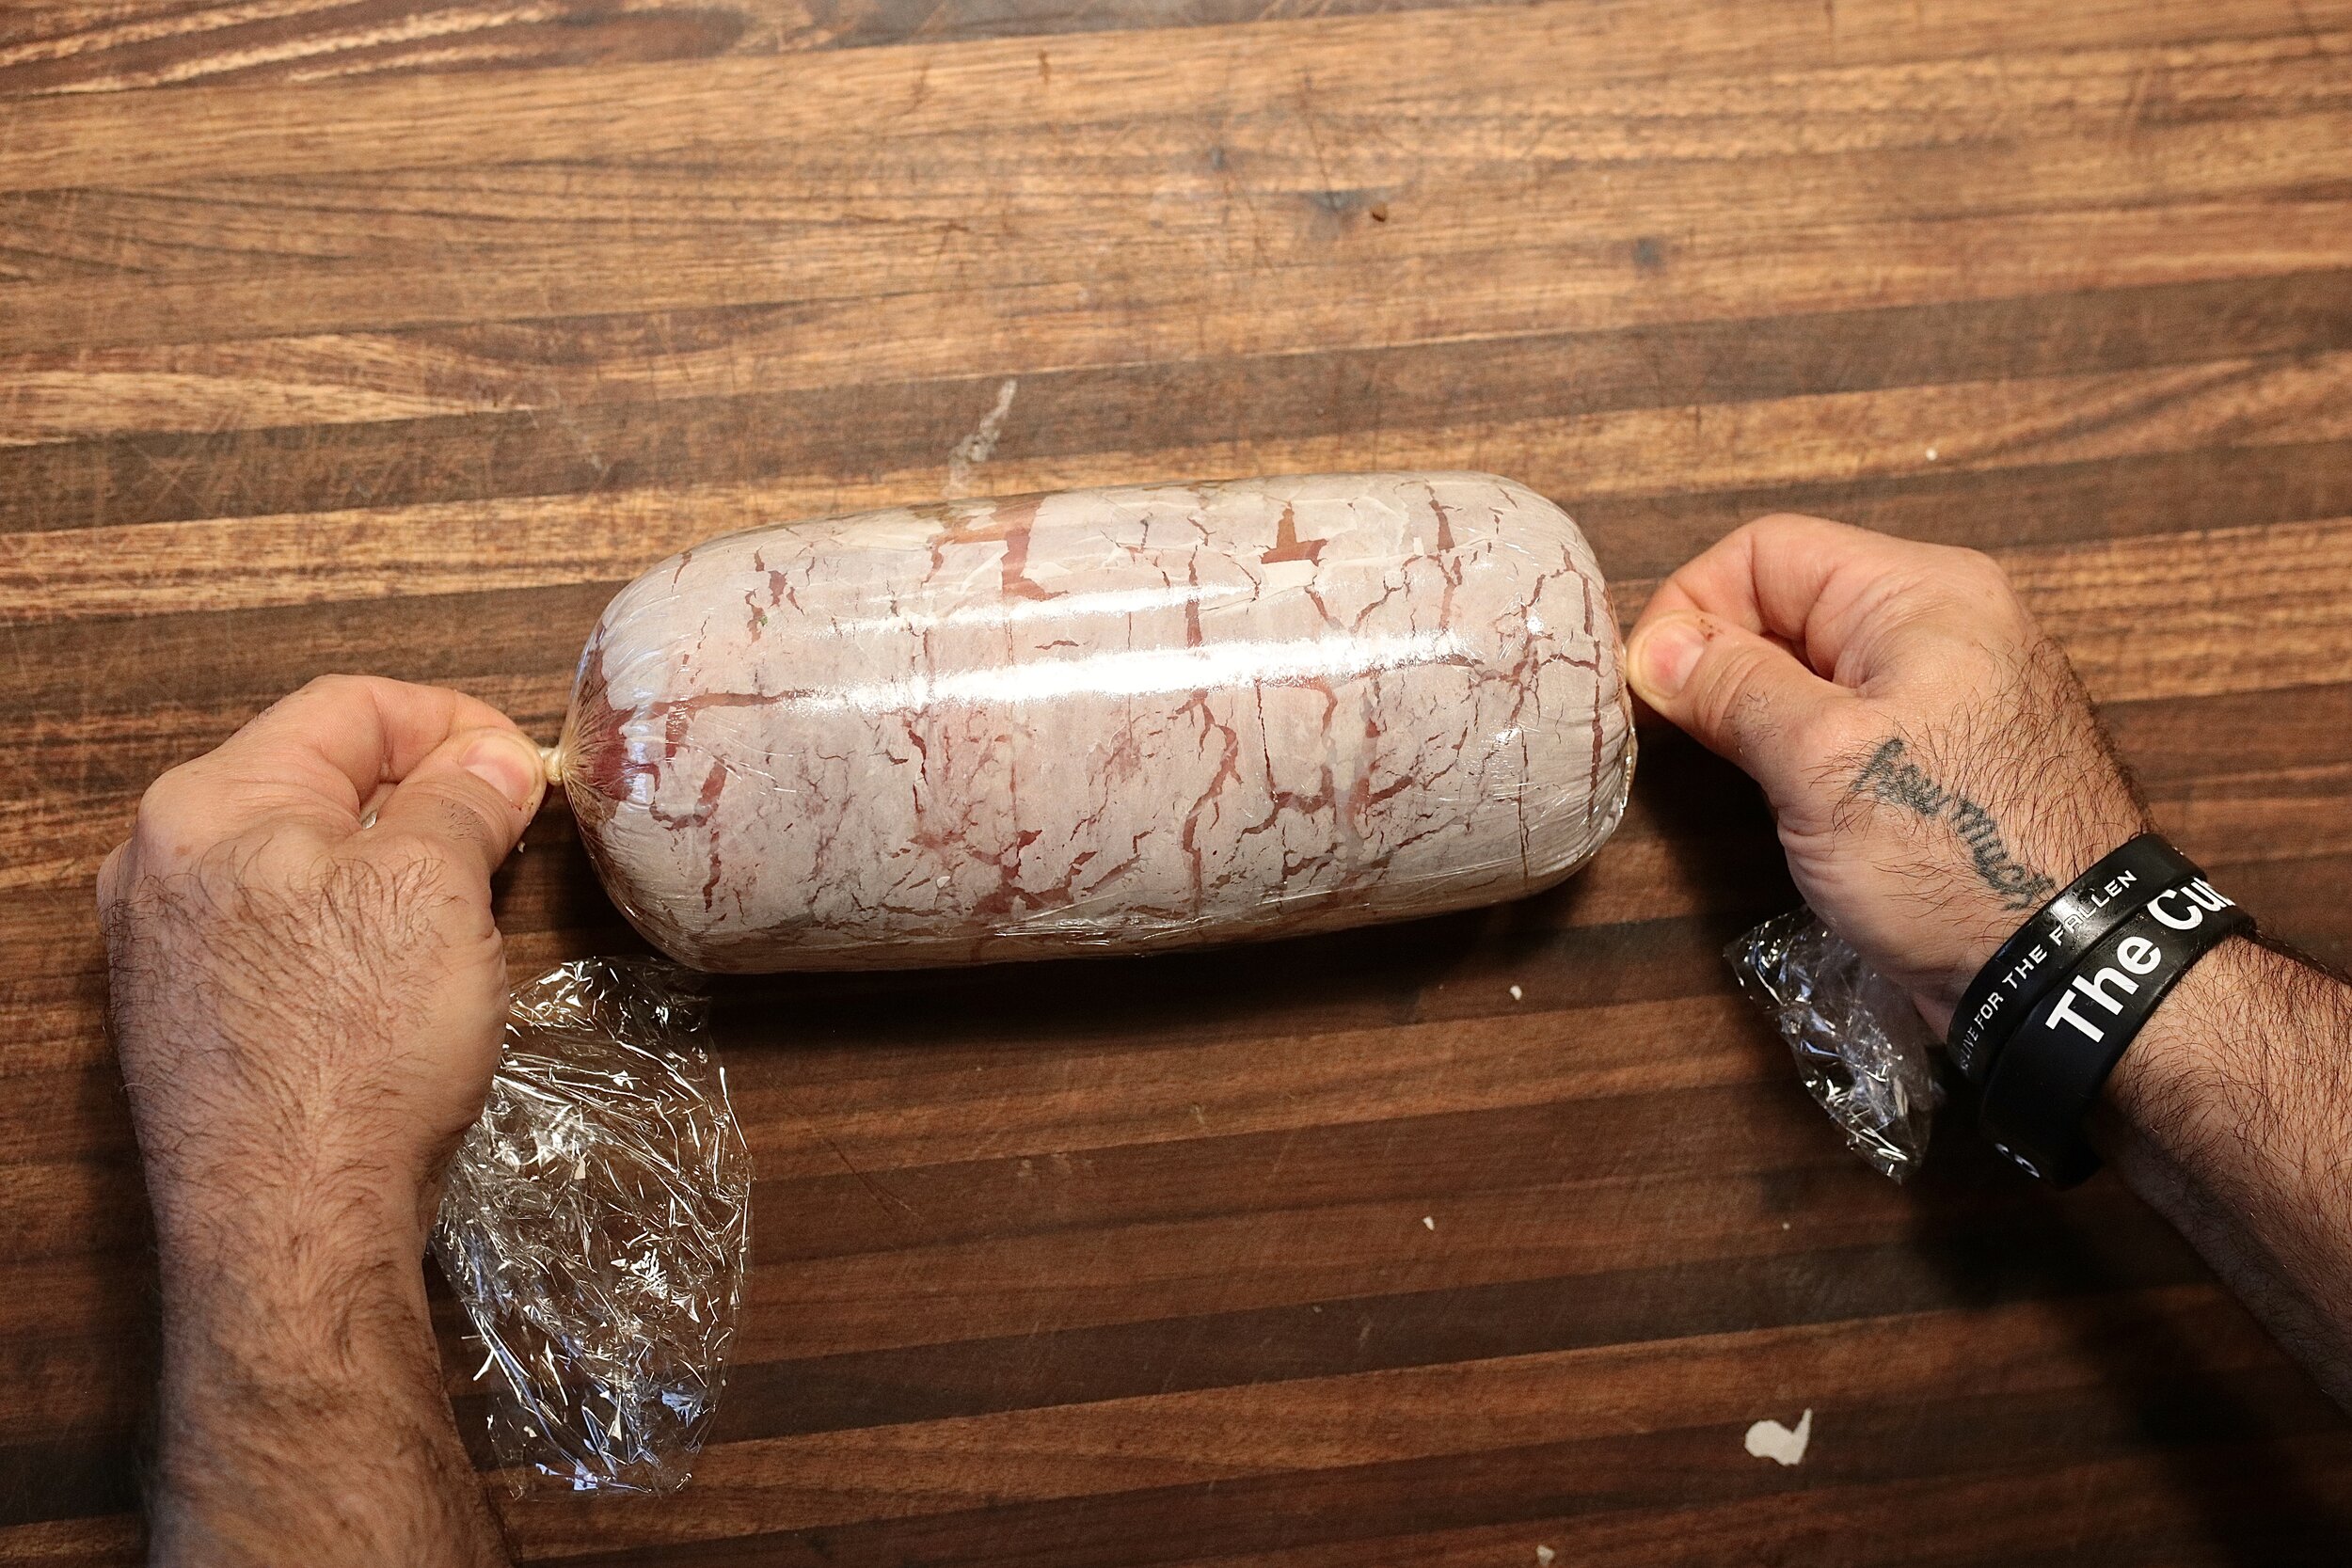
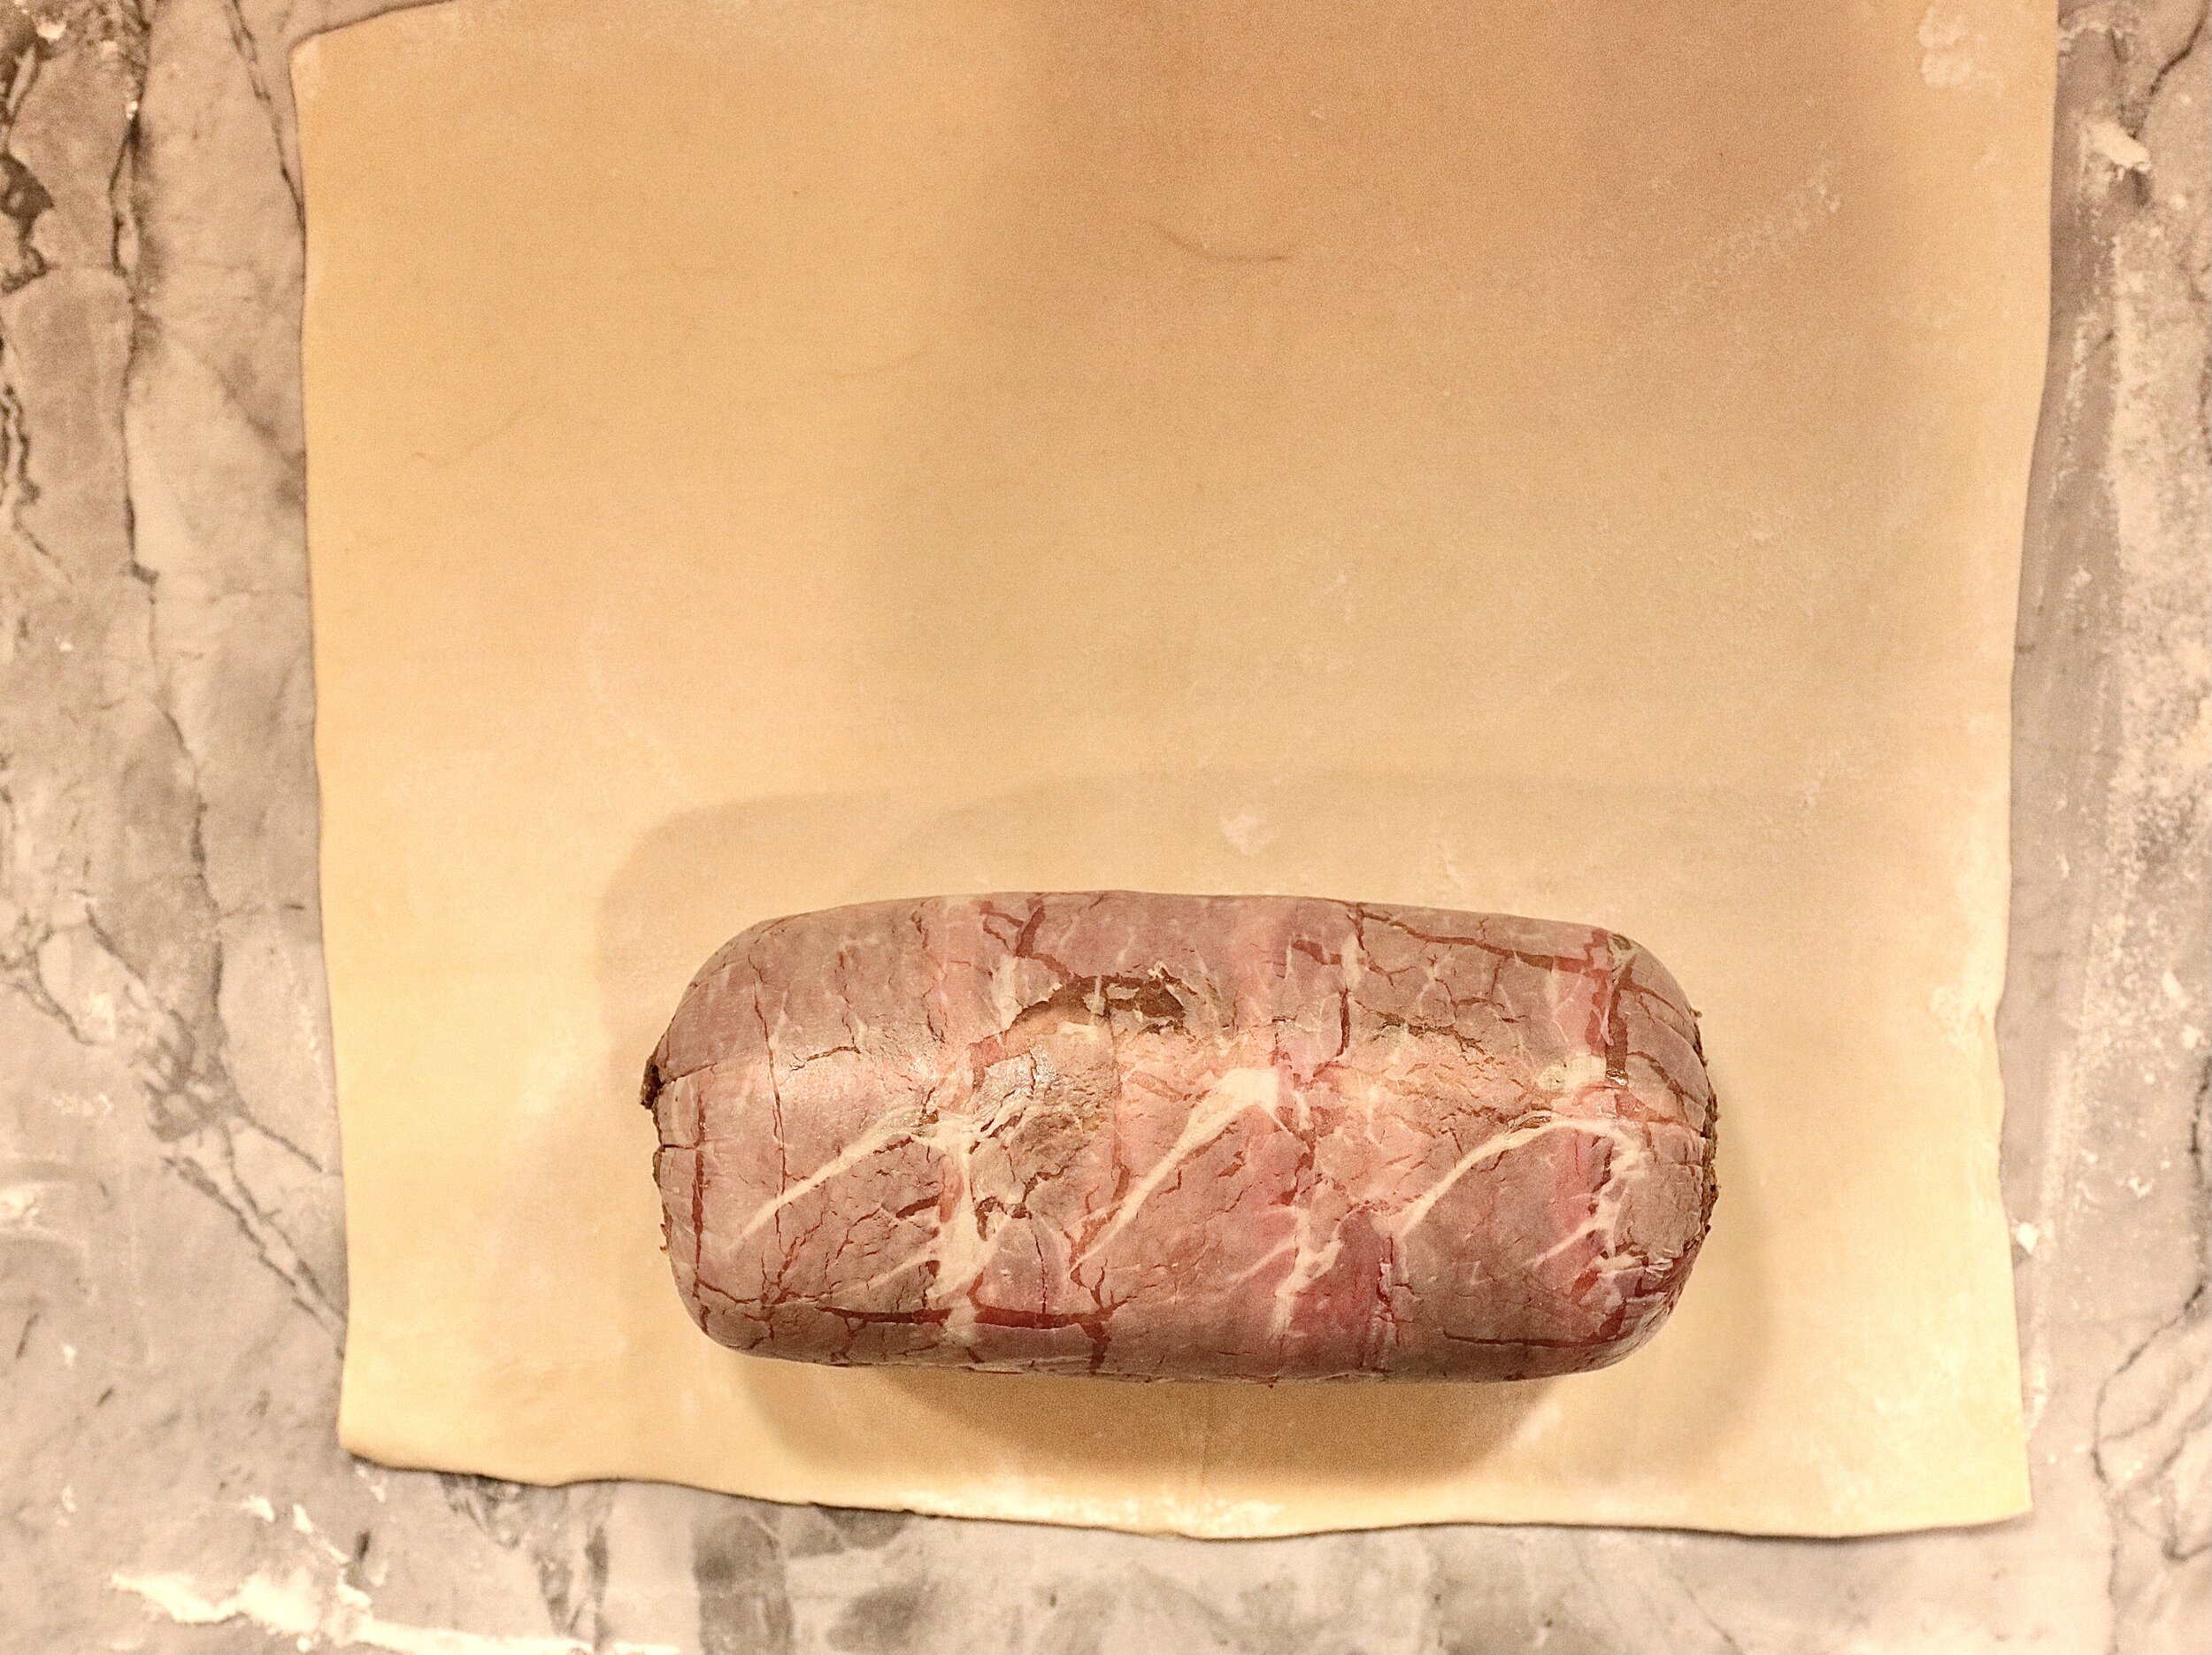
9. Lay a double layer of plastic wrap about 2 feet long and 1 food wide on your cutting board. Lay fillo dough on top of plastic wrap. Shingle prosciutto on top of fillo to create a thin, even, overlapping layer, leaving a 2-inch border along the bottom and top of the fillo dough. Spread mushroom mixture evenly over prosciutto layer.

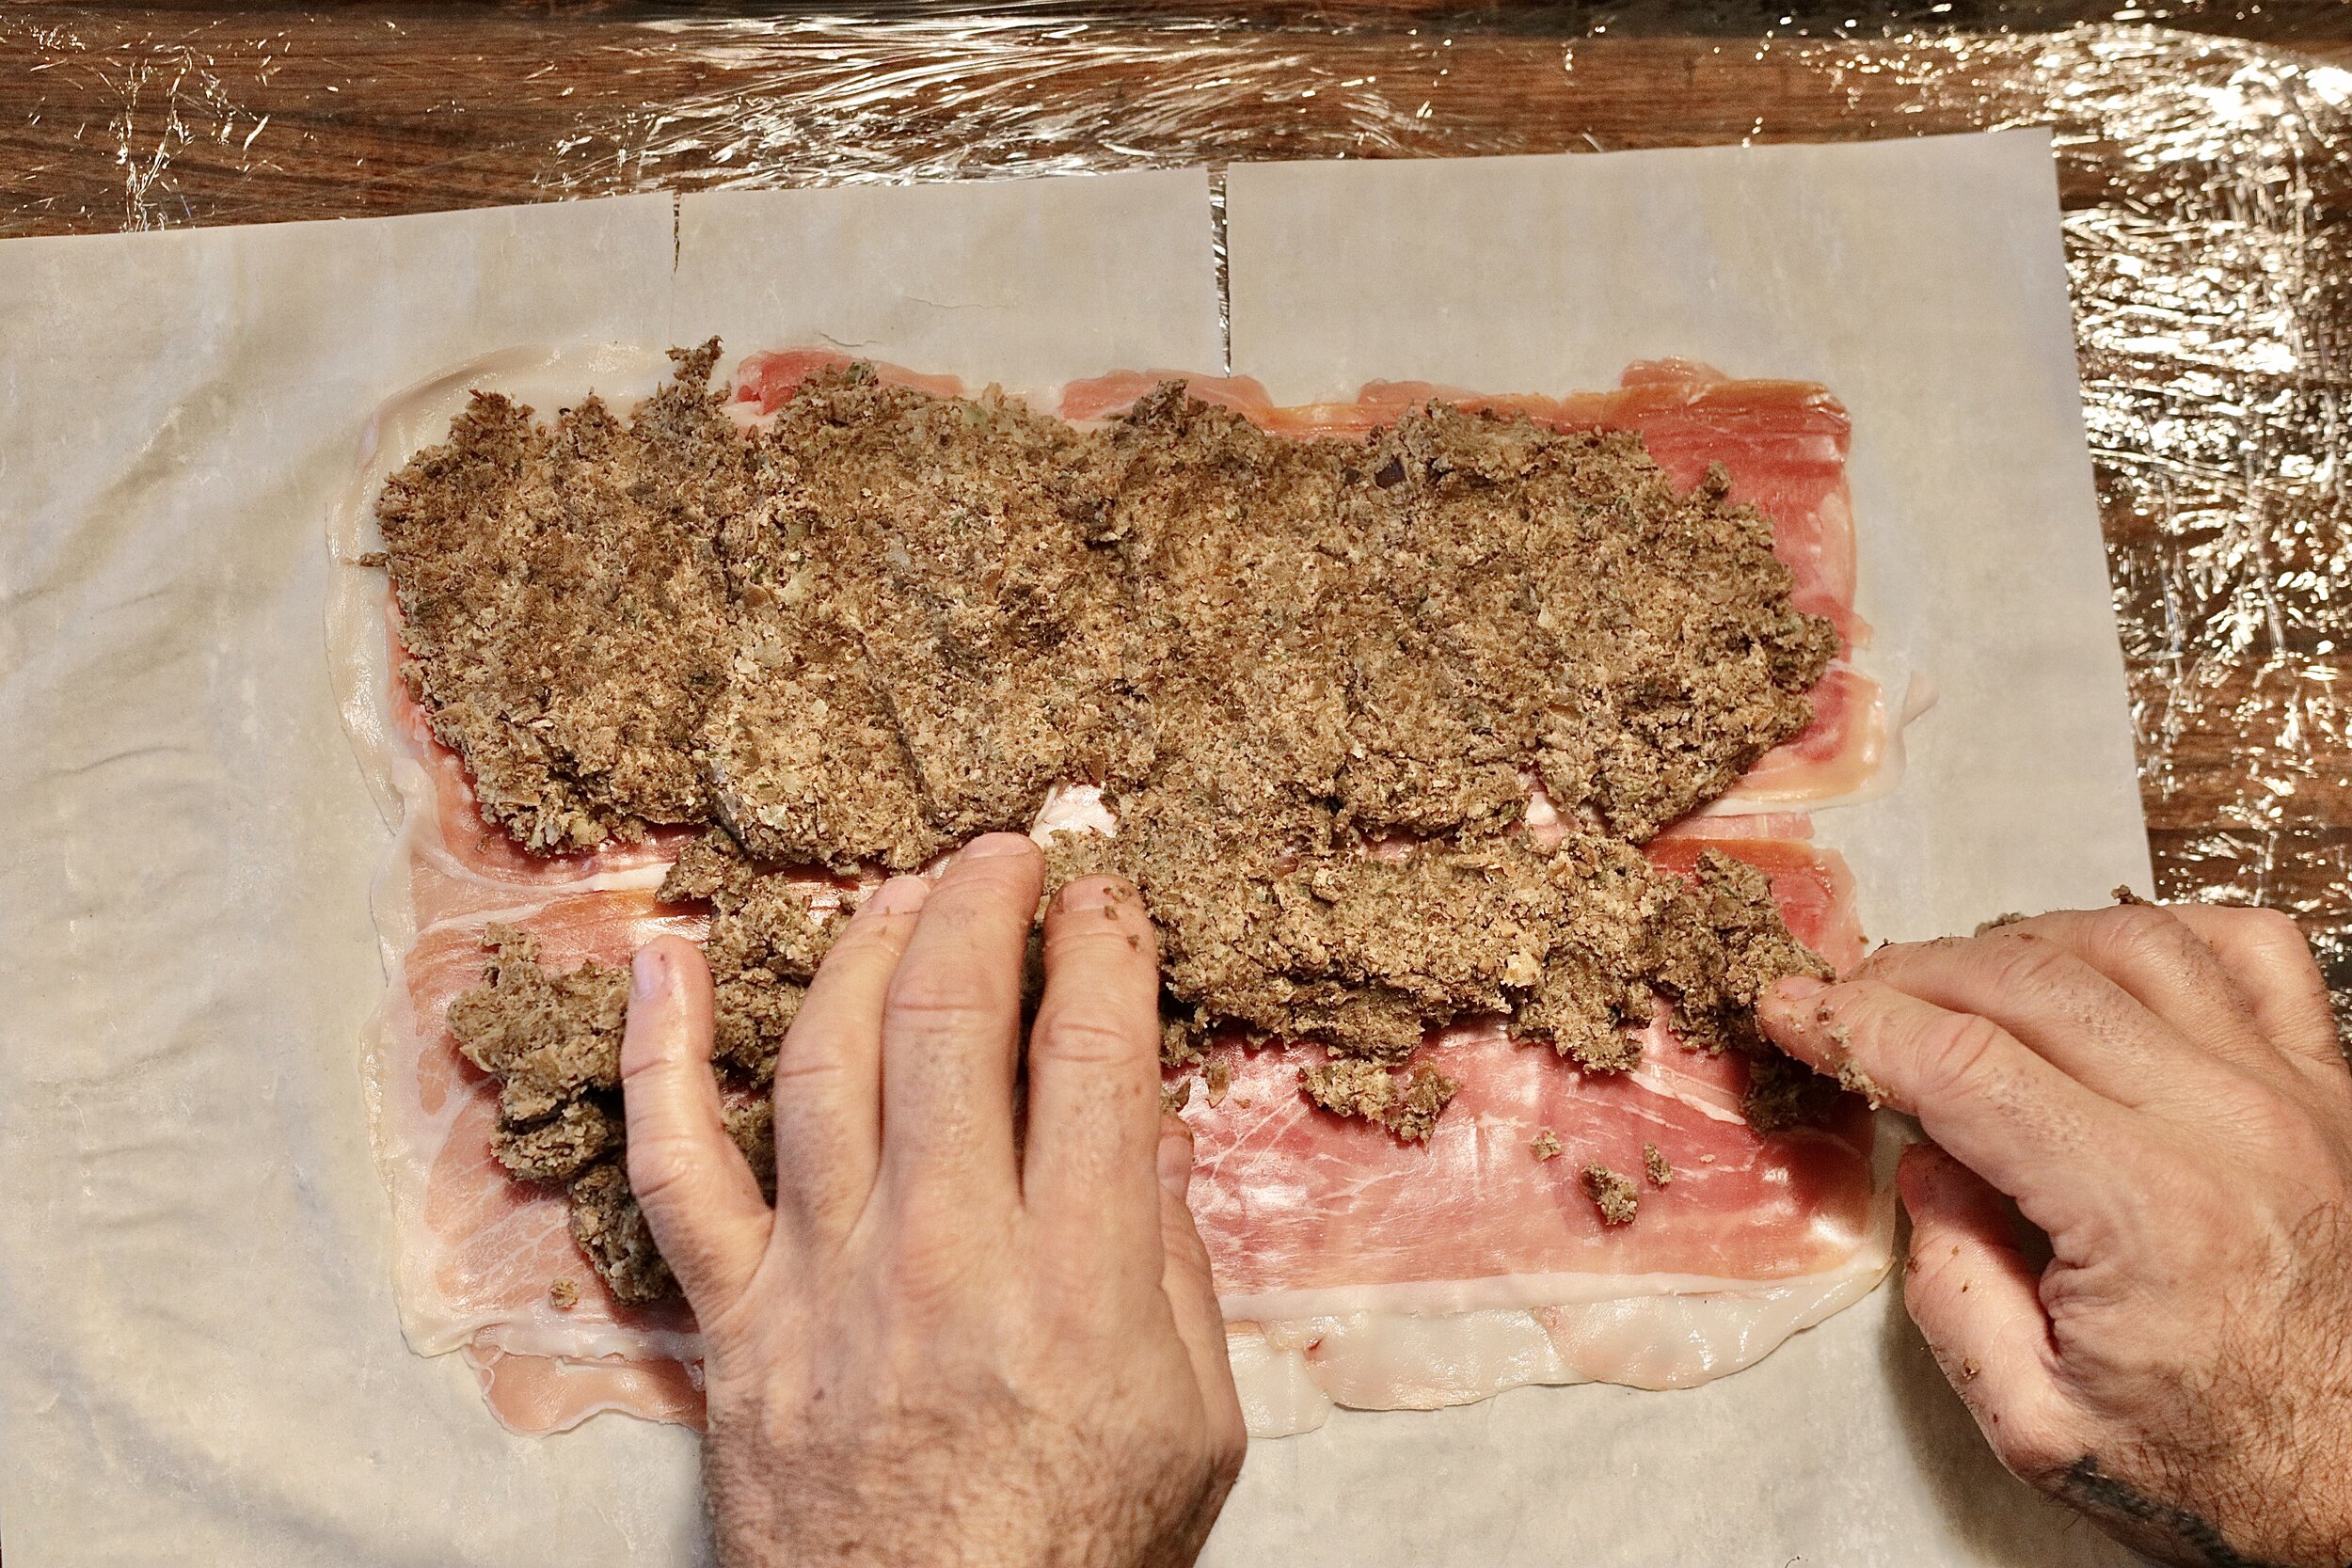
10. Place tenderloin along the very bottom edge of the prosciutto/mushroom layer.
11. (OPTIONAL) Place single layer of foie gras unseared side against tenderloin. You can also use the fois gras as a garnish on top of Wellington upon serving
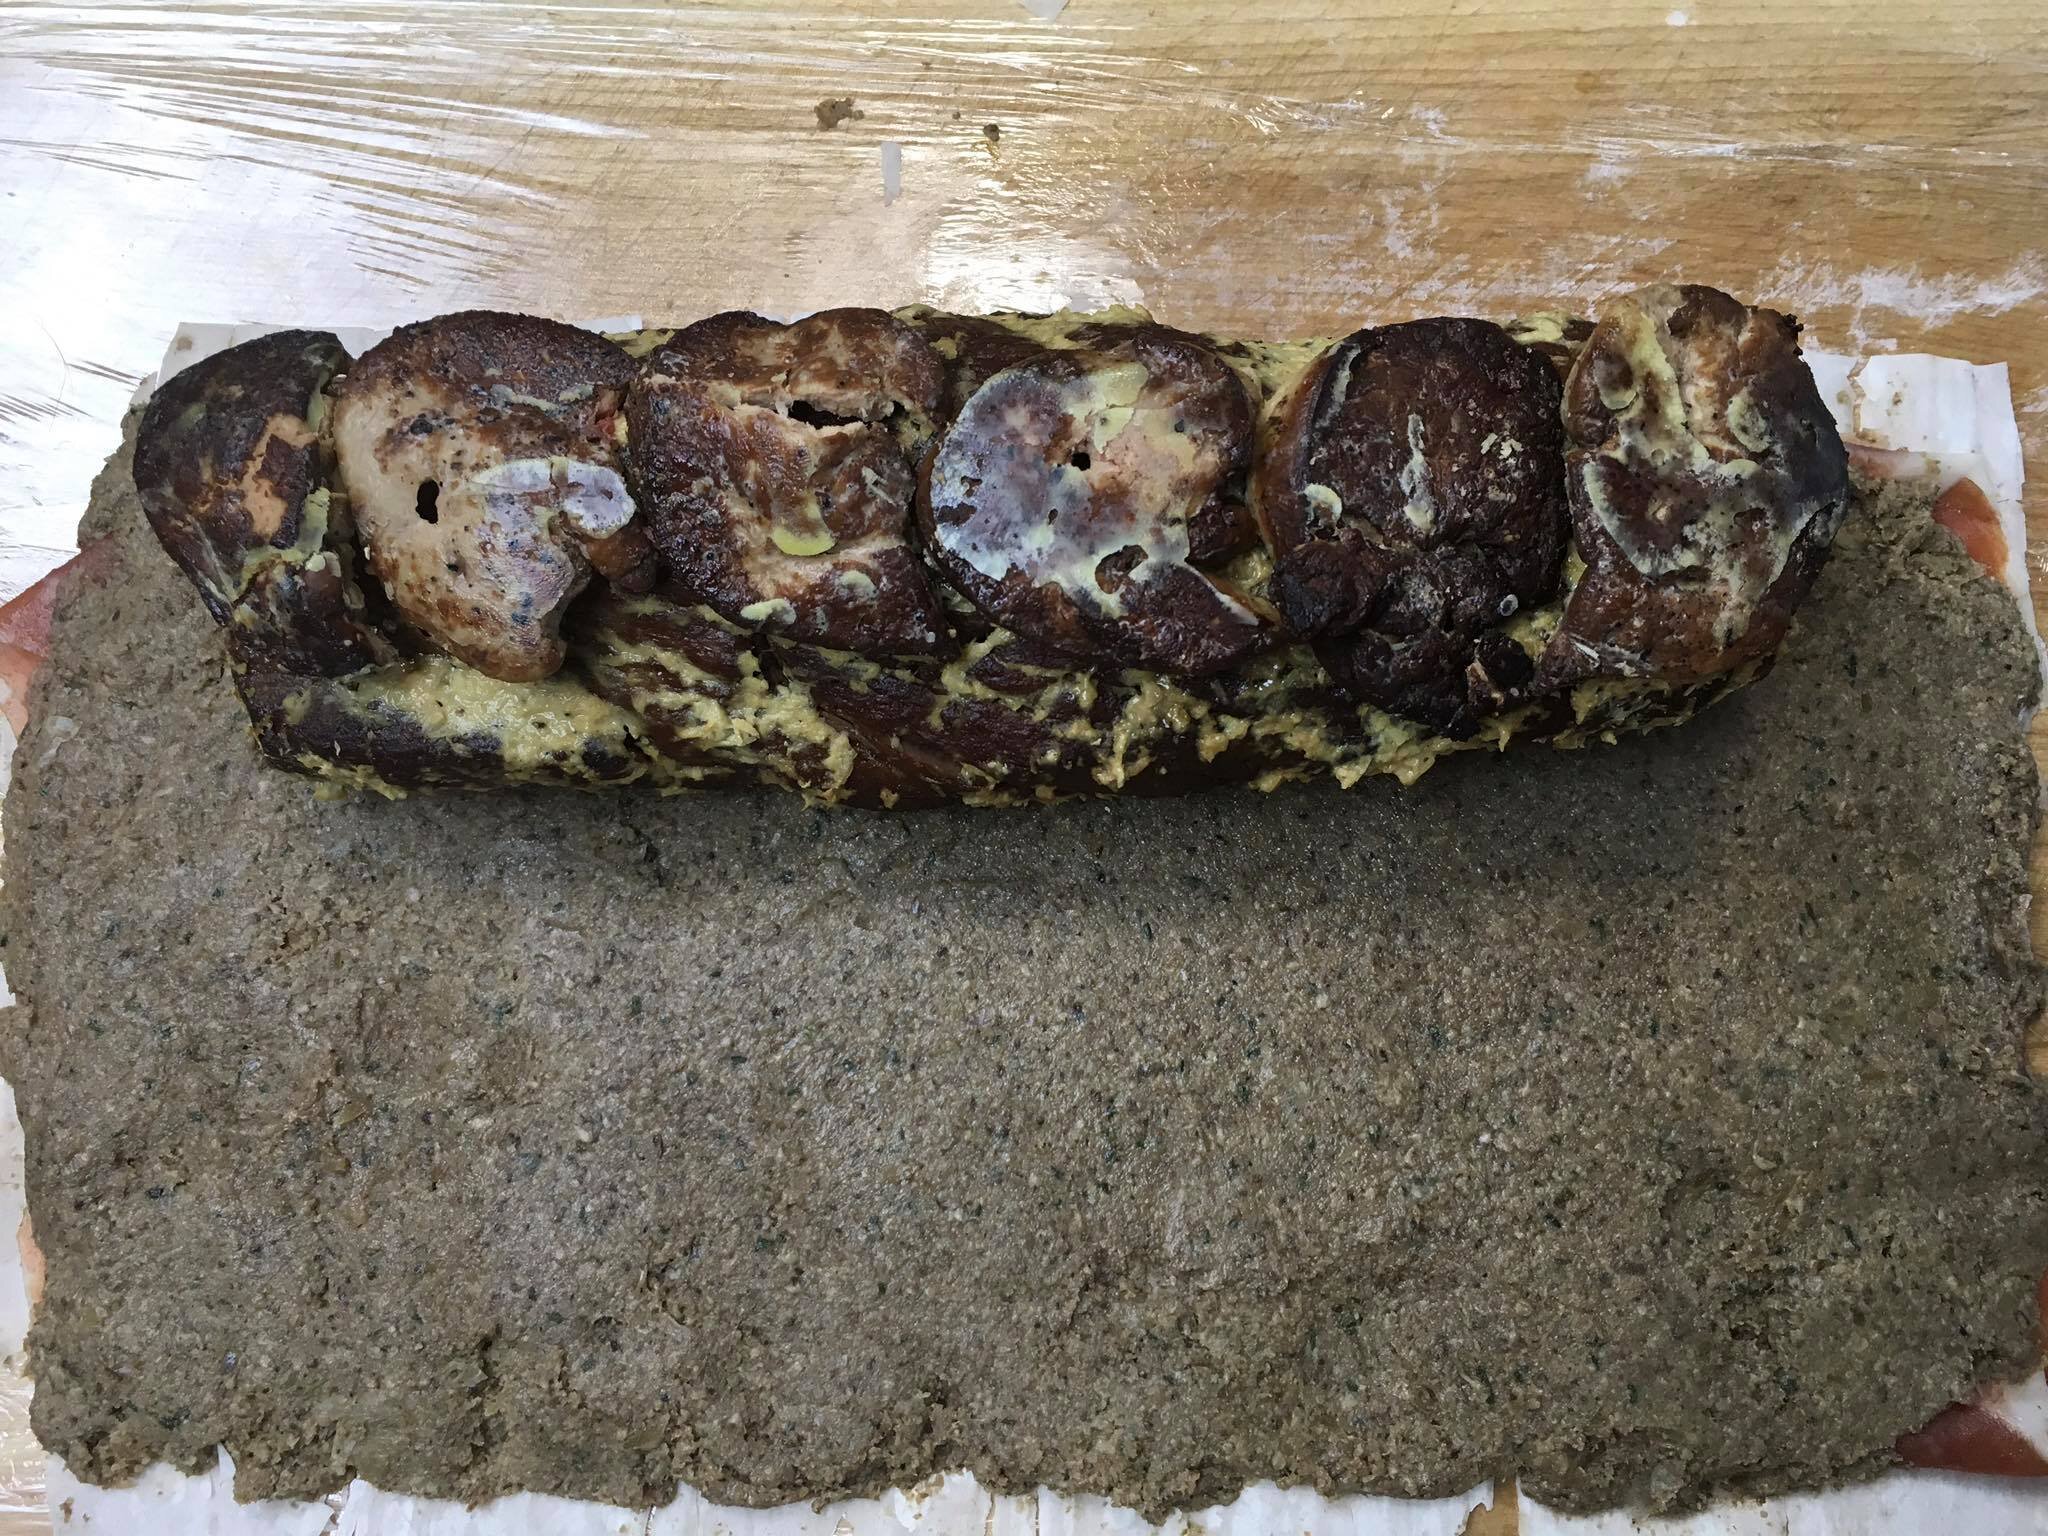
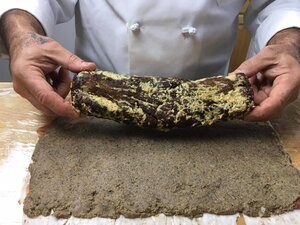
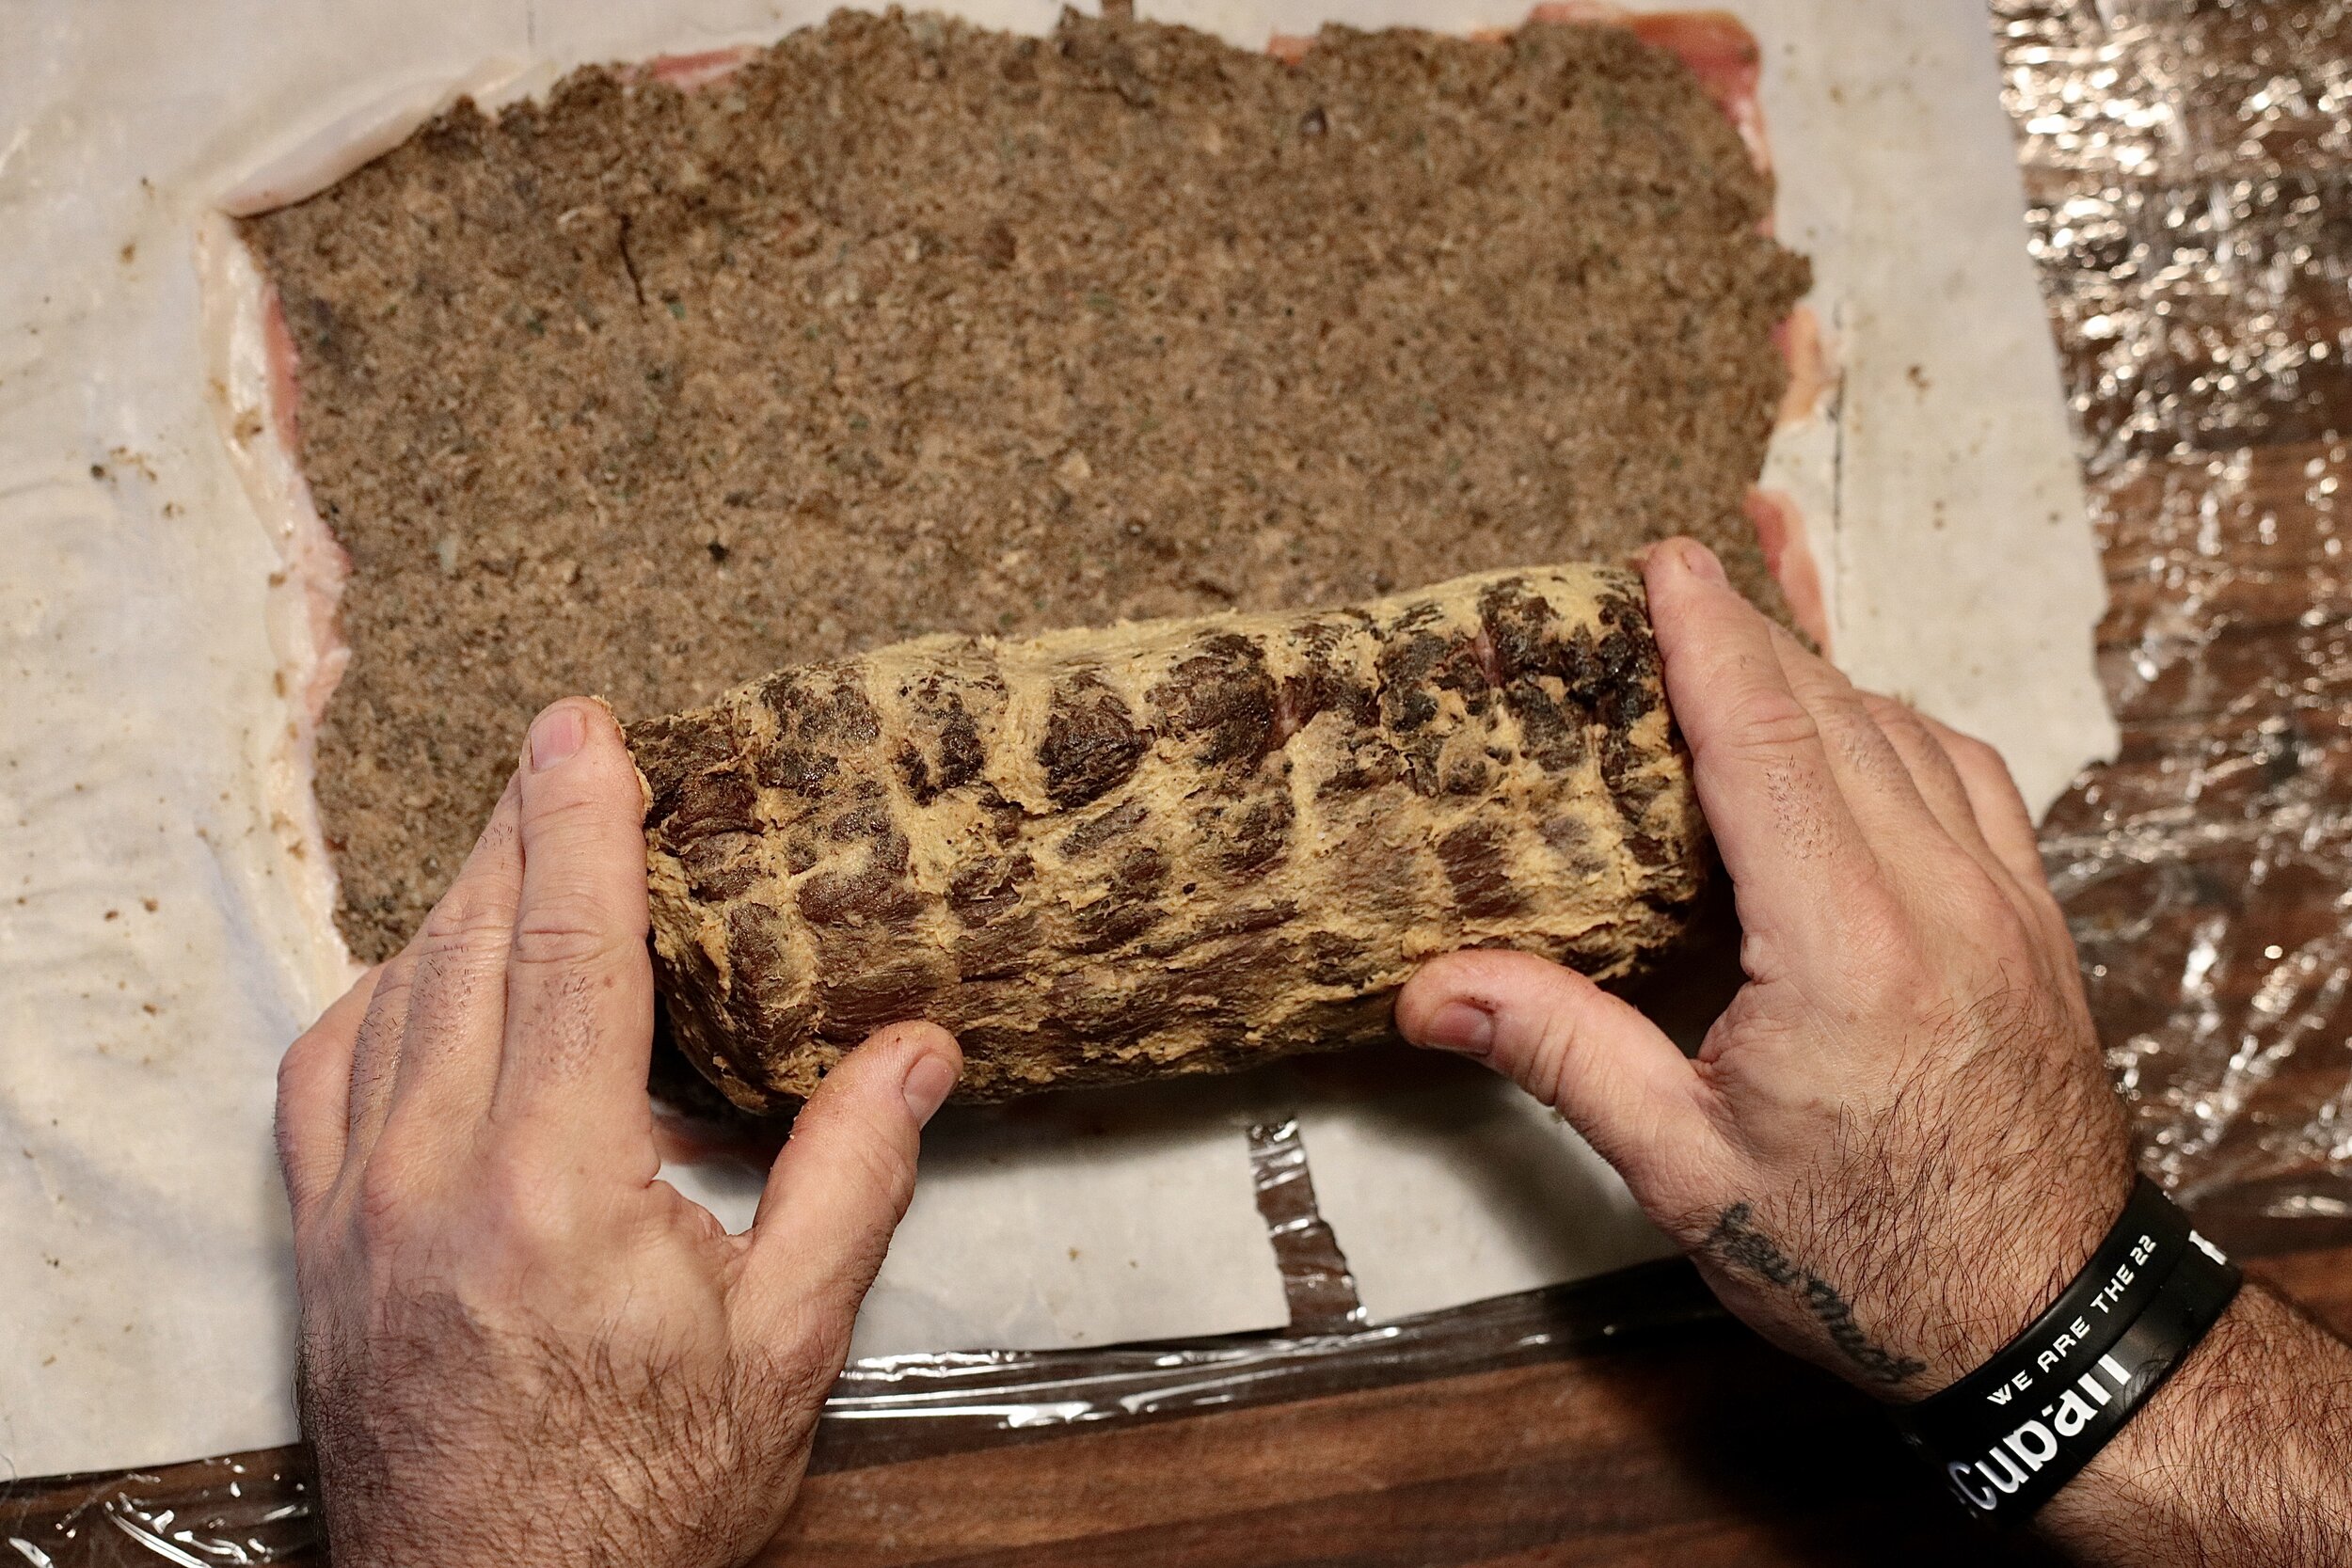
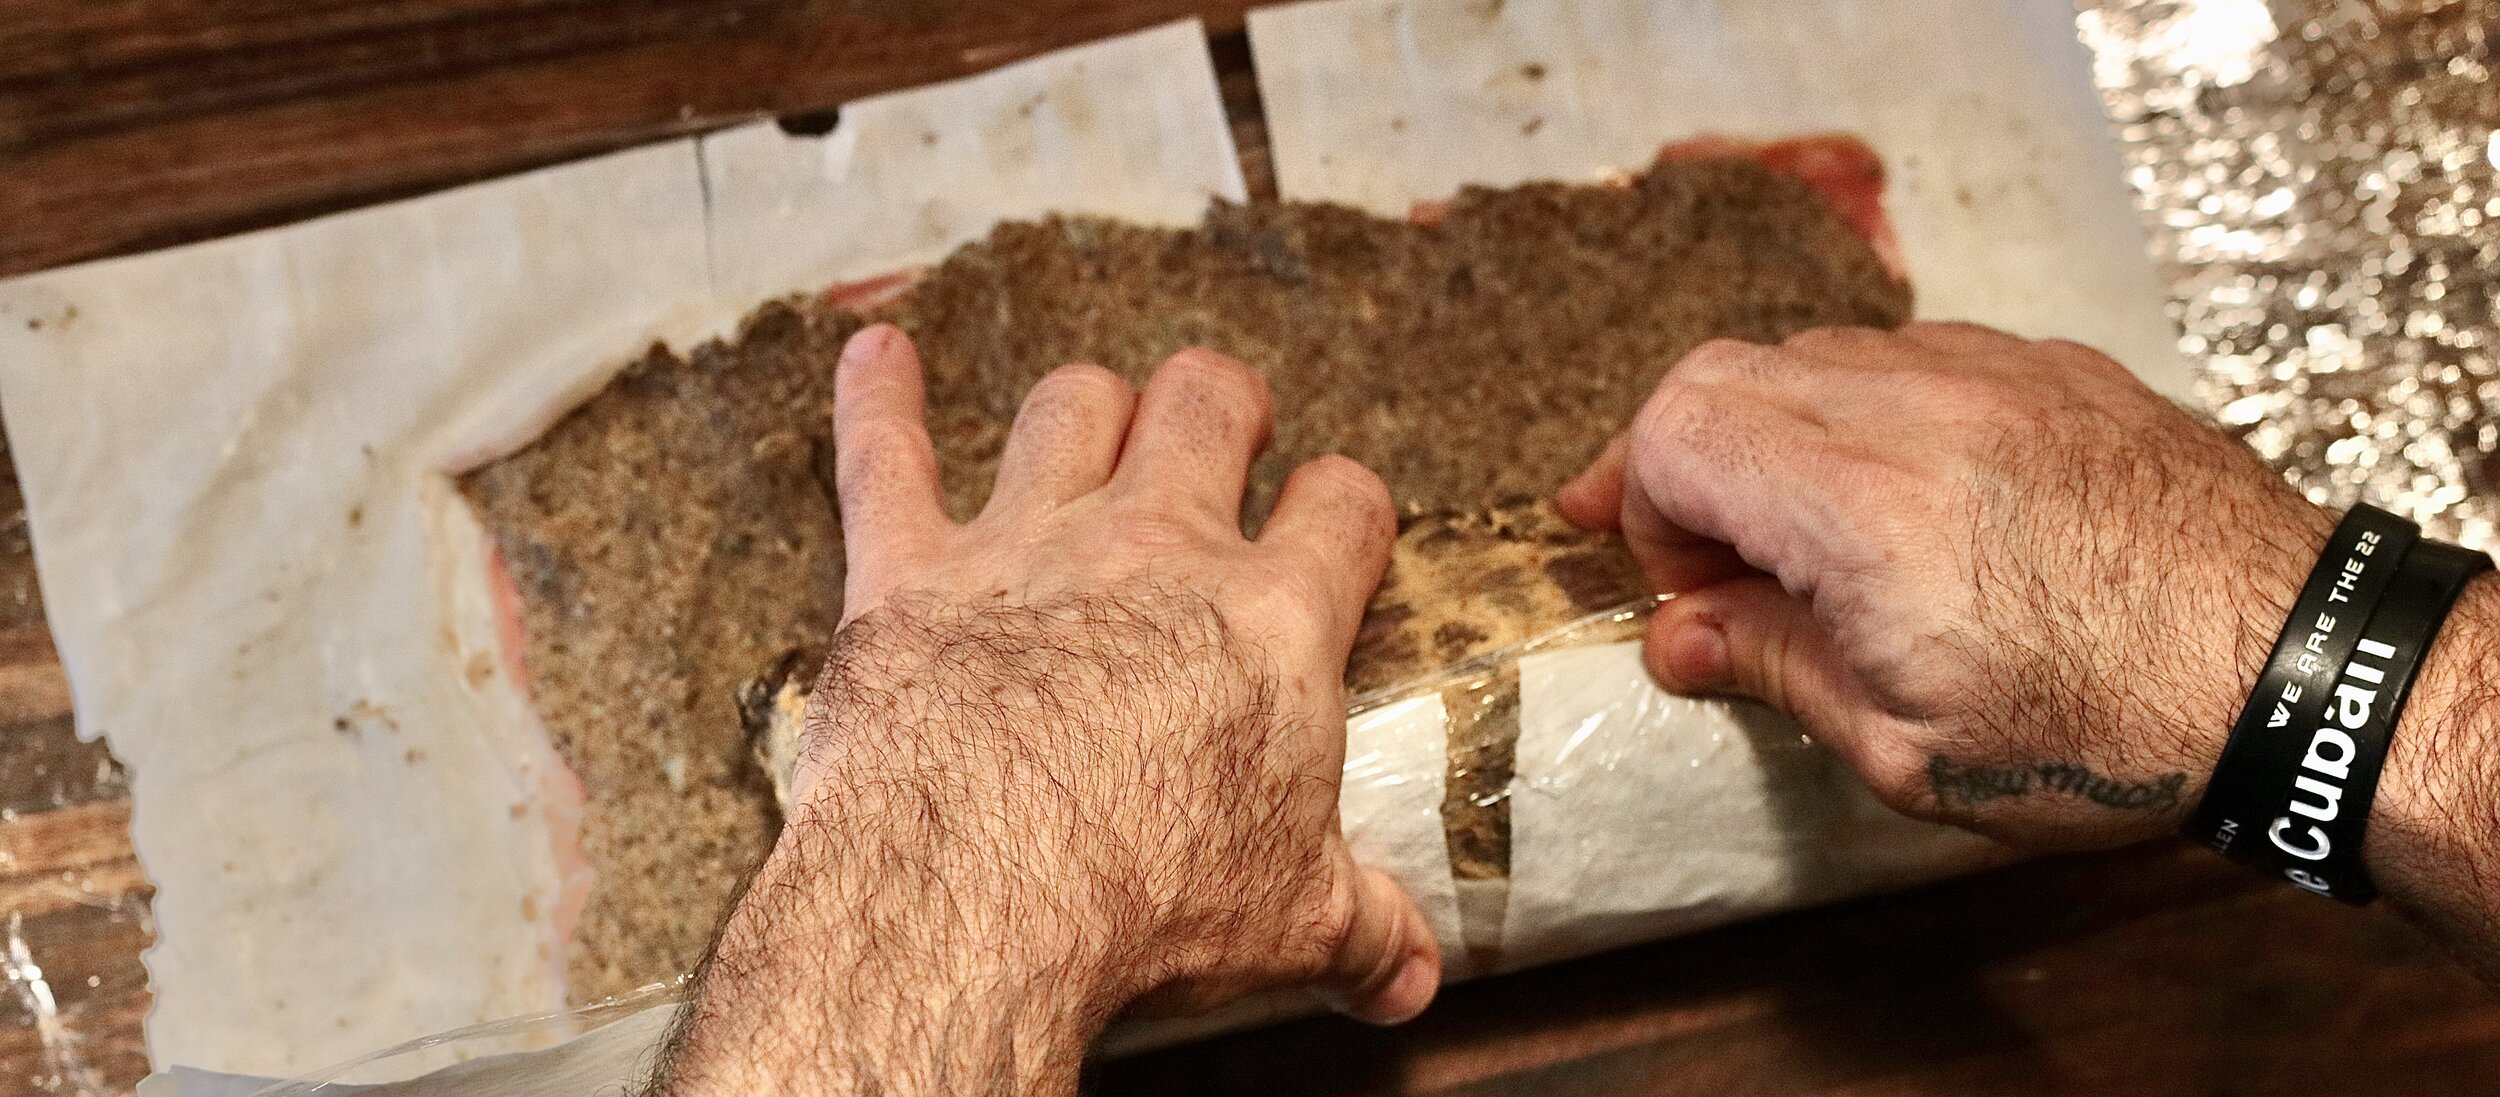
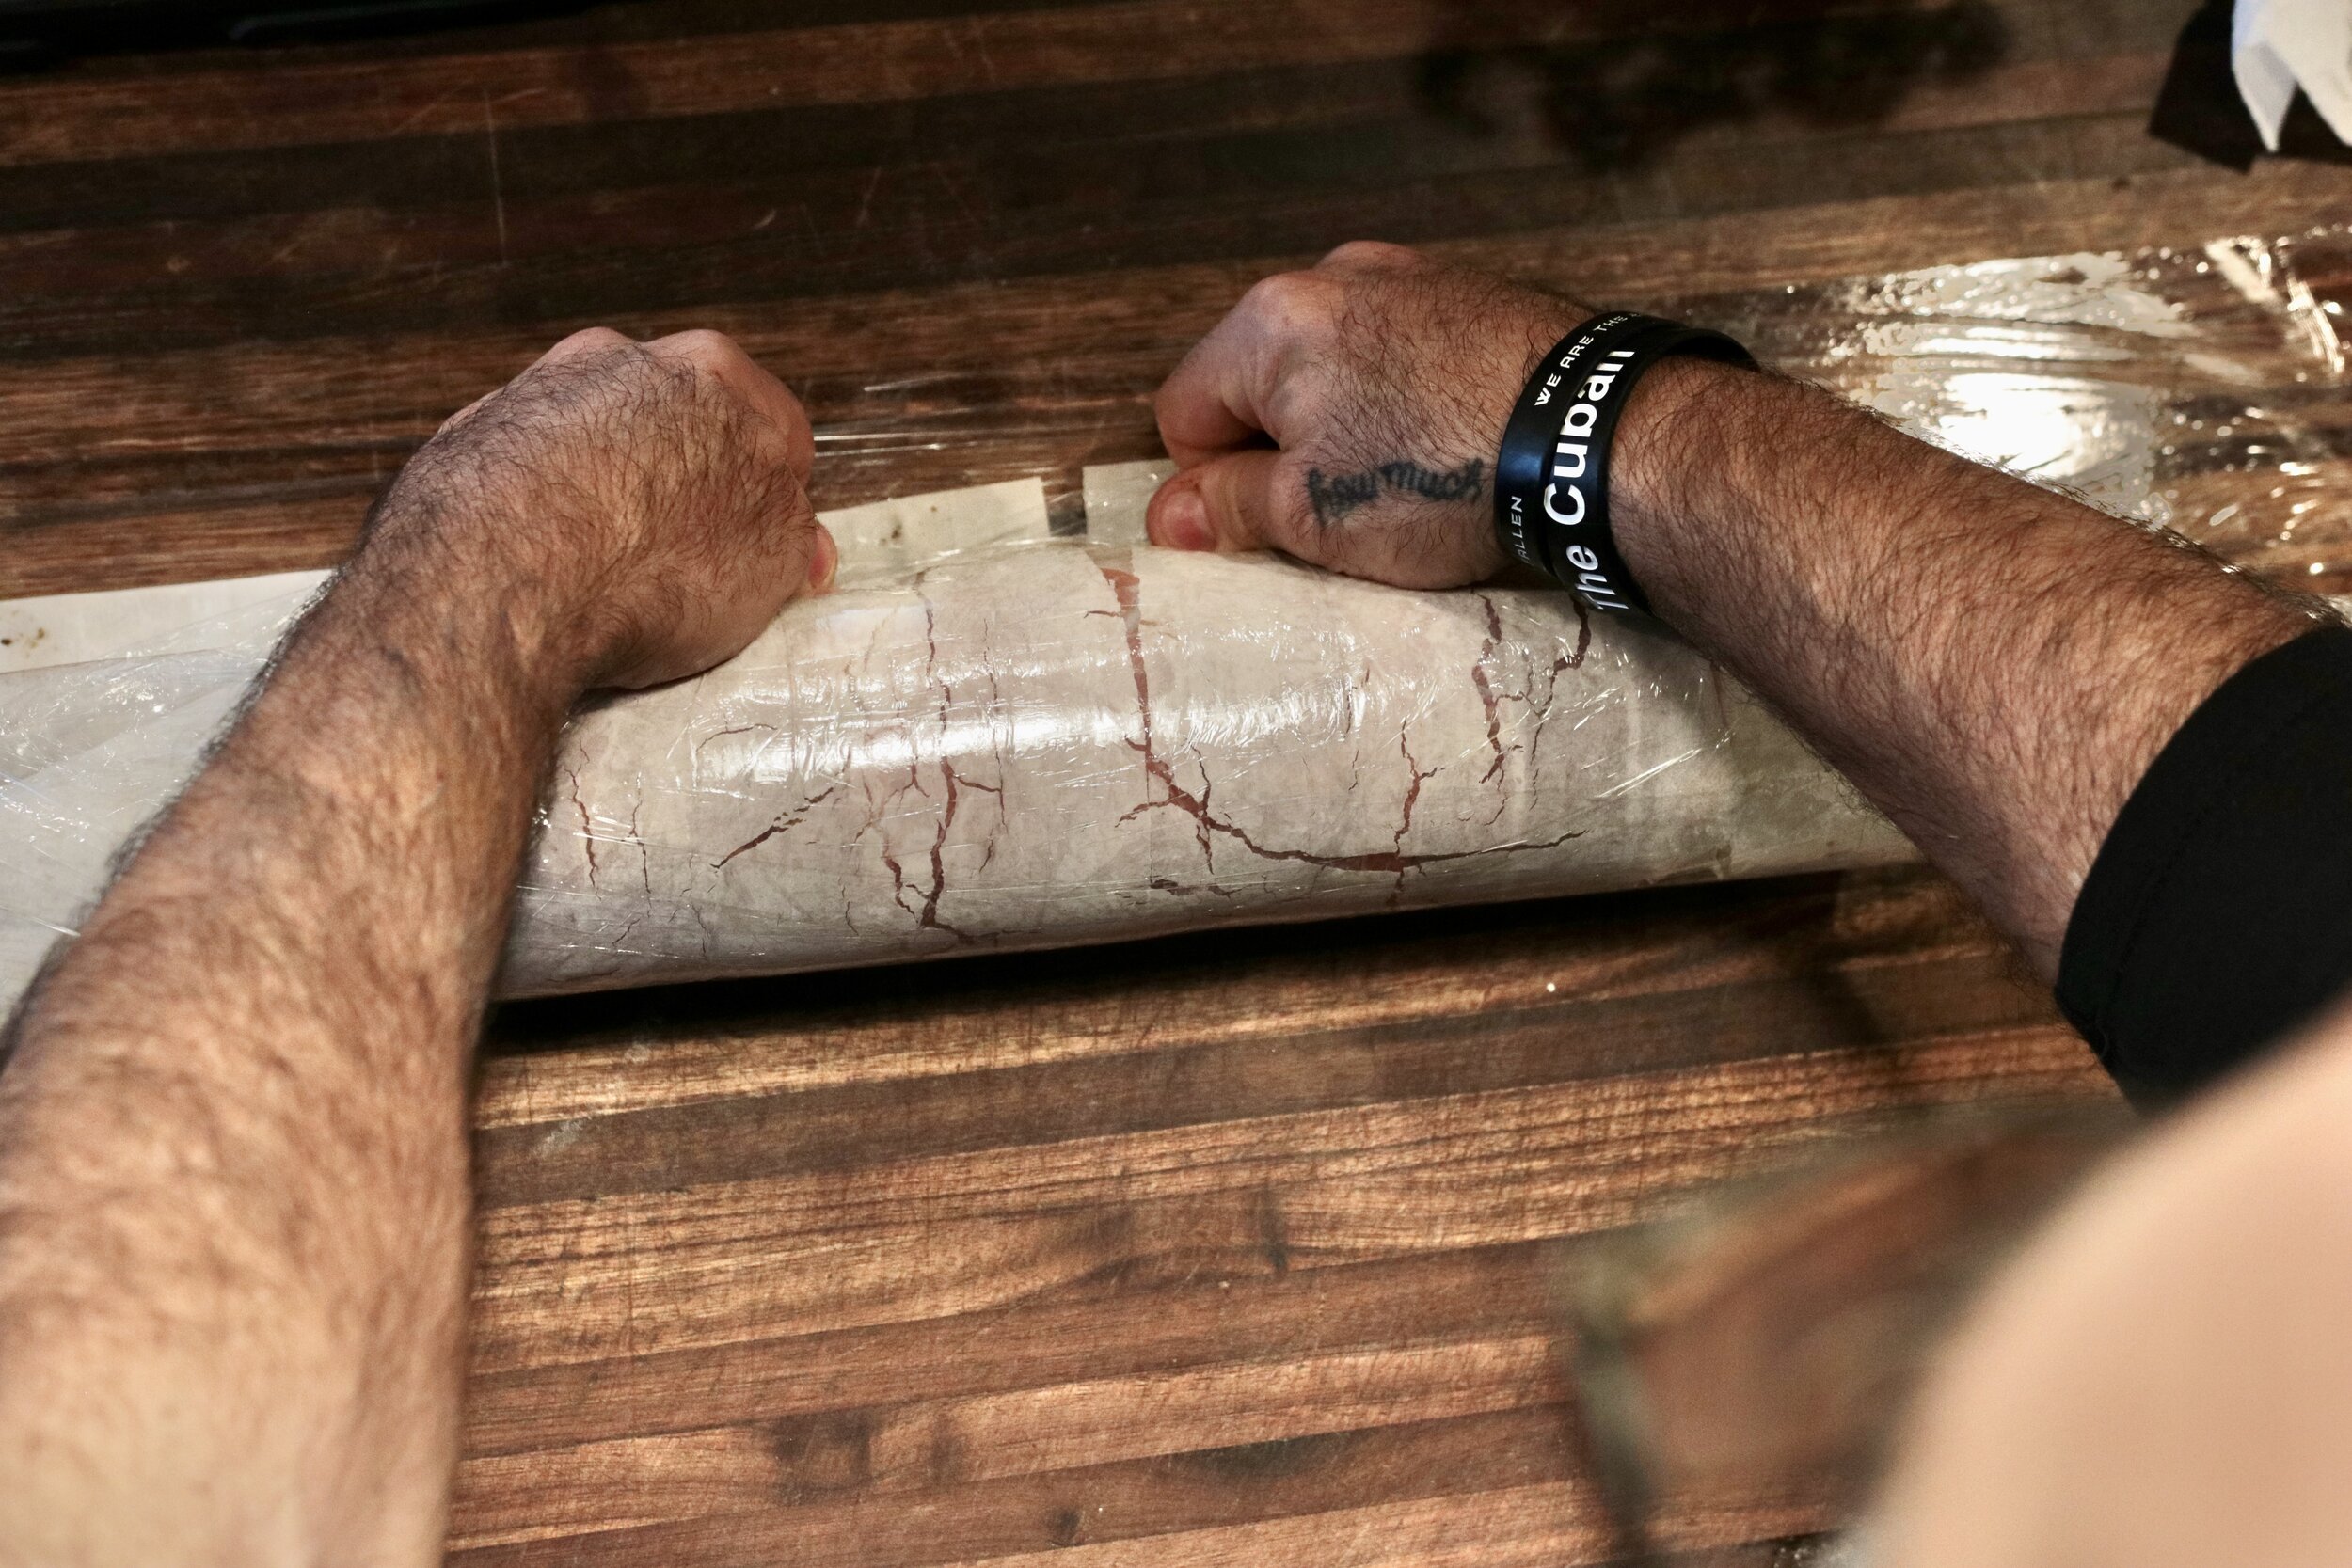
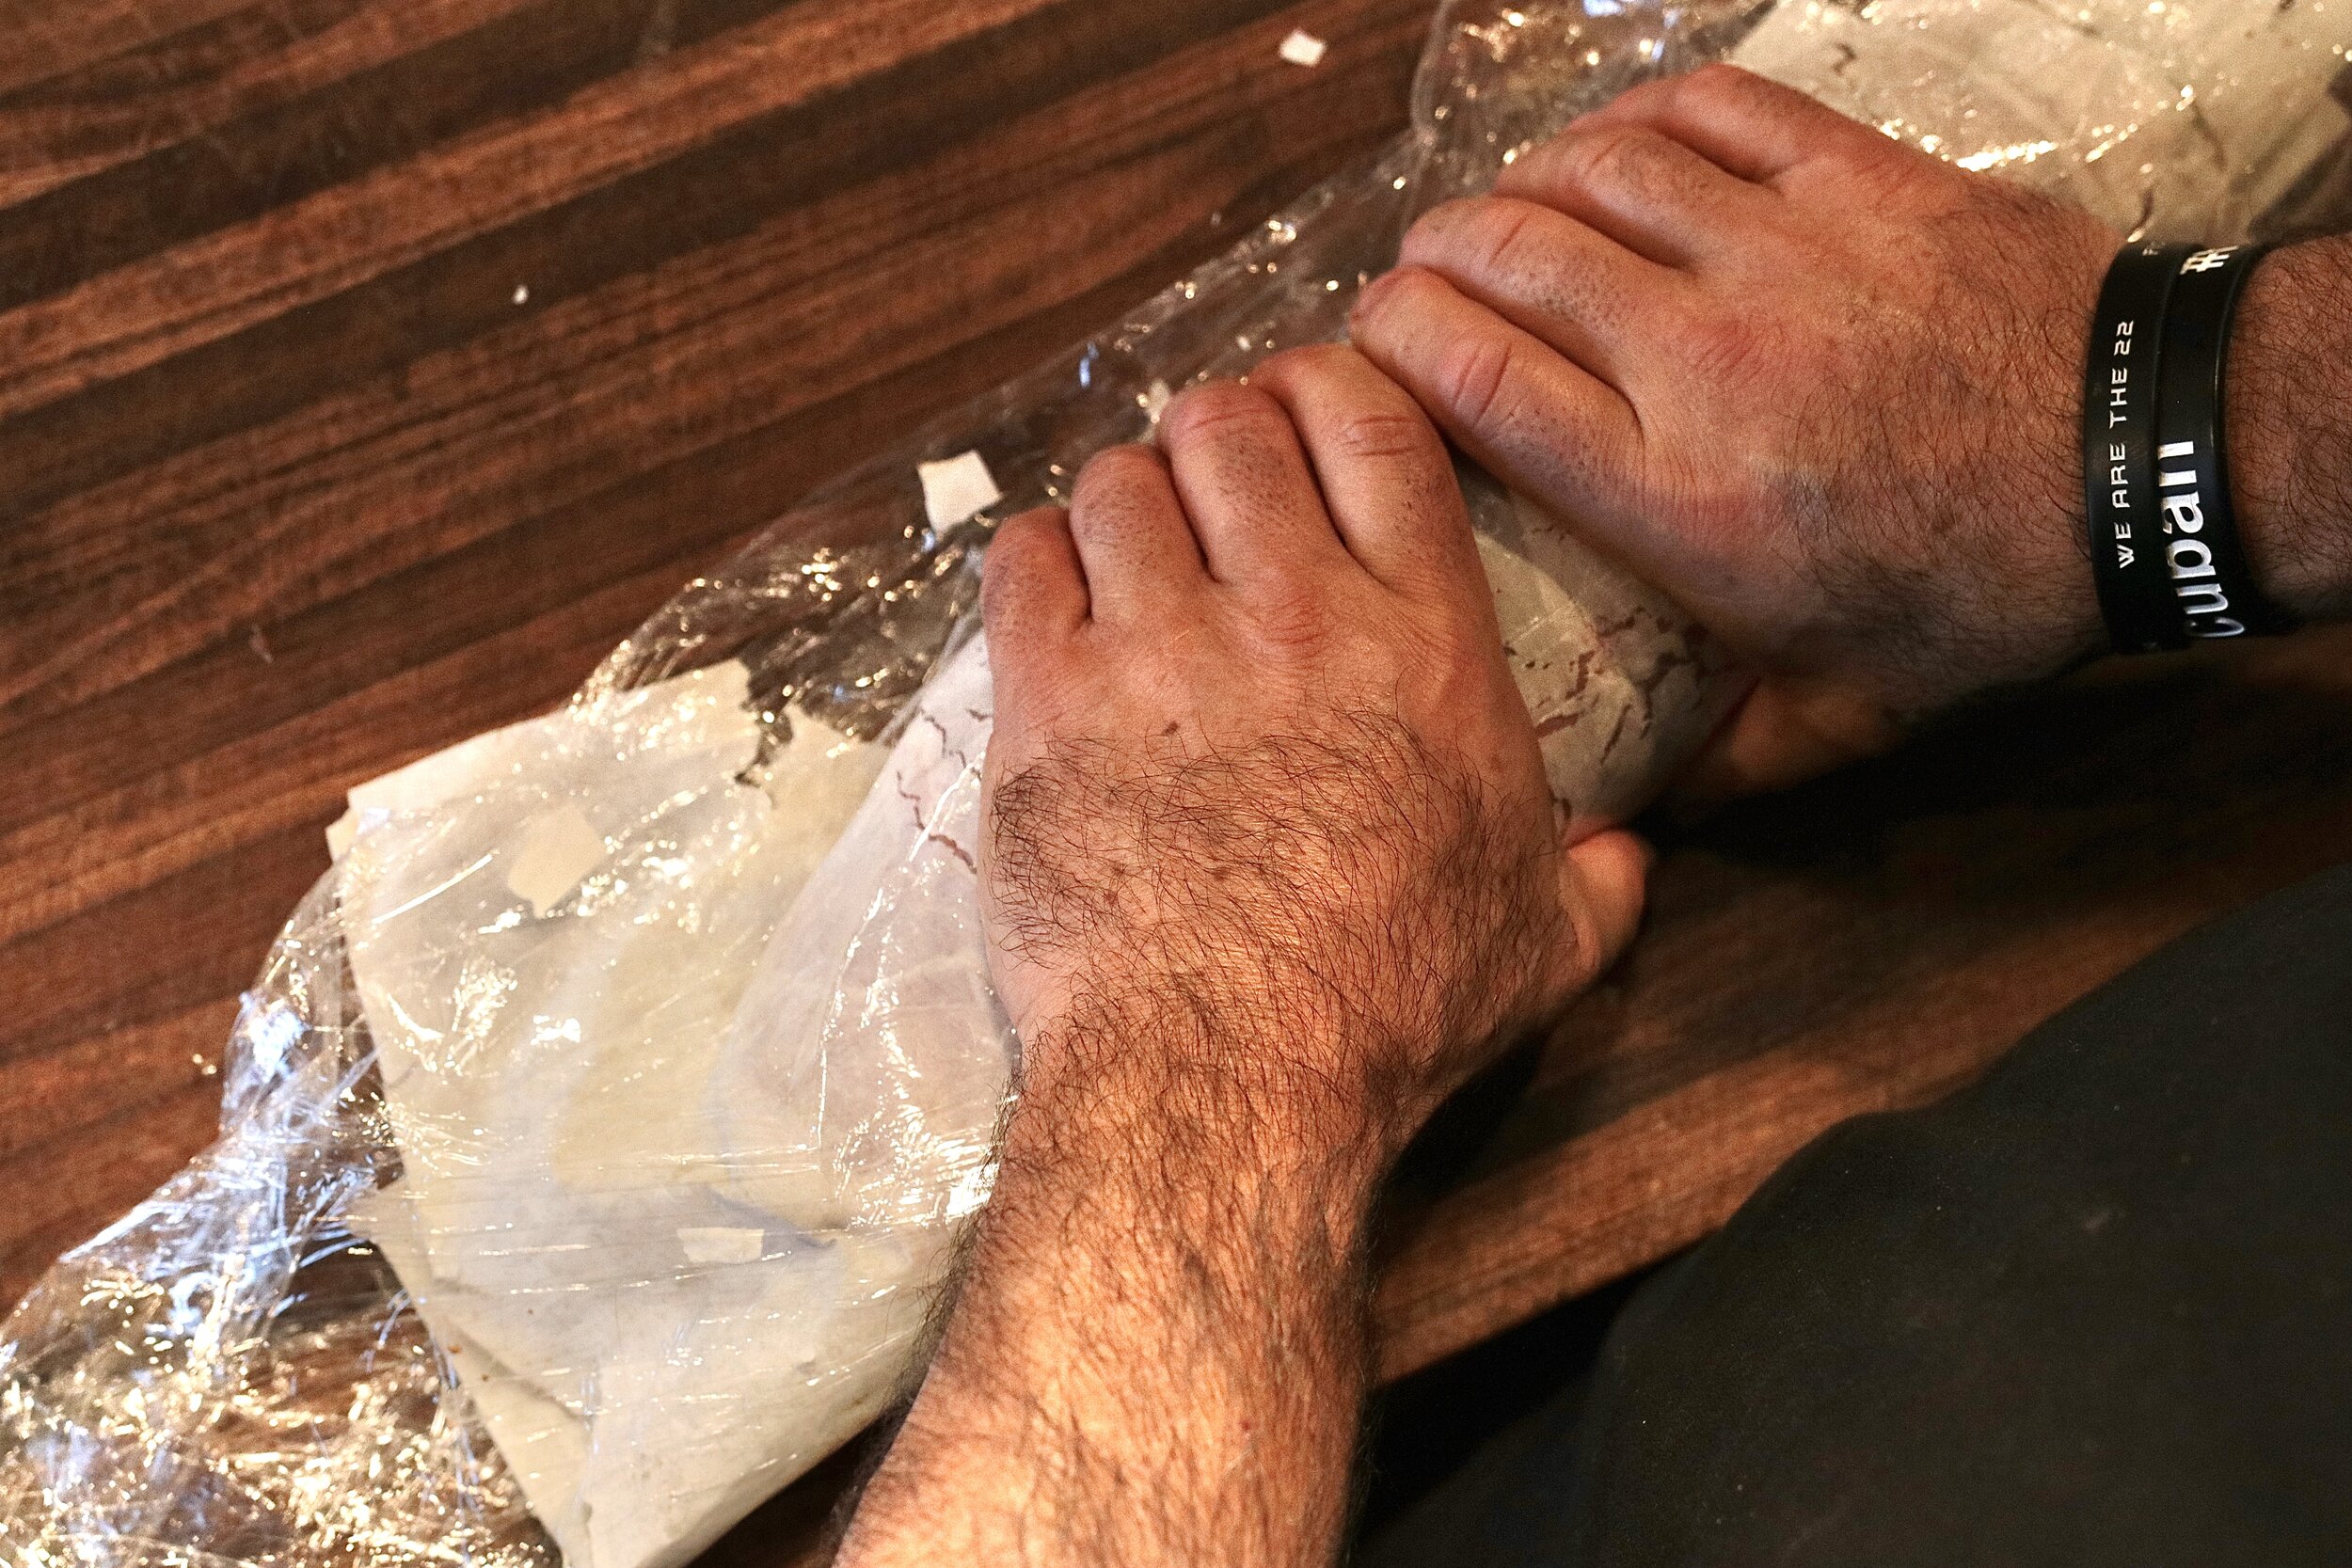
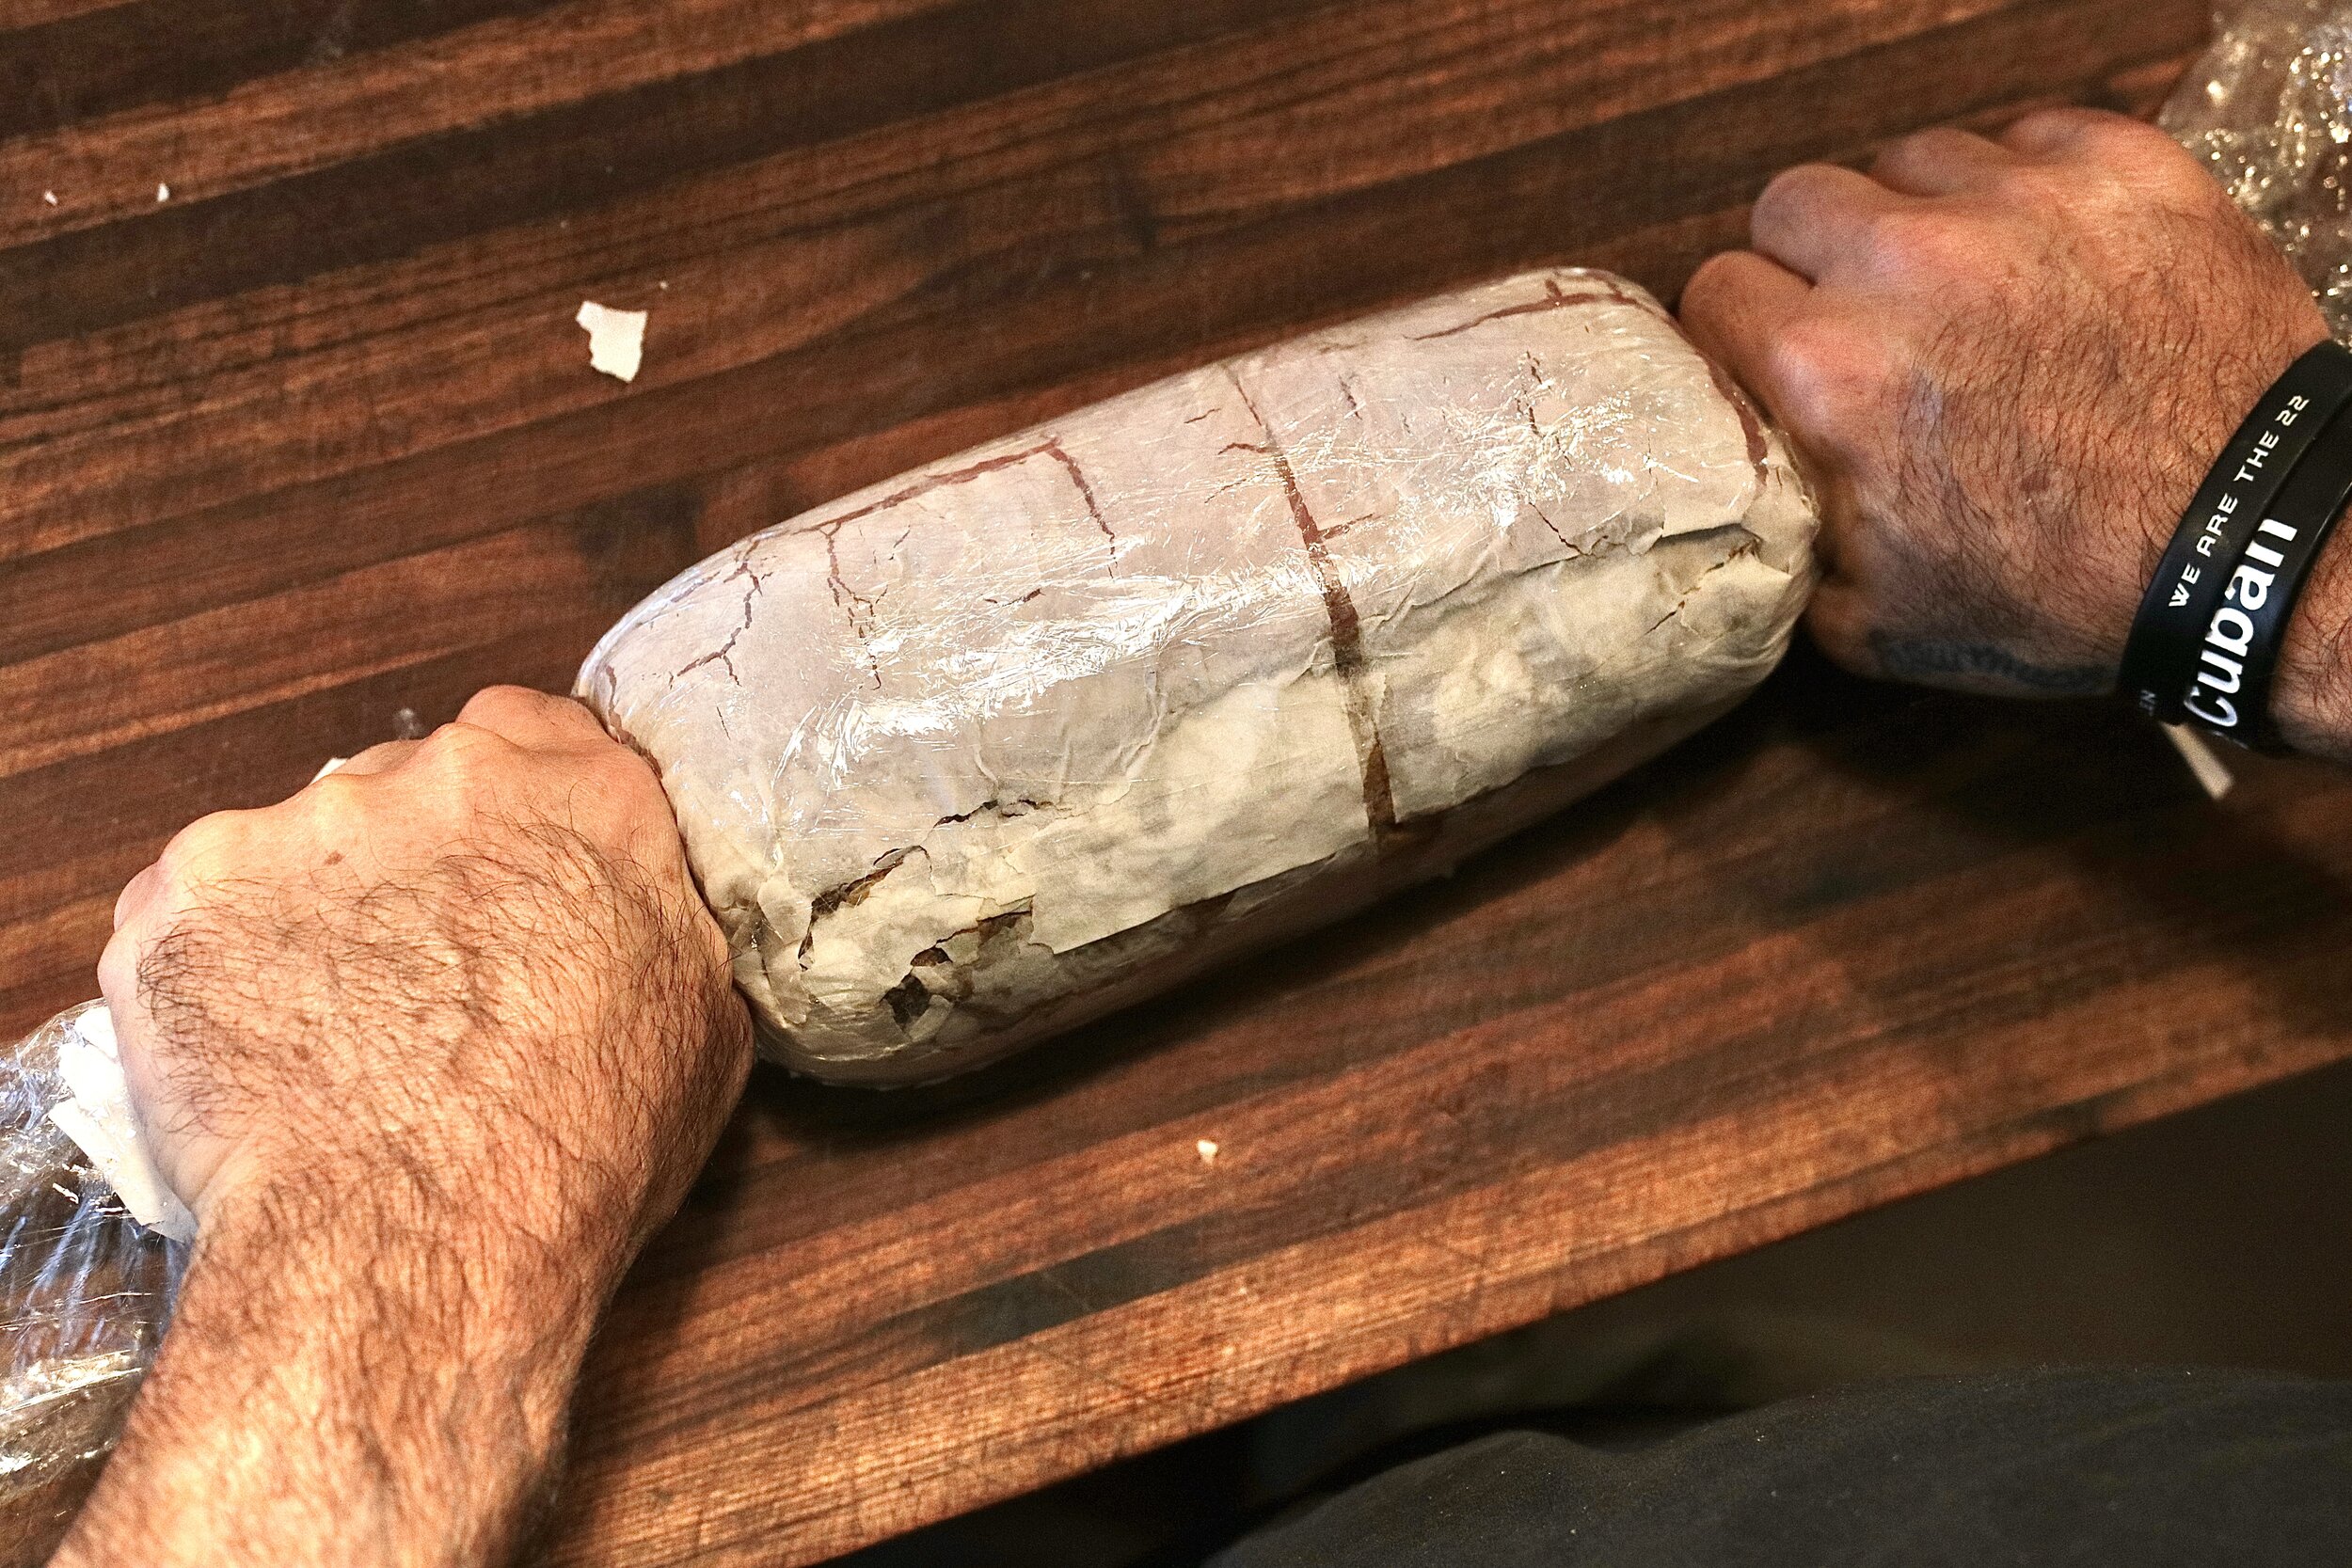
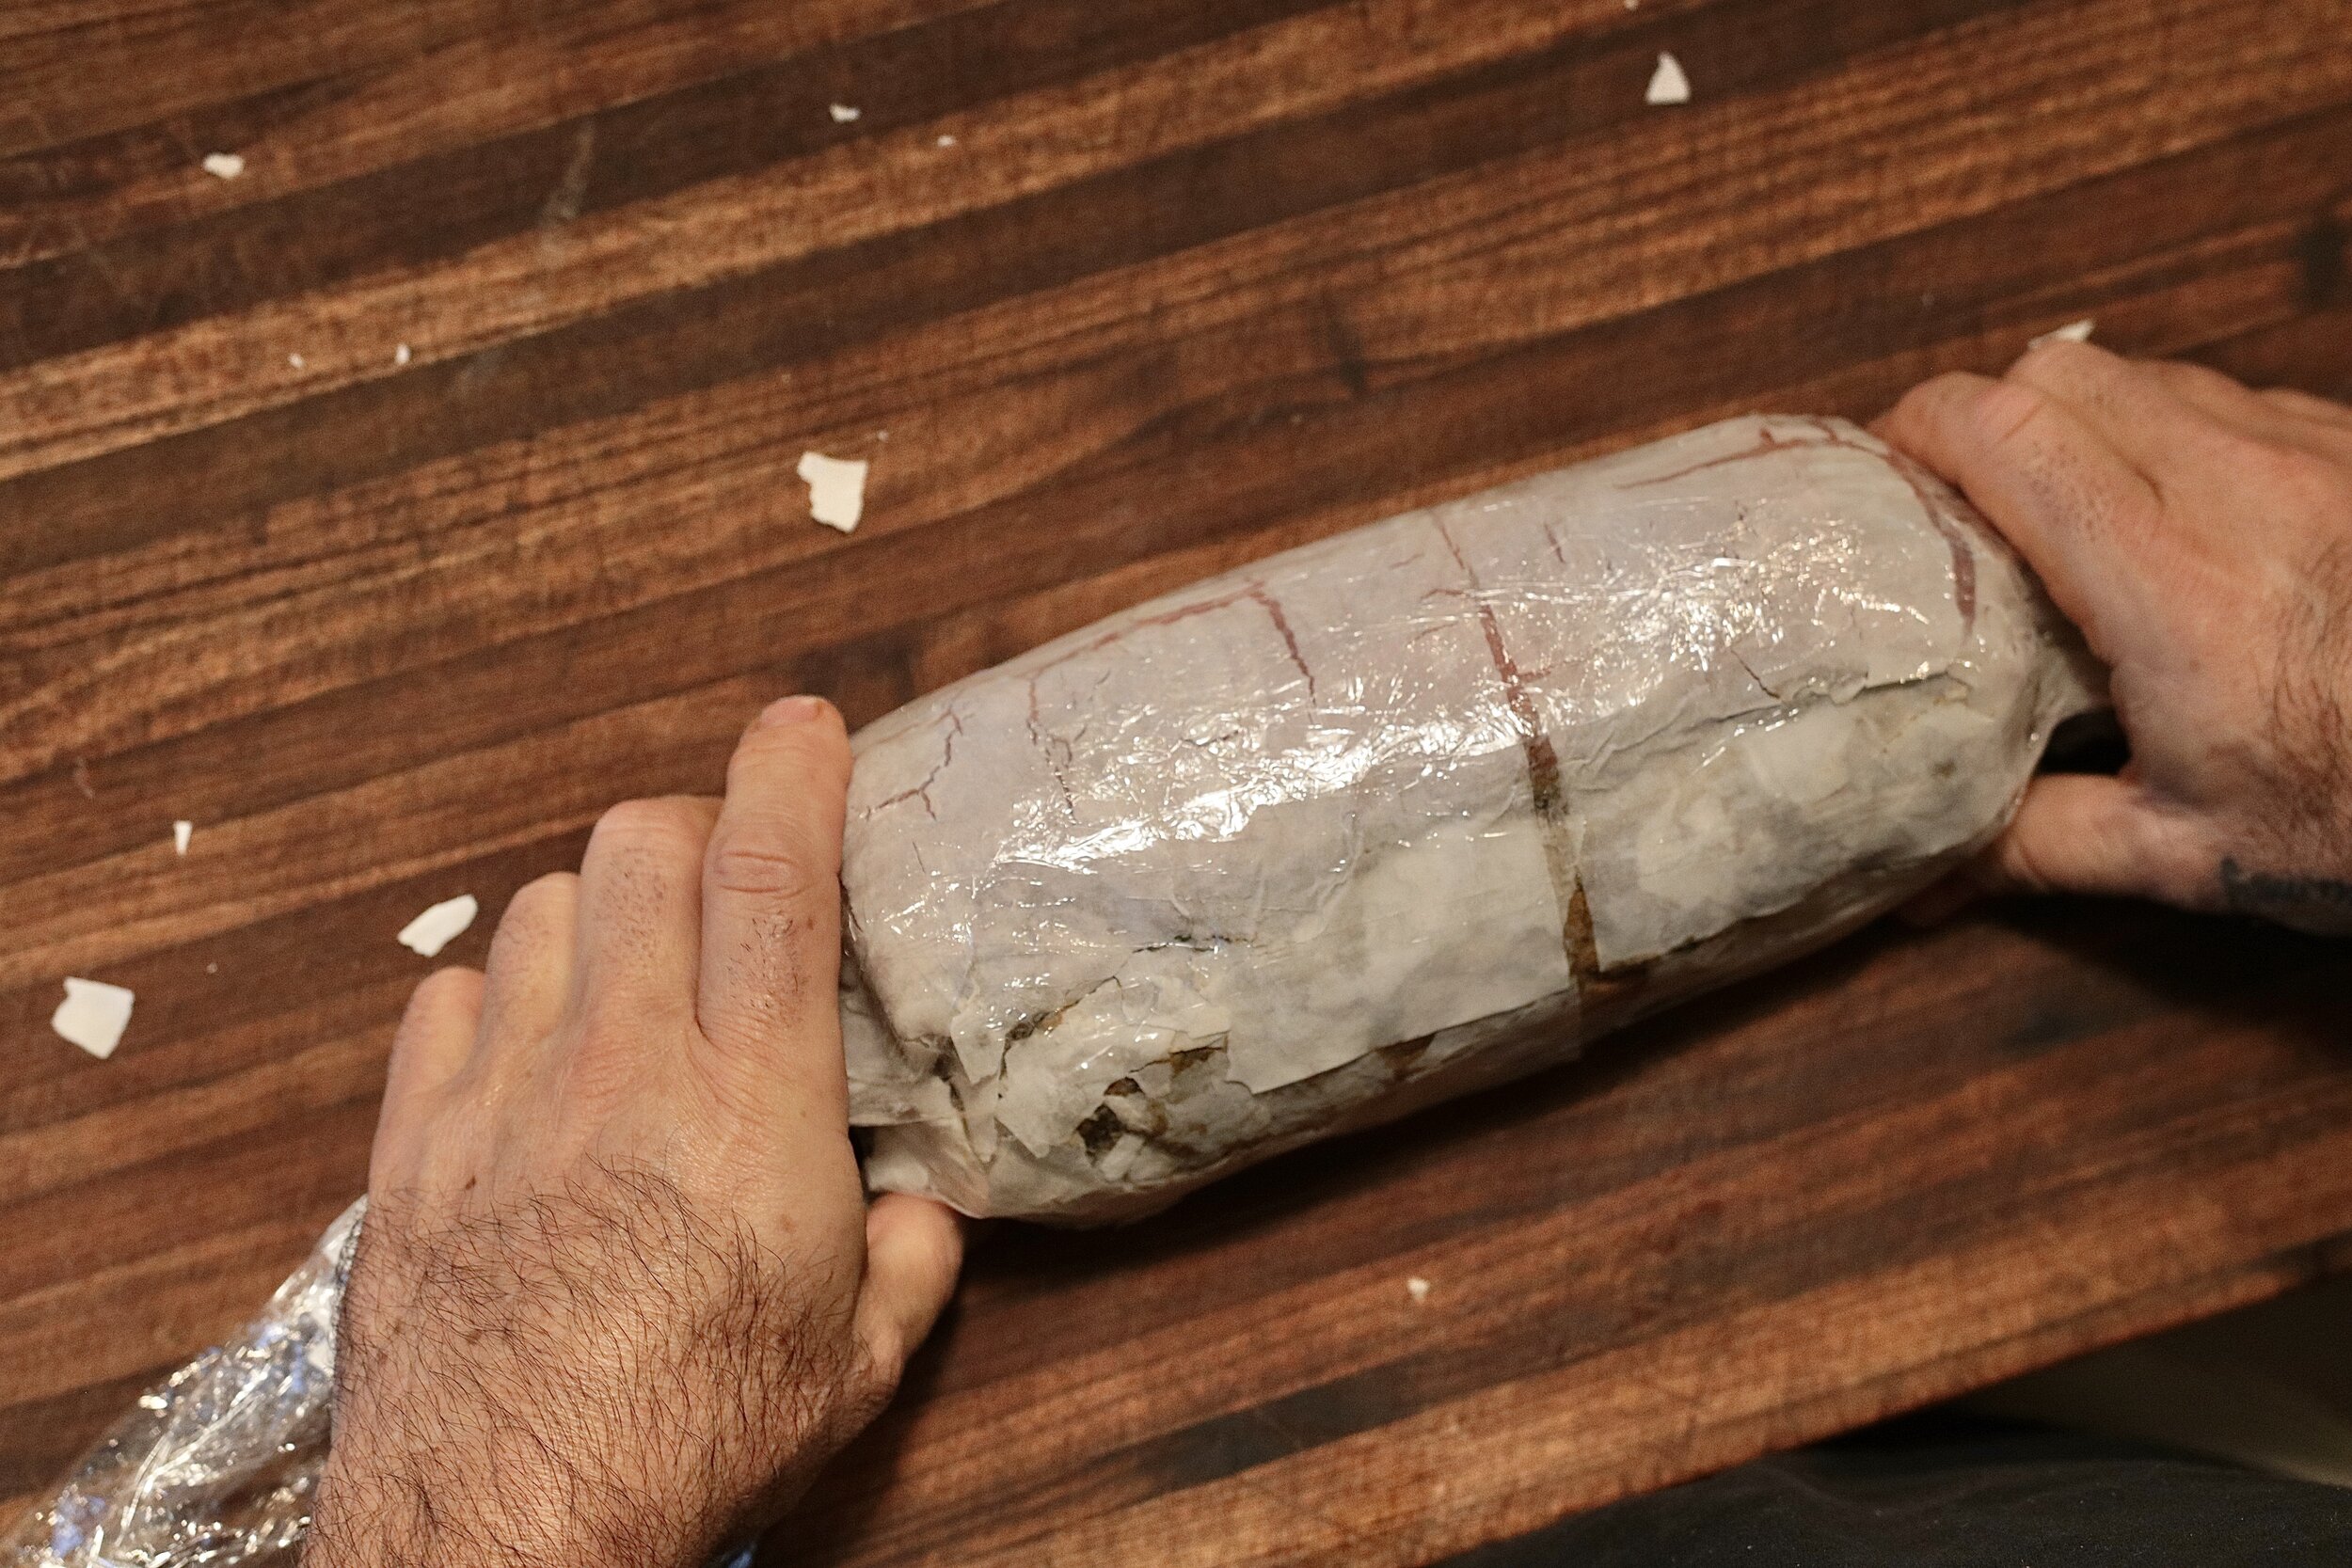
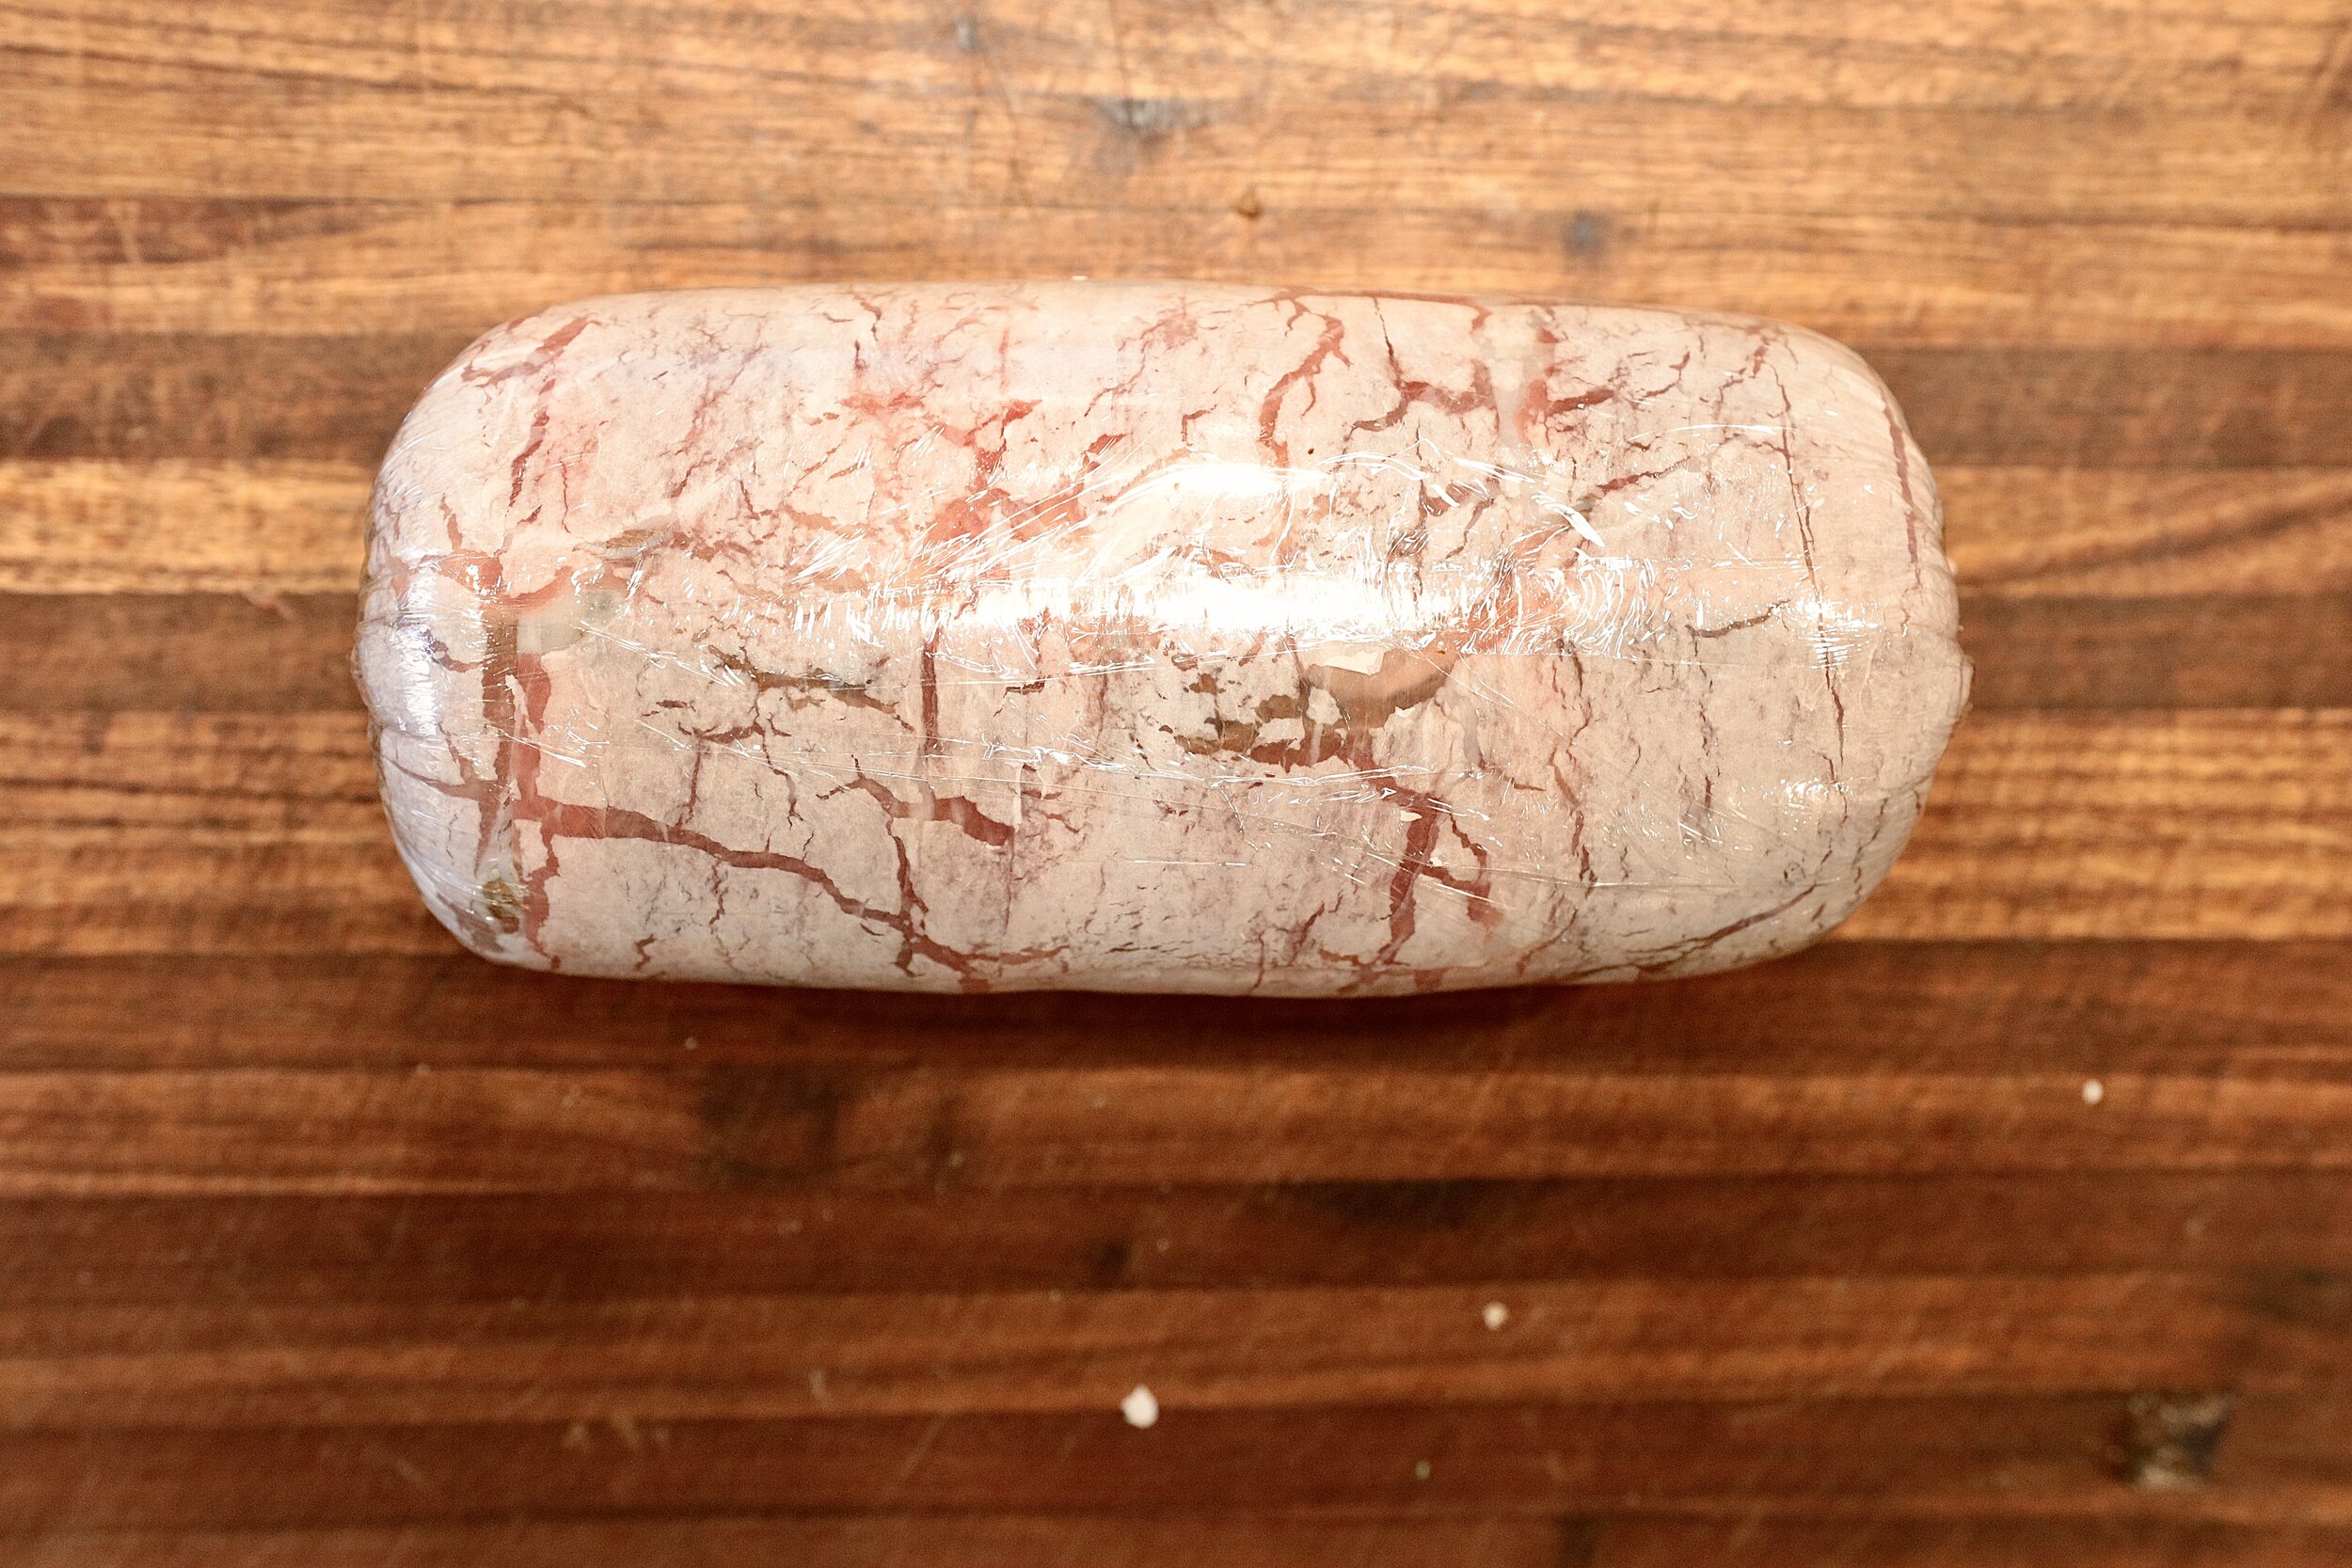
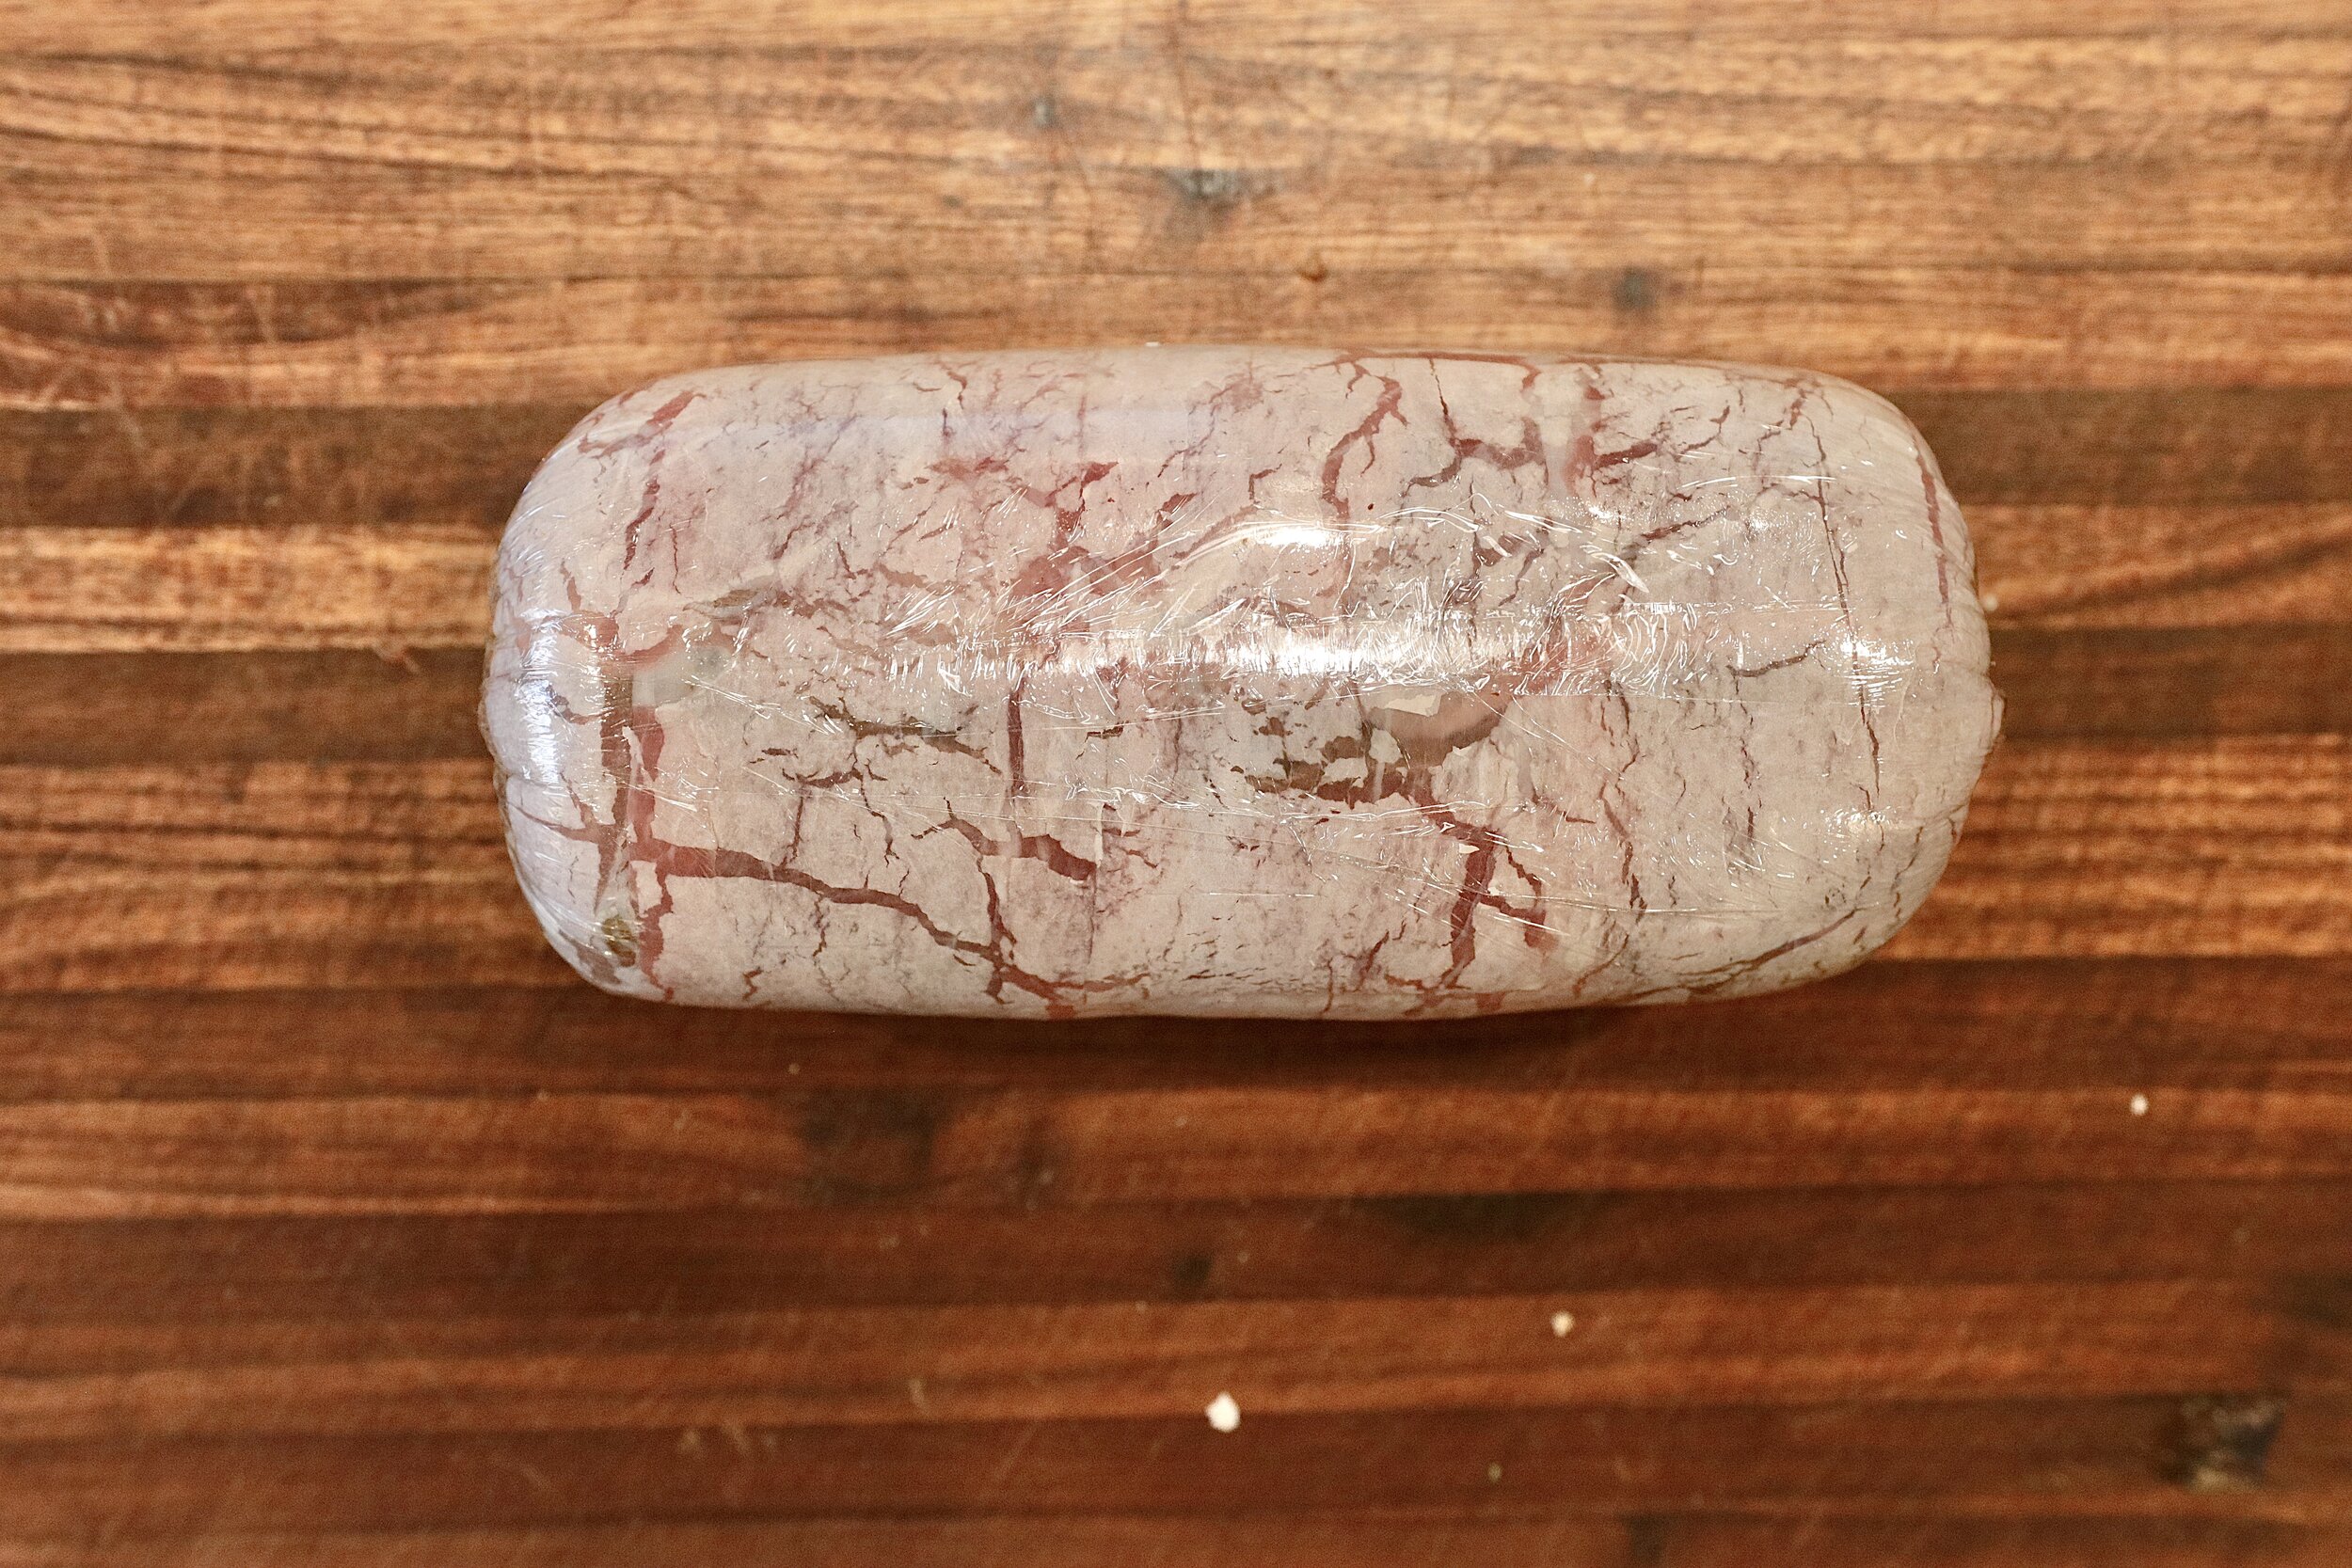
11. Carefully roll tenderloin in mushroom, prosciutto, and filo, using the plastic wrap to help tighten it as you roll. Once beef is completely rolled up, re-wrap with more plastic wrap, twisting the ends to make sure roll is very tight. Return to refrigerator. Note: as you can see in the pictures the filo dough split, this has no impact and is okay


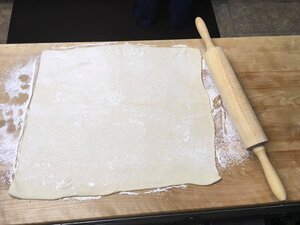
11. Dust board or countertop lightly with flour. Spread puff pastry on board and, using a rolling pin, roll it into a rectangle at least 4-inches wider than the beef roll on its shorter side.
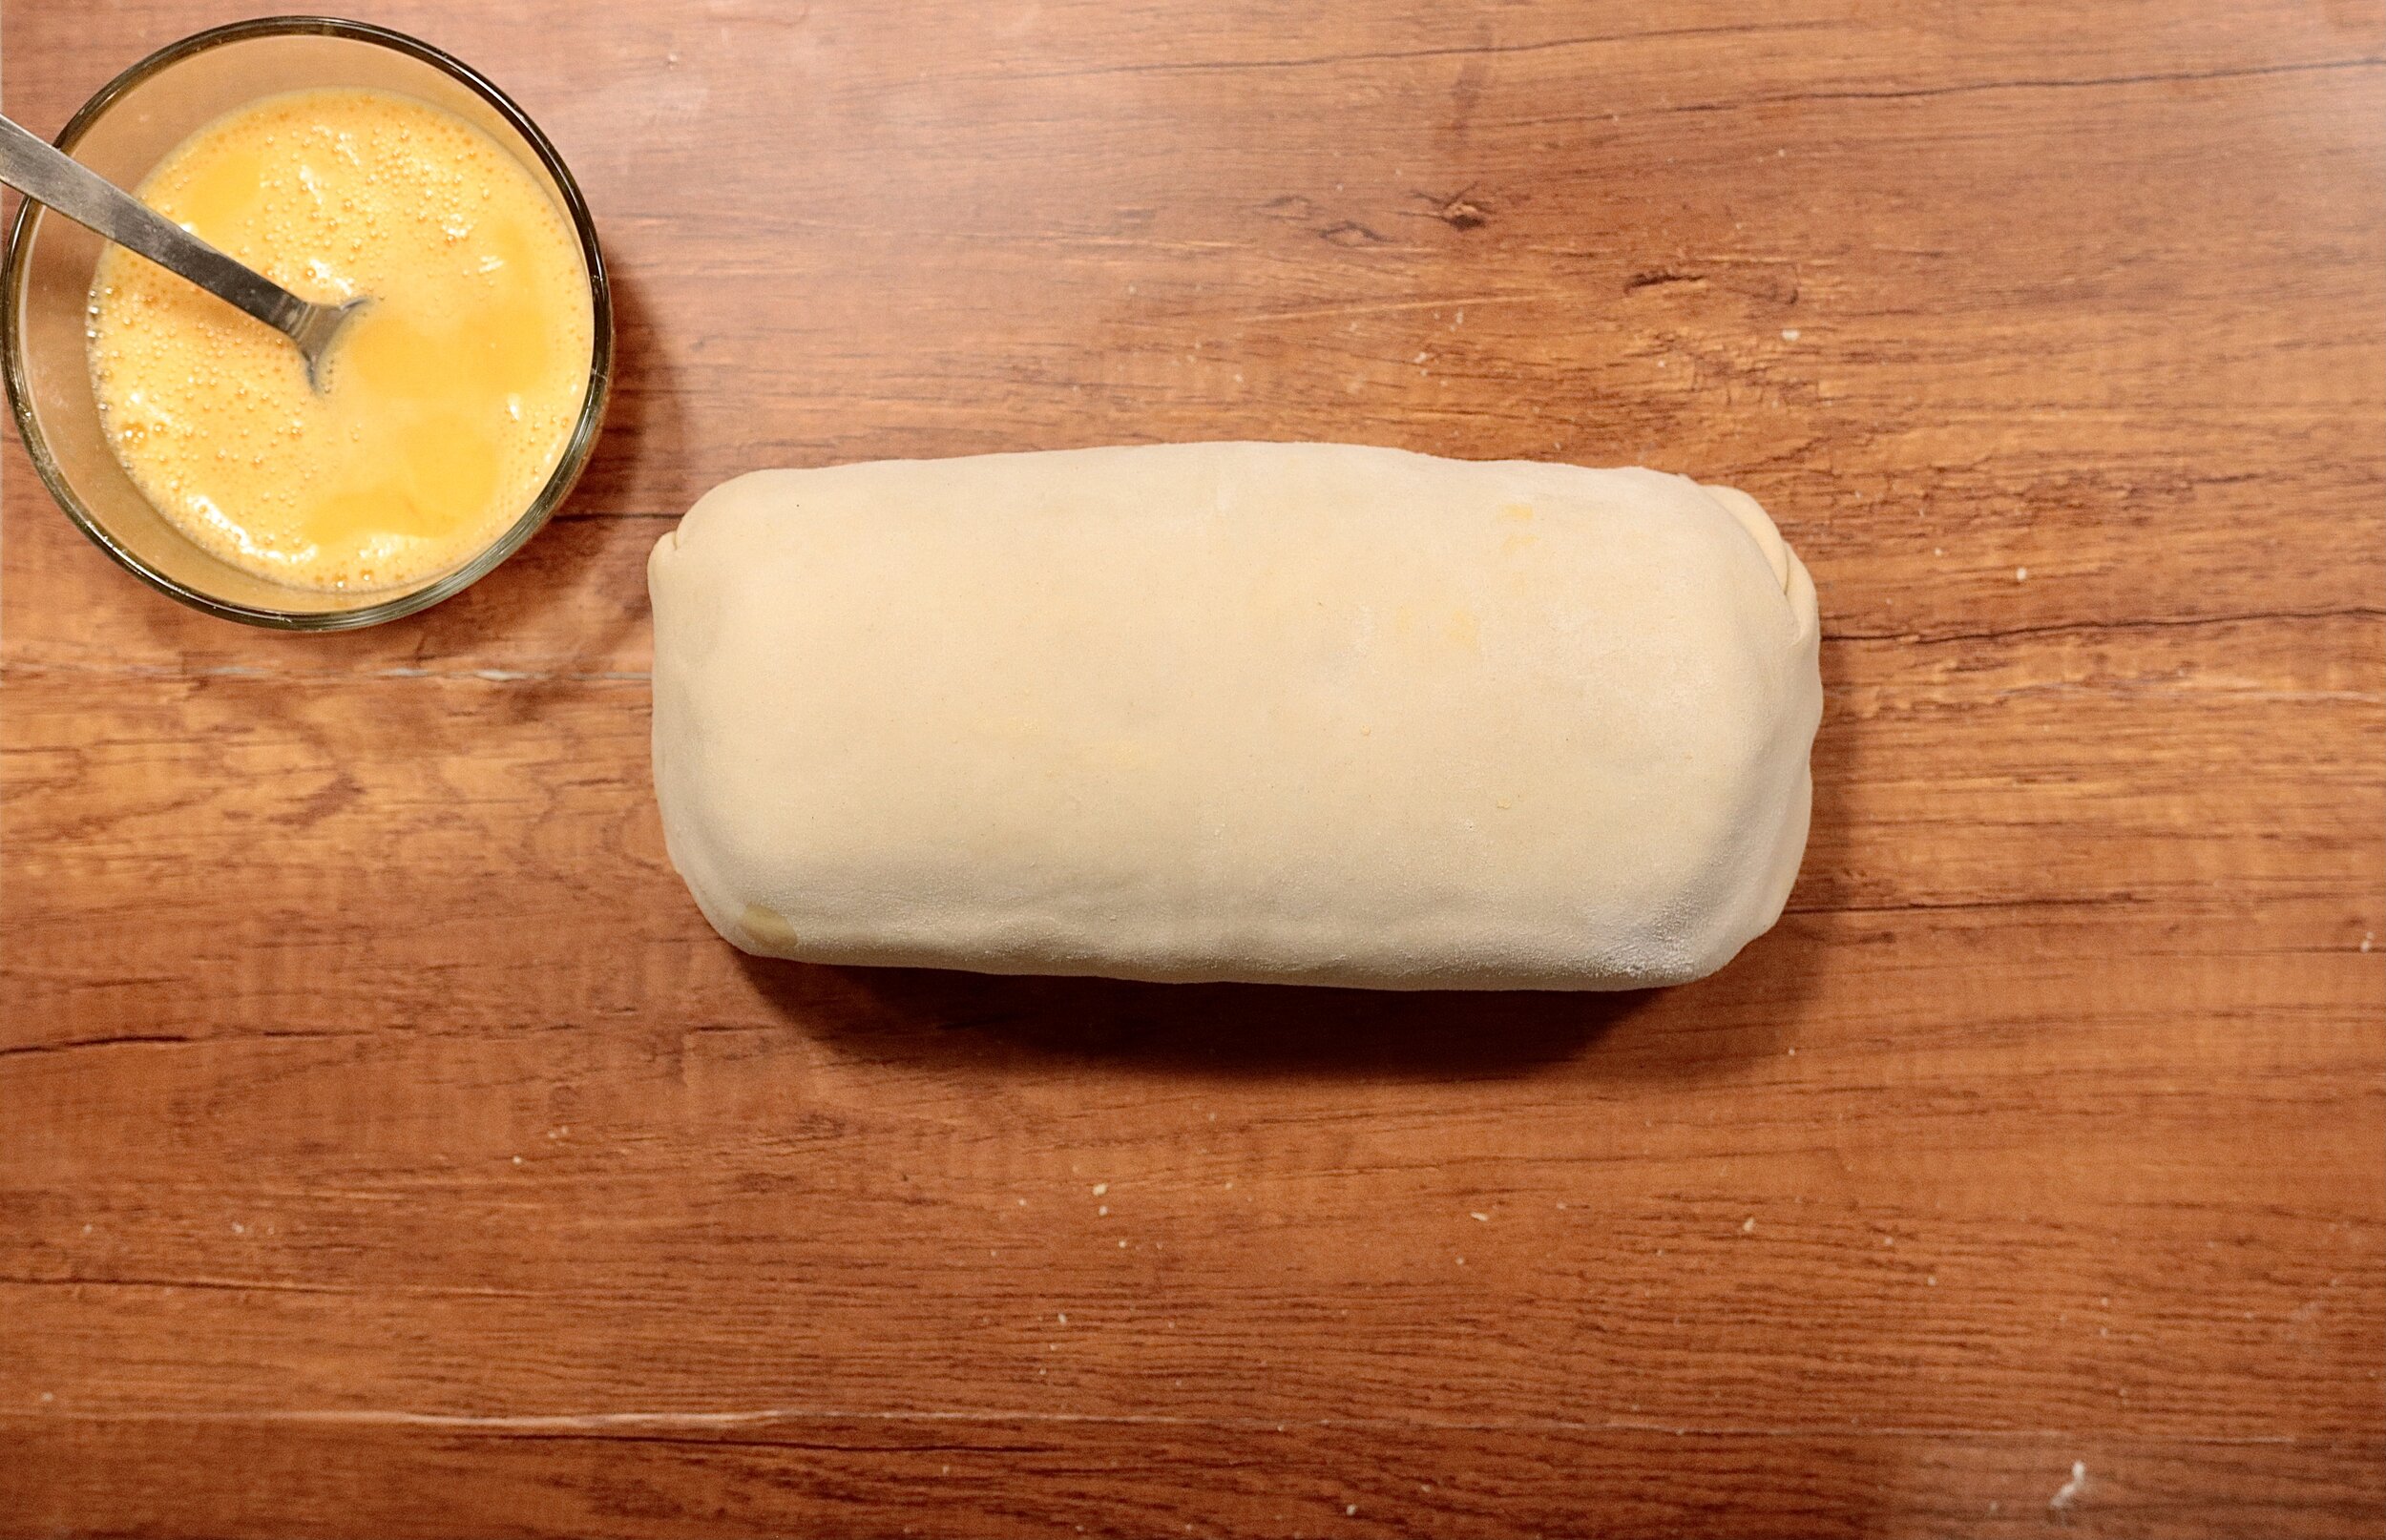
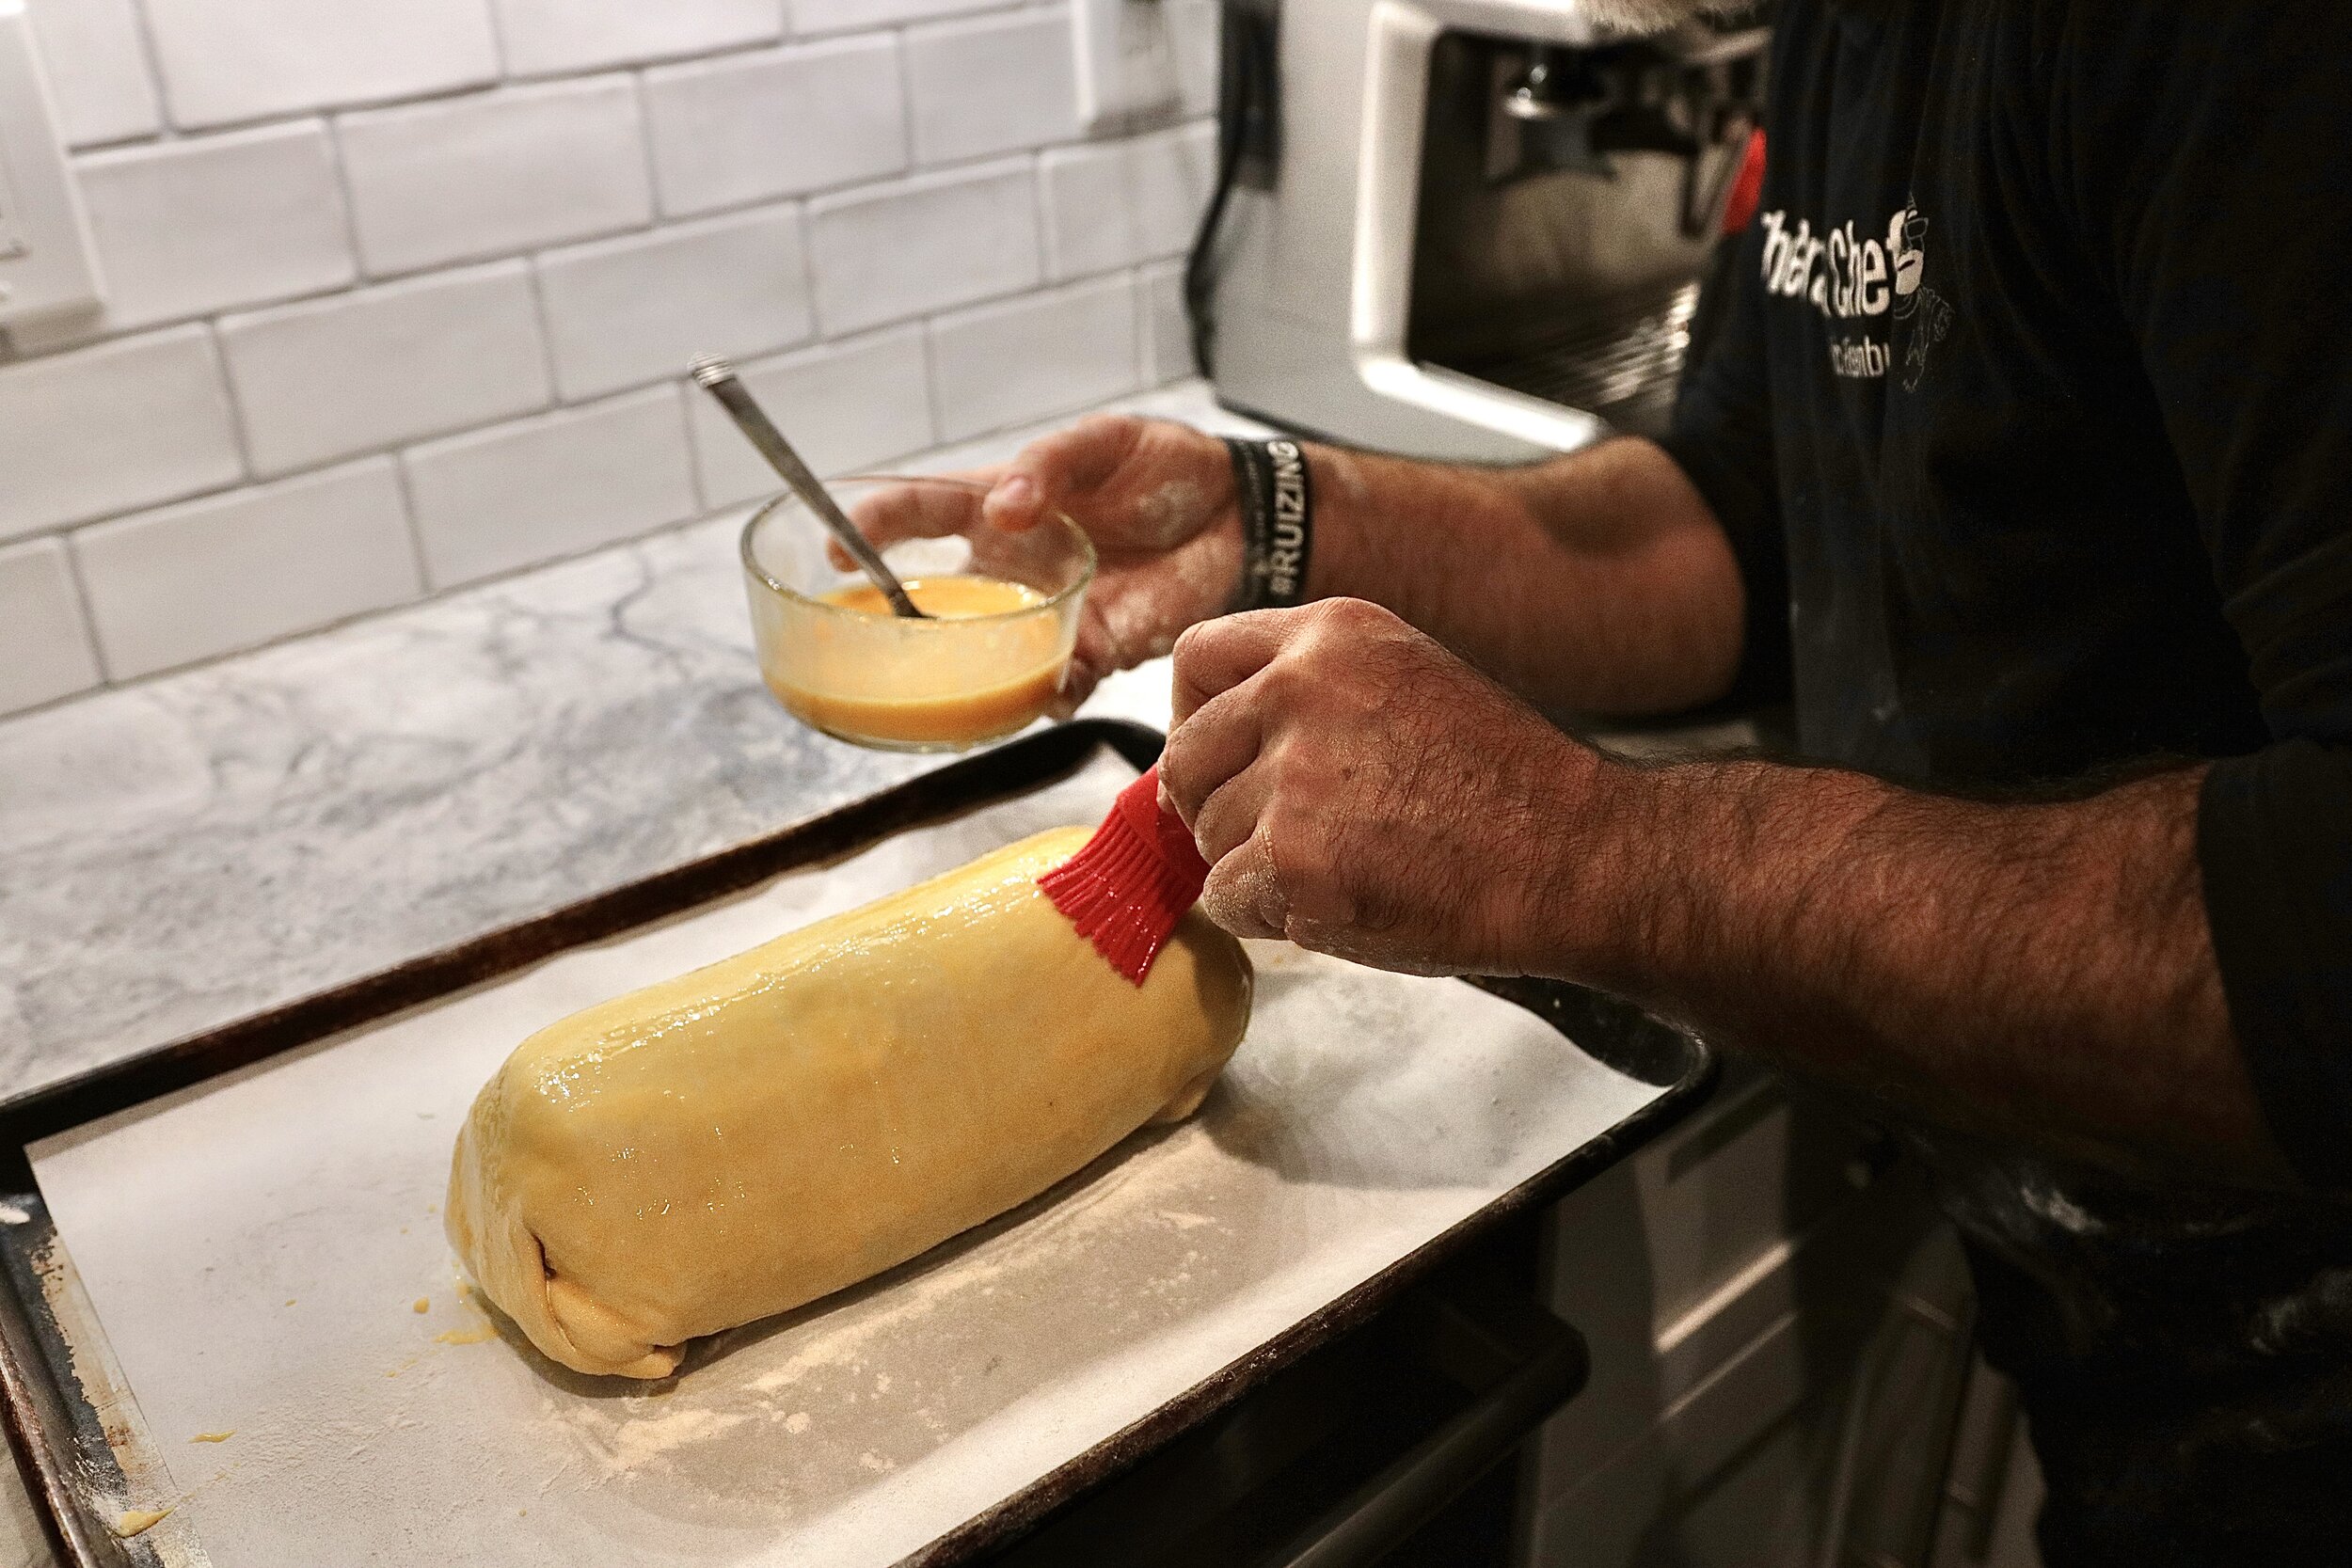
12. Unwrap beef roll and place along very bottom edge of puff pastry. Brush 6 inches of puff pastry just above beef roll with beaten egg. Carefully roll the beef in the puff pastry until it is completely wrapped. Trim pastry with a sharp knife.
13. Fold sides of puff pastry protruding from either end of the beef roll towards the center, then fold the top flaps down. Trim off the bottom flaps carefully.
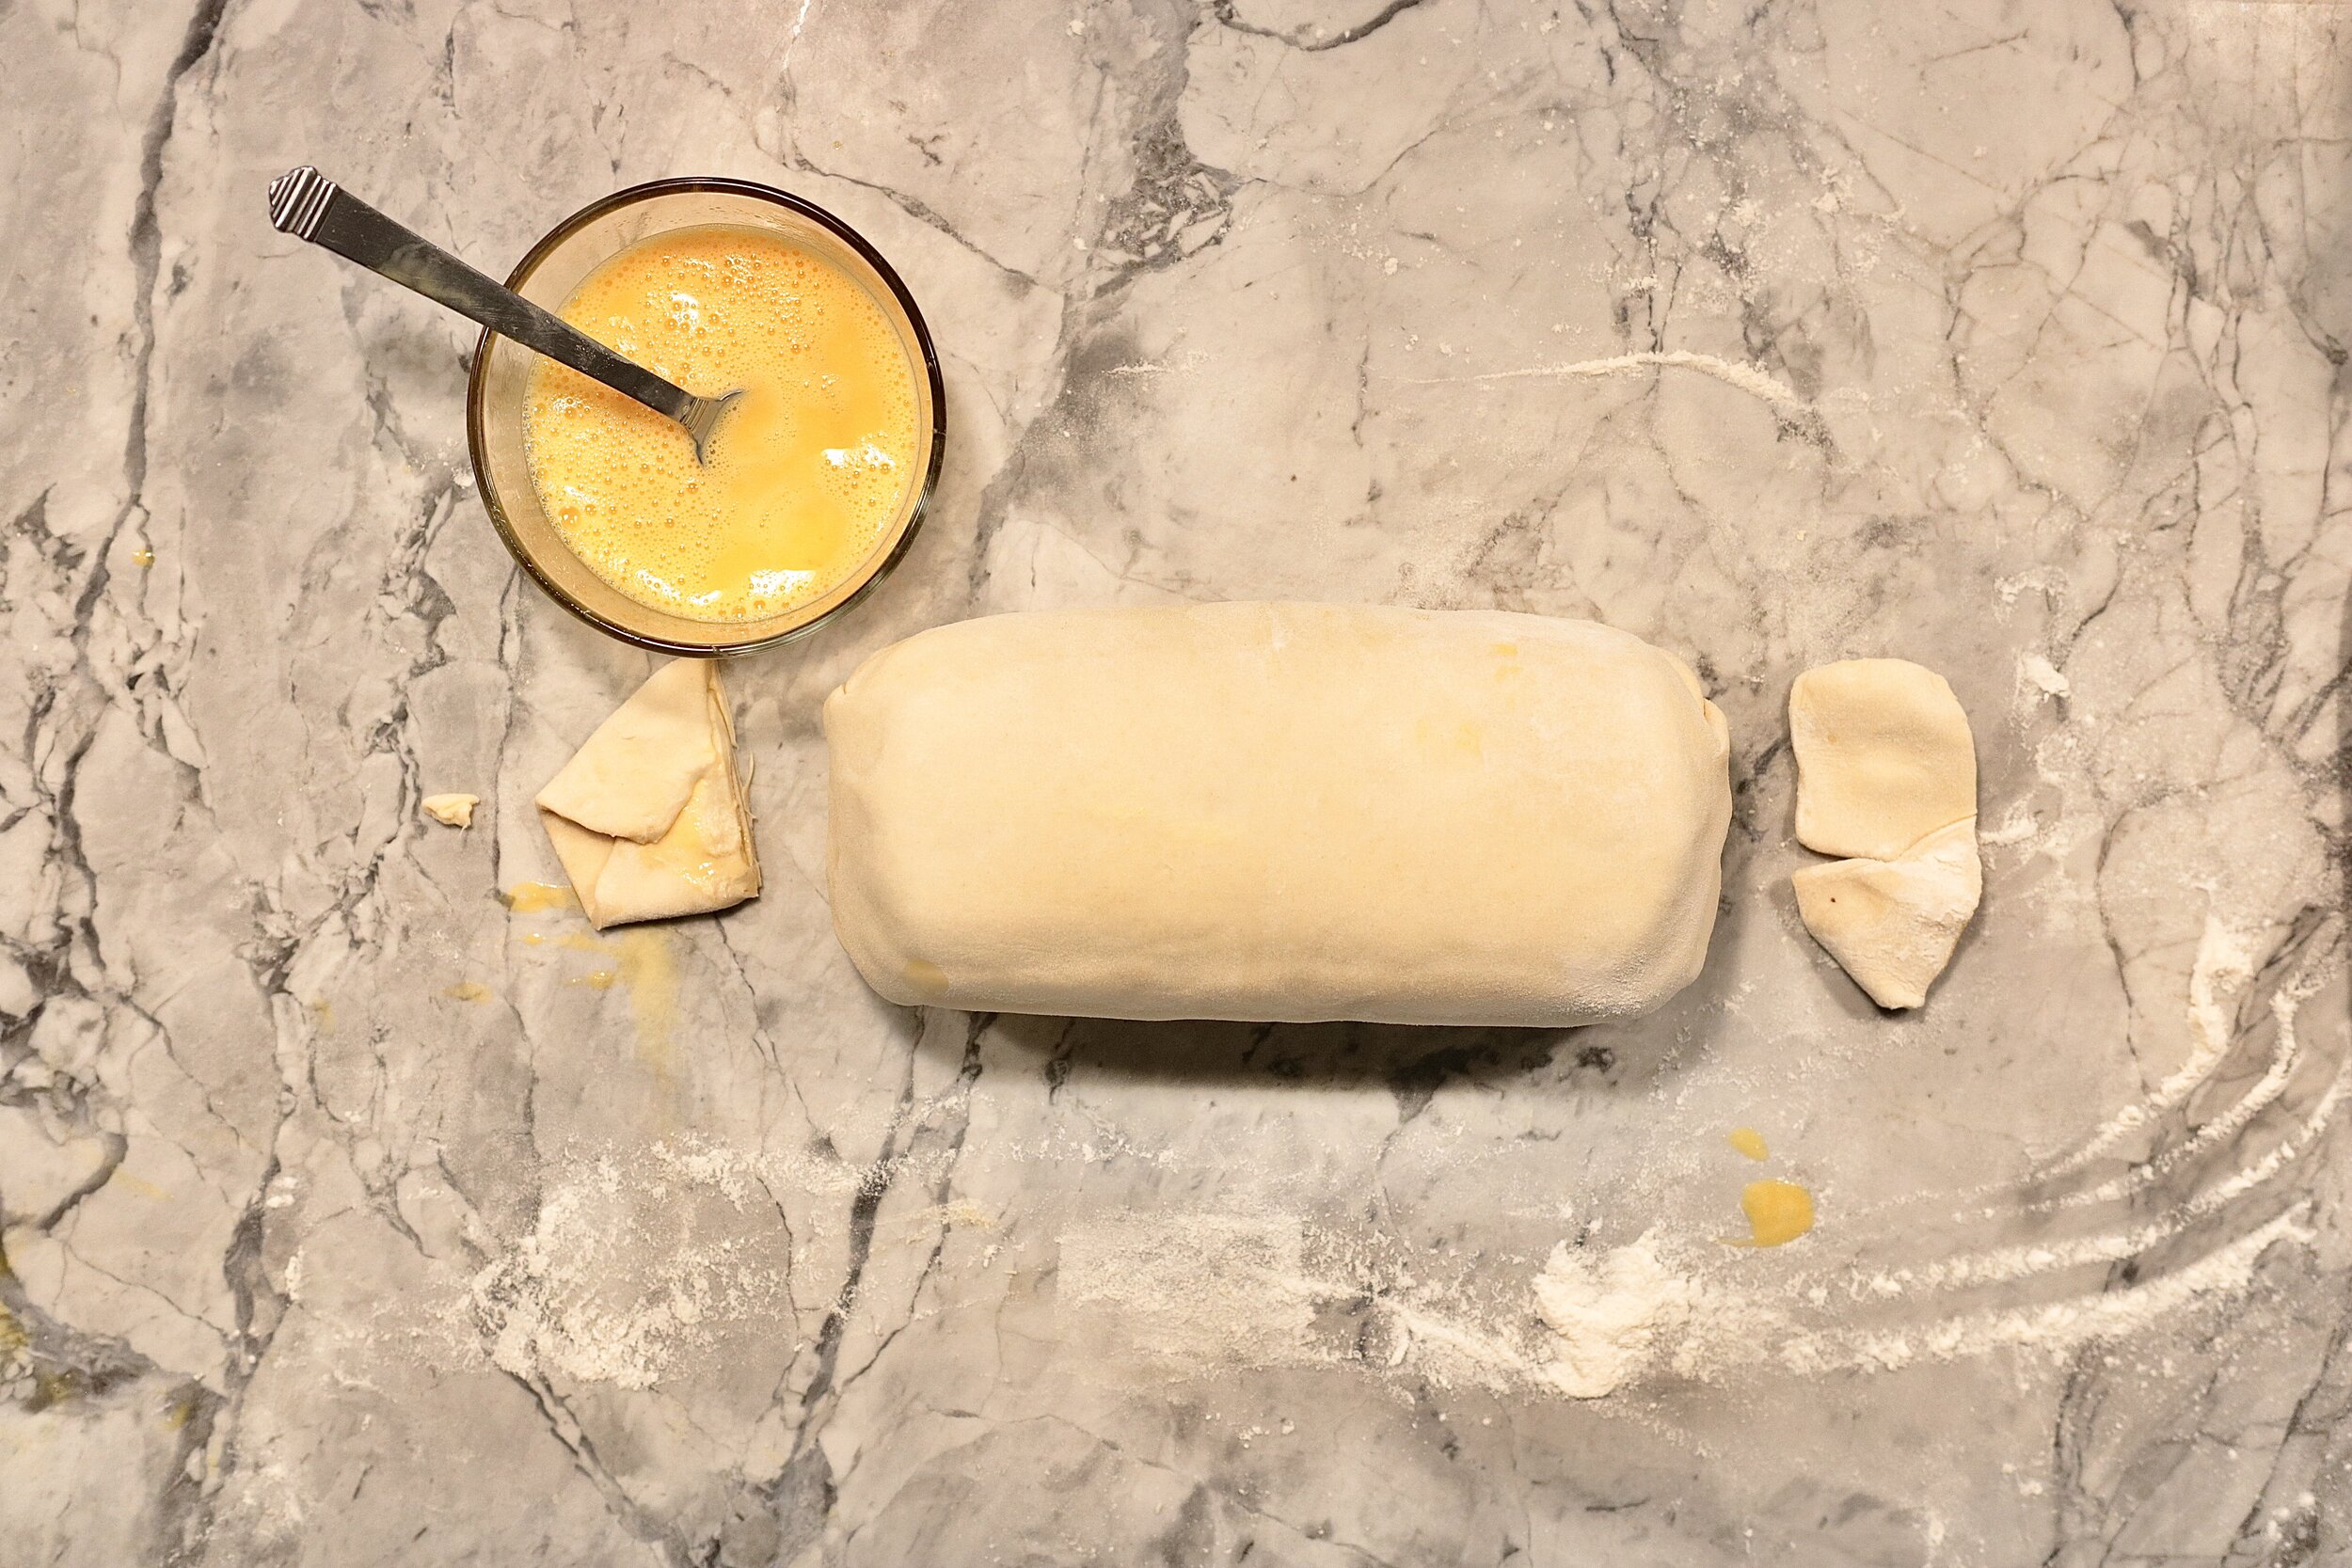
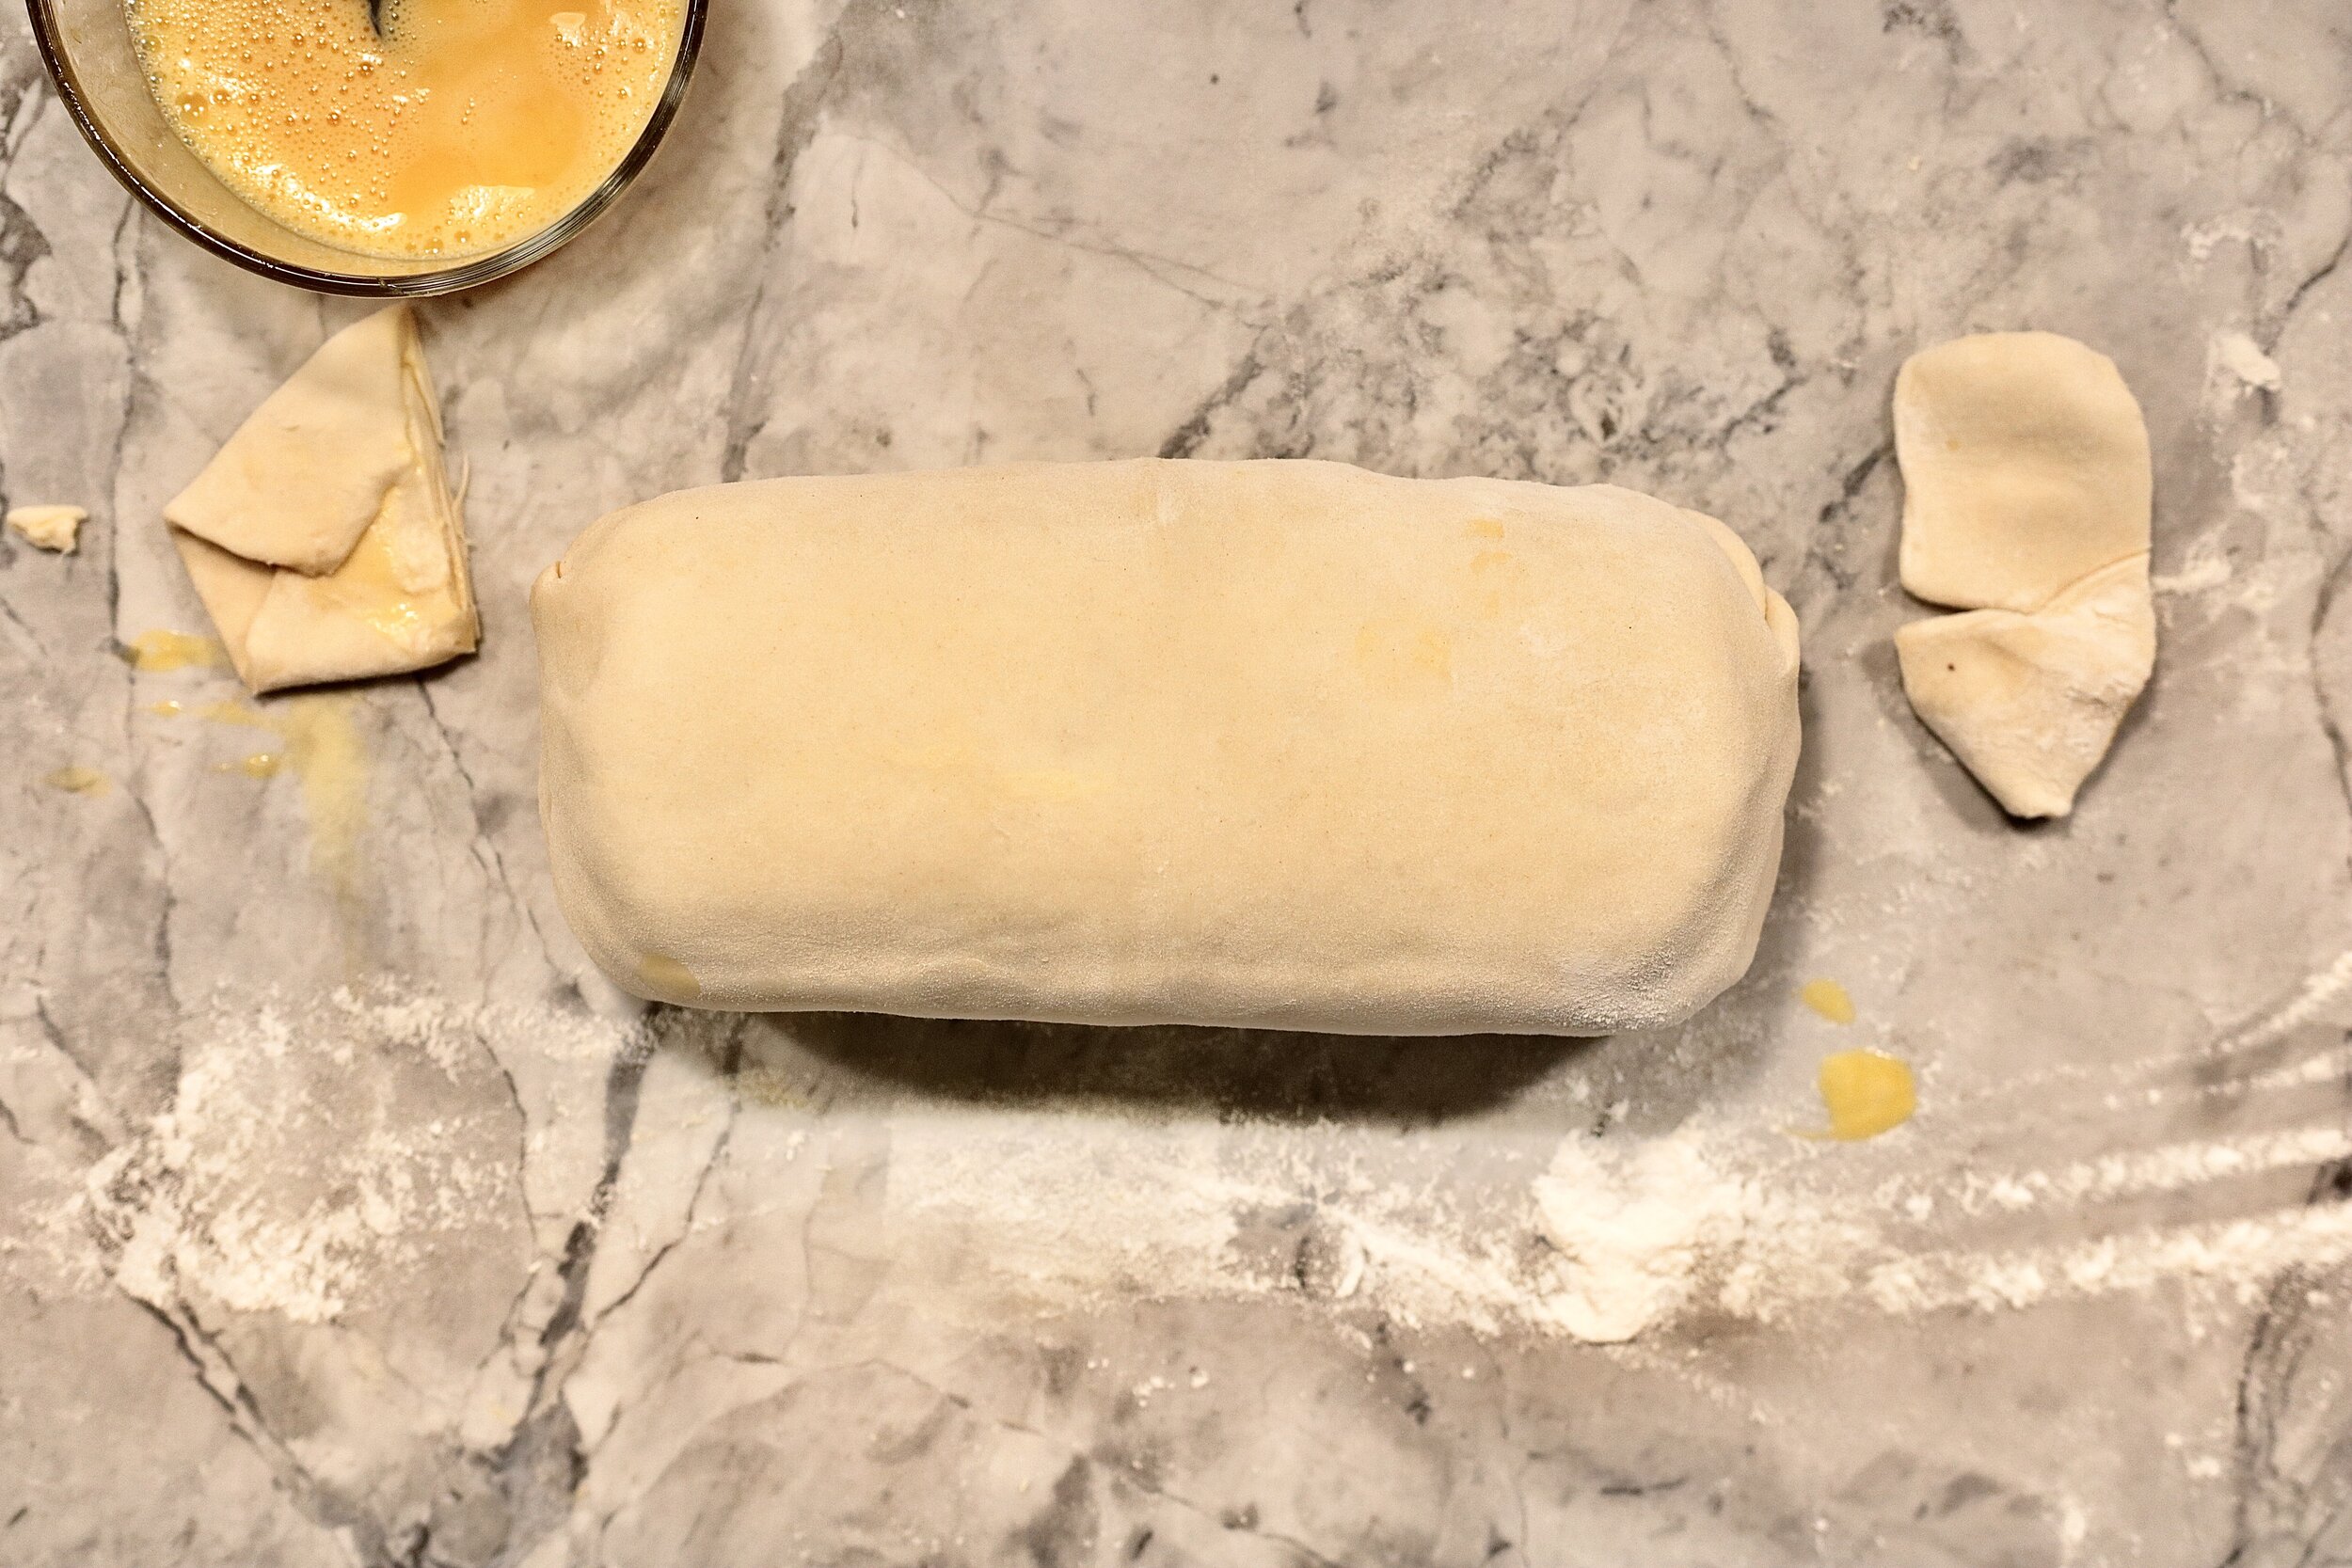
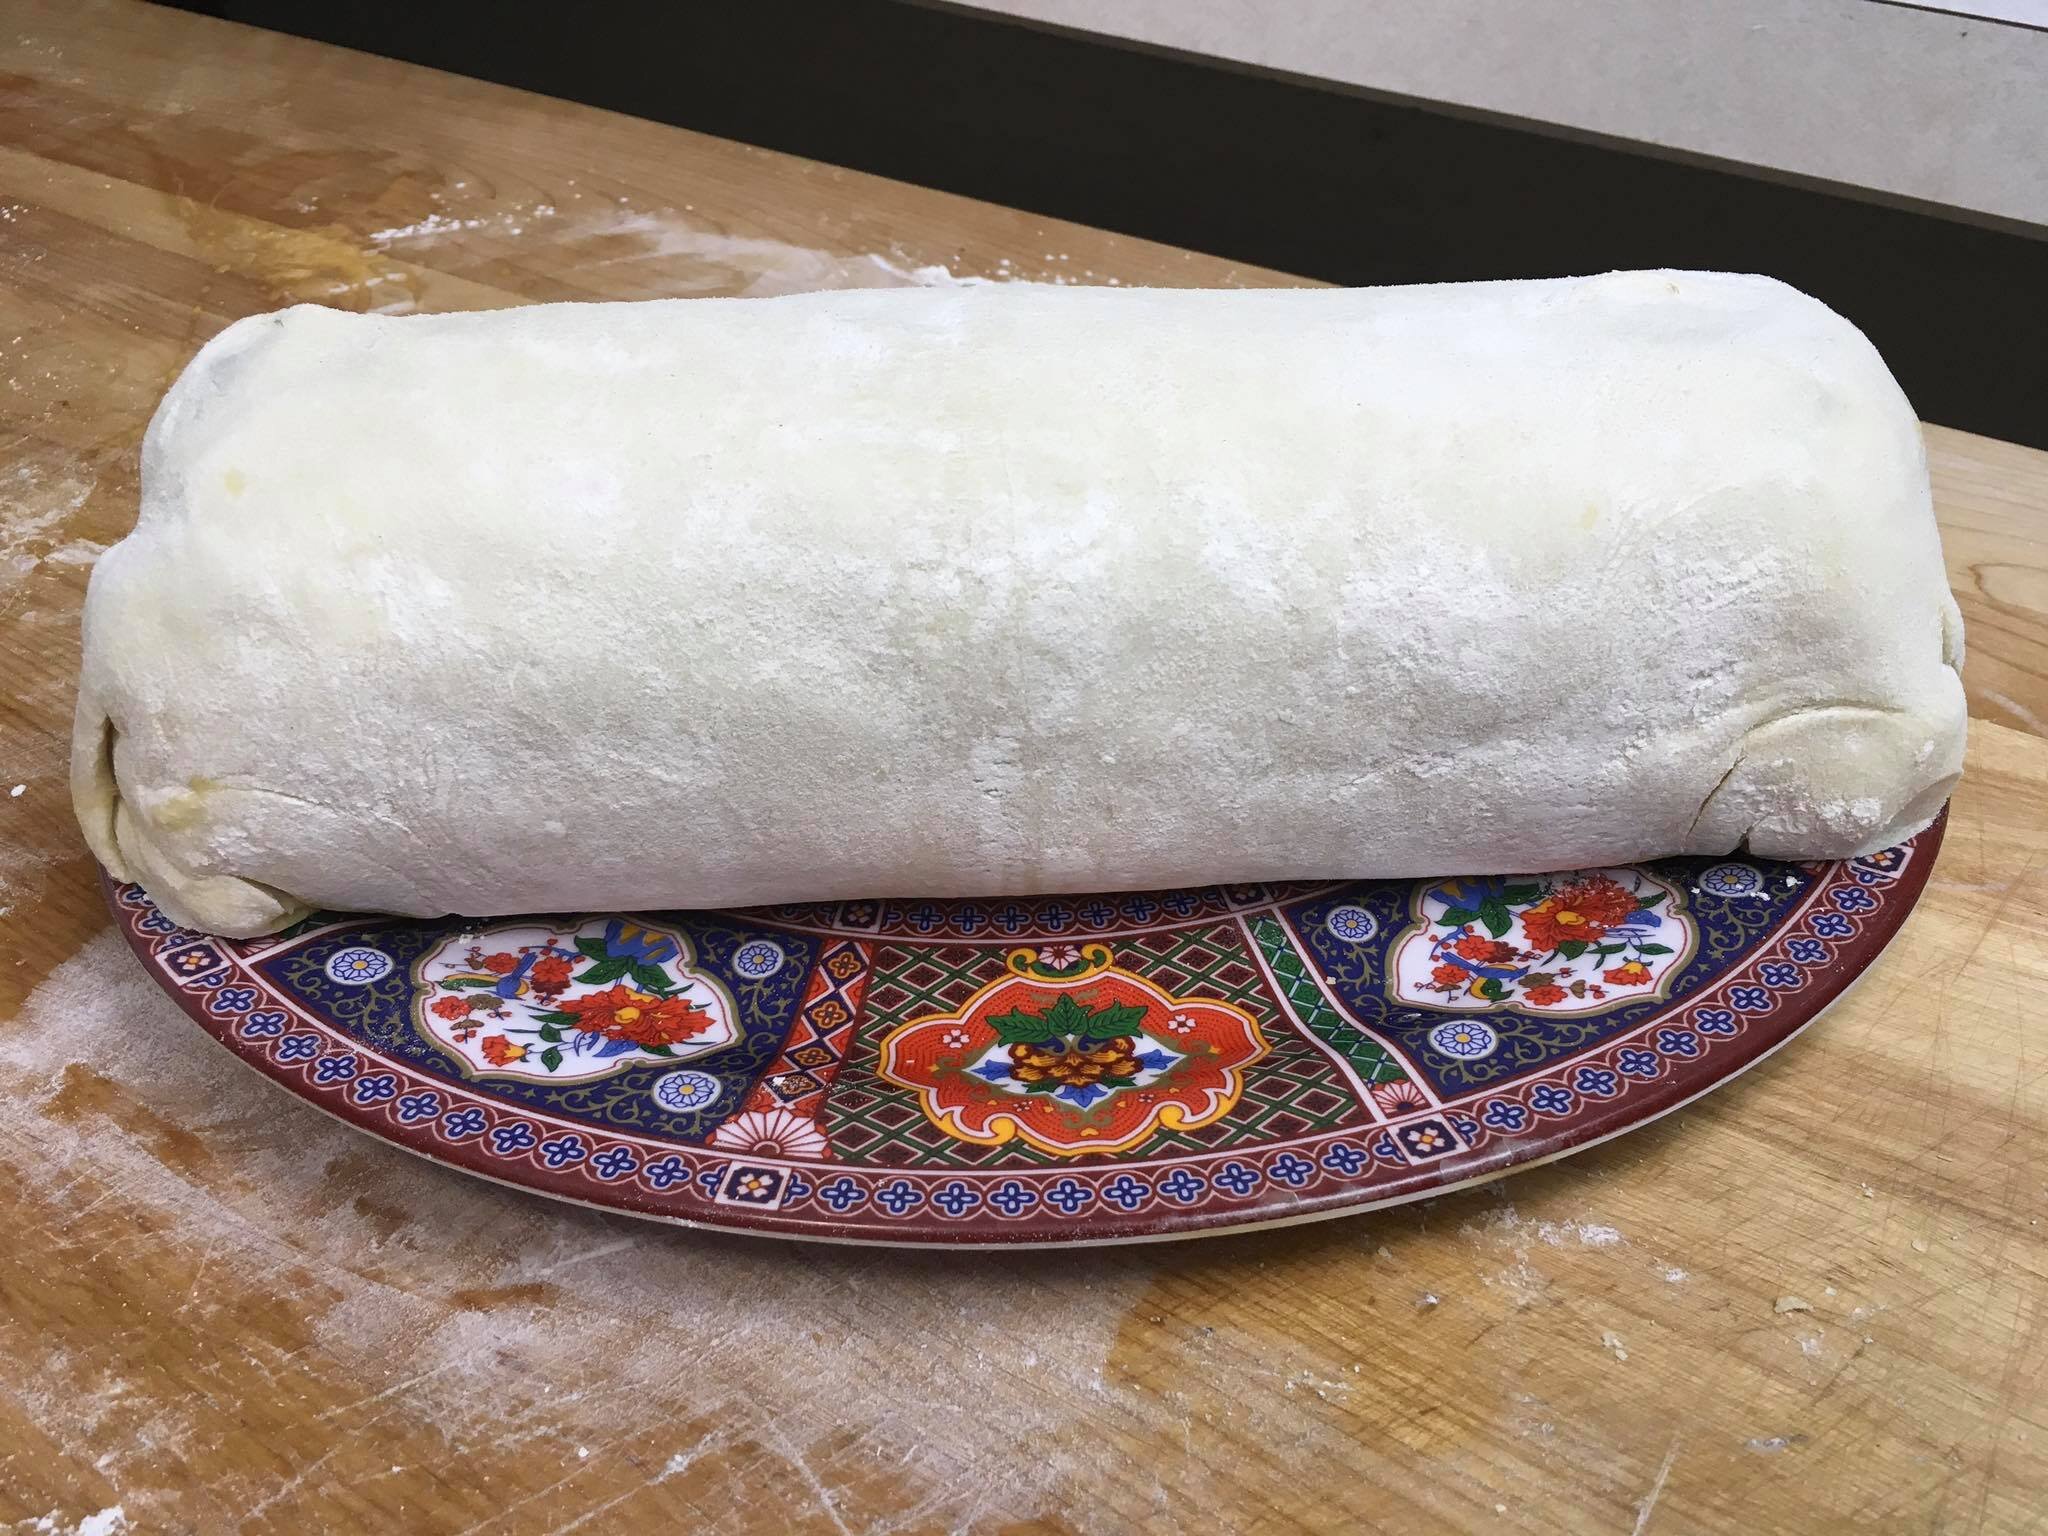
14. Roll entire beef roll over so that the bottom is facing up, the fold up the end flaps to seal completely. Roll beef back right-side up. Transfer to a plate and chill for at least 30 minutes.
15. Optional decorative step, start by doing same steps in “step 11” - Dust board or countertop lightly with flour. Spread puff pastry on board and, using a rolling pin, roll it into a rectangle at least 4-inches wider than the beef roll on its shorter side. Then use the lattice roller noted above in special equipment to roll out lattice. Use your creativity and decorate to your desire (or not at all). One note, as you’ll see in the video, my initial beef wellington, I tried to do a decorative cut in the puff pastry from step 11 and cut a bit too deep. This alternate second puff pastry layer eliminates that risk
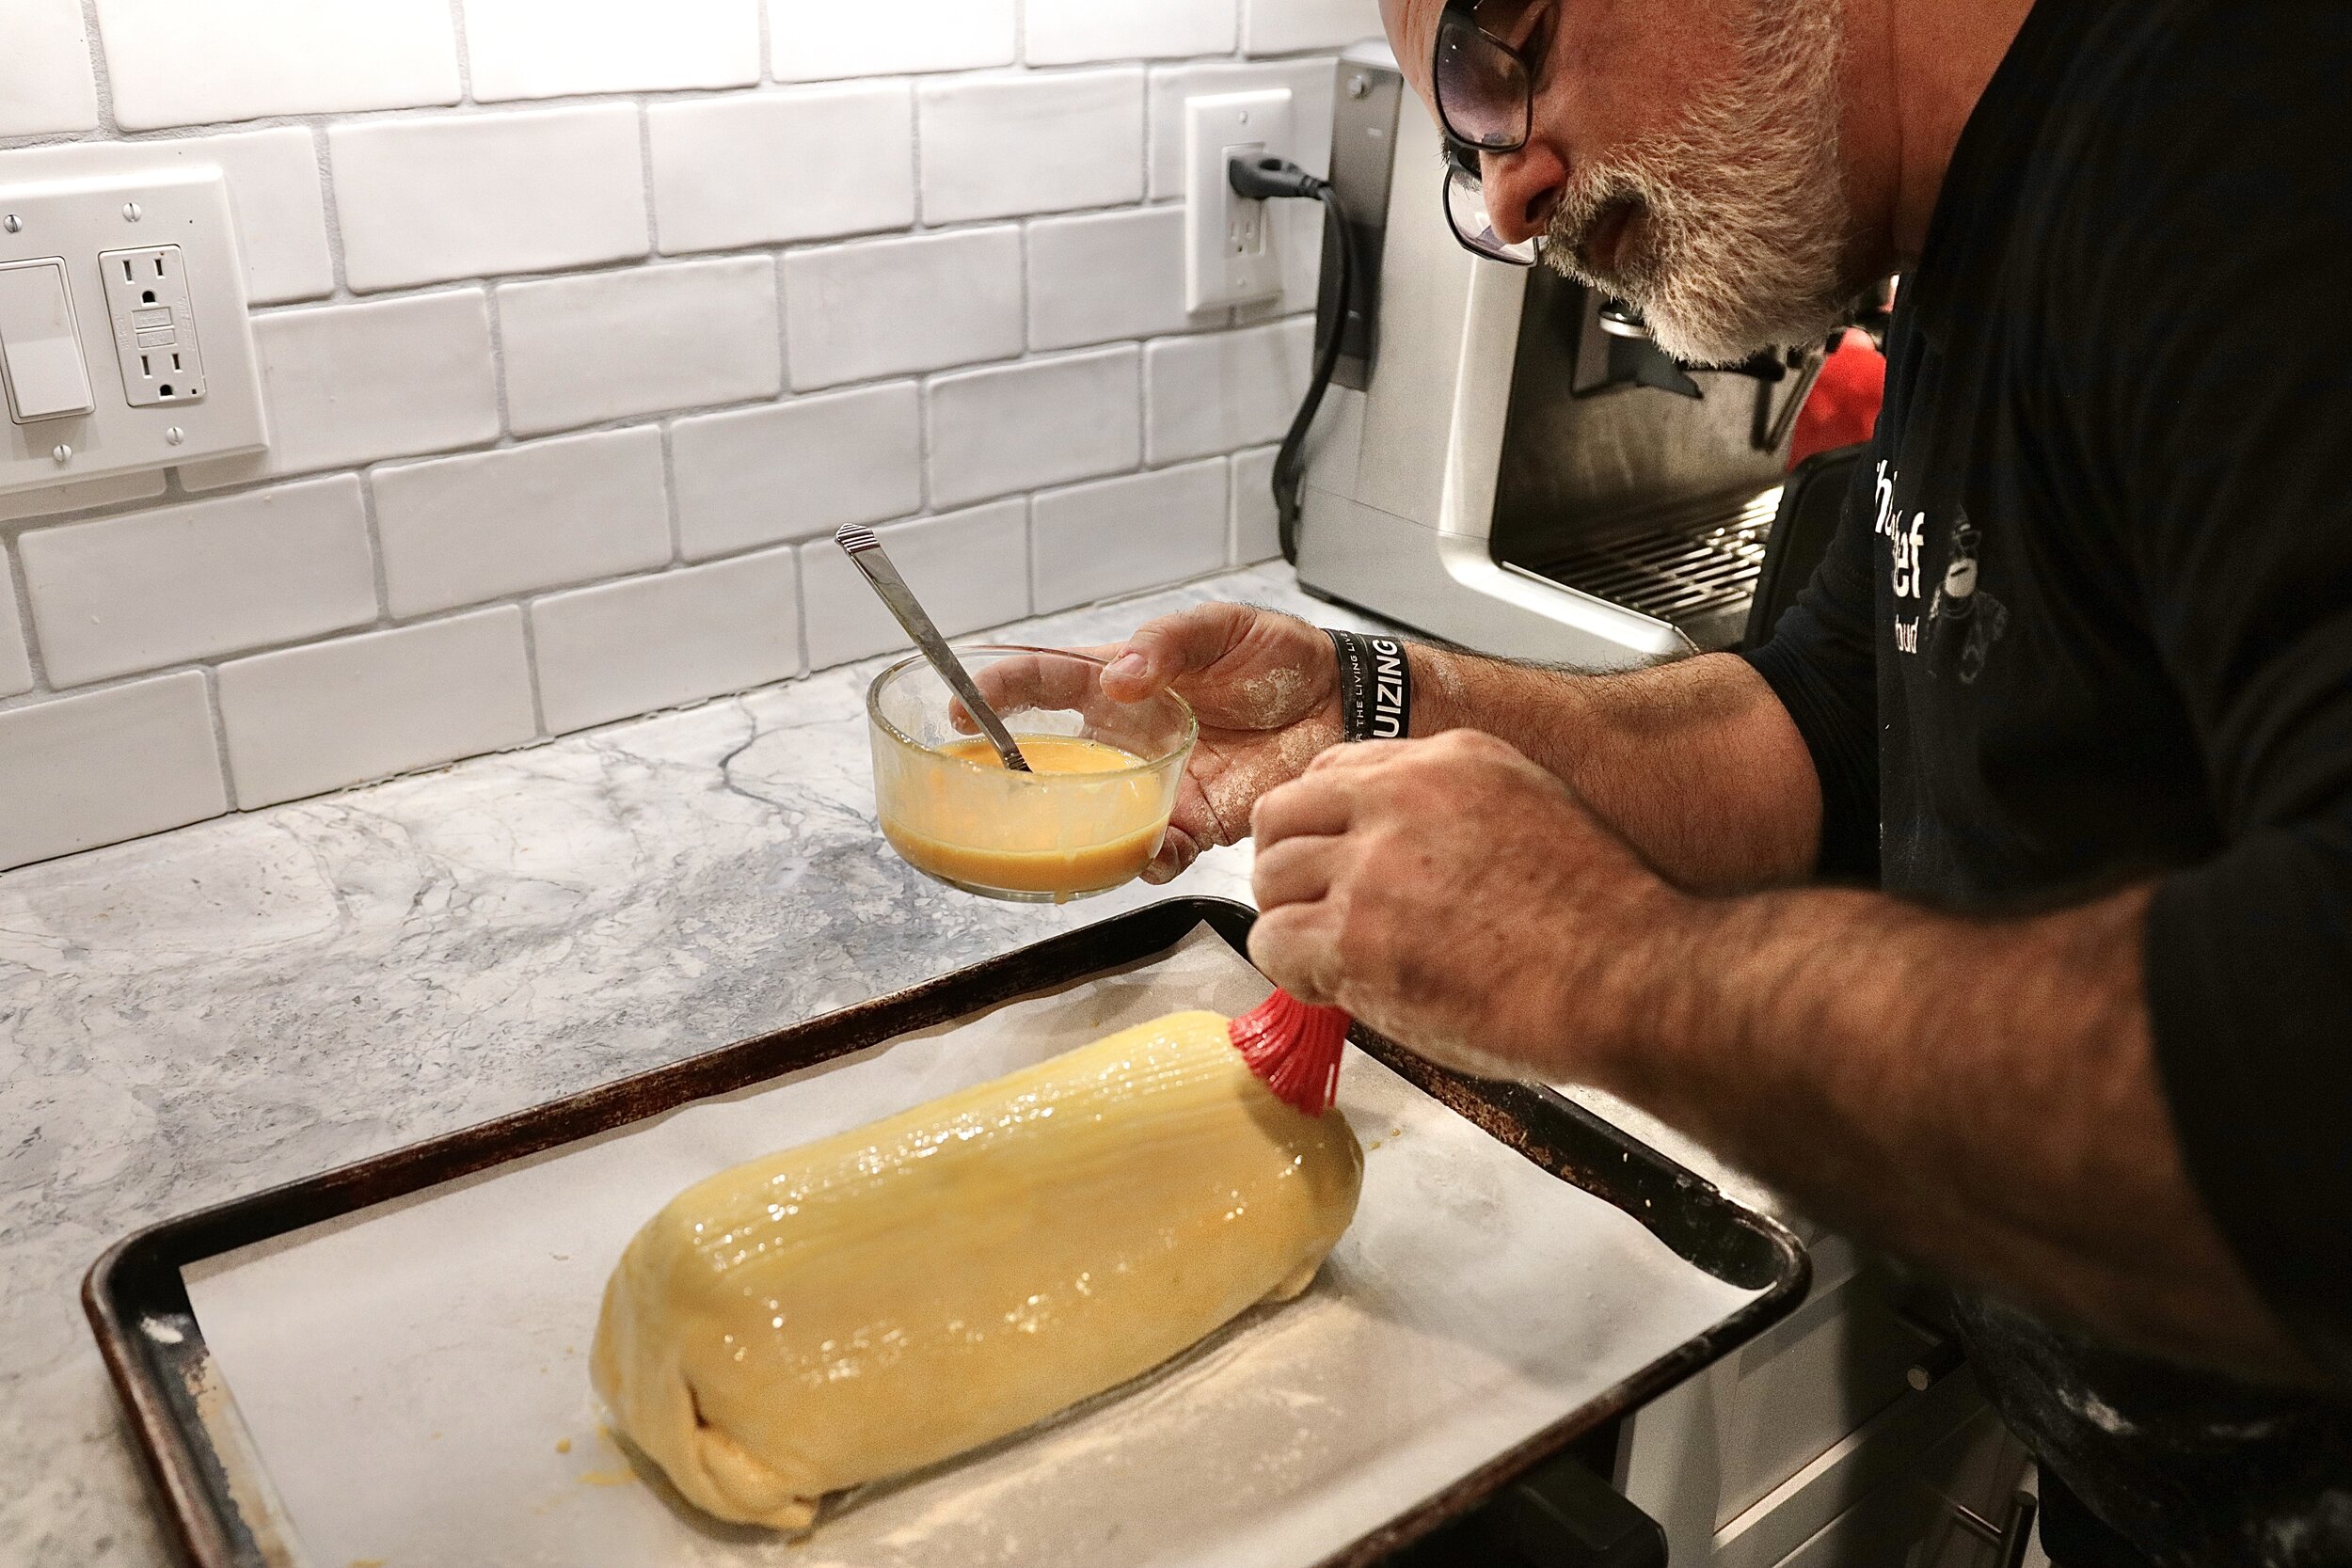
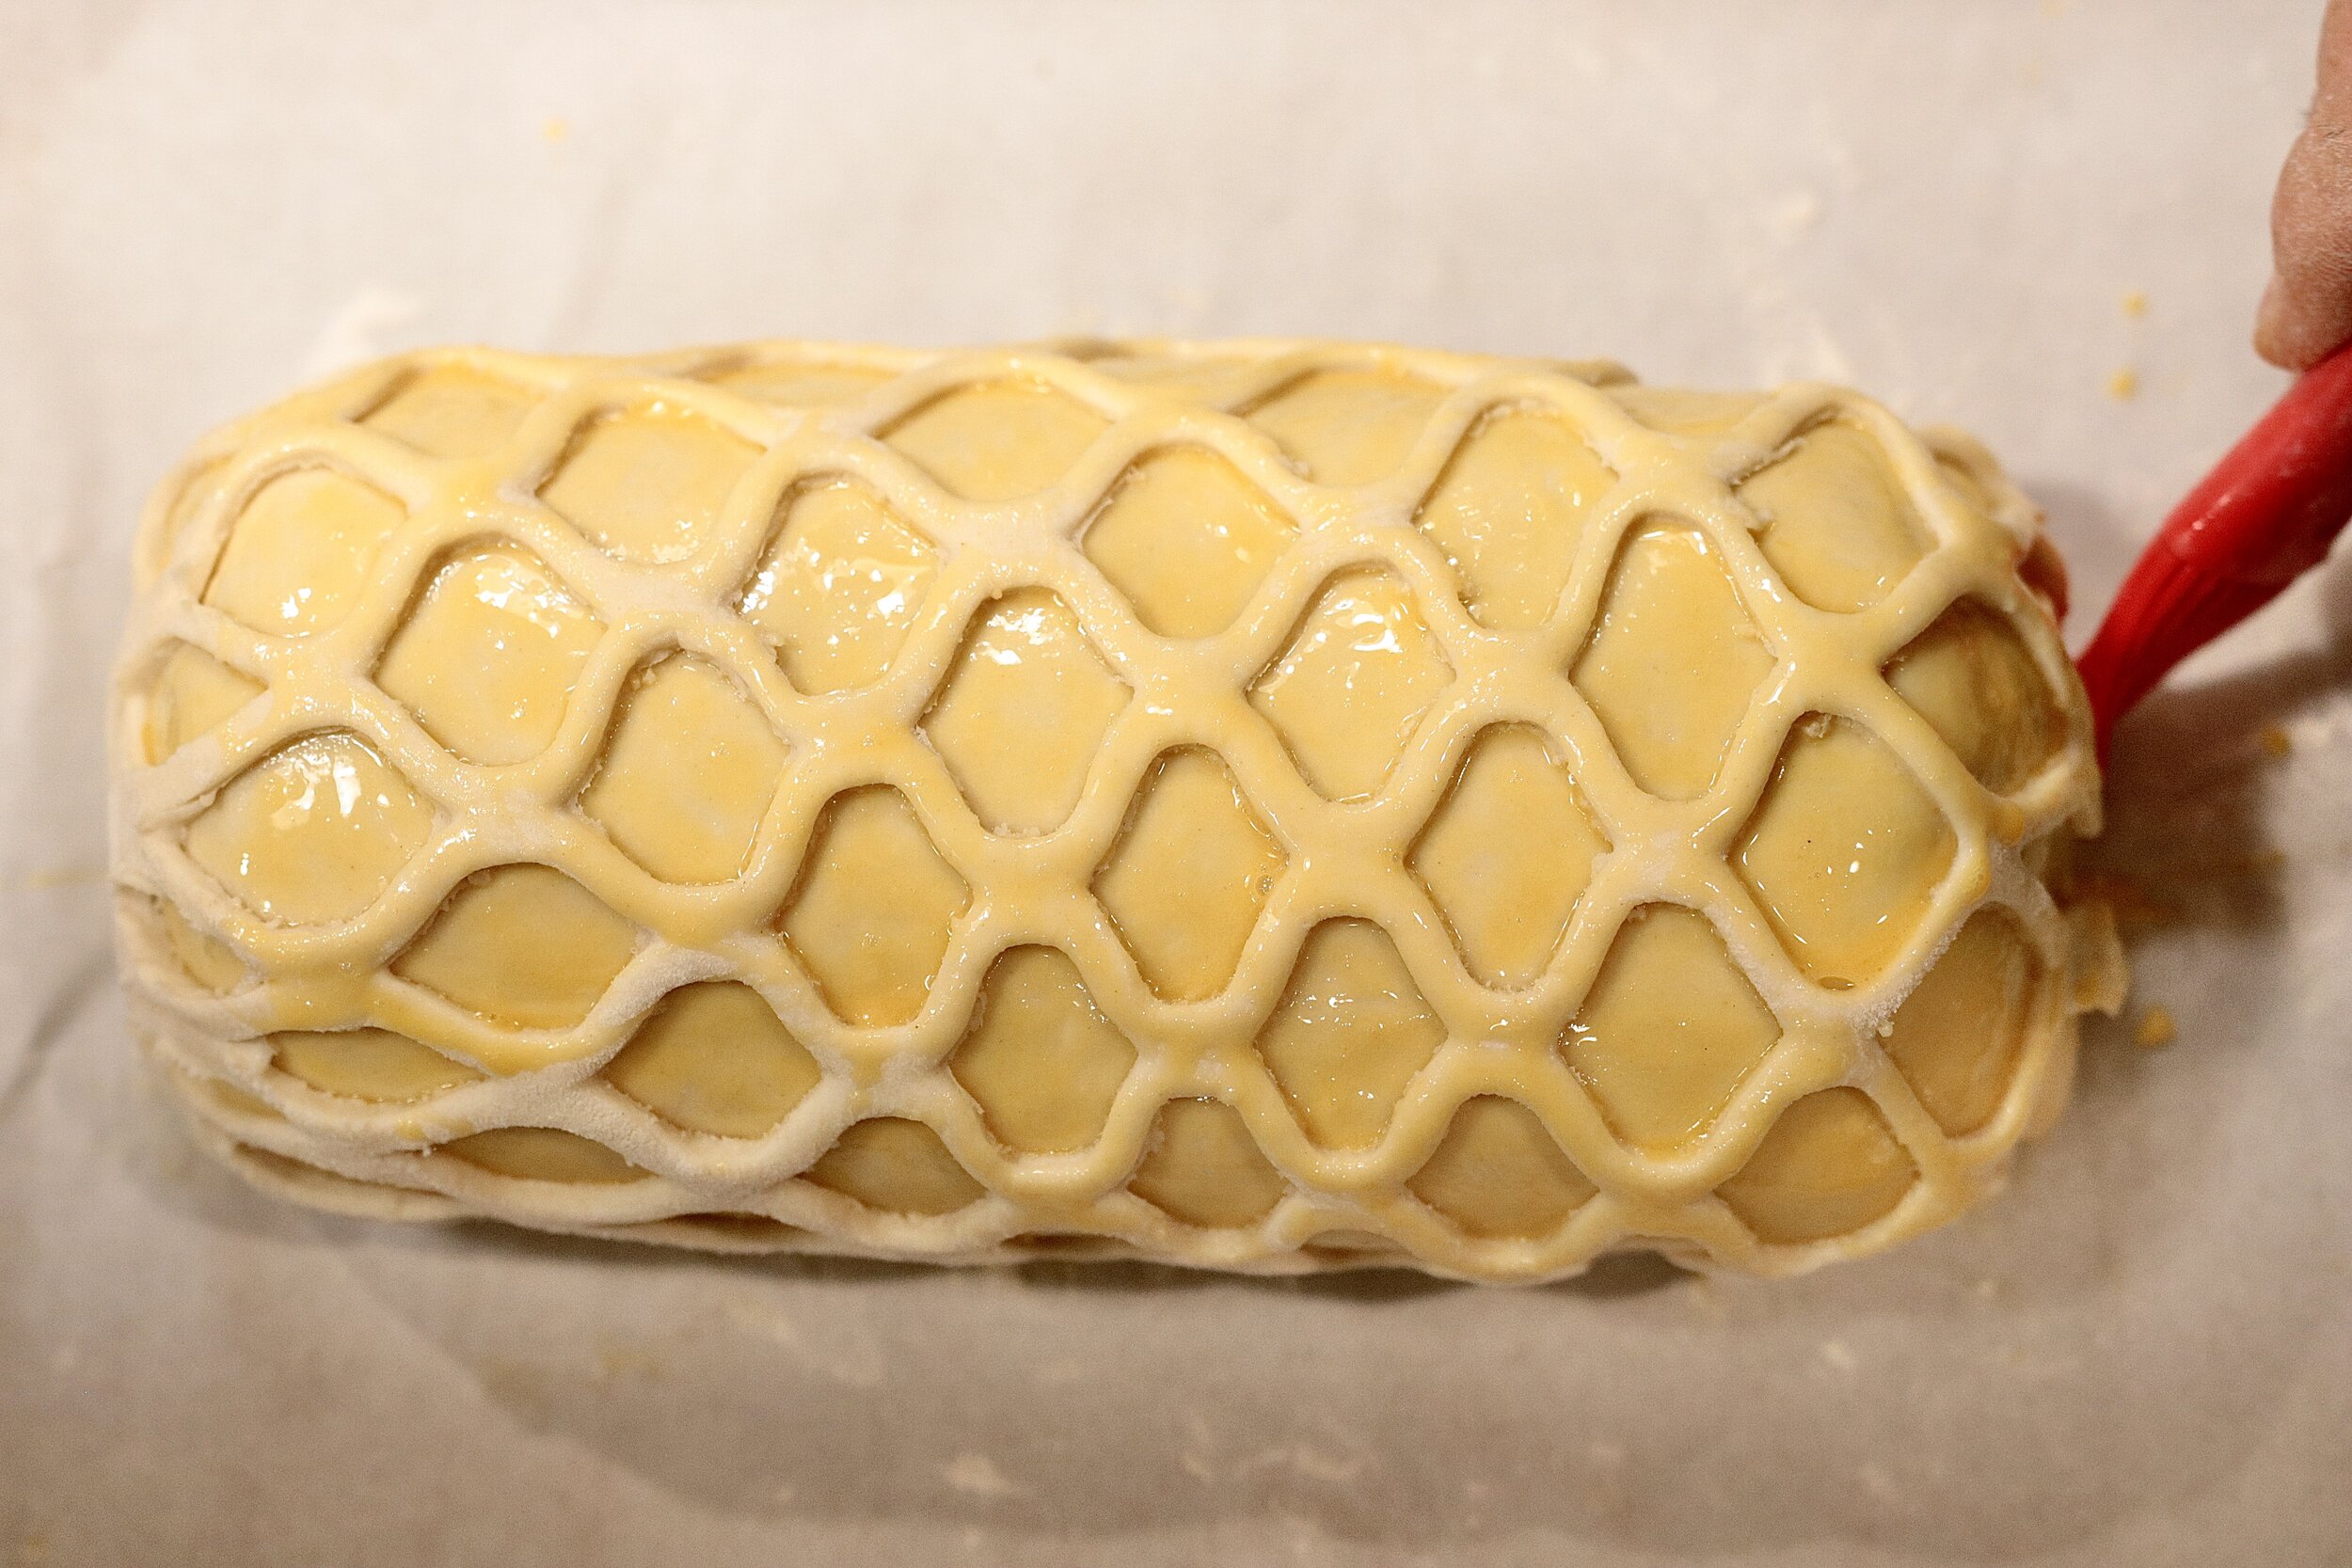
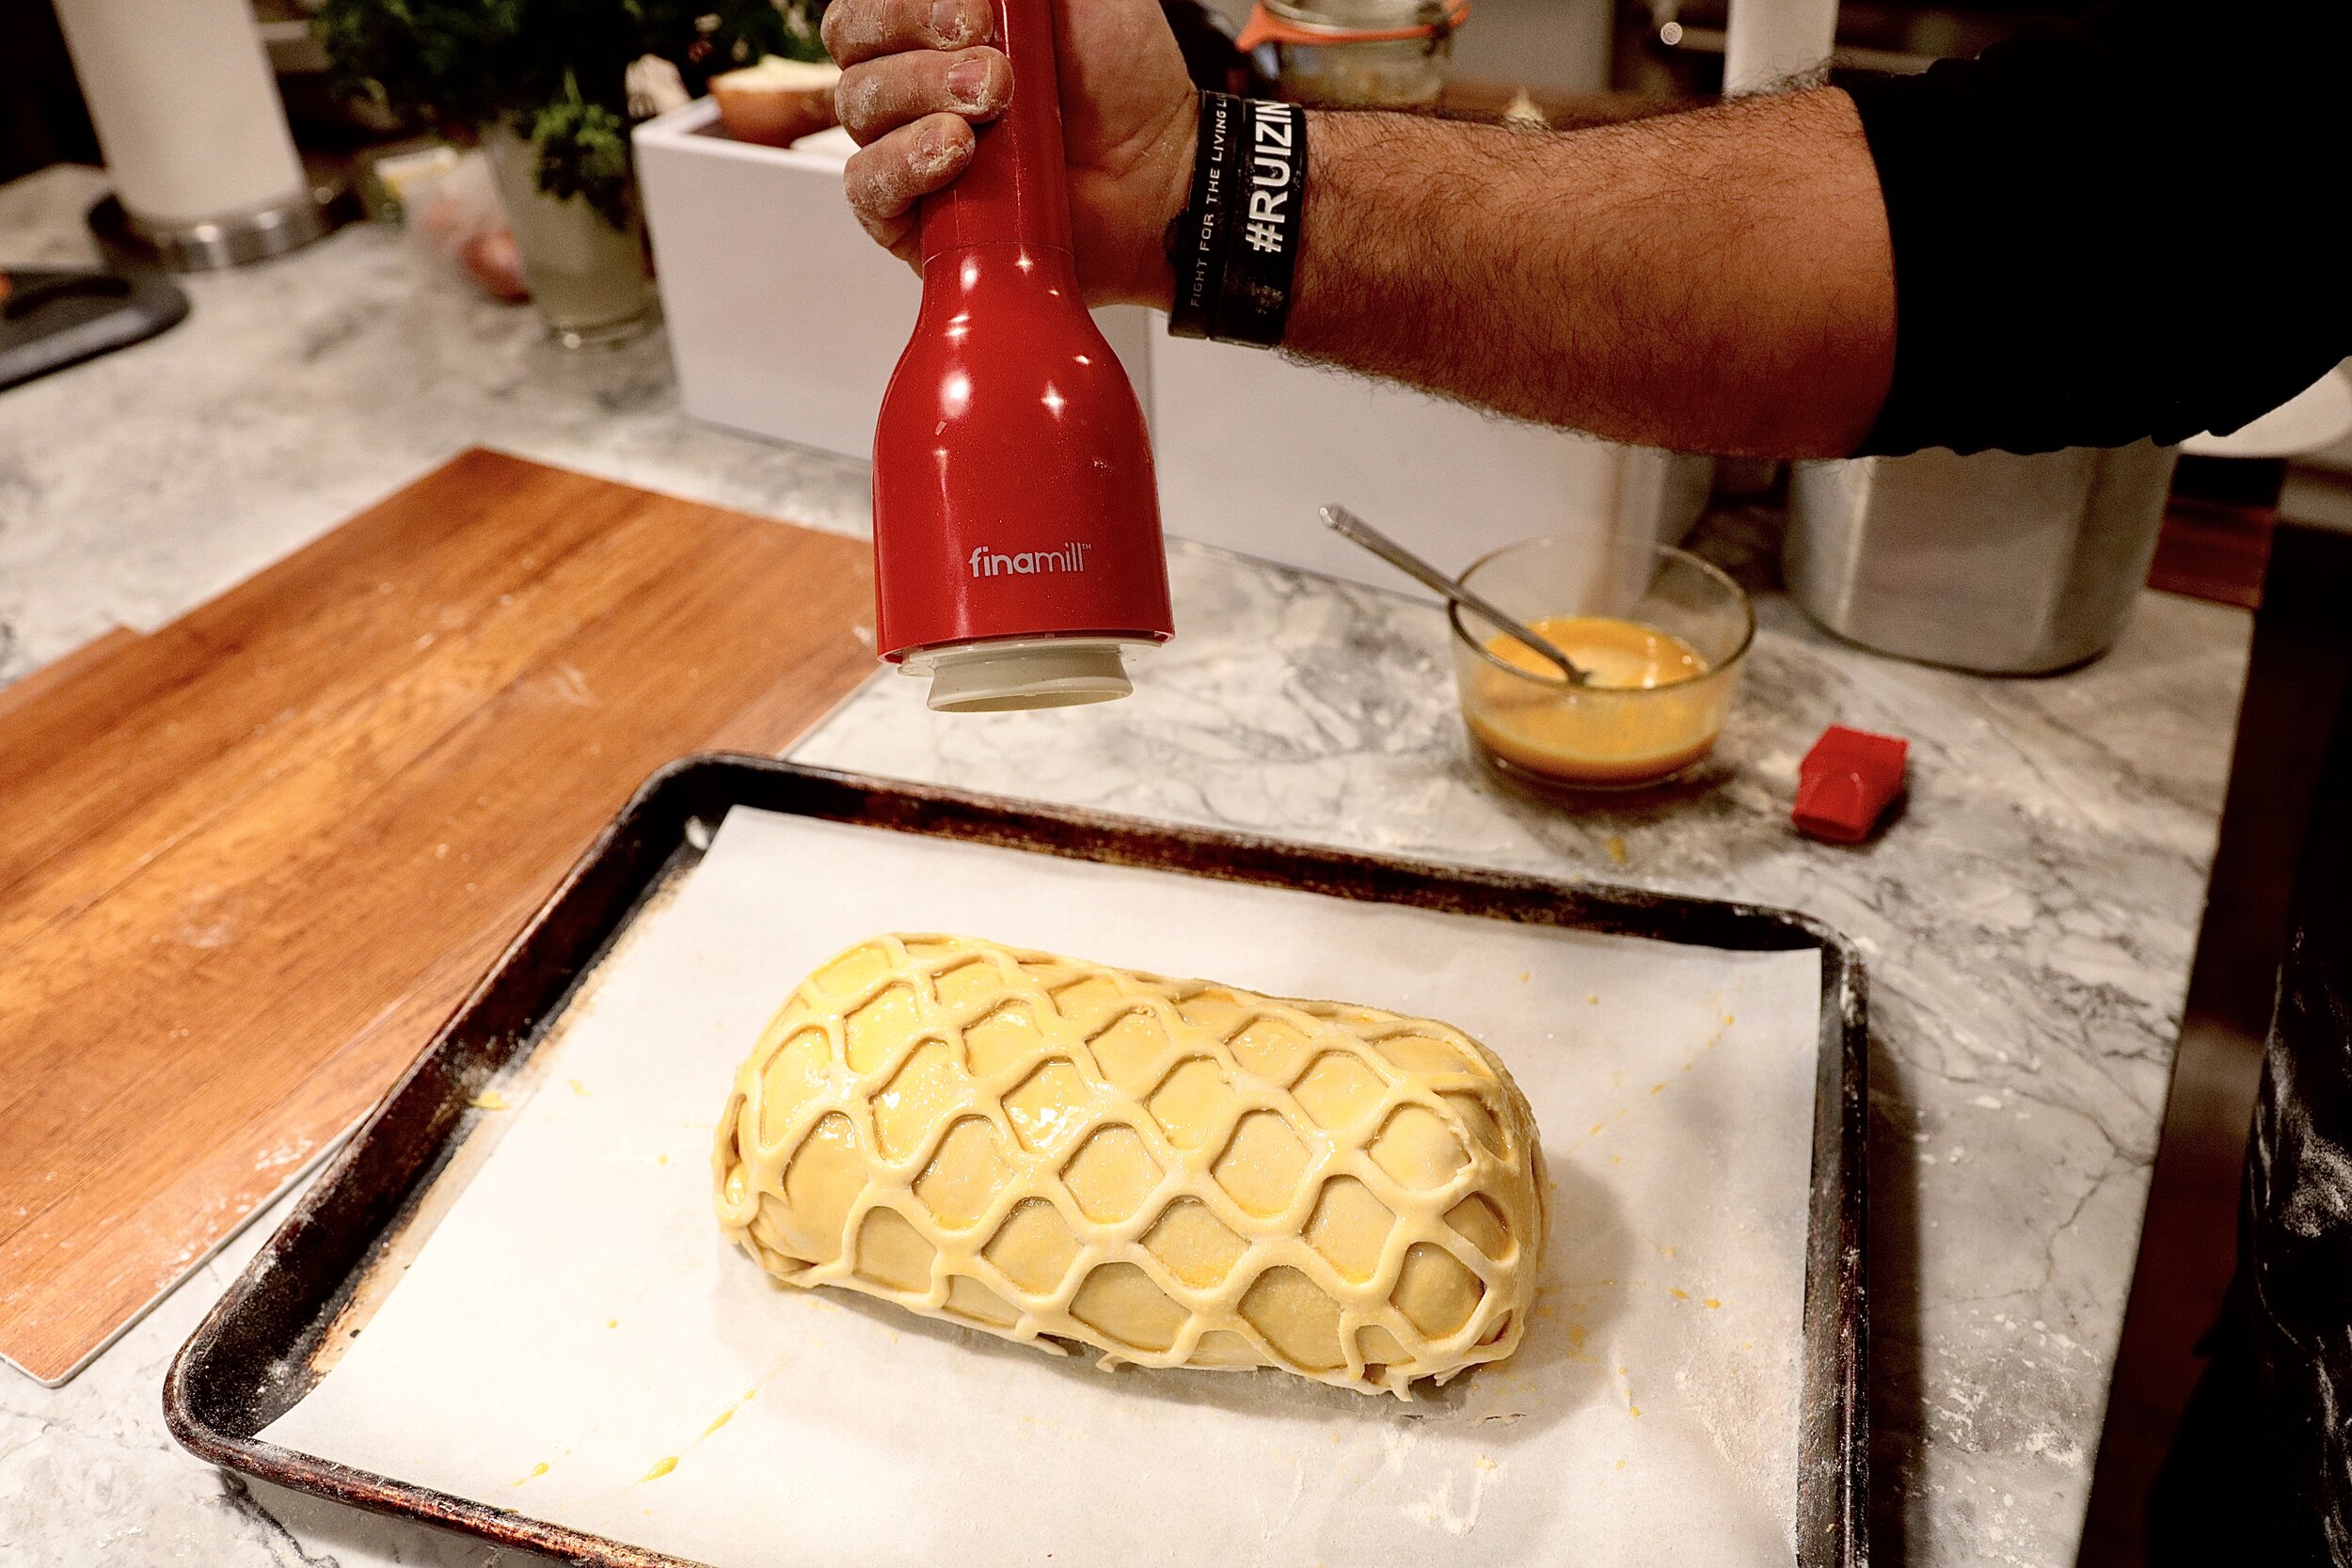
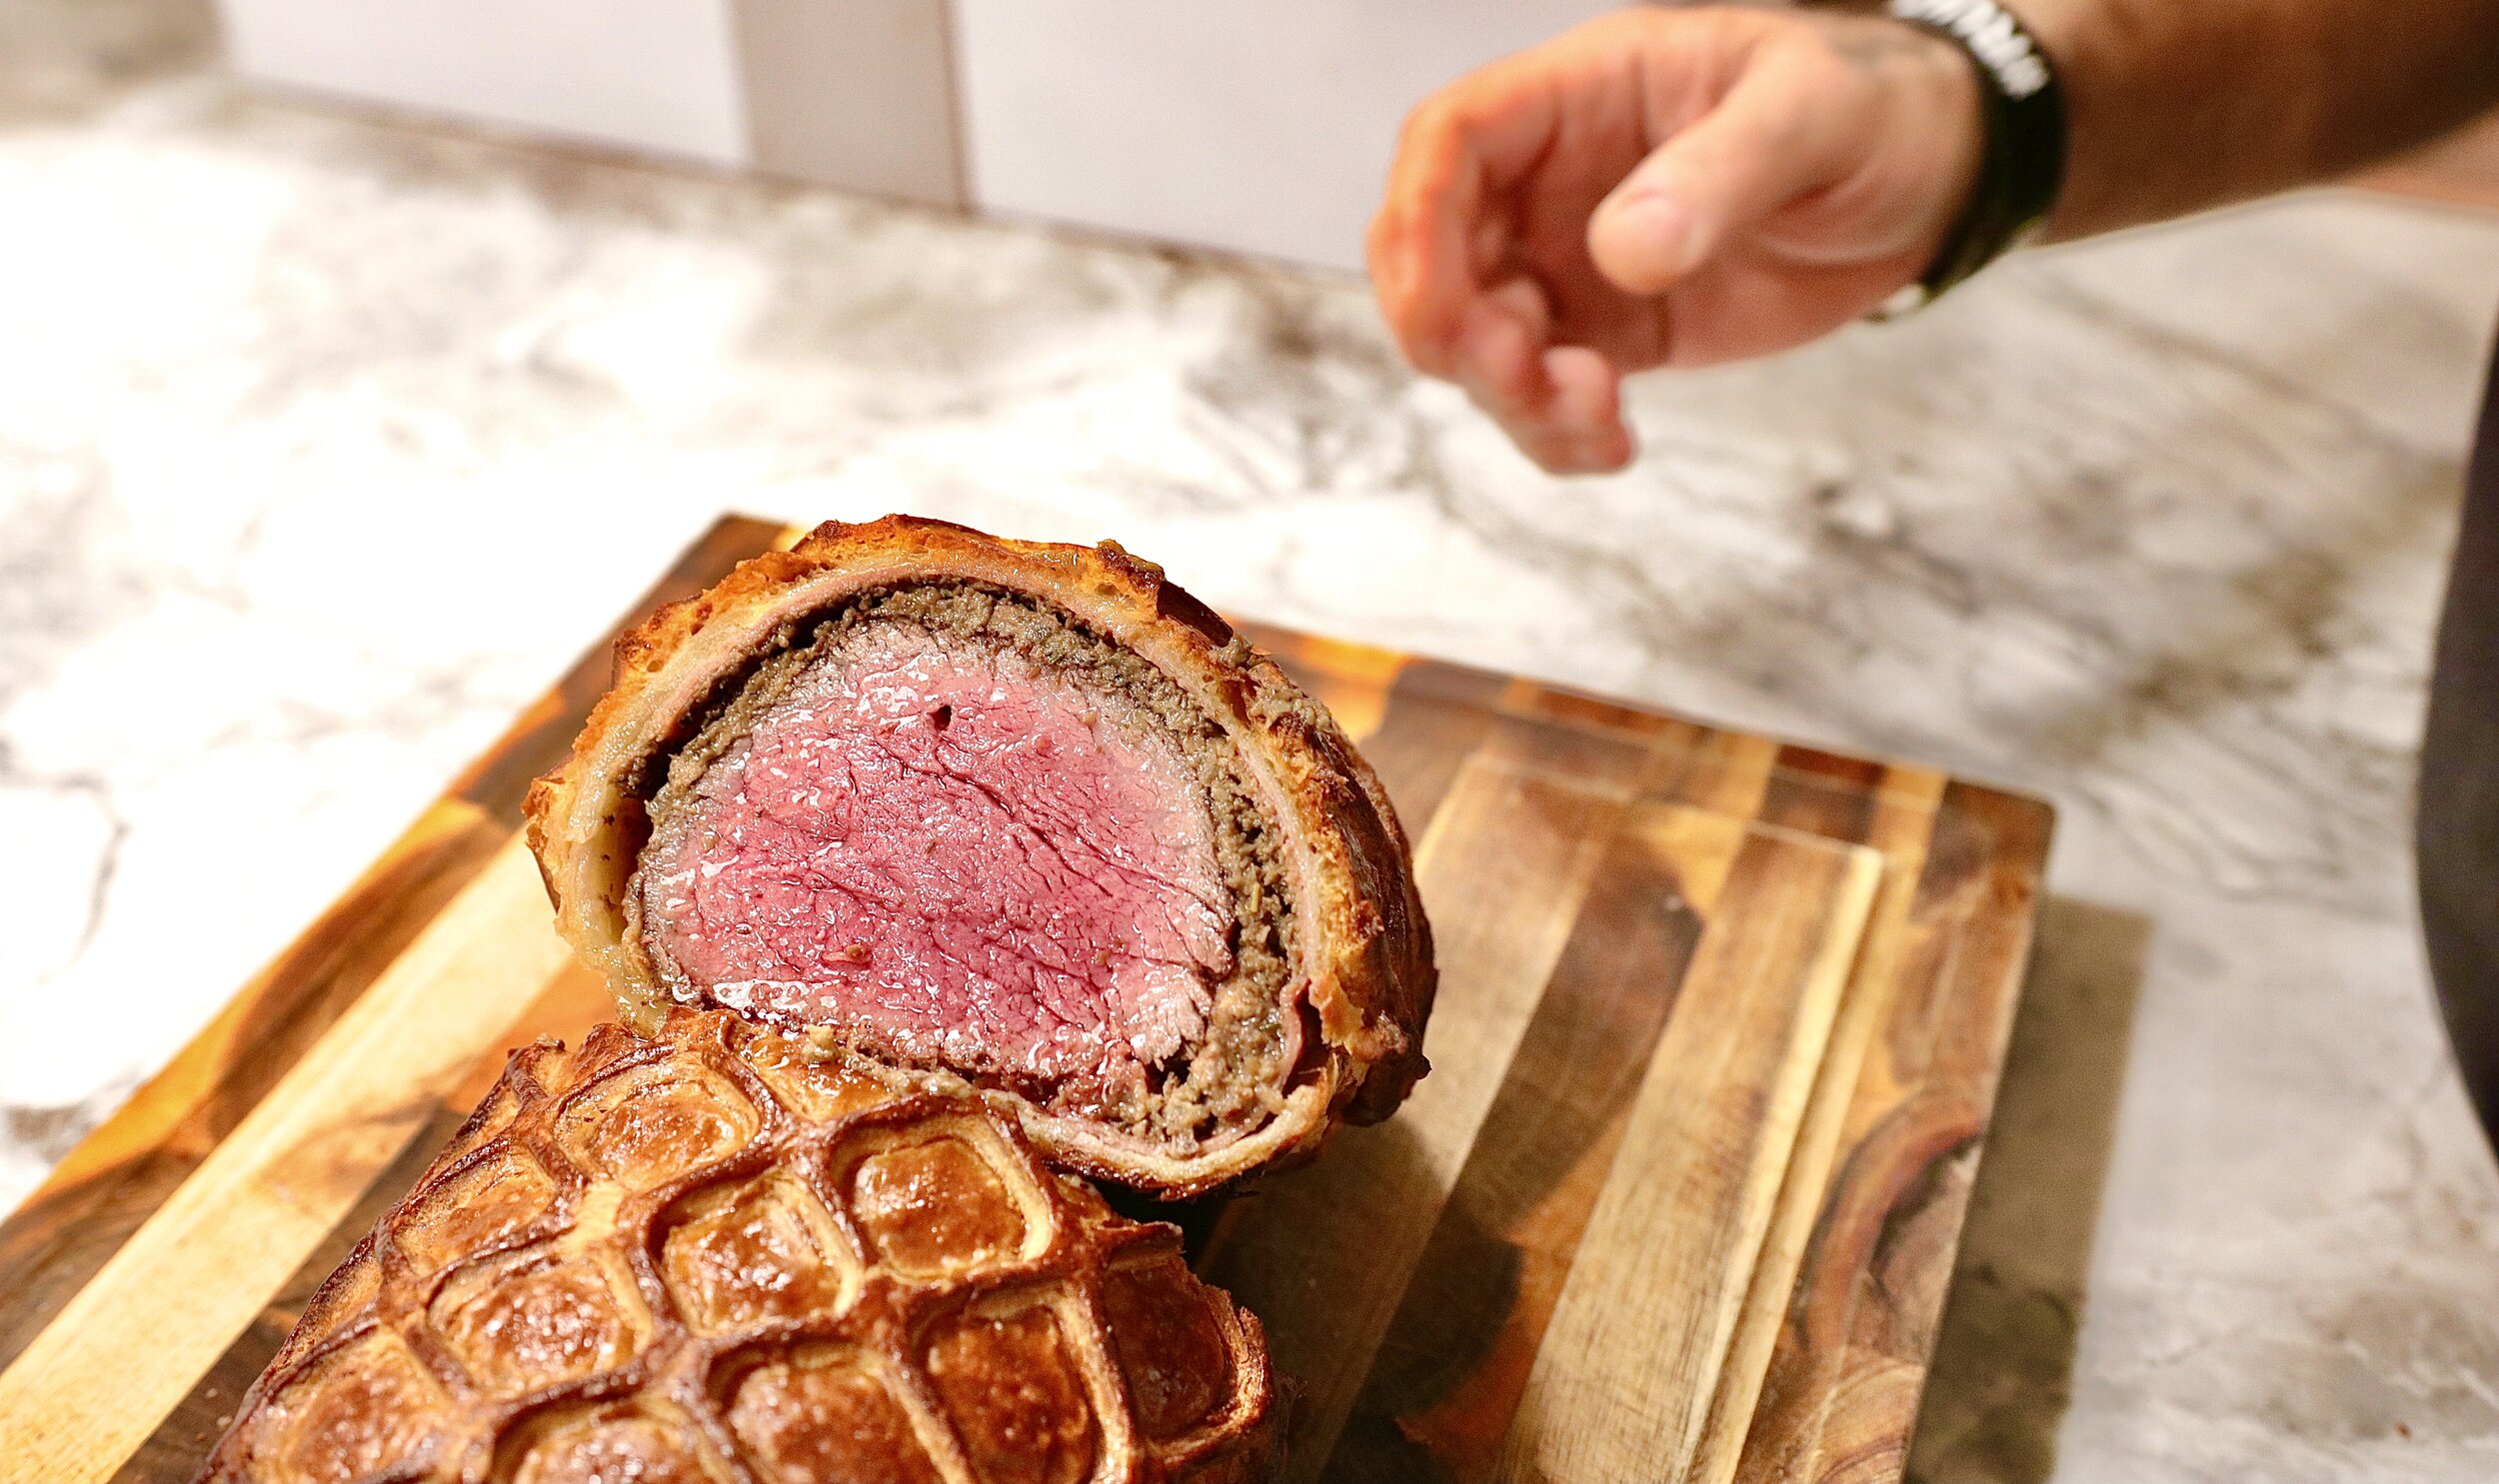
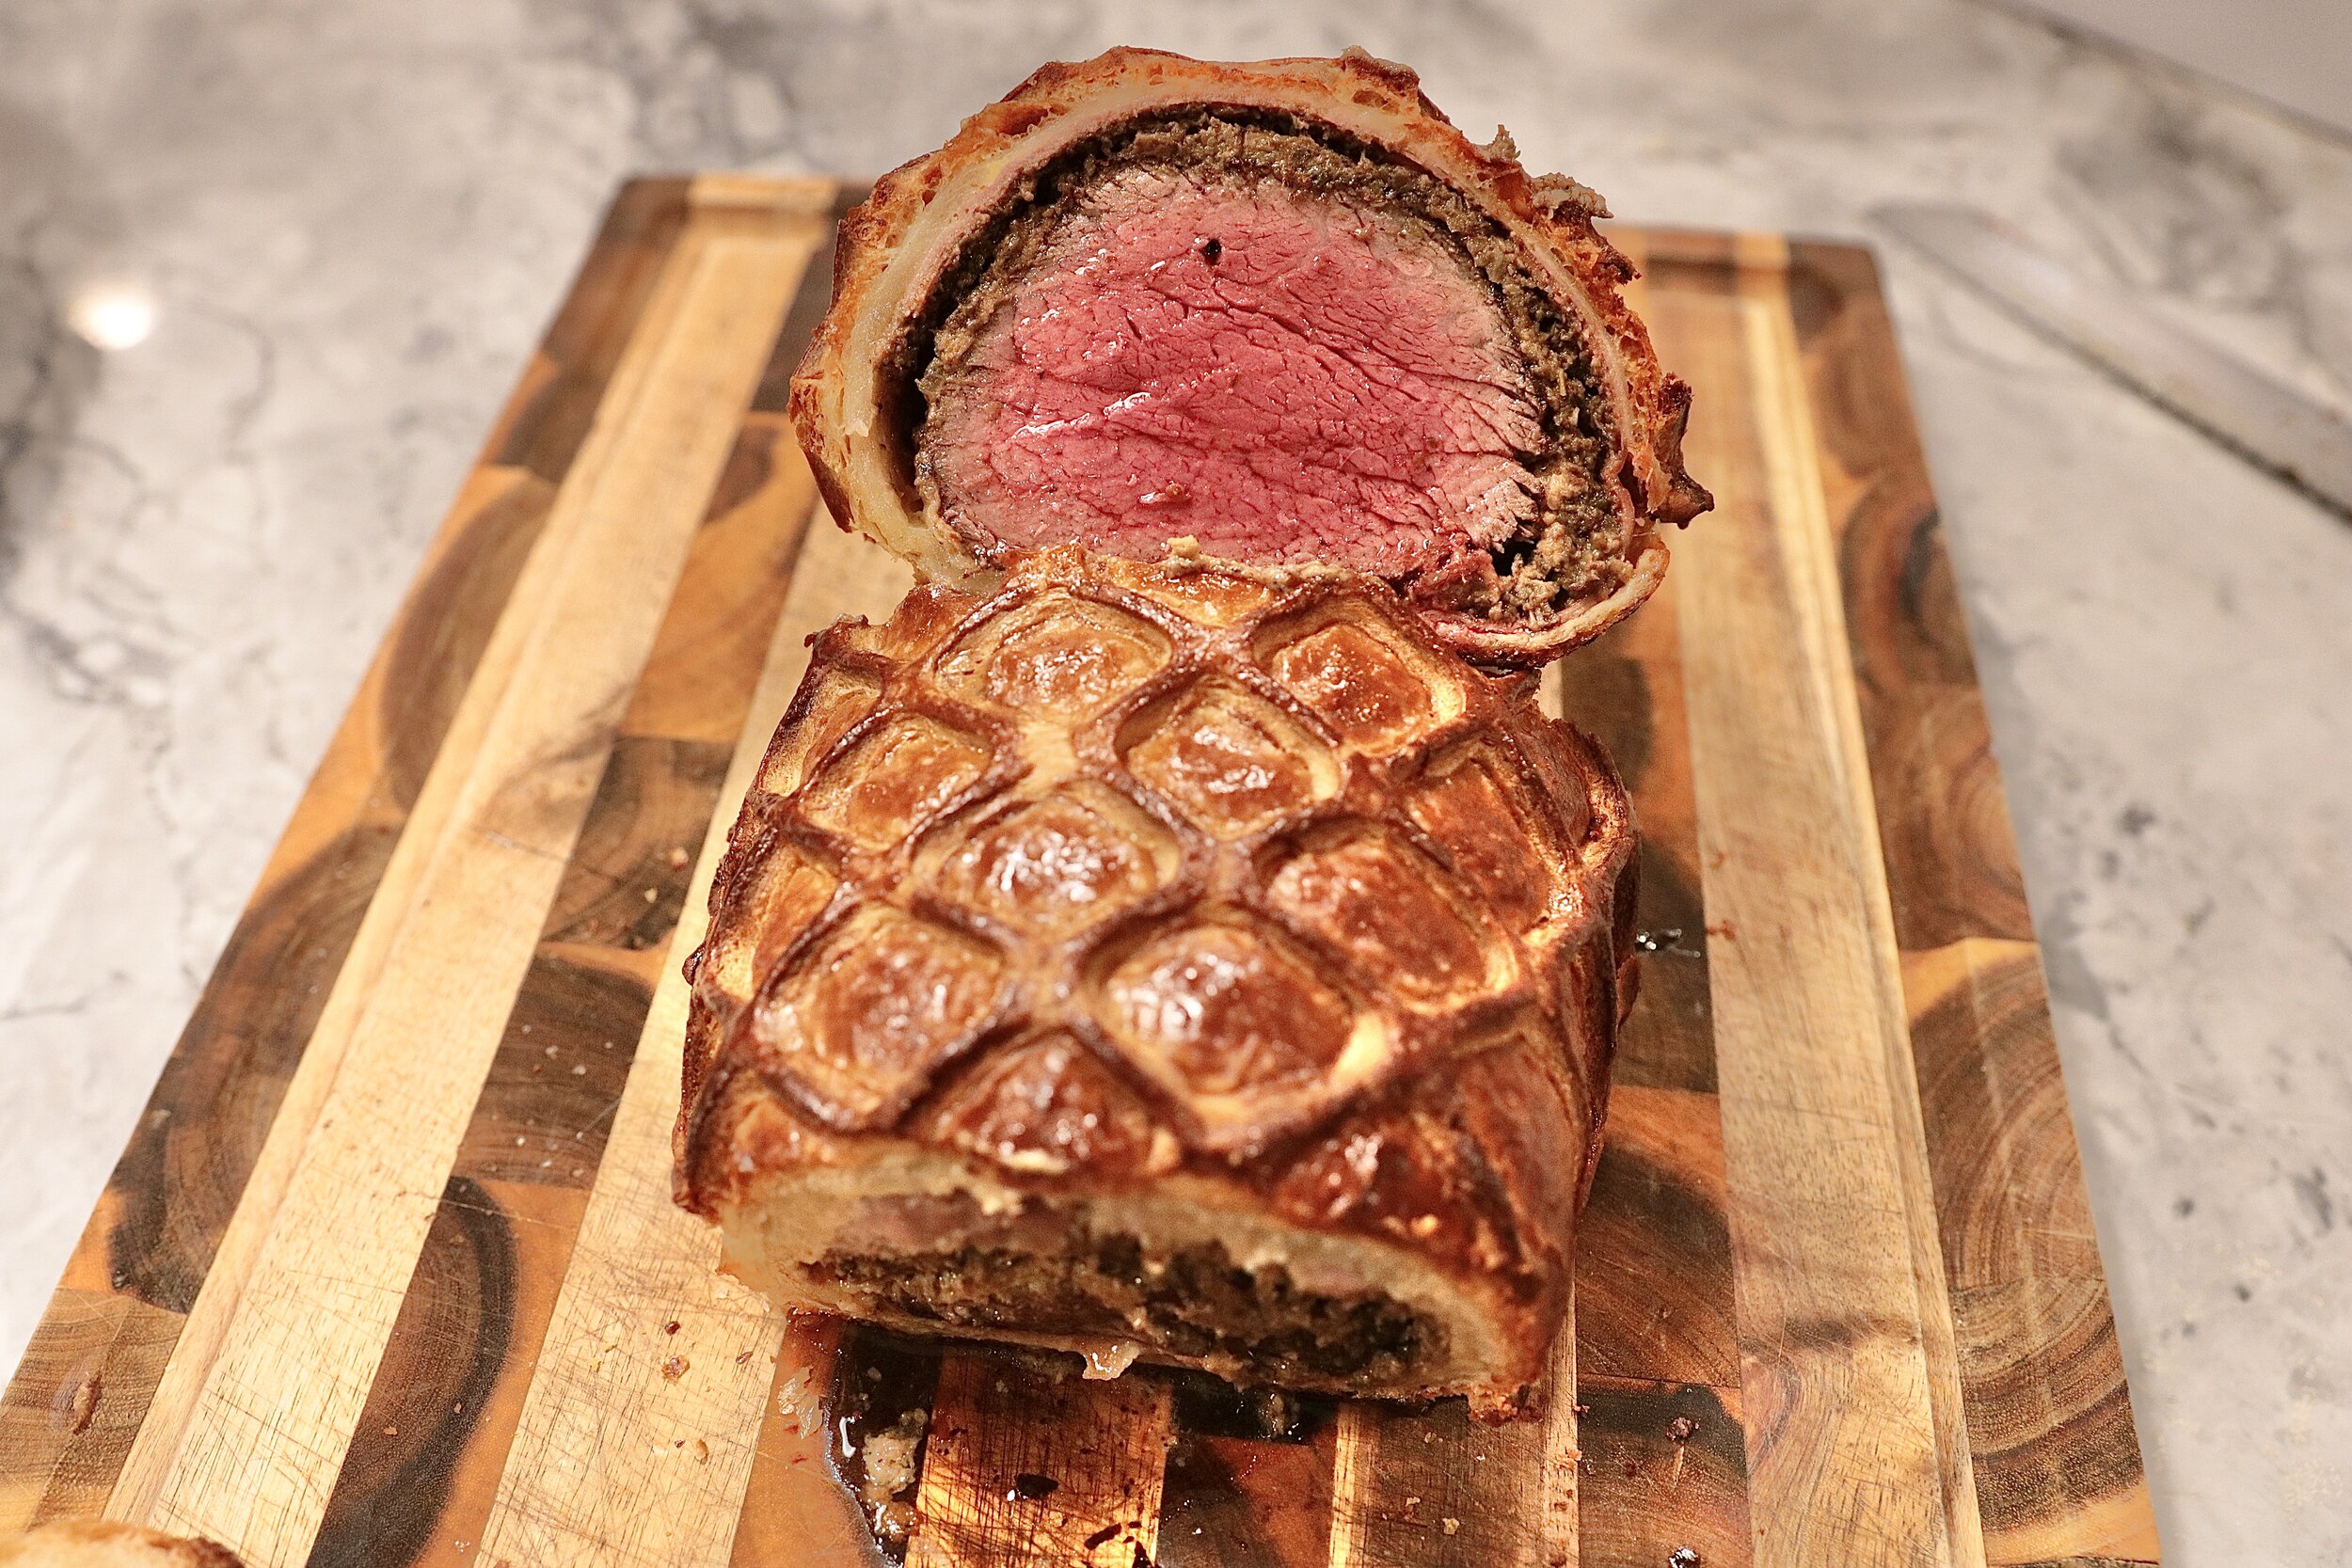
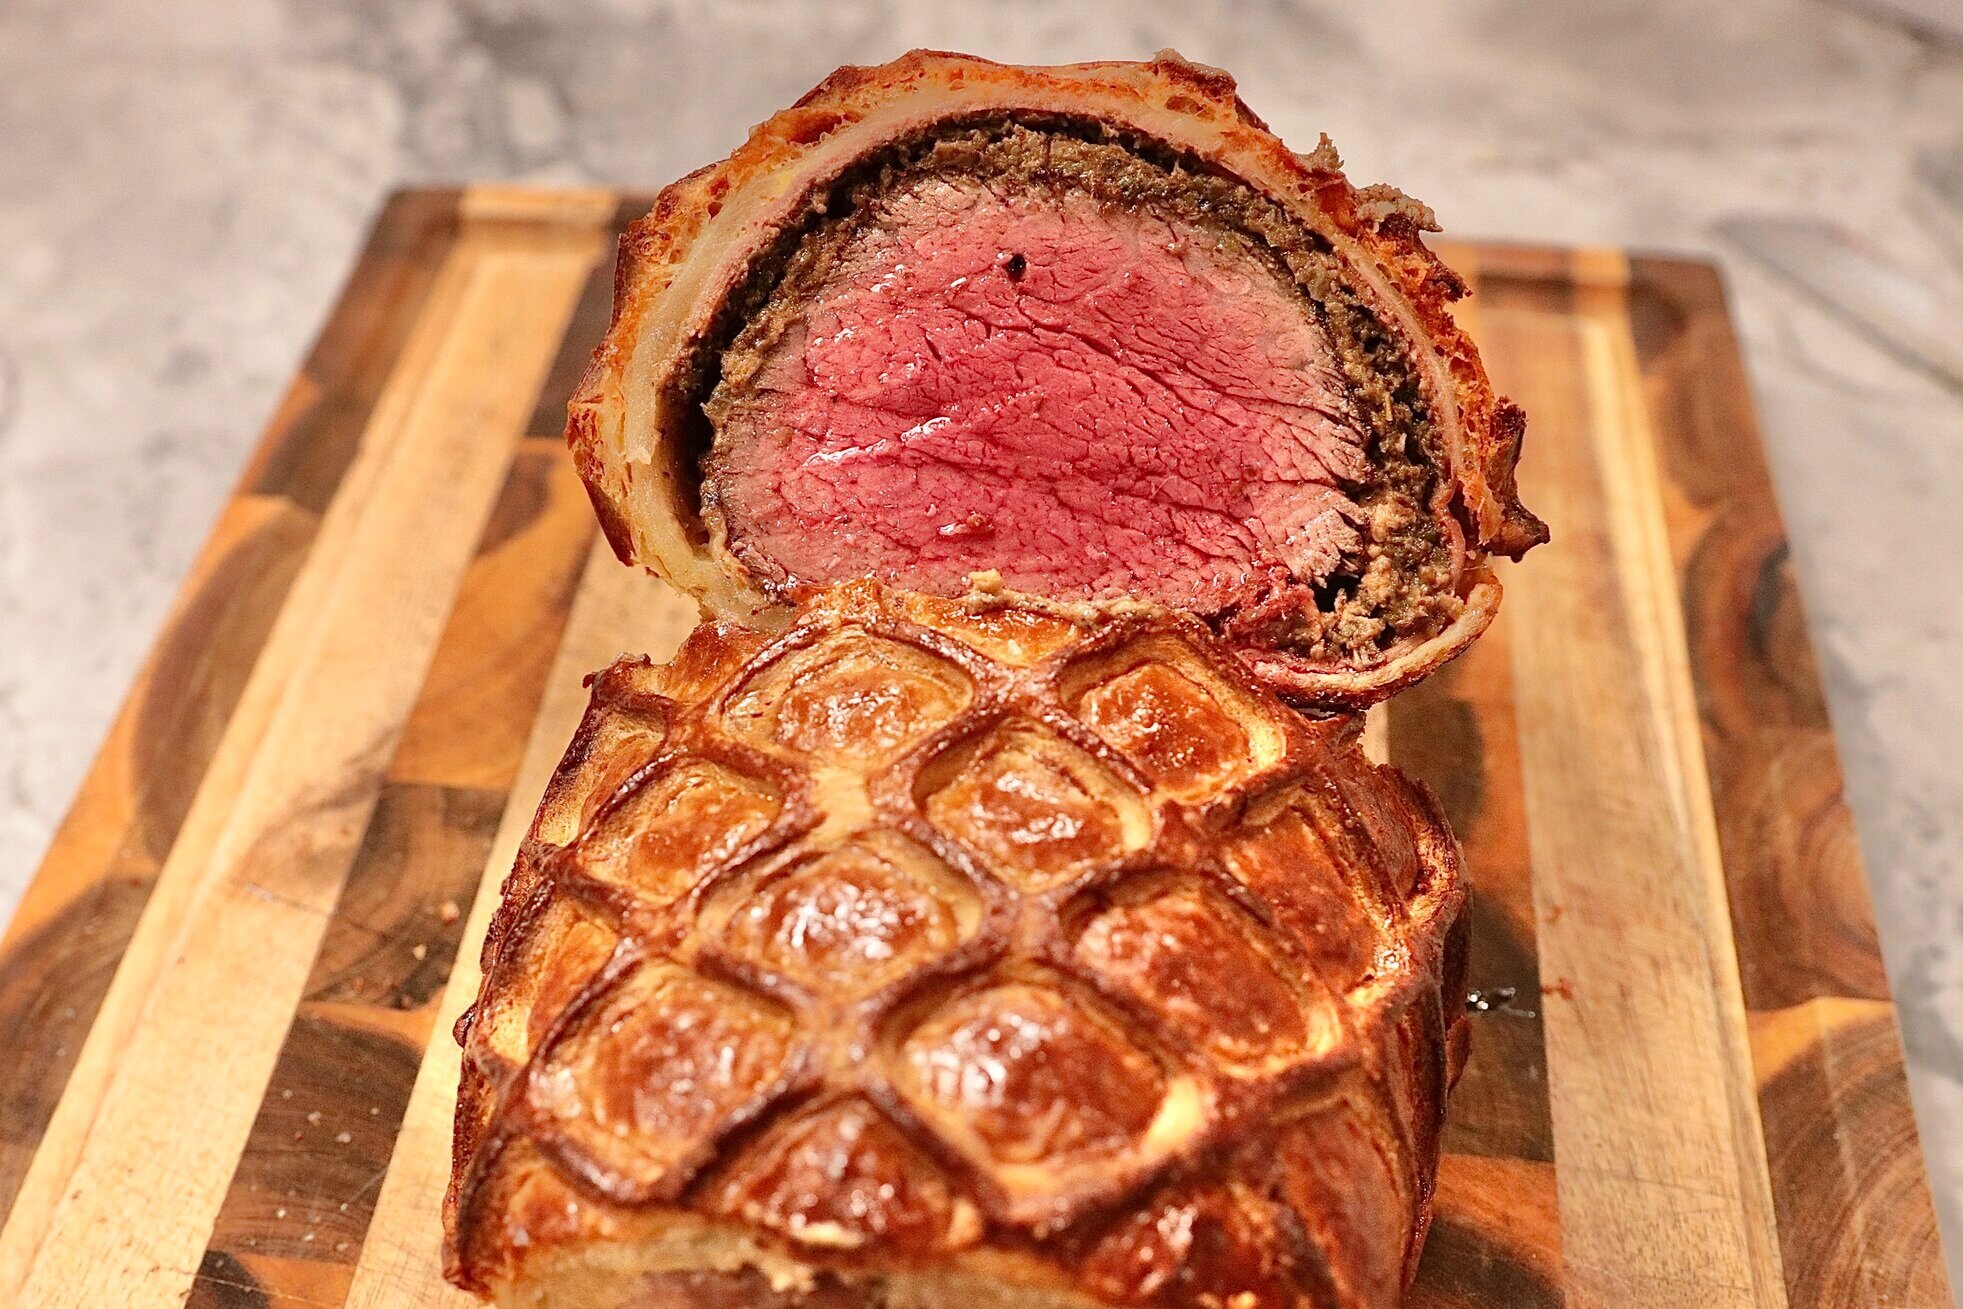
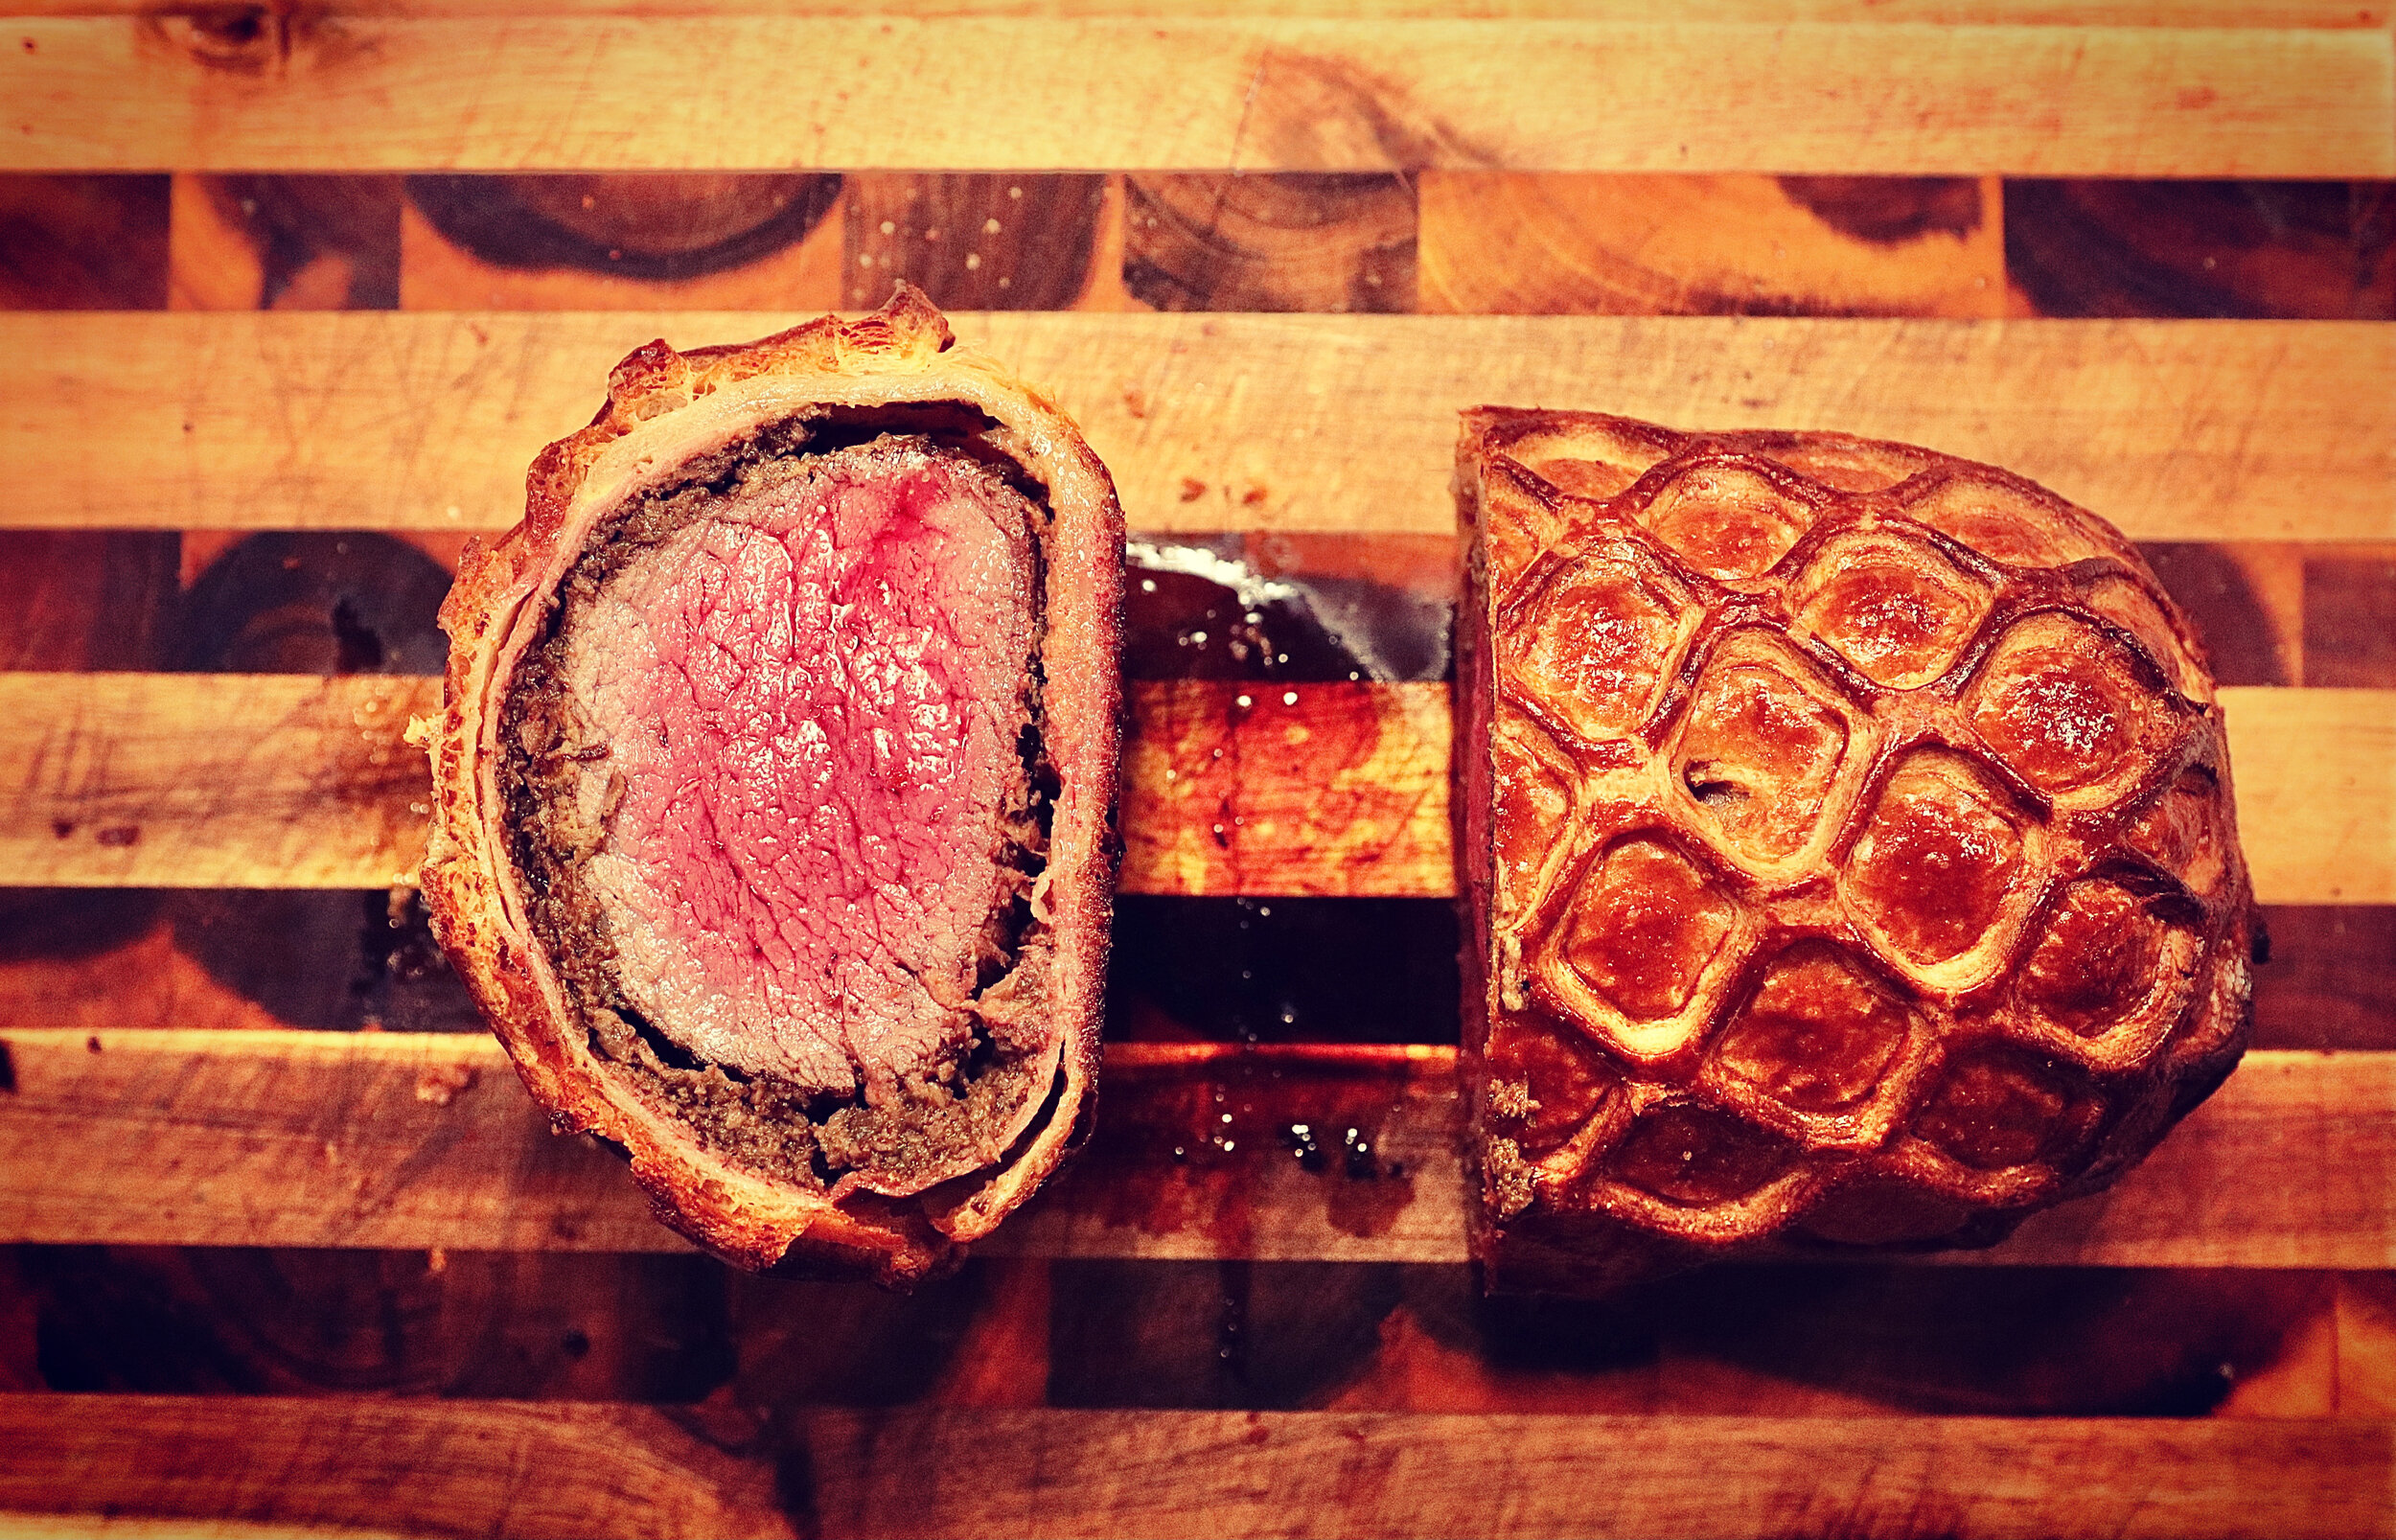
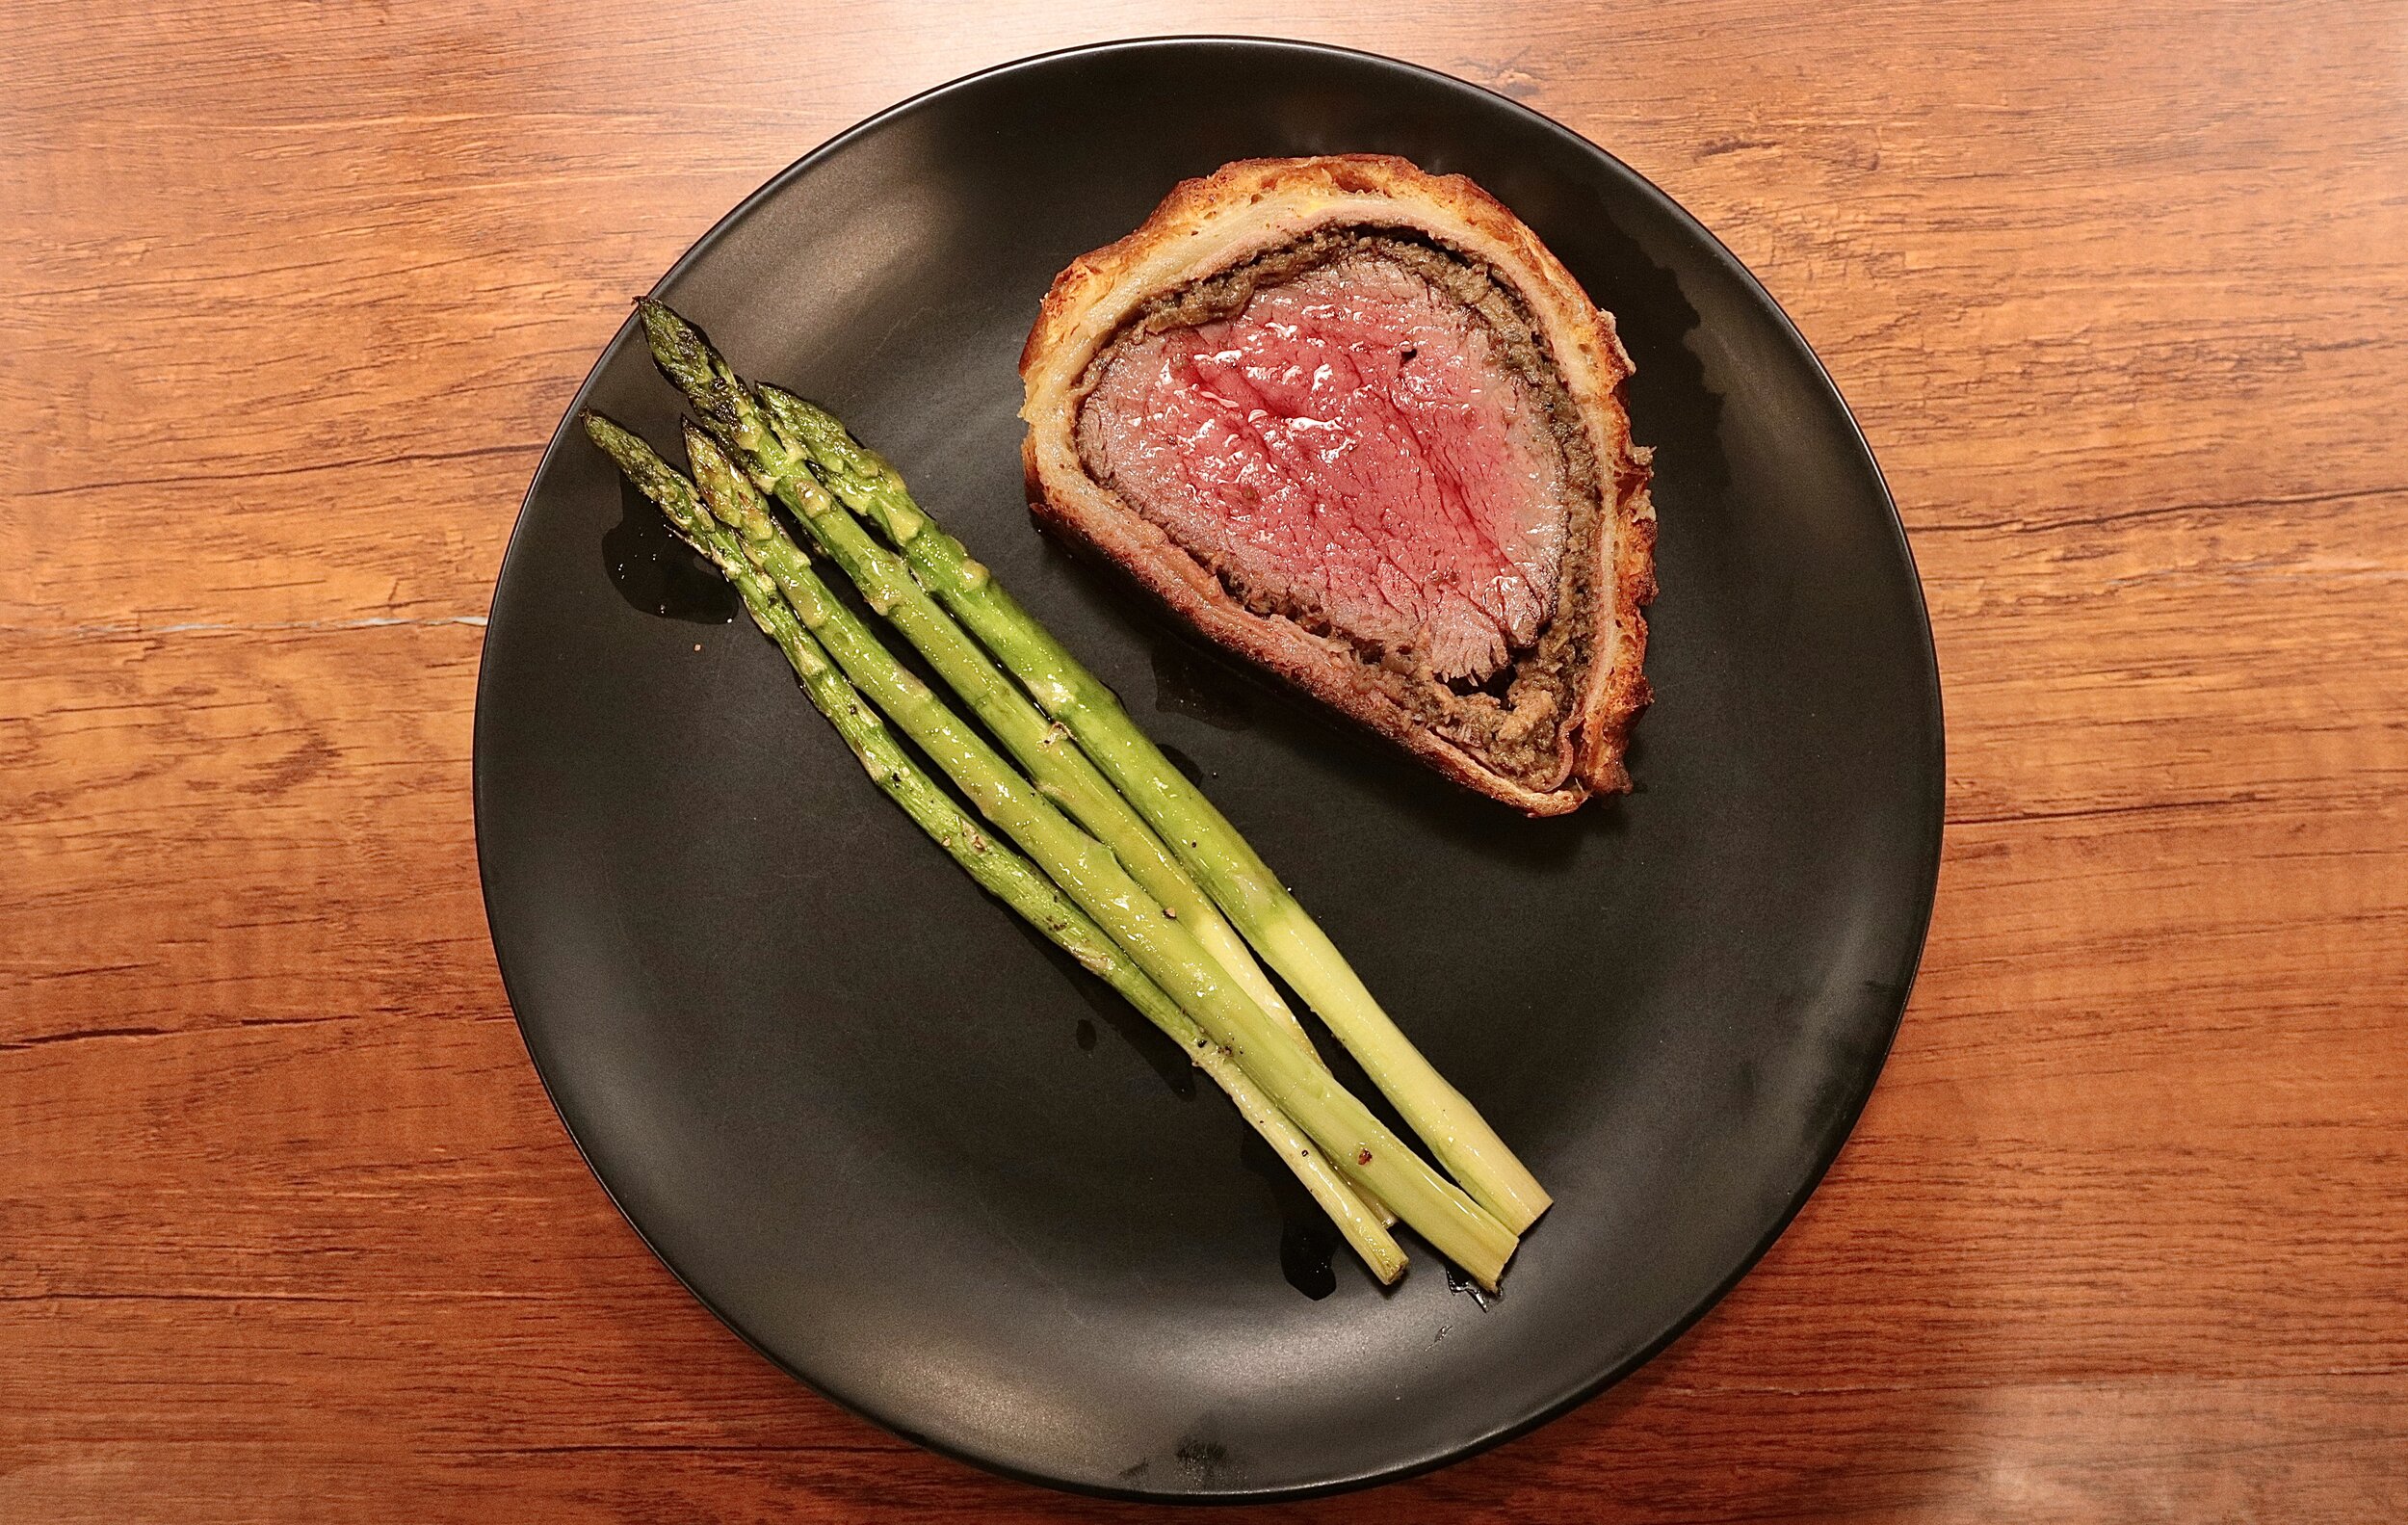
16. Adjust oven rack to center position and preheat oven to 425°F. Transfer Wellington to a foil-lined baking sheet and brush all over with beaten egg. Use a sharp paring knife to score a decorative pattern in the pastry. Sprinkle liberally with coarse sea salt. Bake until pastry is golden brown and center of roast registers 110°F for rare or 120°F for medium-rare on a probe thermometer, 35 to 45 minutes. Remove from oven and allow to rest for ten minutes.
17. Optional prepare BÉARNAISE SAUCE recipe
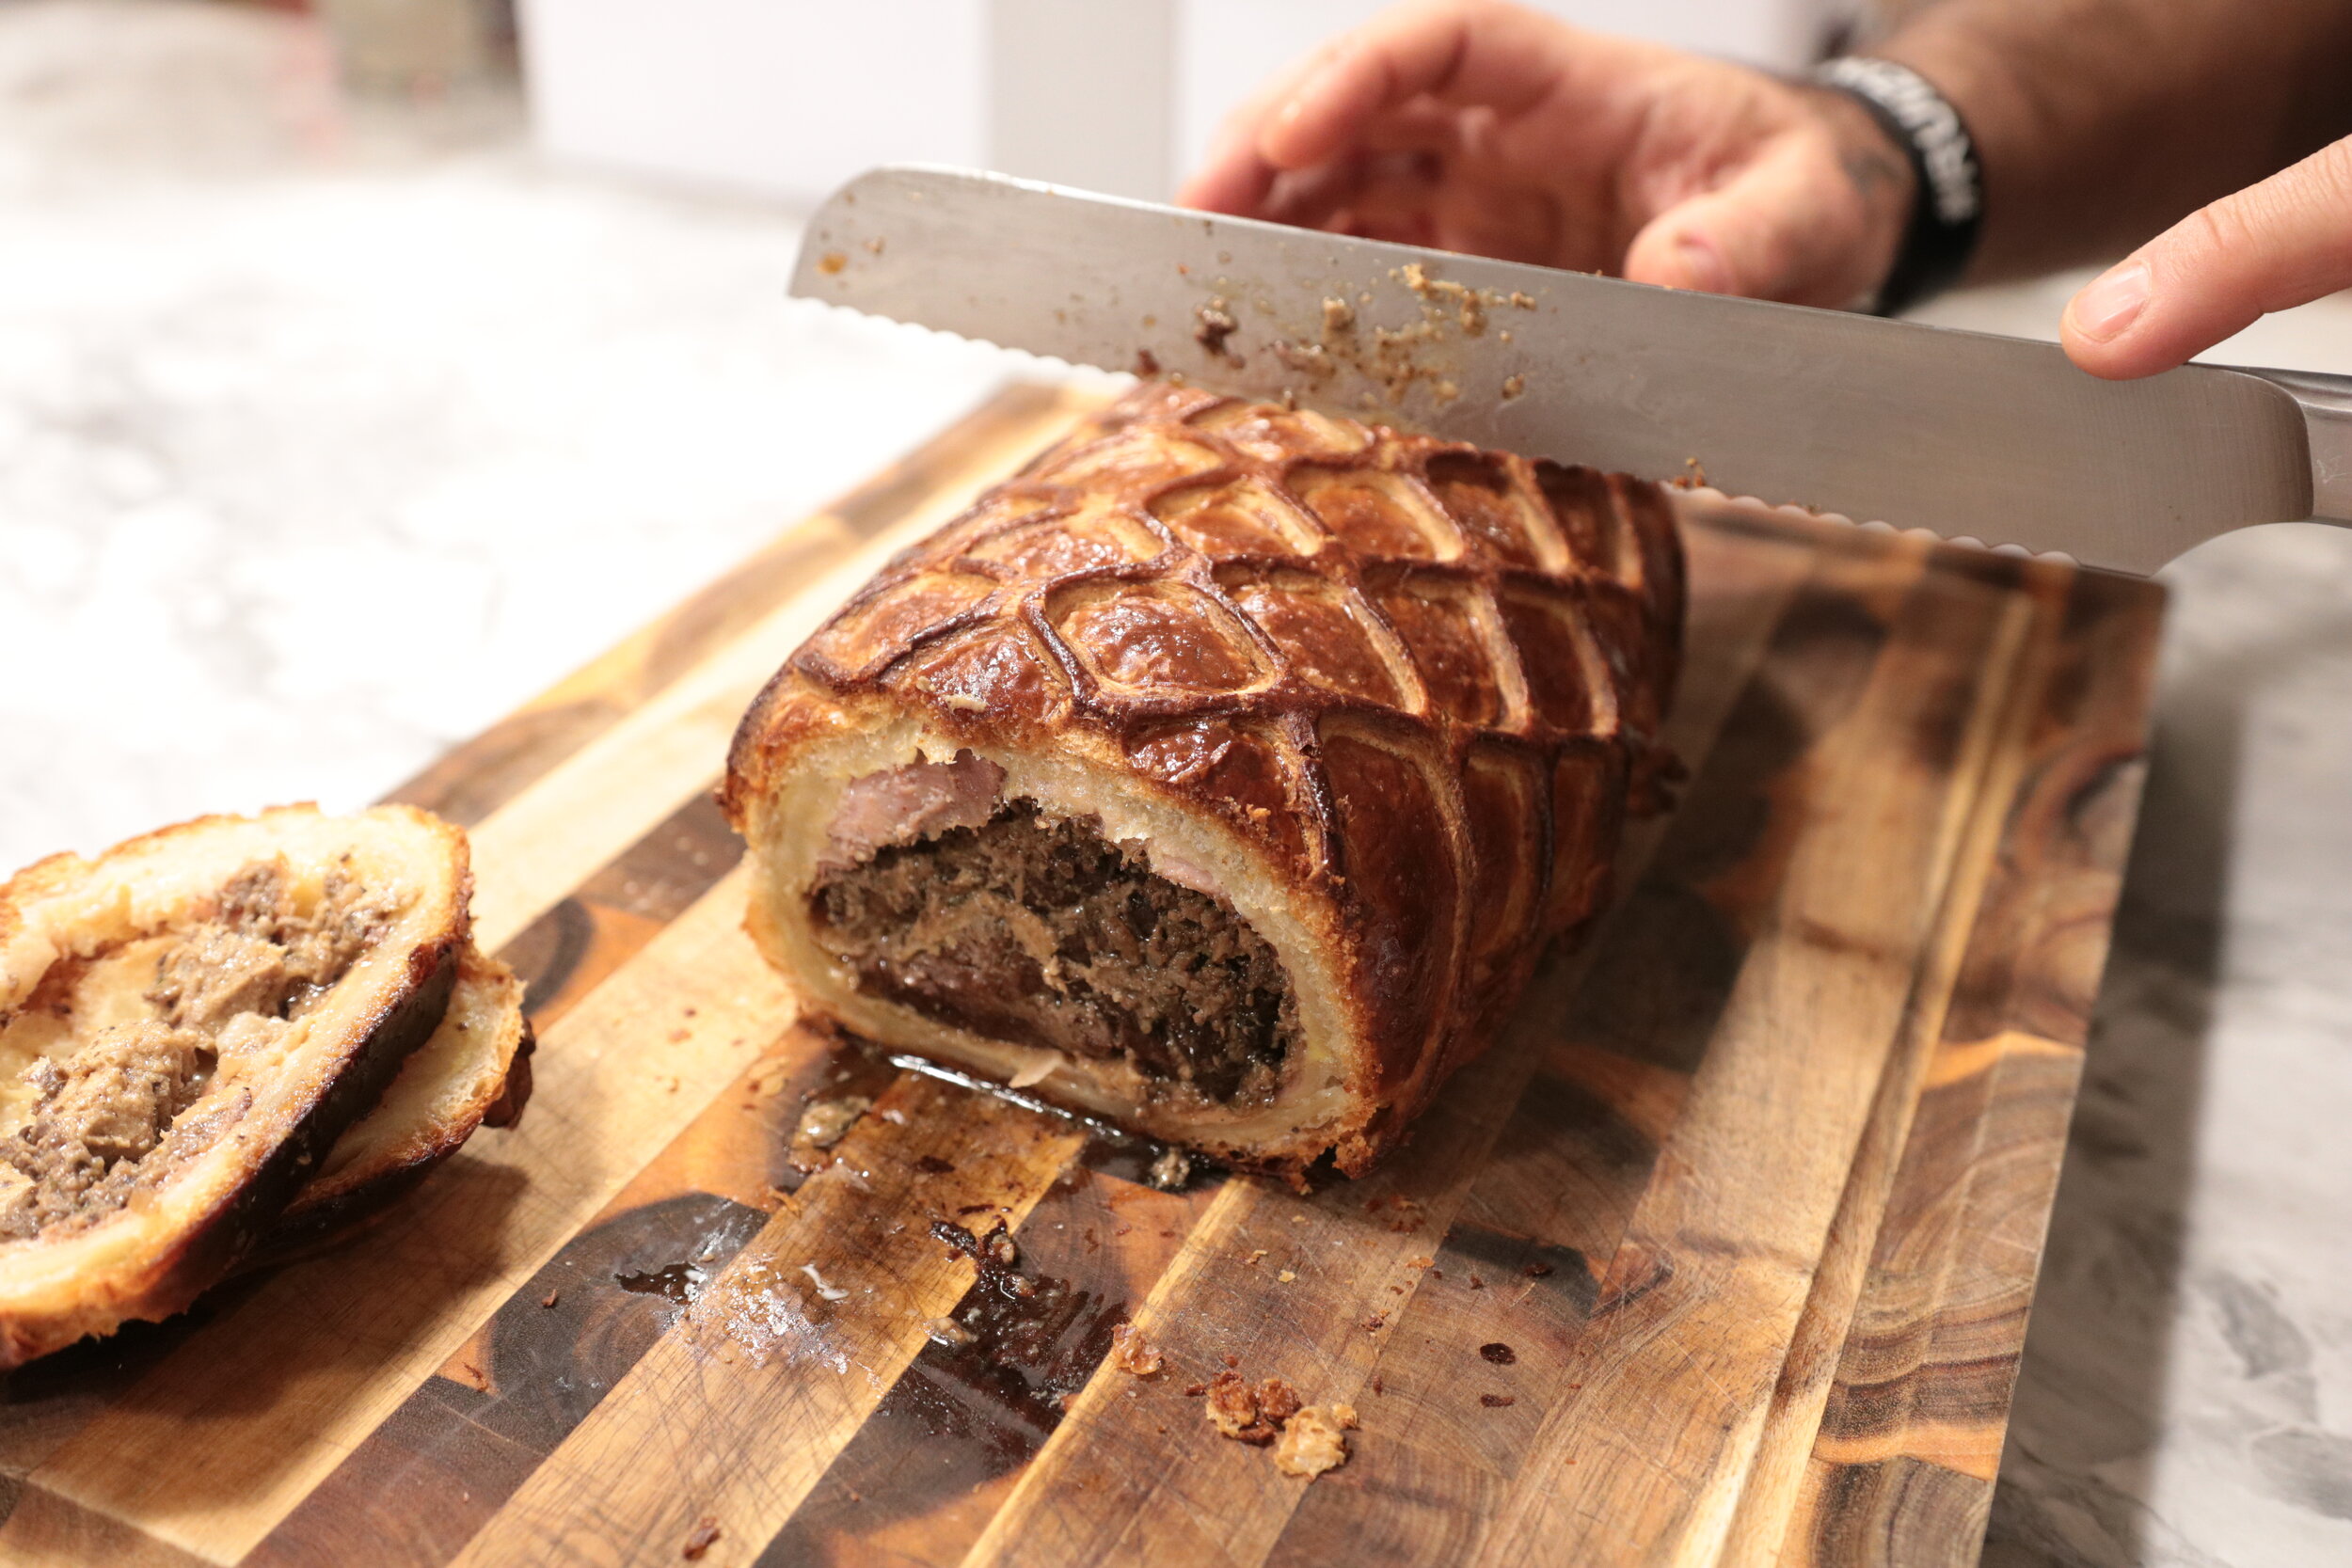
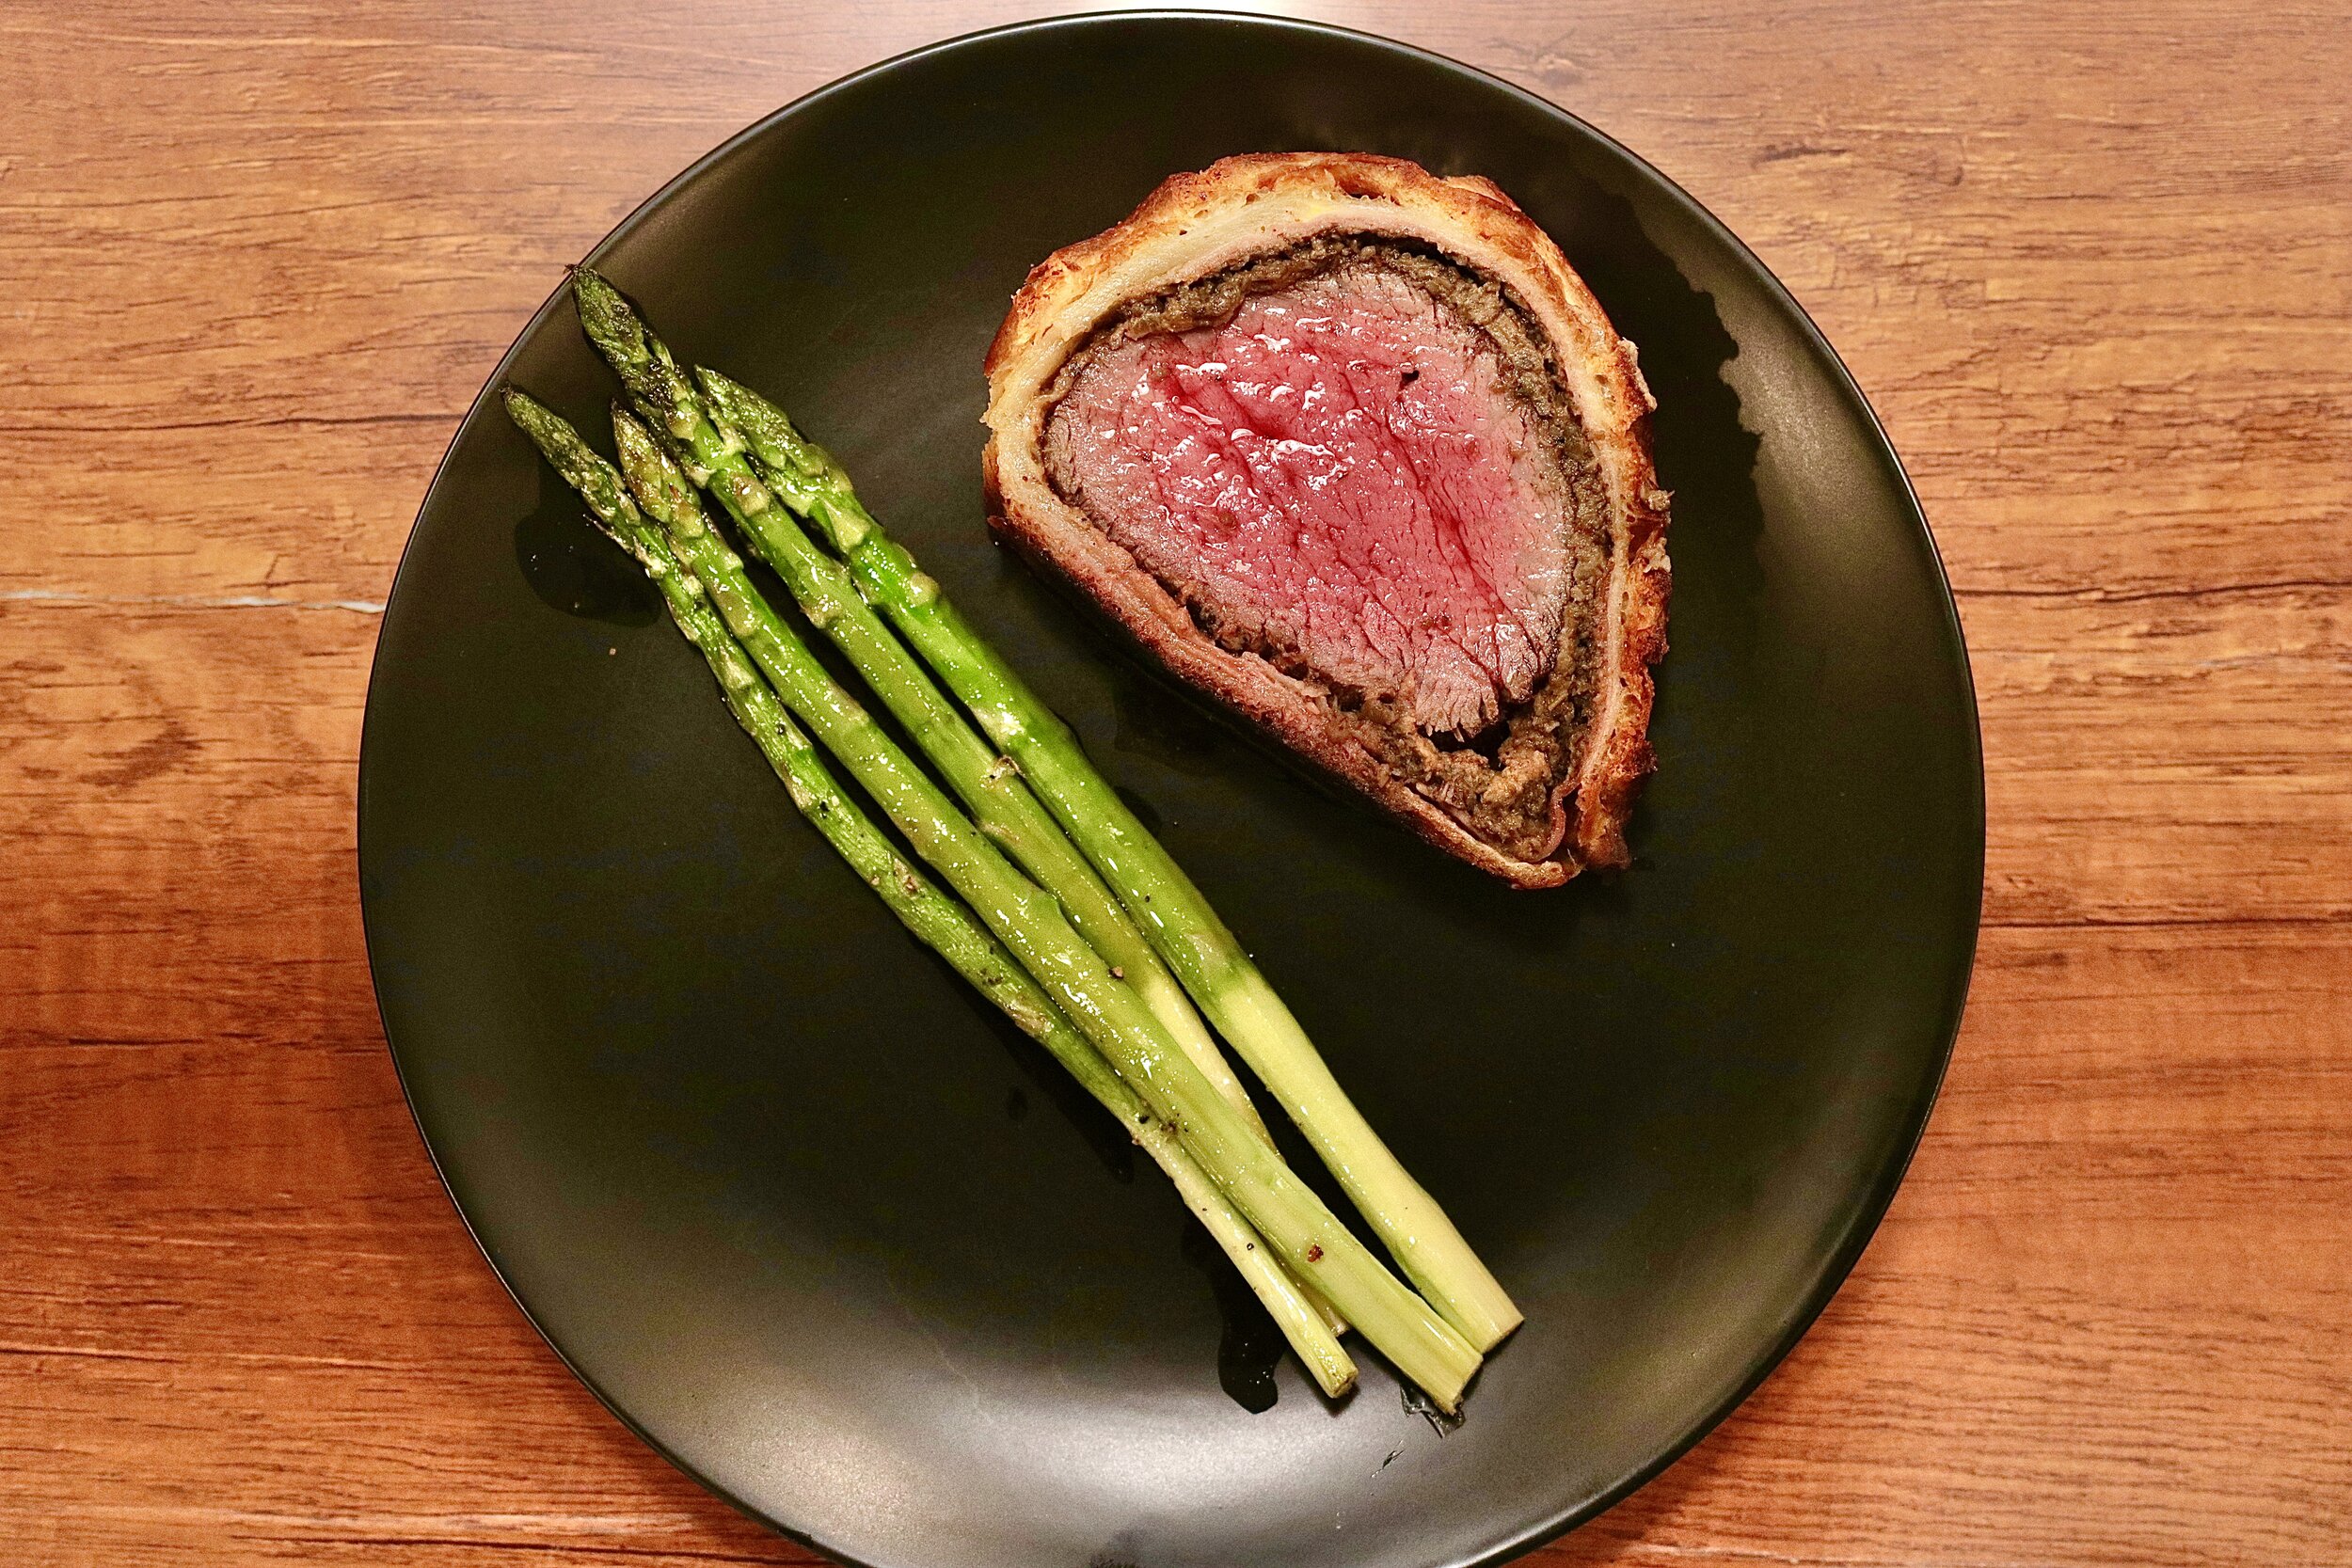
18. Use a thin metal spatula to loosen Wellington from foil, then carefully transfer to a carving board. Slice off the ends with a sharp knife. Carve Wellington, sprinkle cut surfaces with chives and more coarse salt, and serve. Note: I tried to do a decorative cut in the top of this Beef Wellington… you can see that it split. Recommendation would be to add additional puff pastry decorations on top, rather than cut into the pastry.